11 min read
How to Test an Ignition Coil with a Multimeter (7-Step Guide)
Ever wondered why your car isn’t starting or frequently stalls? It could be a problem with your ignition coil. But don’t worry; with a multimeter and a basic tool kit, you can test them yourself.
Quick Summary: Here’s a quick rundown:
🔍 Step 1: Finding the Coil Pack
🛠️ Step 2: Remove the Coil Pack
📏 Step 3: Set Your Multimeter
🔌 Step 4: Probe Time
📈 Step 5: Reading the Primary Resistance
🔁 Step 6: Switch to 20kOhms Range
🔎 Step 7: Secondary Resistance Check
In this article, I’ll guide you on how to test an ignition coil with a multimeter. It’s a simple process that can save you a trip to the mechanic.
Tools Required to Test Coil Pack
Ready to test that coil pack? Let’s gear up with the right tools to get the job done! Here’s what you’ll need:
- A Multimeter: This is your go-to tool for checking those electrical values. Make sure it’s set and ready to measure.
- Multimeter Probes: These are crucial for connecting with the points you’re testing. They’re like the hands of your multimeter.
- A Wrench or Ratchet and Socket: You’ll need these for loosening and tightening connections. It’s all about getting in there and making sure everything is secure.
- A New Coil Pack: This is handy if you find out the old one’s the troublemaker and needs replacing.
With these tools, you can dive in and test that coil pack. Let’s get to it and see what’s happening under the hood!
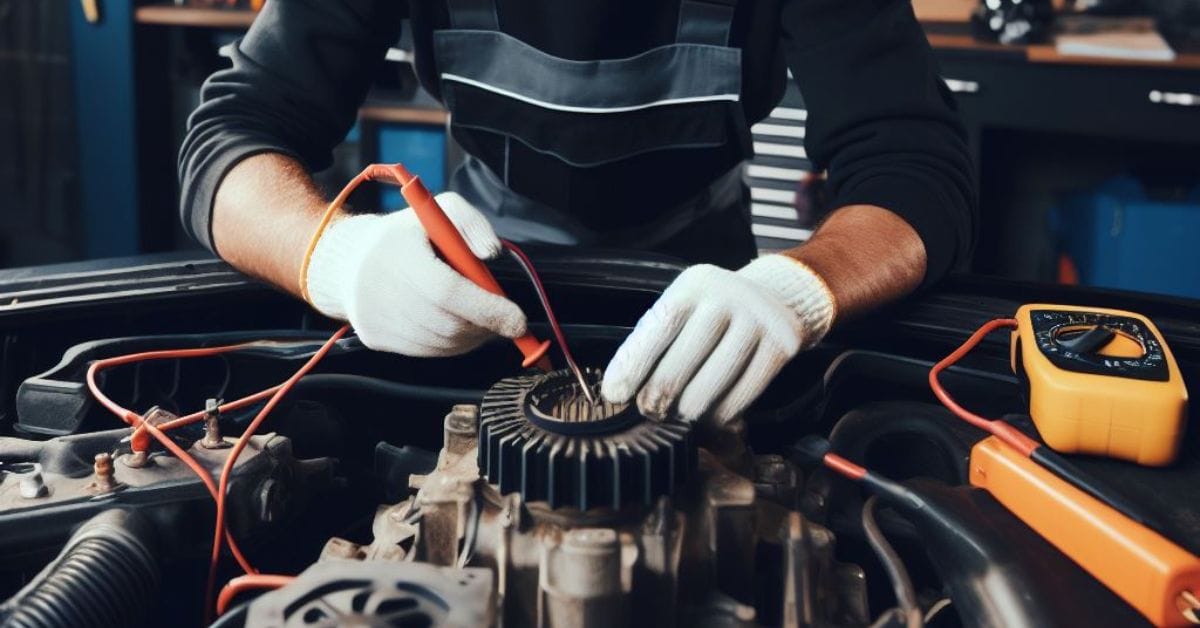
How To Test Coil Pack With Multimeter
Let’s dive into how you can test a coil pack using a multimeter, step by step. I’ve done this a few times, so follow along, and we’ll get through this together.
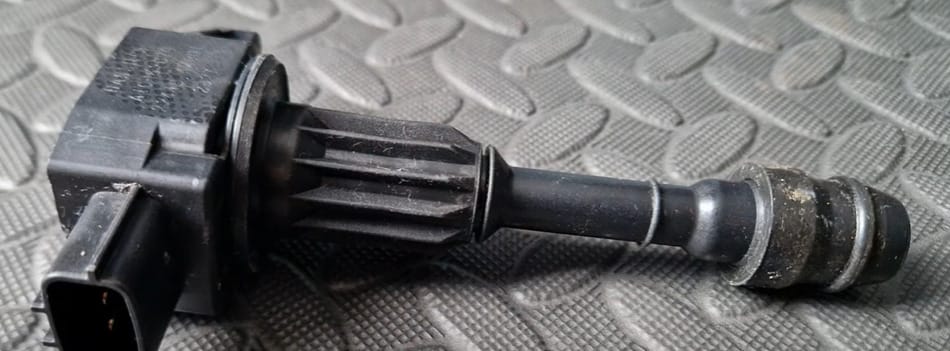
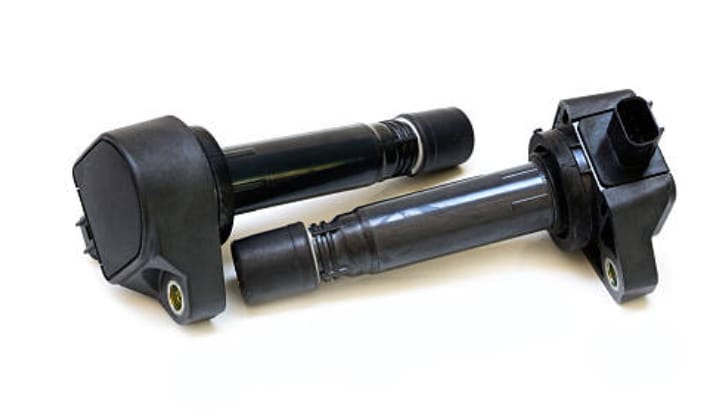
Step 1: Finding the Coil Pack
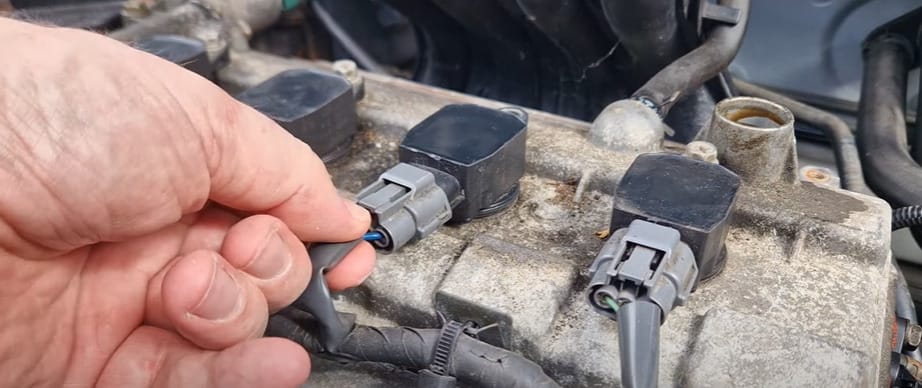
- First, we must locate the ignition coil pack in your engine. Usually, it’s at the back or side of the engine.
- If you’re scratching your head looking for it, follow where the spark plug wires lead – they’re your best clue. The spark plug typically sits at the engine’s top side.
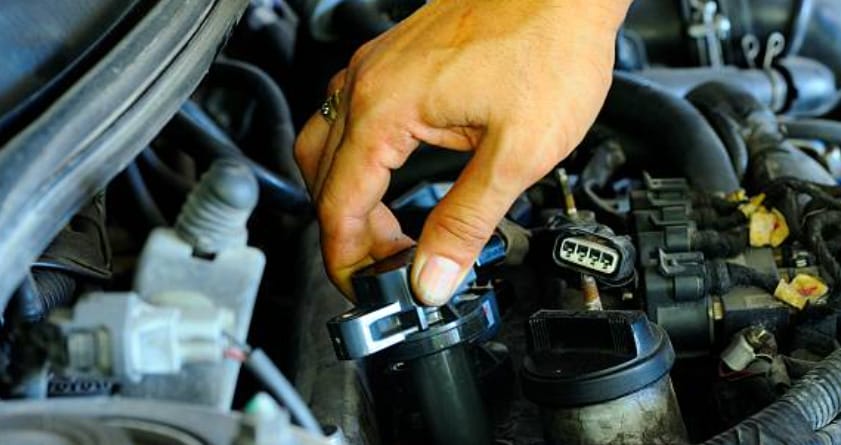
Step 2: Remove the Coil Pack
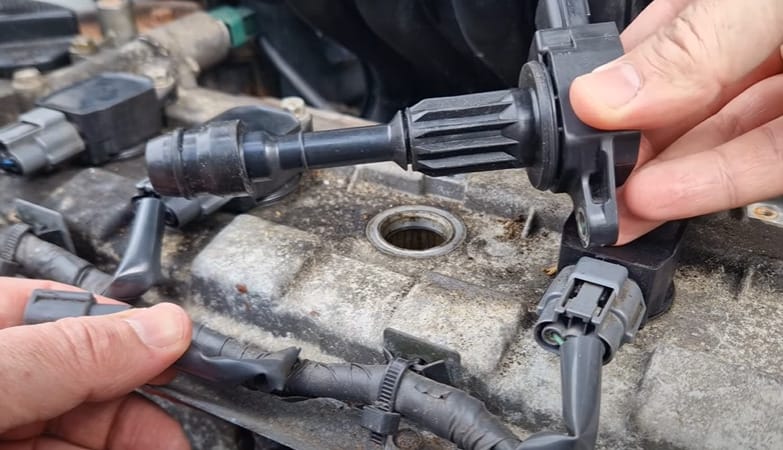
- Have you got your coil pack in sight? Great, let’s remove it. Grab your toolkit and carefully disconnect the bolts holding the coils. Keep all those tiny parts safe – you don’t want to lose any screws or bolts. Gently pull each coil out of the engine area.
Step 3: Set Your Multimeter
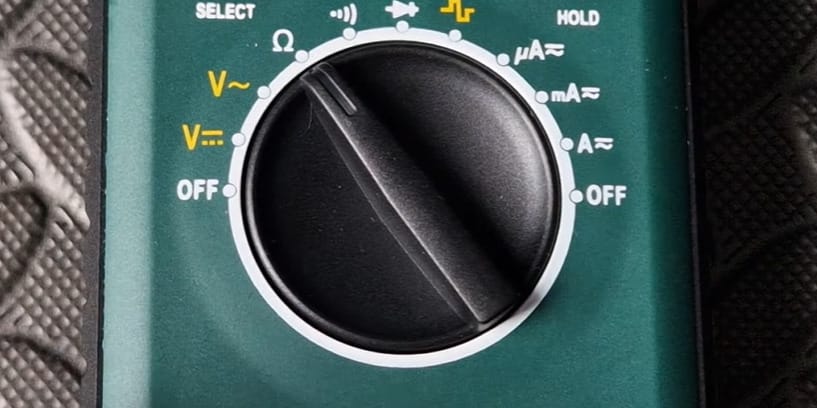
- Here comes the tech part. Set your multimeter to the 200 Ohms range. That’s the Omega symbol (Ω) on your meter.
Step 4: Probe Time
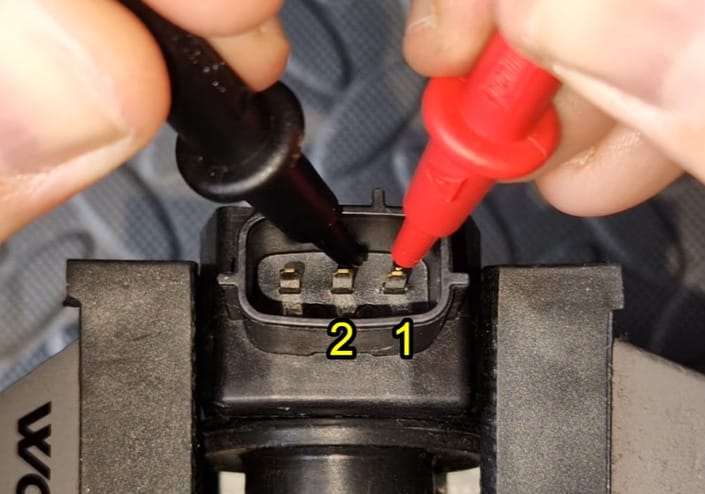
- Now, touch your multimeter probes to the coil’s terminals. Ensure solid contact for accurate readings.
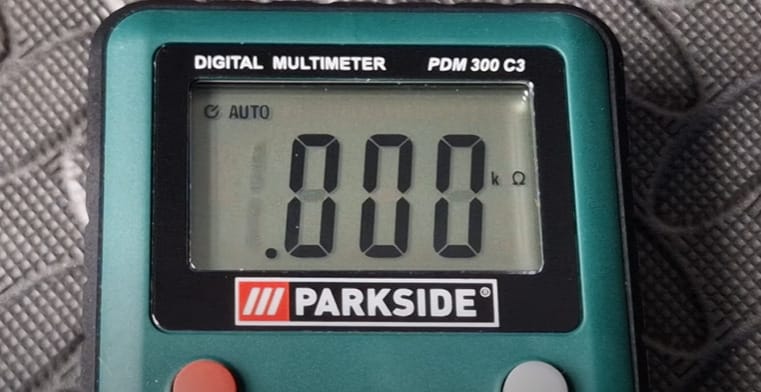
Step 5: Reading the Primary Resistance

- With your probes in place, check the multimeter. We’re looking for readings between 0.3 and 1.0 ohms here. If you see that, your coil’s looking good.
Step 6: Switch to 20kOhms Range
- Not done yet – switch your multimeter to the 20kOhms range now. It’s time to check the secondary resistance.
Step 7: Secondary Resistance Check
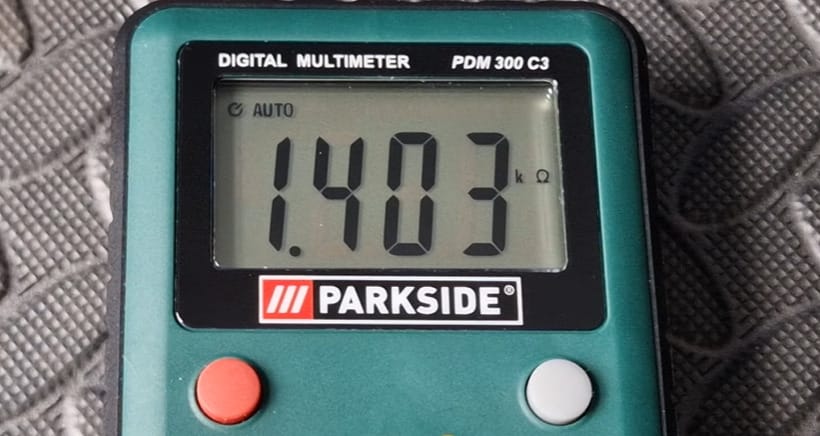
- Place your probes on the coil terminals again. Now, what does the multimeter say? You’re hoping for values between 5.0 and 12.0. Within this range? Your coil is likely in tip-top shape.
And there you have it – seven steps to test your coil pack with a multimeter. It’s all about being methodical and careful. Trust your tools and skills, and you’ll have your answer quickly!
Troubleshooting Scenarios: Navigating Common Ignition Coil Testing Hurdles
Hey there, fellow gearheads! Let’s dive into some common snags you might hit while testing ignition coils and how to navigate them skillfully. These are real-world scenarios, so pay attention – they could save you time and hassle.
| Scenario | Common Mistake | Troubleshooting Fix |
|---|---|---|
| No Spark During Spark Test | Not grounding the spark plug correctly. | Ensure the spark plug firmly touches a piece of metal on the engine for proper grounding. |
| Inconsistent Multimeter Readings | Loose connections or incorrect multimeter settings. | Double-check all connections for snugness and verify that the multimeter is in the correct setting. |
| Misinterpreting Multimeter Results | Expecting specific readings without consulting the manual. | Refer to the vehicle’s manual for the correct resistance range specific to your model. |
| Ignition Coil Swapping Confusion | Mixing up the coils when swapping. | Label the coils clearly to avoid confusion during the swapping process. |
| Overlooking Other Issues | Blaming the ignition coil for all engine problems. | Consider other potential issues like spark plugs, fuel injectors, or electrical connections if the coil tests okay. |
Comparative Analysis: Testing Different Models of Cars and Ignition Coils
Hey everyone, let’s get under the hood and talk about how different car models and types of ignition coils can affect your testing process. Understanding these variations is crucial for accurate diagnostics.
Variations in Car Models
- Older vs. Newer Models: Older cars typically have a single ignition coil, making the testing process relatively straightforward. You’re usually dealing with just one coil and a distributor. On the flip side, newer models often have coil-on-plug (COP) systems, where each spark plug gets its own coil. Testing these requires more finesse since you’re dealing with multiple coils.
- Different Engine Layouts: The engine layout can also influence the testing process. V6 and V8 engines, for example, might have ignition coils tucked away in hard-to-reach places, adding a bit of gymnastics to your testing routine.
Types of Ignition Coils and Testing Nuances
- Canister (Oil-Filled) Coils: Common in older vehicles, these coils are usually tested for resistance across the primary and secondary windings. The process is pretty cut-and-dry, but oil-filled coils can leak and cause misreadings.
- Coil-on-Plug (COP) Systems: Each coil needs to be tested individually in these systems. It’s a bit more time-consuming, but it’s crucial for pinpointing which coil might be failing. The challenge here is ensuring consistency in your testing method across all coils.
- Coil Packs: Some vehicles use coil packs, which serve multiple cylinders. Testing these involves checking the resistance of each coil in the pack. It’s like COP systems, but you deal with fewer individual units.
Tips for Effective Testing Across Models
- Always Check Specifications: Always refer to the specific resistance specifications in your vehicle’s manual, regardless of the car or coil type. What’s normal for one car might be a red flag for another.
- Use the Right Tools: Make sure you have the correct adapters for your multimeter, especially for COP systems. The right tools make all the difference.
- Be Mindful of the Environment: Temperature and humidity can affect your readings, especially with oil-filled canister coils. Always test in a stable environment.
Whether it’s a classic muscle car or a modern sedan, each vehicle has its quirks, and adapting your testing strategy is crucial for accurate diagnostics. Remember these tips, and you’ll be diagnosed like a pro soon!
Maintenance Tips for Keeping Your Ignition Coils in Top Shape
When it comes to maintaining your ignition coils, I’ve learned a thing or two about keeping them in great shape. It’s not just about dealing with problems as they crop up.
Regular maintenance is key to avoiding future issues and keeping your vehicle purring. Here’s my approach:
- Regular Inspections Are a Must: I always make it a point to check out my ignition coils regularly. A quick visual inspection for any signs of wear, cracks, or oil leaks can save you from bigger headaches later.
- Keep Those Coils Clean: I’ve found that a buildup of dirt and grime can do a number on coils. I use a soft cloth to clean them gently, steering clear of harsh chemicals that could cause damage.
- Tight Connections Save the Day: Loose connections? Not on my watch. I regularly ensure all connections are snug and free from corrosion. A splash of contact cleaners can work wonders here.
- Happy Spark Plugs, Happy Coils: Since ignition coils and spark plugs are like best buddies, keeping your spark plugs in shape is crucial. I replaced mine according to my car manufacturer’s guidelines.
- Go Easy on the Start-Stop: I avoid short trips that involve much starting and stopping. It’s tough on the ignition system. Longer drives can be more coil-friendly.
- Quality Matters for Replacements: If I need a new coil, I don’t skimp. Opting for quality replacement parts pays off in the long run, even if they cost a bit more upfront.
- Professional Checks for Peace of Mind: I include ignition coil checks in my regular vehicle servicing. Getting a professional once-over can catch things I might miss and give me extra peace of mind.
By sticking to these maintenance practices, I’m not just looking after my ignition coils; I’m investing in the long-term health of my vehicle. Keep these tips in your toolkit, and your car’s ignition system will improve!
Frequently Asked Questions
- Can I Test an Ignition Coil Without a Multimeter?
- While a multimeter is the most accurate tool for testing, you can perform a basic spark test without one. However, a multimeter provides a more comprehensive diagnosis.
- How Do I Know if My Ignition Coil is Bad?
- Common signs include engine misfiring, stalling, a reduction in power, and poor fuel economy. Testing with a multimeter can confirm these symptoms.
- Is It Safe to Test an Ignition Coil on My Own?
- Absolutely, as long as you follow safety protocols. Always wear protective gear, keep the engine cool, and follow the steps carefully.
- Can a Faulty Ignition Coil Damage My Engine?
- Over time, yes. A bad coil can lead to unburned fuel, which damages the catalytic converter or causes misfires, damaging the engine.
- Do I Need to Disconnect the Battery Before Testing?
- It’s not mandatory but a safety measure, especially if you’re uncomfortable working around live electrical components.
- How Often Should Ignition Coils Be Replaced?
- There’s no set interval, but they should be checked regularly, especially if you notice any engine issues. Typically, they can last around 100,000 miles.
References
Organizations:
- Applied Electrical Metrology Group at NIST. https://www.nist.gov/pml/quantum-measurement-division/applied-electrical-metrology
Books:
- “How to Diagnose and Repair Automotive Electrical Systems” by Tracy Martin, an ASE Certified Master Technician. https://www.barnesandnoble.com/w/how-to-diagnose-and-repair-automotive-electrical-systems-tracy-martin/1102559010
- “Modern Automotive Electrical Systems,” available on Wiley Online Books. https://onlinelibrary.wiley.com/doi/book/10.1002/9781119801078
Website Resources:
- O’Reilly Auto Parts. https://www.oreillyauto.com/how-to-hub/how-to-test-an-ignition-coil-on-your-car
Video References: