8 min read
How to Test a 3 Wire Pressure Sensor?
By the end of this article, you’ll know how to test a three-wire pressure sensor.
Testing a 3 wire pressure sensor can be a complicated task. After all, you’ll have to test all three wires for voltage. These wires have different voltages. So, without proper understanding and execution, you might get lost, which is why I’m here to help!
In general, to test a 3-wire pressure sensor:
- Set the multimeter to voltage mode.
- Connect the multimeter’s black lead to the negative battery terminal.
- Connect the multimeter red lead to the positive battery terminal and check the voltage (12-13V).
- Turn the Ignition Key to the ON position (don’t start the engine).
- Locate the pressure sensor.
- Now test three slots of the 3 wire sensor with the multimeter’s red lead and note down the readings.
- One slot should read 5V, and one should read 0.5V or slightly above. The last slot should read 0V.
For a more detailed explanation, follow the below post.
Before We Start
Before getting into the how-to part, there are a few things that you should know about.

Understanding the three wires in a pressure sensor can benefit you immensely while testing the sensor. So, let’s start with that.
Among the three wires, one wire is the reference wire, and the other is the signal wire. The last one is the ground wire. Each of these wires has different voltages. Here are some details about their voltages.
- The ground wire should have a voltage of 0V.
- The reference wire should have 5V.
- If the engine is off, the signal wire should have a 0.5V or slightly above.
When you switch ON the engine, the signal wire will show considerable voltage (5 or below). But I’m going to conduct this test without starting the engine. So, the voltage should be 0.5V. It might slightly go up.
Tip of the Day: Pressure sensor wires come in many color combinations. There is no exact color code for these sensor wires.
What is Back Probing?
The technique that we use in this testing process is called back probing.
Testing the current flow of a device without disconnecting it from the connector is known as back probing. It is an excellent way to test the voltage drop of the pressure sensor under a load.
For this demonstration, I’ll talk about how to test a 3-wire automotive pressure sensor. A vehicle comes with various types of pressure sensors such as air pressure sensors, tire pressure sensors, absolute pressure sensors, fuel rail sensors, etc. For instance, an air pressure sensor detects atmospheric pressure.(1)
7 Step Guide on How to Test a 3-Wire Pressure Sensor

The fuel rail sensor keeps track of the fuel pressure. This sensor is located in an easily accessible location in your vehicle. So, this 3-wire sensor is a perfect choice for this guide. (2)
Step 1 – Set the Multimeter to Voltage Mode
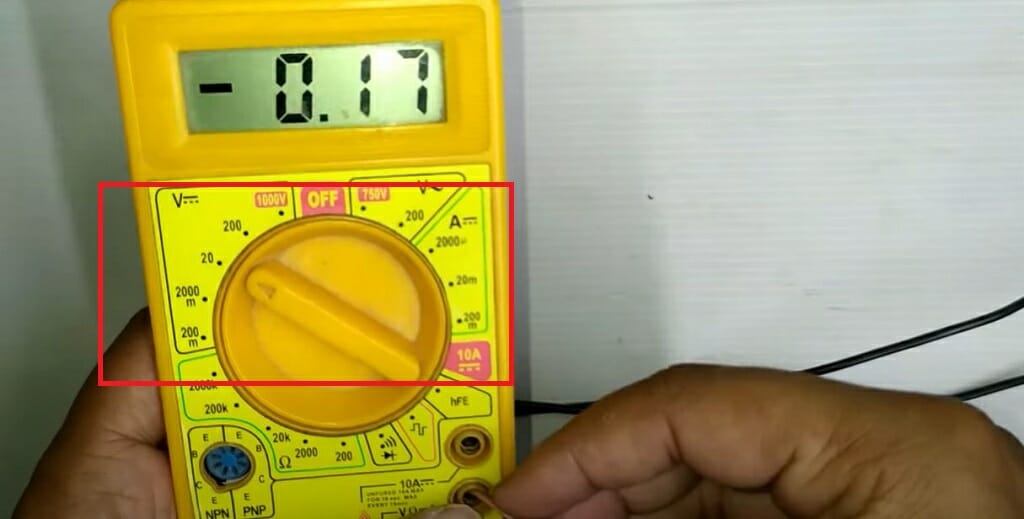
First, set the multimeter to DC voltage mode. Turn the dial to the appropriate position. Some multimeters come with auto-ranging capabilities and some don’t. If that is the case, set the range to 20V.
Step 2 – Connect the Black Lead
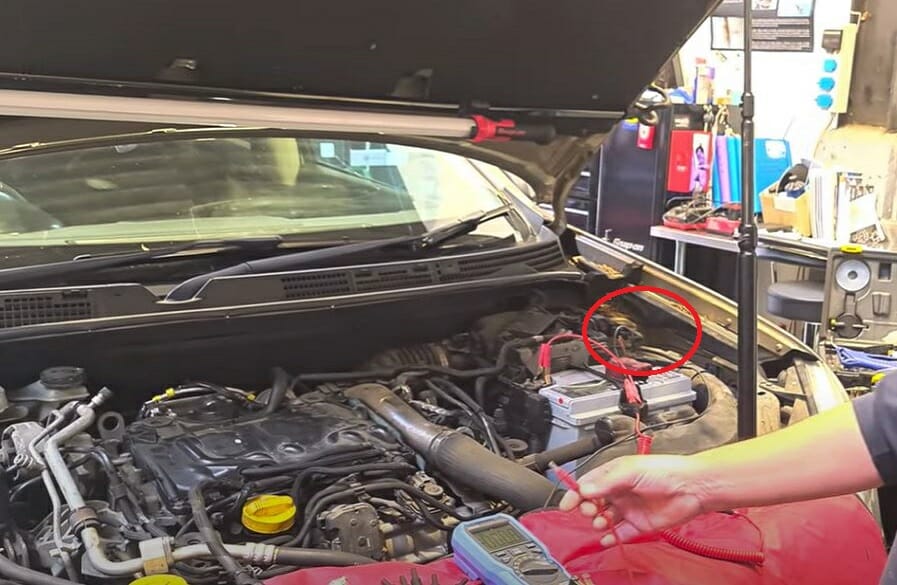
Then, connect the multimeter black lead to the battery negative terminal. The black lead should remain on the negative terminal until this test is completed. You can use this connection as the ground connection for this test.
Step 3 – Check the Ground Connection

Next, connect the multimeter red lead to the battery positive terminal and check the reading.
The reading should be above 12-13V. This is an excellent method to check the ground connection. Also, with this step, you can check the condition of the power supply.
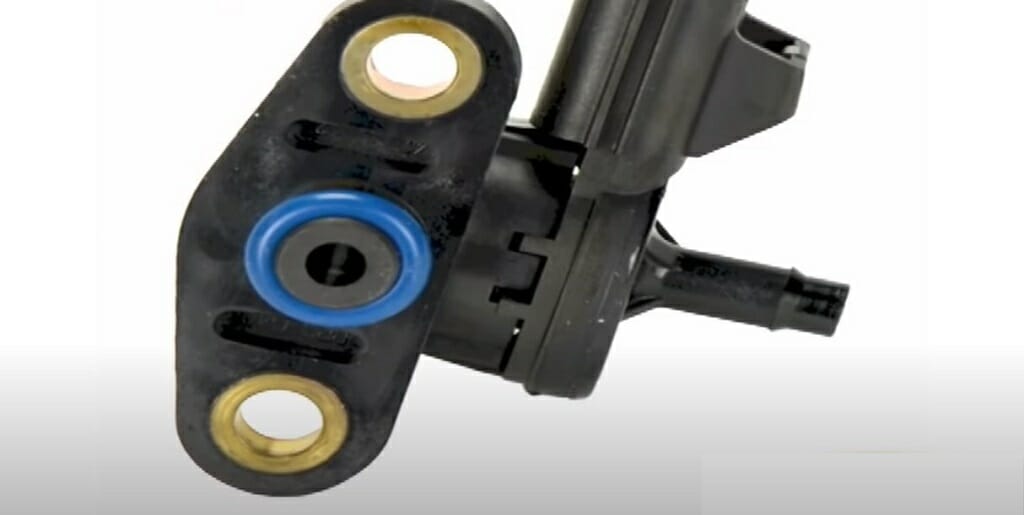
Step 4 – Locate the 3 Wire Sensor
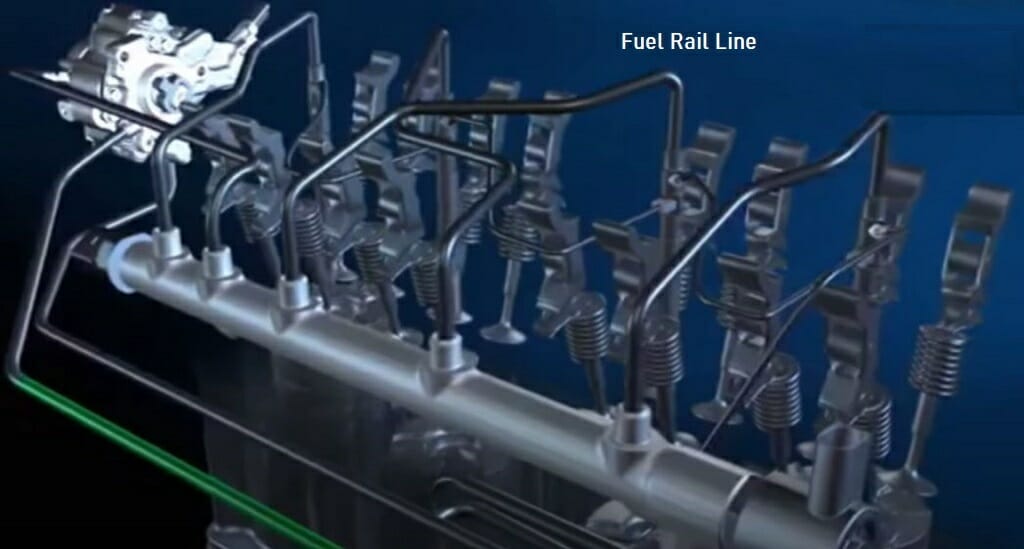
The fuel rail sensor is located in front of the fuel rail.
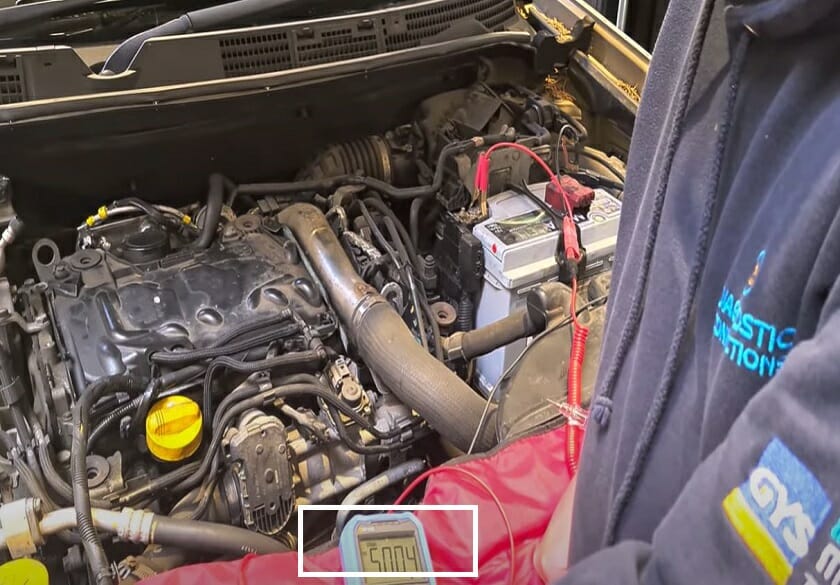
Step 5 – Turn the Ignition Key to ON Position

Now get inside the vehicle and turn the ignition key to the ON position. Remember, don’t start the engine.
Step 6 – Test the Three Wires
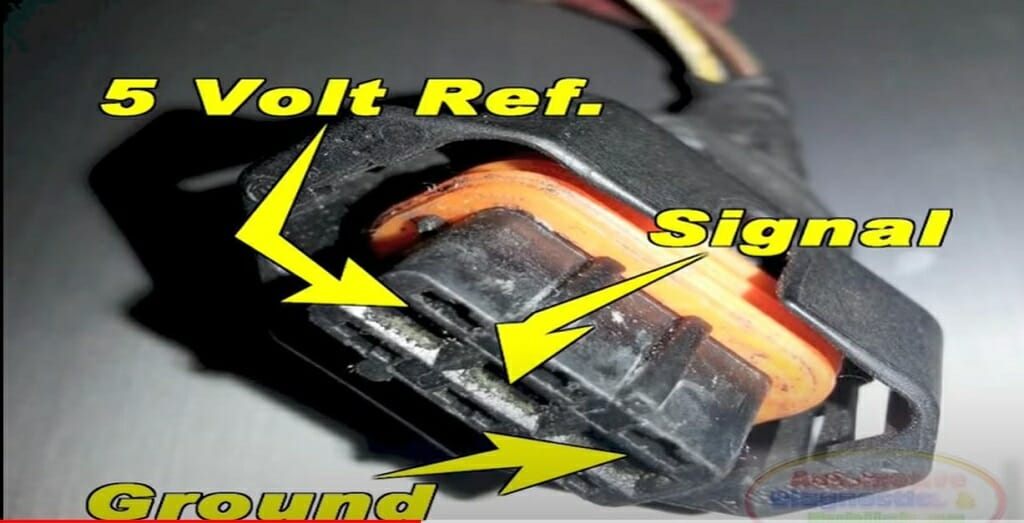
Since you have been using the back probing method, you cannot disconnect the wires from the connector. There should be three slots on the sensor’s rear. These slots represent the reference, signal, and ground wires. So, you can connect the multimeter lead to them.
- Take the multimeter’s red lead and connect it to the 1st slot.
- Note down the multimeter reading.
- Do the same for the other two remaining slots.
Use a paper clip or pin when connecting the red lead to the three slots. Make sure the paper clip or the pin is conductive.
Step 7 – Examine the Readings
Now, you should have three readings in your notebook. If the sensor is working fine, you’ll get the following voltage readings.
- One reading should be 5V.
- One reading should be 0.5V.
- One reading should be 0V.
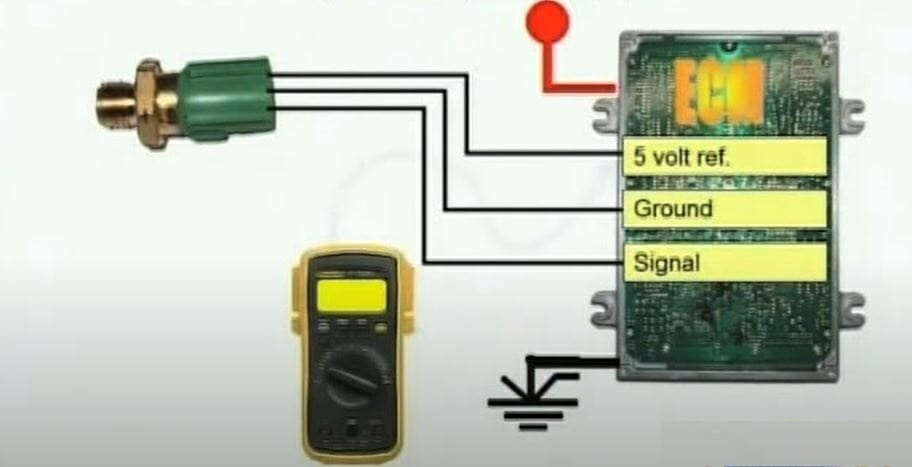
The 5V slot connects to the reference wire. The 0.5V slot connects to the signal wire, and the 0V slot connects to the ground wire.
So, a good 3-wire pressure transducer should give you the above readings. If it doesn’t, you are dealing with a faulty sensor.
Take a look at some of our related articles below.
References
(1) atmospheric pressure – https://www.nationalgeographic.org/
encyclopedia/atmospheric-pressure/
(2) fuel – https://www.sciencedirect.com/journal/fuel
Video References
ADPTraining
Automotive Engineering
Simply Diagnostics
Despair Repair