13 min read
How to Test a PC Power Supply with a Multimeter (Guide)

Have you ever wondered if your PC’s power supply is the culprit behind those frustrating crashes and freezes? I’ve been there, and let me tell you, it’s a relief to pinpoint the problem.
The good news is you can test your PC’s power supply using a multimeter. Here’s a summary of what we will cover and how to do it step by step:
- Step 1: Shut down your PC completely and unplug it, then set up your workspace on a non-static surface like wood.
- Step 2: Unfasten and remove the side panel of your PC case.
- Step 3: Set your multimeter to AC voltage and check the voltage between your wall outlet’s neutral and live pins.
- Step 4: Identify the 24-pin connector on your power supply.
- Step 5: Use a U-shaped paperclip to connect the green wire pin and any black wire pin on the 24-pin connector.
- Step 6: Turn on the power supply, set your multimeter to DC voltage, and test each pin according to its color code.
- Step 7: Document the voltage readings from each pin for troubleshooting and reference.
In this article, I will show you how to test a PC power supply with a multimeter – it’s simpler than you might think! I’ll walk you through each step. So grab your multimeter, and let’s get started!
Tools and Materials
Before diving headlong into testing your PC’s power supply, gather the necessary gear to make this task a walk in the park.
- Digital Multimeter: The multi-tool of electrical diagnostics. This gadget is vital for getting those precise voltage readings.
- Screwdriver Set: You must get into that PC case; a set of screwdrivers is your best friend.
- Power Supply Tester (optional but handy): This can give a quick health check on the PSU’s different connectors.
- Safety Goggles: It is always better to be safe than sorry when tinkering with electronics. You’ve only got one set of eyes!
- Insulated Gloves: Not a must, but I always like to play it safe with electricity.
- Notepad and Pen: Also great to have on hand for jotting down those readings you’ll get so that nothing slips through the mental cracks.
Before I leave you to gather your toolkit, let me stress the importance of a clean work environment. A cluttered space is a recipe for an accidental short-circuit or – heaven forbid – a fried component.
Have you got everything rounded up? Awesome! Let’s get ready to tackle that power supply with the poise and precision of a PC pro.
Testing with Multimeter
It’s time to roll up those sleeves and dive into the nuts and bolts of power supply testing.
Step 1: Turn off your PC Completely
First things first, you’re going to want to power down your PC completely. And I mean, shut it down, unplug it from the wall, and let’s not have any unexpected light shows, okay?

Also, work on a non-static surface. Wood is good. Make sure you’re grounded to avoid any static damage.
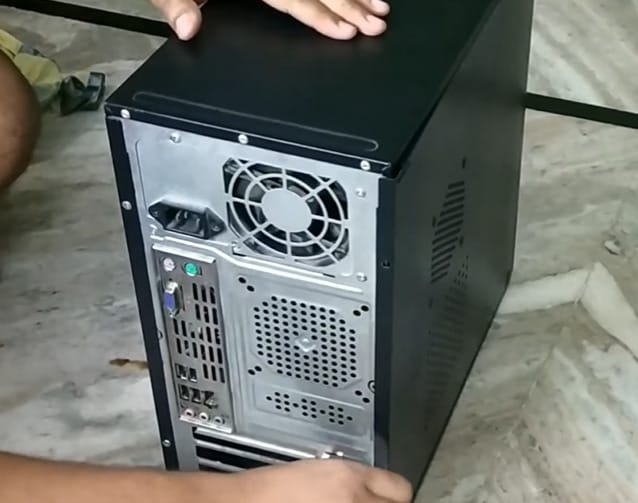
Step 2: Open the Case
Let’s pop open that case. Unscrew the side panel, which usually requires no tools, thanks to thumb screws. But hey, if you need a screwdriver, you’ve got your trusty set ready.
Step 3: Test the Plug
First, we must ensure the correct voltage is coming in from the mains. Set your multimeter to AC voltage.

Check the voltage between the neutral and live pins of the plug. It should be around 240 volts.

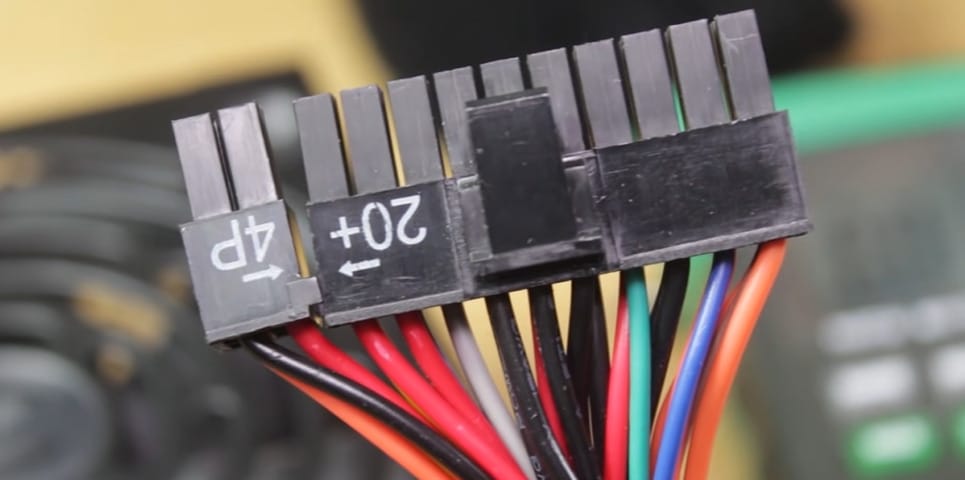
Step 4: Prepare the Power Supply
Find the 24-pin connector on your power supply. These pins are color-coded – each color represents a different voltage.
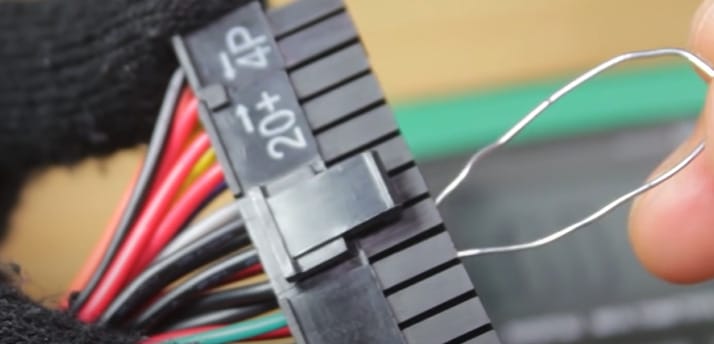
Step 5: Create a Bridge
Before powering the supply, you must create a bridge between a green and any black pin on the 24-pin connector. I do this with the U-shaped paperclip.
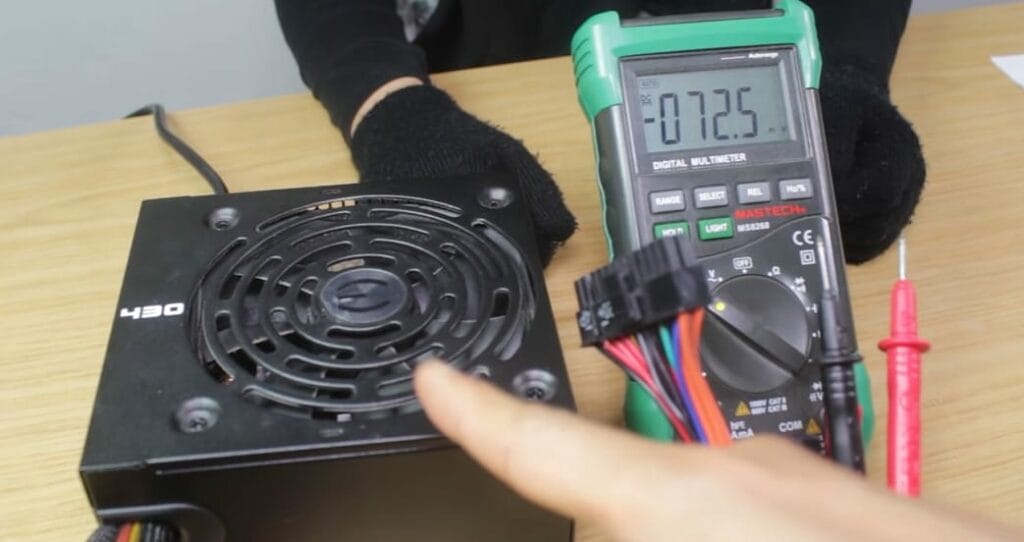
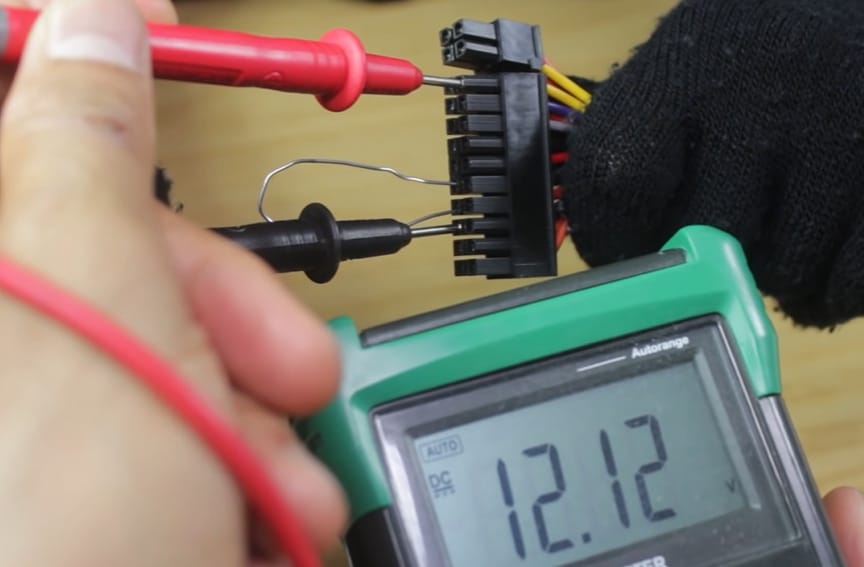
Step 6: Power On and Test
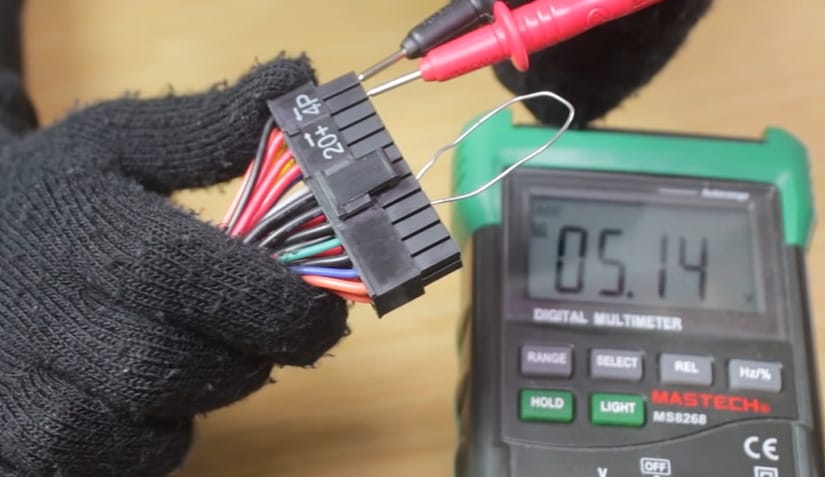
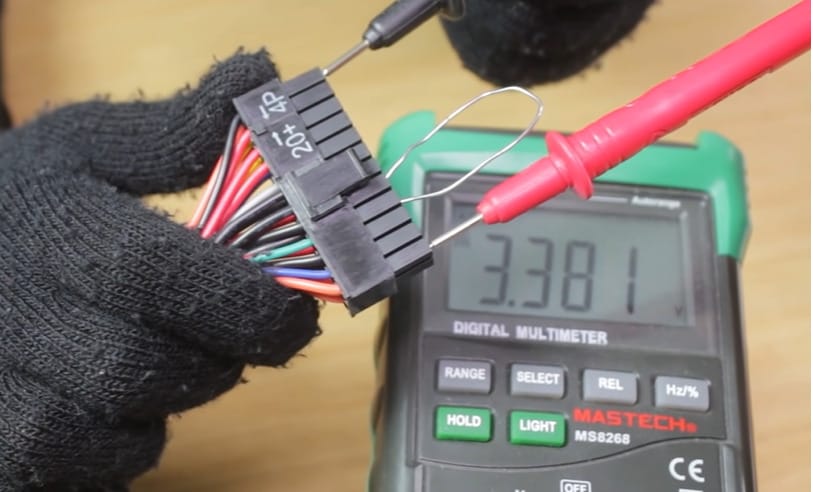
With the power supply switched on (you’ll see the fan spinning), set your multimeter to DC voltage. Start testing each pin according to the color code and compare the readings with the standard voltages:
- Yellow wires should give you 12V
- Red wires are usually 5V
- Orange wires are 3.3V
Step 7: Document Your Findings
Keep a record of the voltages for each pin. This helps in troubleshooting if something isn’t right.

Comparison of Power Supply Testing Methods
There are several ways to check the health of your power supply, and each method has pros and cons. It’s like having different tools in your toolbox – each has its specific use and importance.
So, let’s break it down and see which tool might be right for your needs. Whether you’re a seasoned tech guru or just starting, understanding these methods is key to keeping your PC in shape.
| Method | Multimeter | Power Supply Tester | BIOS/UEFI Checks |
|---|---|---|---|
| Description | A versatile tool that gives precise voltage readings. It’s like having a high-precision measuring tape in your toolkit. | A specialized tool designed for testing PC power supplies. It is a quick diagnostic tool, like a smoke alarm test button. | Built-in software checks in your PC that provide system health insights, including the power supply. It’s like having a basic health checkup. |
| Precision | High. It shows exact voltage readings, allowing you to spot even slight deviations. | Moderate. Indicates if there’s a problem but may miss finer details. | Low. It offers general health insights but isn’t detailed for power supply nuances. |
| Ease of Use | Requires some technical know-how. It’s like using a high-tech drill – you need to know the right settings. | Very easy. Just plug and play, much like using a flashlight. | Very easy. Automatically runs during system startup, like a car’s dashboard indicators. |
| Cost | It can be an investment, but it’s a versatile tool for multiple uses. Think of it as buying a top-quality power tool. | Usually less expensive. It’s a one-trick pony but does its job well, like a reliable hammer. | No additional cost. It’s part of your PC, like the included wrench with flat-pack furniture. |
| Versatility | Extremely versatile. Not just for power supplies but for a range of electrical testing. Like a multi-purpose screwdriver set. | It is limited to testing power supplies. | It is limited to basic system diagnostics. |
| Best For | Detailed troubleshooting and those serious about their tech. It’s the go-to for a seasoned builder. | Quick checks and convenience. Ideal for a quick diagnosis when you’re in a hurry. | Basic system checks. It is handy for a quick overview but not for in-depth analysis. |
Ultimately, choosing the right tool to test your PC’s power supply boils down to your need and comfort level with tech tools. Whatever your choice, remember that keeping your power supply in check is key to a healthy and happy PC!
Troubleshooting Common Issues During Power Supply Testing

Let’s discuss troubleshooting when testing your PC’s power supply with a multimeter. Over the years, I’ve encountered a few hiccups, so I will share some common issues and how to tackle them.
Inconsistent Multimeter Readings
- What’s Happening: Your multimeter readings are jumping all over the place or not what you expect.
- How to Tackle It: First, check your multimeter’s battery. A dying battery can give you false readings. Then, ensure your multimeter is set to the correct setting.
No Voltage on Certain Pins
- What’s Happening: You’re testing the pins; some show no voltage.
- How to Tackle It: This might indicate a problem with the power supply itself, but before jumping to conclusions, double-check your connections. Make sure the power supply is properly plugged in and turned on.
Voltage Readings are Off
- What’s Happening: Your reading voltages are not within the expected range.
- How to Tackle It: A slight variation is normal, but significant deviations could indicate trouble. Ensure that your testing environment is stable – no fluctuating temperatures or humidity, as these can affect electronic components. Also, if you’re using an older multimeter, consider getting it calibrated or using a newer one.
Safety Concerns
- What’s Happening: You smell burning or see sparks.
- How to Tackle It: Immediately turn off and unplug everything. Safety is your top priority. Don’t try to fix anything while the power supply is plugged in.
Multimeter Shows Overload
- What’s Happening: The multimeter display shows an overload message or something similar.
- How to Tackle It: This usually means the voltage you’re trying to measure is too high for the multimeter’s setting. Adjust the multimeter to a higher range and try again. Just ensure you’re not exceeding the multimeter’s maximum rating – that’s a recipe for disaster.
And if you’re ever in doubt, it’s better to consult a professional. There’s no shame in that – we’ve all been there. Happy testing, and stay safe!
RELATED 3 Pin Horn Relay Wiring Diagram
Essential Tips for Testing Your PC’s Power Supply with a Multimeter

Here are some tips for testing your PC power supply with a multimeter. These are from my own experiences, so I hope they help you as much as they’ve helped me.
- Remember that multimeters vary by brand. The voltage, current, and resistance readings can differ, so read the manual before starting.
- It’s crucial to check all your connections. Ensure your power supply is properly connected to the motherboard and all other components. I’ve seen cases where a loose connection was the root of all the trouble, and it’s an easy fix.
- Ensure the power supply is on and there’s no blown fuse or tripped circuit breaker. I’ve had moments where I scratched my head for hours only to find out the power was off. Talk about feeling a little embarrassed, right?
- Don’t plug anything into the wall outlet while testing with a multimeter. Doing so can cause damage or, worse, injury. Safety first – always.
- If you’re unsure about your power supply’s health, don’t hesitate to contact your computer manufacturer for advice before proceeding. Better to be safe than sorry. I’ve had instances where a quick call to tech support saved me much time and effort.
Remember, understanding your tools and setup can make all the difference. Stay safe, and happy testing!
Frequently Asked Questions
- Can A Faulty Power Supply Damage My Multimeter?
- Generally, a multimeter is designed to handle the voltages involved in a PC power supply test. However, the PSU outputs extremely high or unstable voltages that could harm your multimeter. Always start with the multimeter set to a higher range to be safe.
- Can I Test Other Components of My PC With a Multimeter?
- A multimeter can test components like your motherboard, hard drives, and CPU for proper voltage and continuity. Just make sure you understand what you’re testing and the expected results.
- Do I Need a Special Multimeter for PC Testing?
- Not really. Most standard digital multimeters will do the job. Just ensure it can measure DC voltages up to at least 20 volts.
- Can I Test a Laptop Power Supply with a Multimeter?
- Yes, you can test a laptop power supply the same way you would a desktop’s. Just be aware of the different connector types and voltage requirements of laptops.
- Is There a Difference in Testing Modular vs. Non-Modular PSUs?
- The testing process is essentially the same for both. However, with a modular PSU, ensure that all the detachable cables are securely connected before testing. A loose cable in a modular setup can lead to incorrect readings or an undetected PSU issue.
- How Long Does a Typical Power Supply Last?
- The lifespan of a power supply can vary greatly depending on its quality and usage. Generally, a good PSU can last anywhere from 5 to 10 years. Regular testing can help you catch any potential issues before they become serious problems.
References
Organizations:
- International Electrotechnical Commission (IEC). https://www.iec.ch/homepage
- National Institute of Standards and Technology (NIST). https://www.nist.gov/
Books:
- “PC Hardware in a Nutshell” by Robert Bruce Thompson and Barbara Fritchman Thompson. https://www.barnesandnoble.com/w/pc-hardware-in-a-nutshell-robert-bruce-thompson/1122471975
- “Upgrading and Repairing PCs” by Scott Mueller. https://www.barnesandnoble.com/w/upgrading-and-repairing-pcs-scott-m-mueller/1124173553
Website Resources:
- Tom’s Hardware. http://tomshardware.com/
- AnandTech. http://anandtech.com/
- PCMag. https://www.pcmag.com/
Video References:
Ayush Mishra
HealMyTech