10 min read
How to Test Light for Fuses (5 Easy Steps)
Testing fuses with a test light is a breeze and much more budget-friendly than a multimeter. Plus, you get reliable results that tell you exactly what’s going on with your fuses.
Here’s a summary of our article on how to do a quick fuse check with a test light – it’s something you can easily pull off in about 5 minutes:
- Step 1: Locate the fuse in the box, usually found under the hood.
- Step 2: Grounding the test light correctly.
- Step 3: Connecting the test light’s probe to a positive power source.
- Step 4: Ensure that your test light is functioning as it should.
- Step 5: And finally, the actual testing of the fuses.
We will delve into each of these steps in more detail, ensuring you’re equipped with all the knowledge you need to diagnose and fix the issue at hand. So, grab your test light, roll up your sleeves, and get started!
Tools and Materials: Getting Ready to Test Those Fuses
Hey, folks! Before we jump into testing fuses with a test light, let’s make sure you’ve got everything you need. Here’s the lowdown on the tools and materials you’ll need to get the job done:
- Test Light: This little gadget is your main tool. It’s super handy for checking if there’s power in the fuse. You can grab one from any auto parts store or order one online. They’re usually not too pricey, so it’s a great addition to your toolbox.
- Grounding Clip or Clamp: Most test lights have a clip or clamp attached. You’ll use this to ground the test light to your car. It’s an important step, so make sure your test light has one of these.
- Car’s Fuse Box: You don’t have to buy this—it’s part of your car! You’ll find it under the hood or on the driver’s side inside your car. Just pop open the cover, and you’re ready to go.
- Needle-nose Pliers (Optional): Sometimes, those fuses can be a little stubborn. If you’re having trouble pulling out a fuse to inspect it, a pair of needle-nose pliers can be a real finger-saver.
- Replacement Fuses (Just in Case): Having a few replacement fuses of various amperages on hand is always a good idea. If you find a blown fuse, you can swap it immediately.
And that’s pretty much it! With these tools and materials, you’ll be all set to check those fuses like a pro.
Step-by-Step Guide: Testing Car Fuses with a Test Light
Let’s walk through the straightforward steps to check if your car’s fuses are in good shape using a test light. It’s easier than you think!
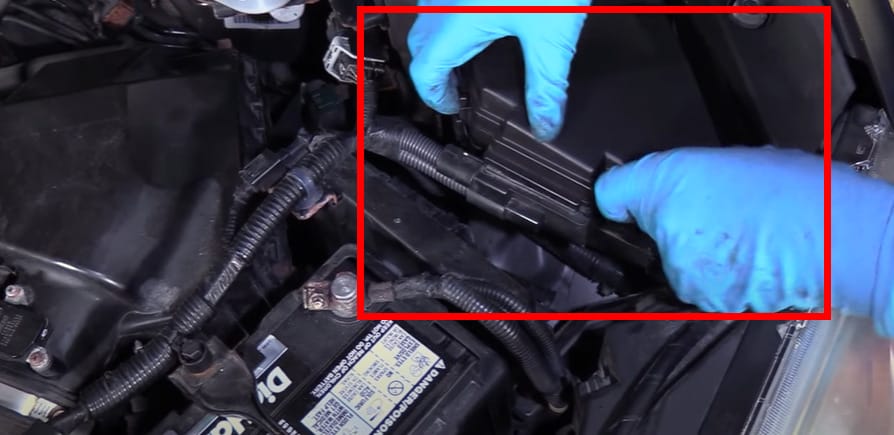
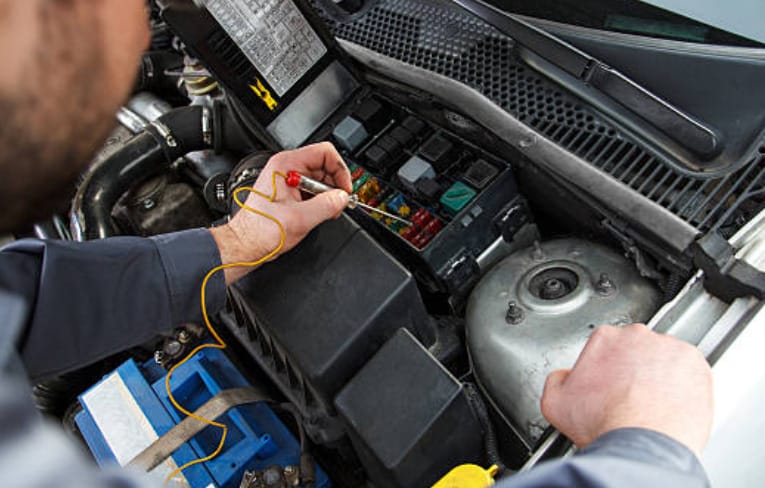
Step 1: Find the Fuse Box
- First things first, locate your fuse box. It’s usually under the hood of your car, but sometimes you’ll find it on the driver’s side inside the car. Lift off the cover to reveal the fuses.
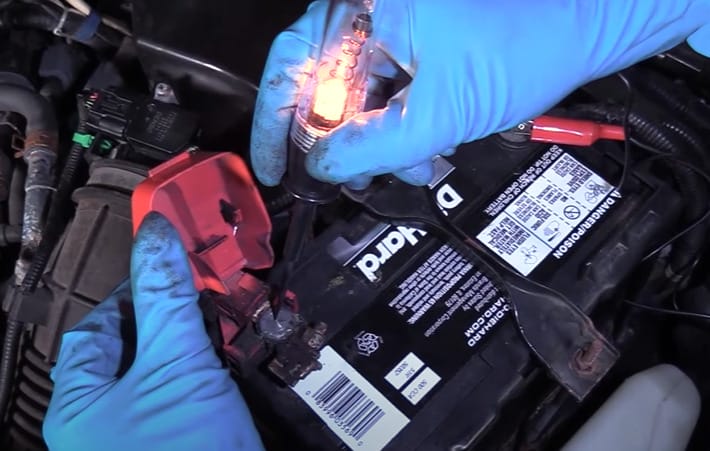
Step 2: Ground Your Test Light
- Grab your test light and connect the clip or clamp to a metal part of the car for grounding. You can use the battery’s negative terminal as a solid grounding point.
Step 3: Test the Test Light
Before going any further, let’s ensure the test light is working. Touch the probe (the pointy end) to the battery’s positive terminal. If the light in the test light illuminates, you’re good to go.
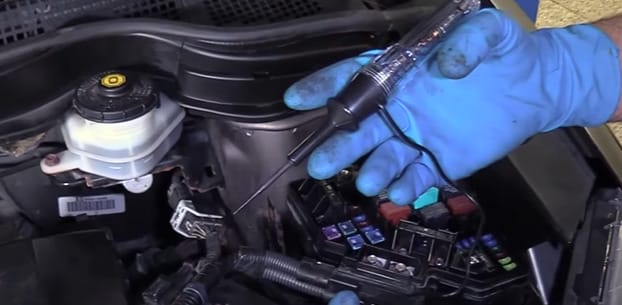
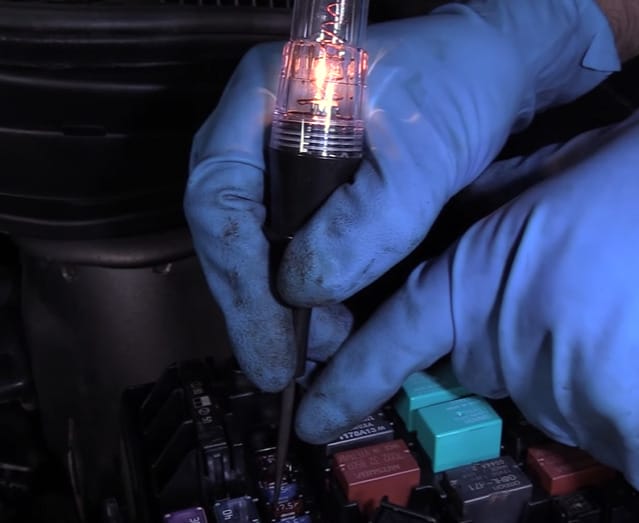
Step 4: Test the Fuses
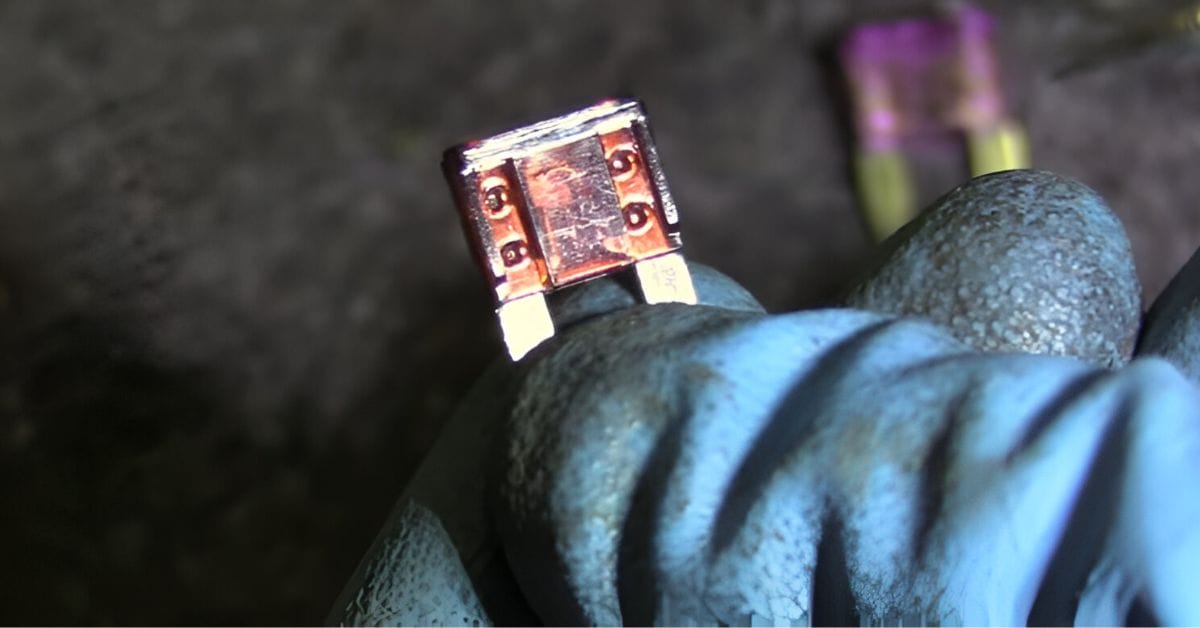
On the back of each fuse is a tiny exposed metal part. Touch the test light probe to these points. If the light illuminates on both sides of the fuse, it’s working fine. If it only lights up on one side, that’s your troublemaker – the fuse is blown.
Step 5: No Light at All?
If you touch a fuse and the test light doesn’t light up at all, don’t worry. It just means the circuit isn’t active.

It doesn’t necessarily mean the fuse is bad. Some circuits only become active with the ignition on or when a specific function (like the headlights) is turned on.
Remember, if you find a blown fuse, replace it with one of the same amperages to keep everything running smoothly. Happy testing!
Test Light vs. Multimeter: Comparing Fuse Testing Methods
Let’s break down the two popular methods for testing fuses: a test light and a multimeter. Each has pros and cons, so understanding these can help you decide which tool suits your needs.
| Aspect | Test Light | Multimeter |
|---|---|---|
| Cost | Generally less expensive. | Usually more expensive than a test light. |
| Ease of Use | Simple and straightforward, great for quick checks. | It requires a bit more knowledge to use effectively but offers more detailed information. |
| Functionality | Primarily used to check for power in a circuit. | It can measure voltage, current, and resistance, offering a broader range of testing capabilities. |
| Accuracy | Good for a quick check to see if power is present. | It provides precise measurements, which is crucial for diagnosing complex issues. |
| Portability | Small and easy to carry around. | Typically larger than a test light but still portable. Some compact models are available. |
| Suitability for Beginners | It is very beginner-friendly due to its simplicity. | It might be intimidating for beginners, but it offers a great learning opportunity for those who understand its functions. |
| Troubleshooting Capabilities | It is good for identifying whether power is reaching a particular point in the circuit. | Excellent for in-depth troubleshooting and identifying a range of electrical issues beyond just fuses. |
In summary, a test light is a great tool if you’re looking for a quick, easy, and cost-effective way to check fuses. But a multimeter is the way to go if you dive into more complex electrical diagnostics.
Troubleshooting Common Fuse Testing Issues
Let’s get into some common issues you might run into while testing fuses with a test light, and I’ll walk you through how to tackle them.
Difficulty Accessing the Fuse Box: The fuse box can be tricky, like under the dashboard or in a tight corner in the engine bay. Here’s the deal: patience is key. Take your time to remove any panels or covers gently. If it’s tough to reach, sometimes a pair of needle-nose pliers can help you get a grip on those elusive fuses.
Dealing with Corroded Fuses: Corrosion is a real party pooper. It can make it tough to test or even remove fuses. If you spot any greenish or white powdery stuff on the fuses, that’s corrosion. Don a pair of gloves, and gently clean the corrosion off with a small wire brush or sandpaper. But be gentle – you don’t want to damage the fuse or the holder.
Test Light Not Lighting Up: Check your ground connection if your test light isn’t glowing. Make sure it’s firmly attached to a metal part of the car. No luck? Try testing the battery’s test light directly to ensure it’s working. If it still doesn’t light up, your test light might need a replacement.
Unclear Fuse Diagrams: Sometimes, the diagram on the fuse box is like reading a map without any landmarks. If the diagram isn’t unclear or worn off, a quick internet search for your car model’s fuse box diagram can save the day. Keep a printed copy in your glove box for future reference.
Fuses That Keep Blowing: If you find a fuse that keeps blowing, it’s usually a sign of an underlying issue, like a short circuit somewhere. Replacing the fuse will only be a temporary fix. You might need to dive deeper or get a professional to take a peek.
Hard-to-Remove Fuses: Some fuses can be stubborn. A fuse puller or a small pair of pliers can help if you can’t pull a fuse out by hand. But here’s the thing: pull straight out and don’t twist. You don’t want to damage the fuse or the holder.
Remember, safety first. Always make sure your car is off, and the keys are out of the ignition before you start poking around. And if you’re ever unsure, there’s no shame in getting a professional to help out. Happy troubleshooting!
Frequently Asked Questions
- Can Any Test Light be Used to Check Car Fumes?
- Any standard test light is suitable for checking car fuses. Just make sure it’s in good working condition before you start.
- Is It Safe to Test Fuses with the Car Running?
- Always turn off the car and remove the keys from the ignition before testing fuses. This helps prevent any electrical mishaps.
- Can a Test Light Be Used on Any Fuse?
- Test lights work on all fuses, whether in your car or home. Just ensure you can access both ends of the fuse to test it properly.
- How Often Should I Check My Car’s Fuses?
- It’s a good idea to check your fuses regularly, like during routine maintenance or oil changes. This way, you can catch any issues early on.
- What If a Fuse Keeps Blowing?
- If the same fuse keeps blowing, it often indicates a deeper electrical problem in that circuit. It’s time to dig a little deeper or consult a professional.
- Are There Any Risks to Using a Test Light on Fuses?
- If you use the test light properly and follow safety precautions, minimal risks are involved. Just remember to turn off your vehicle first!
References
Organizations:
- Automotive Service Association (ASA). https://www.asashop.org/
Website Resources:
- 2CarPros. https://www.2carpros.com/
- Ran When Parked. https://ranwhenparked.net/
Video References:
1A Auto: Repair Tips & Secrets Only Mechanics Know