12 min read
How to Test Car Fuses with a Multimeter (Guide)

Ever found yourself scratching your head, wondering if a blown fuse is the culprit behind your car’s electrical woes? Well, I’ve been there, and let me tell you, it’s not a fun spot to be in.
But fear not! I’m here to walk you through the surprisingly simple process of testing car fuses with a multimeter. Trust me, it’s a game-changer.
- Step 1: Identify those blade fuses in your car; they have metal tabs on top, ready for a check-up without being pulled out.
- Step 2: Skip the hassle of removing fuses; we’re going straight for the continuity test with our multimeter in the fuse box.
- Step 3: Dial your multimeter to ohms or continuity mode, gearing up for that satisfying beep that tells us all is well.
- Step 4: Gently tap the probes on the fuse’s metal tabs; a beep or a near-zero reading means we’re in the clear.
- Step 5: Don’t forget to give those larger fuses a visual once-over through their inspection windows, ensuring everything’s intact.
So, grab your multimeter, roll up your sleeves, and let’s get to work. I’ll guide you through each step, ensuring you have the know-how to tackle this task confidently. Let’s do this!
Understanding Car Fuses and Their Importance
Let’s not skip ahead without grasping the basics of what we’re actually poking at – car fuses. These little guys are more than just pieces of metal inside plastic; they’re the unsung heroes of our vehicles’ electrical systems.

Think of car fuses as the guardians of your car’s electrical kingdom. They’re there to protect wiring and components from getting fried when there’s an unexpected power surge.
Each fuse in your car has a specific amp rating, which limits how much electricity it can handle before it says, “Nope, that’s it,” and blows to save the day.
This is why replacing a blown fuse with one of the same rating is crucial. Put in a fuse that’s too high, and you might as well roll out the welcome mat for electrical damage.
But here’s the kicker – not all problems are as obvious as a blown fuse. They’re slightly underperforming sometimes, so a multimeter becomes your best friend. It helps you deeply dive into your fuses’ health, ensuring everything works as it should.
This might sound daunting, especially if you’re unfamiliar with car electrics. But trust me, once you’ve got the hang of it, testing fuses with a multimeter is as easy as pie.
Step-by-Step Guide to Testing Car Fuses with a Multimeter
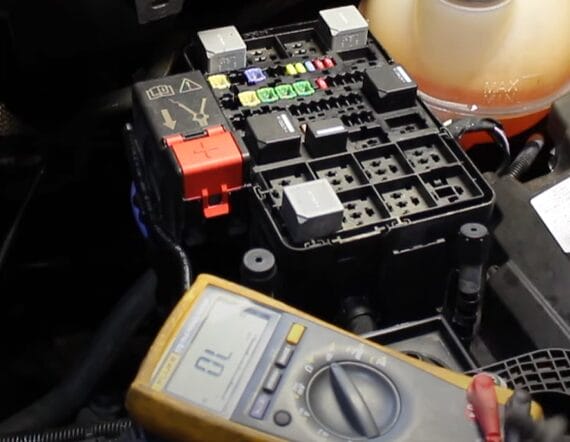
Let’s talk about how you can quickly check all the fuses in your car’s fuse box with a multimeter without needing to remove them.
This method is particularly useful for testing blade fuses or mini blade fuses, which are commonly found in cars today. Here’s how you can do it efficiently and effectively.
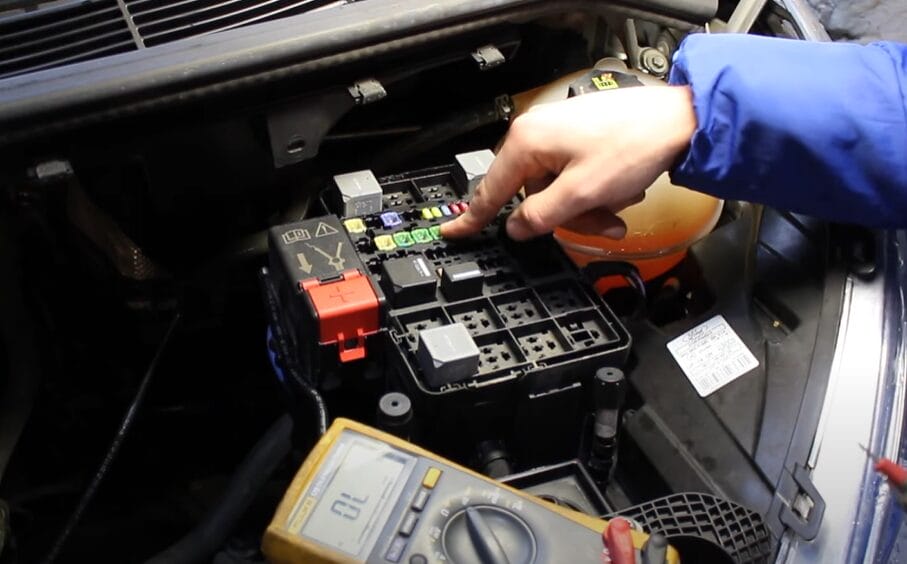
Step 1: Understand Your Fuses
First, recognize that standard and mini-blade fuses have metal terminals at the bottom connected to metal tabs on the top. These accessible tabs allow you to test the fuse without removing it.

Step 2: Avoid Unnecessary Removal
Instead of removing each fuse to inspect it, you can use a multimeter to check for continuity directly in the fuse box. This approach saves time and simplifies the process.
Step 3: Prepare Your Multimeter
Set your multimeter to the resistance (ohms) setting or continuity mode. Many multimeters feature a beep function that signals continuity when the probes are connected.
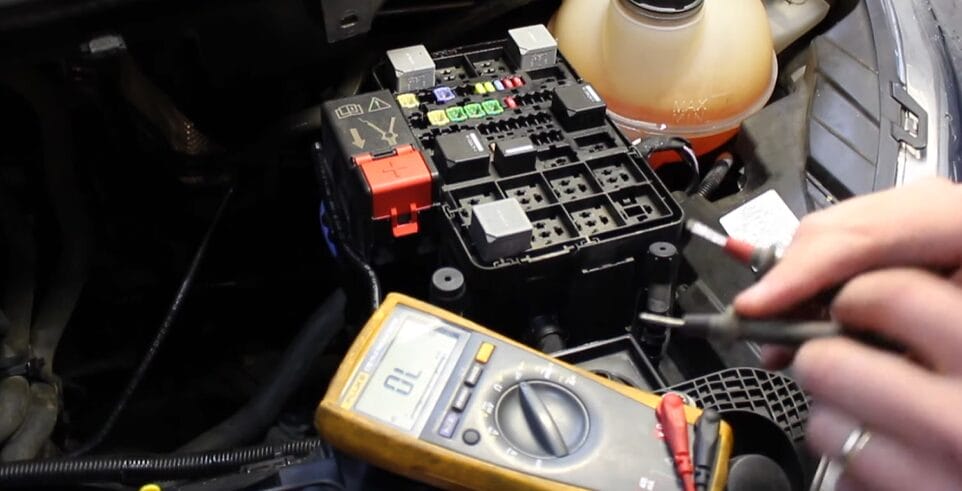
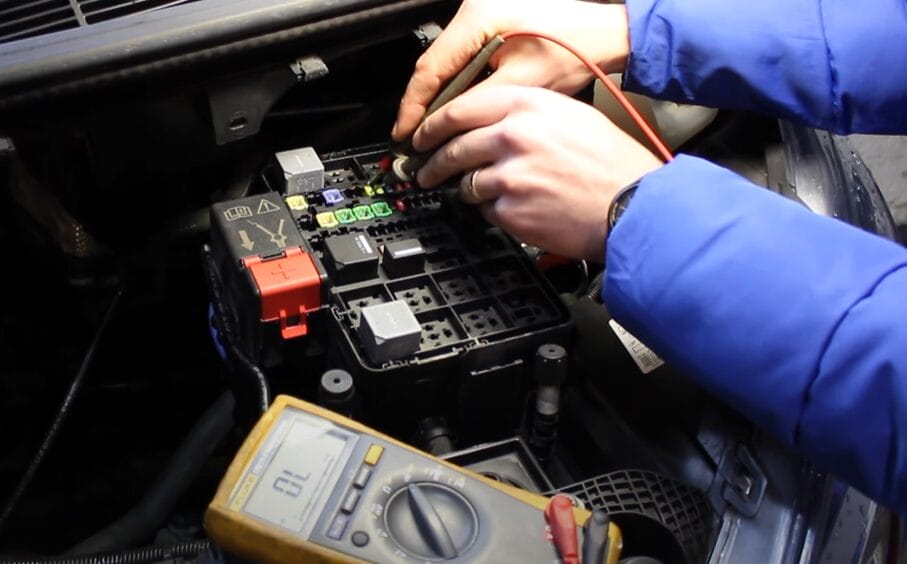
Step 4: Conduct the Test
Touch the multimeter probes to the metal tabs on the top of each fuse. A continuity beep or a resistance reading near zero indicates the fuse is good. Proceed to test each fuse in the box using this method.
Step 5: Check Larger Fuses
For larger fuses, which may have an inspection window, visually check the window as an additional measure to ensure the fuse is intact.
By following these steps, you can efficiently test all the fuses in your car’s fuse box without the need to remove them. This quick and effective process can help maintain your car’s electrical system.
Interpreting Multimeter Readings: What They Mean for Your Car
Let’s dive right into the heart of the matter—interpreting those multimeter readings when you’re testing your car’s fuses. I can’t emphasize enough how crucial this step is.
It’s not just about getting a number on the screen; it’s about understanding what that number tells you about your car’s health.
- 0 Ohms Reading: This means the fuse is in tip-top shape, and there’s a continuous path for electrical current to flow. It’s like your car giving you a thumbs up, saying, “All systems go!”
- OL or High Resistance Reading: This indicates a blown fuse. While it’s a bummer, it’s also a sign to pat yourself on the back. You’ve successfully identified the culprit that might’ve been causing electrical issues in your vehicle.
It’s also worth noting that not all multimeters are created equal. Make sure you’re using one that’s suitable for automotive use. This ensures the readings you get are accurate and reliable, preventing any mishaps down the road.
Replacing a Faulty Fuse: A Simple Guide
You’ve tested your car fuses with a multimeter, and boom; you’ve found the culprit! Now, let’s talk about replacing that faulty fuse. It’s simpler than you might think, and I’m here to walk you through it step by step.
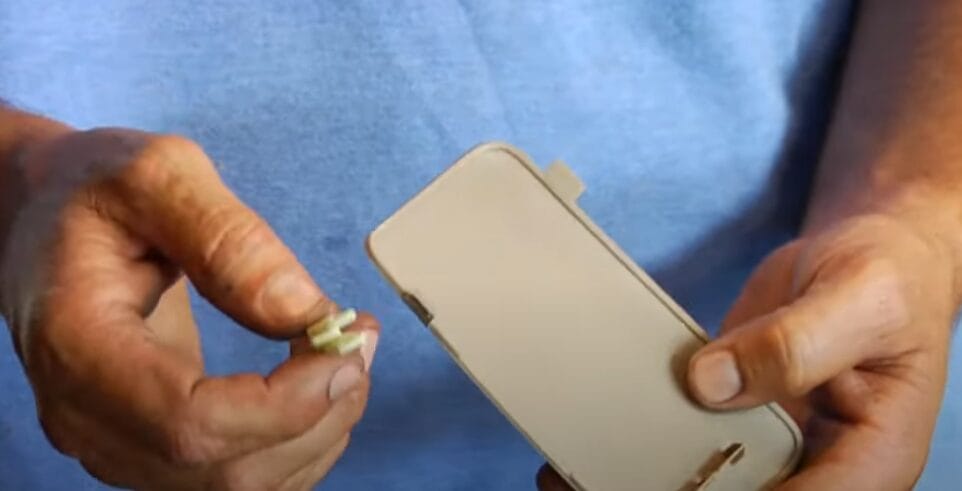
Step 1: Prepare the Necessary Tool
- Locate the special fuse removal tool in your fuse box. Have the replacement fuse with the correct rating ready.
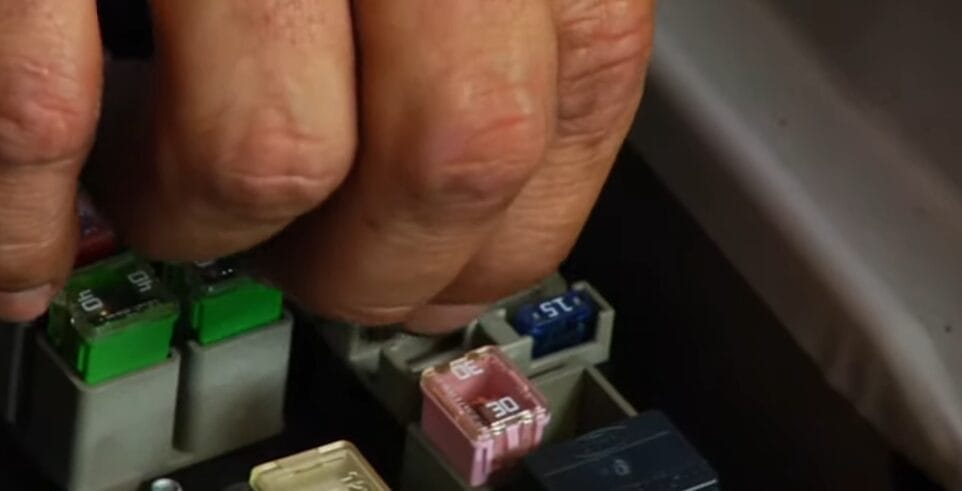
Step 2: Remove the Faulty Fuse
- Use the fuse removal tool to extract the faulty fuse from its slot carefully. Apply gentle pressure to avoid damaging the fuse box.
Step 3: Verify Replacement Fuse Rating
- Before installing the new fuse, ensure its amp rating matches the one you’re replacing. This is crucial for the safety and efficiency of your car’s electrical system.
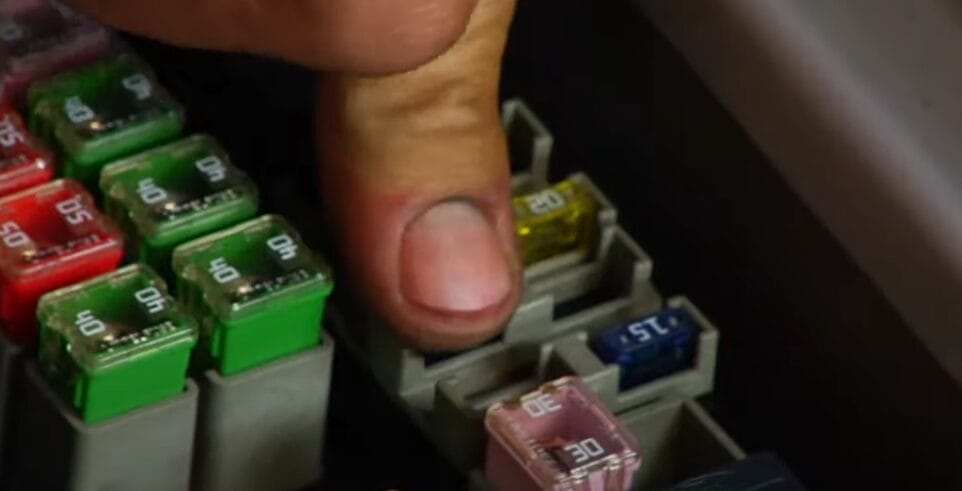
Step 4: Install the New Fuse
- Position the new fuse into the vacant slot where the old one was removed. Push it in firmly to ensure it is securely connected.
Step 5: Test the Replacement
- After the new fuse is in place, turn on your car and test the affected electrical component. If it operates as expected, the replacement was successful.
Keep these steps in your back pocket for the next time your car throws a curveball. Happy driving, and here’s to smooth rides and flawless fixes!
Navigating Car Fuse Troubles: Mistakes to Avoid and Expert Troubleshooting Tips
Let’s dive into some of the common missteps and savvy troubleshooting tips when it comes to dealing with car fuses. It’s easy to think you’ve figured it all out, but even the best of us can slip up now and then.
So, here’s the lowdown on how to stay on track and what to do if swapping out that pesky fuse doesn’t quite fix the issue.
| Common Mistakes | How to Avoid Them | Troubleshooting Tips |
|---|---|---|
| Not checking the fuse diagram first | Always consult your vehicle’s owner’s manual or the fuse box cover for the diagram. This ensures you’re working on the right fuse. | Double-check the diagram if you’ve replaced a fuse and the issue persists. You might have worked on the wrong fuse. |
| Using the wrong type of replacement fuse | Make sure the replacement fuse matches the original in type and amperage. Using the wrong fuse can cause more electrical issues. | If a new fuse blows immediately, verify it’s the correct type and amperage. Incorrect fuses can lead to immediate failure. |
| Ignoring the multimeter setup | Ensure your multimeter is correctly set to measure continuity or resistance (Ohms) before testing fuses. | If you’re not getting clear readings, double-check your multimeter setup. It might not be configured correctly for the task. |
| Forgetting to inspect the fuse box for corrosion or damage | Before popping in a new fuse, take a moment to inspect the fuse box for any signs of corrosion or damage. | Clean any corrosion with a brush and check for damaged terminals. Poor contact can be as troublesome as a blown fuse. |
| Overlooking related electrical components | Fuses often protect multiple components. If a fuse keeps blowing, consider other parts of the circuit that might be faulty. | Investigate the circuit the fuse protects. Look for worn wires, short circuits, or malfunctioning components that could cause the fuse to blow. |
| Jumping to conclusions without proper testing | Use your multimeter to test fuses for continuity before deciding they’re the culprit. Not all electrical issues are fuse-related. | If replacing the fuse doesn’t fix the problem, broaden your diagnostics to include switches, relays, and connectors in the affected circuit. |
Remember, tackling car repairs can be incredibly satisfying, but it’s all about knowing when to dive in and when to step back and let the experts take over. Stay safe, and happy troubleshooting!
Maintaining Your Car’s Electrical System: Tips and Tricks
Keeping your car’s electrical system in top shape isn’t just a good idea—it’s a must if you’re all about that smooth ride. Let’s dive into some handy tips and tricks that’ll make sure your car keeps running like a dream.
- Regular checks. I can’t stress enough how important it is to make checking your car’s fuses part of your routine maintenance. It’s like giving your car a quick health check-up. You’ll catch any potential issues before they turn into big problems.
- Clean and tight connection game. Ensuring your battery terminals and fuse box connections are clean and secure is vital. A simple brush-off corrosion and a snug can ward off a host of electrical gremlins.
- Upgrades. If you’ve got an older vehicle, consider upgrading your fuse box and wiring. Modern cars are loaded with electronics, and an upgraded system can handle the load much better.
- Importance of a quality multimeter. Investing in a good one is like choosing a quality tool over a bargain bin disappointment—it’ll give you accurate readings and won’t let you down when you need it the most.
Maintaining your car’s electrical system will ensure you’re ready for the road ahead. Trust me, a little bit of care and attention go a long way in keeping your car’s electronics in check.
Frequently Asked Questions
- What If a New Fuse Blows Immediately?
- This suggests a deeper issue, like a short circuit. Check for damaged wiring or consult a professional if the problem continues.
- How Can I Prevent Fuses From Blowing?
- Maintain your vehicle’s electrical system, ensure professional installation of any modifications, and avoid overloading circuits with too many accessories.
- Is It Safe to Drive With a Blown Fuse?
- Driving with a blown fuse depends on which system the fuse controls. If it’s for a non-essential feature like the radio, it’s generally safe. Still, if it’s for critical systems like the brakes or headlights, it should be replaced immediately for safety.
- Are All Car Fuses the Same?
- Car fuses have different ratings and types (like blades or glass). Always replace a fuse with the exact same type and rating specified for that circuit to ensure proper protection and functionality.
- How Can I Tell If a Fuse Is Blown Without a Multimeter?
- For blade fuses, inspect the fuse’s transparent top. If the metal strip inside is broken or burned, the fuse is blown. Glass fuses will show visible signs of damage or discoloration when blown.
- What’s the Difference Between a Fuse and a Relay?
- A fuse is a protective device that melts or blows when the current exceeds a certain level, interrupting the circuit. A relay is a switch that opens or closes circuits electromechanically or electronically, often controlled by low-power signals.
References
Organizations:
- ASE (National Institute for Automotive Service Excellence). https://www.ase.com/
- IEEE (Institute of Electrical and Electronics Engineers). https://www.ieee.org/
Books:
- “Automotive Wiring and Electrical Systems” by Tony Candela. https://valsec.barnesandnoble.com/w/automotive-wiring-and-electrical-systems-tony-candela/1013702545?ean=9781613250198
- “Automotive Electrical Handbook” by Jim Horner. https://www.abebooks.com/9780895862389/Automotive-Electrical-Handbook-HP-387-0895862387/plp
Website Resources:
- AutoZone’s Repair Guides. https://www.autozone.com/diy/repair-guides
- iFixit.com. https://ifixit.com/
Video References:
FixItSam
ehow