22 min read
How to Use a Cen Tech Multimeter? (7 Function Guide)
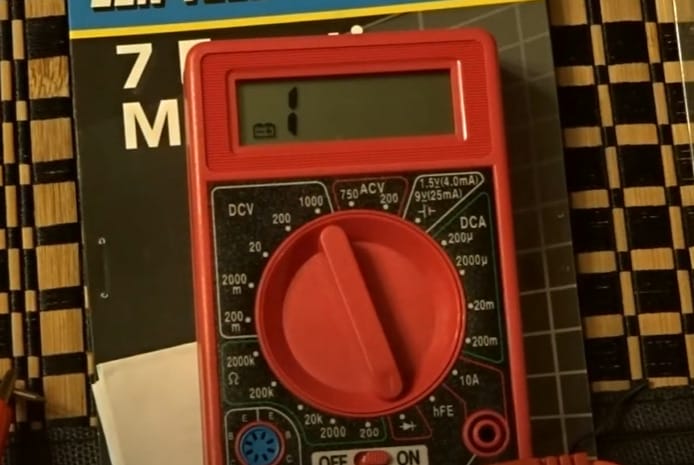
Hey everyone, it’s time to get hands-on with one of my favorite tools in the toolbox – the Cen Tech multimeter, specifically the 98025 seven-function model.
This little powerhouse has been my go-to in many electrical projects, and I’m thrilled to share my insights on its full potential. Here’s my step-by-step approach to mastering it.
Quick Summary:
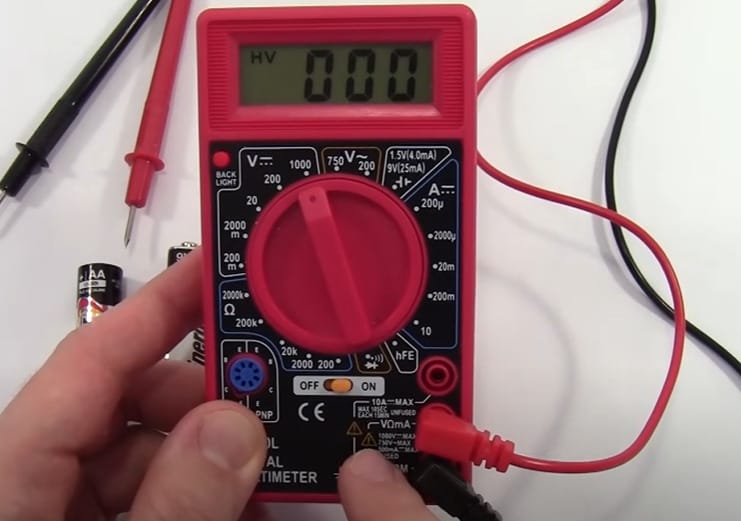
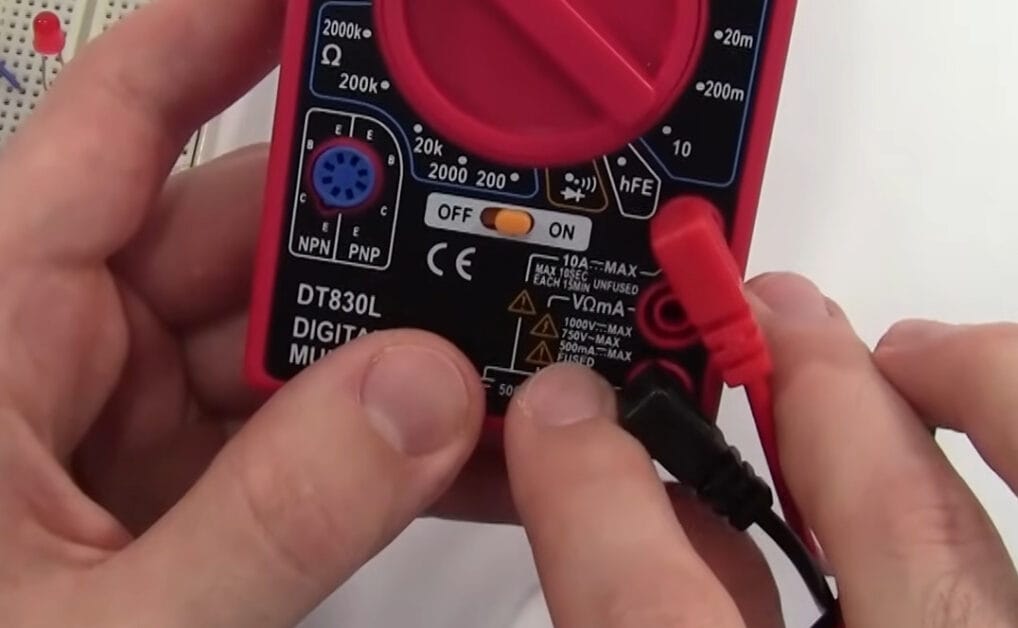
🔌 Step 1: Start by Connecting the Leads
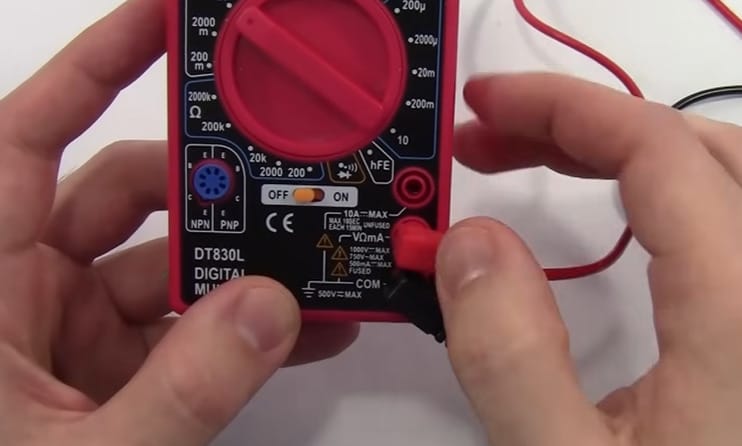
💡 Step 2: Powering Up
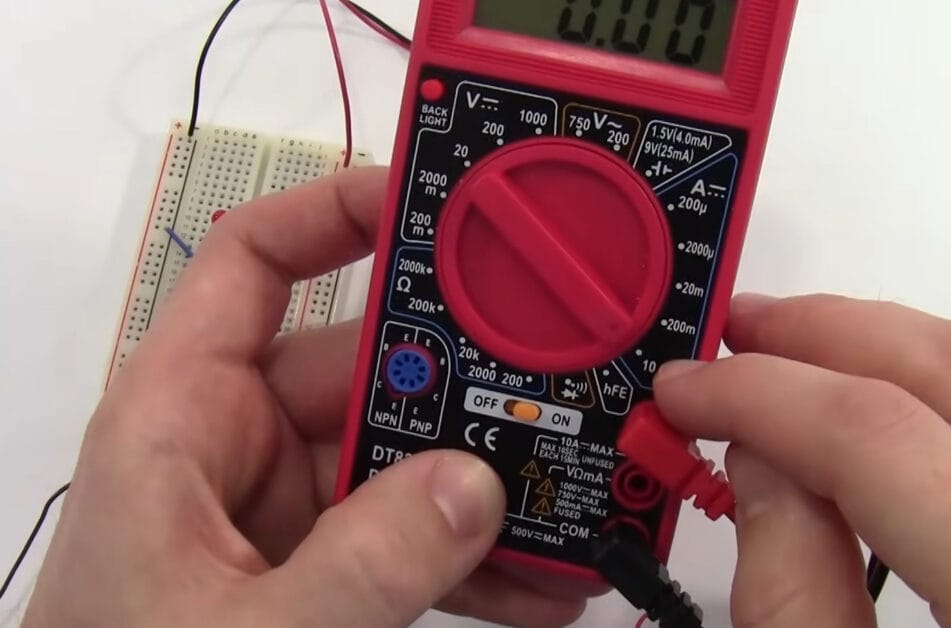
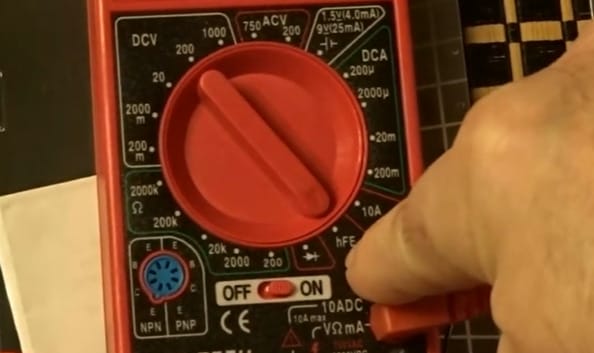
🔄 Step 3: Turning the Dial Symbol based on test
🔍 Step 4: Adjust for Accuracy
📊 Step 5: Connect the Probes and Measure
📝 Step 6: Take Notes of Your Findings
In this article, I’ll take you through each of the functions. From measuring resistance to checking the charge in your batteries, I’ve got a lot of ground to cover. So, roll up your sleeves, and let’s dive in!
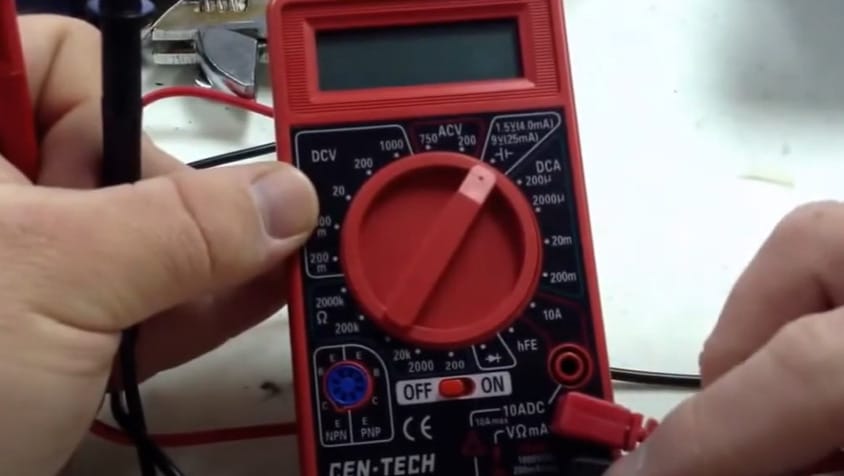
Navigating the Multimeter Maze: Understanding Its 7 Core Functions
Let’s crack the code of the Cen Tech multimeter. This tool is like a Swiss Army knife for electrical work and is crucial to getting to grips with its seven key functions.
I’ve spent countless hours with this gadget and am excited to walk you through each function. Trust me, once you get the hang of it, it’s like speaking a new, electrifying language!
- Resistance (Ω): This little symbol represents ohms, the unit for resistance. I’ve used it to troubleshoot wiring issues and check connections’ integrity. It’s a real problem-solver.
- Voltage (DCV and ACV): These settings – DCV for direct current voltage and ACV for alternating current voltage – are the bread and butter of electrical testing. I’ve used them for everything from checking battery levels to diagnosing electrical faults in home appliances.
- Current (DCA): Now, this is where it gets interesting. DCA stands for DC. The multimeter can measure up to 200 mA in one setting and above 200 mA in another. This is invaluable for small electronics, where precise current measurements are key.
- Diode Testing: The symbol here resembles a triangle with a line for checking diodes. It’s handy when working on circuit boards or repairing electronic devices.
- Transistor Condition (hFE): This function tests transistors, crucial for any electronics hobbyist. Understanding the health of a transistor can be the difference between a functioning device and a trip to the electronics store.
- Battery Charge: Two vertical lines with a horizontal line – that’s for checking batteries. Knowing if your batteries are up to snuff is essential, whether a small AA or a larger 9V. I’ve saved myself from quite a few powerless remotes with this one.
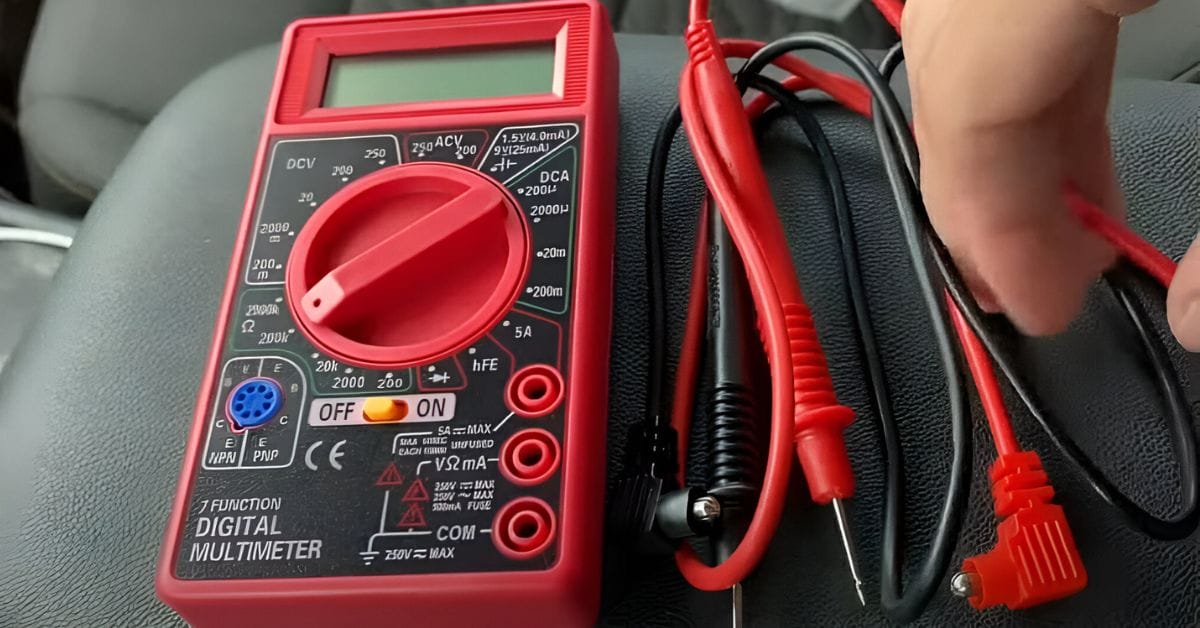
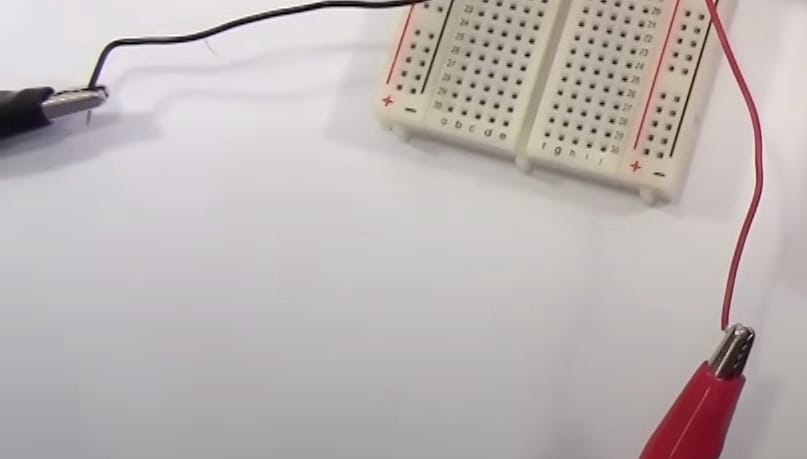
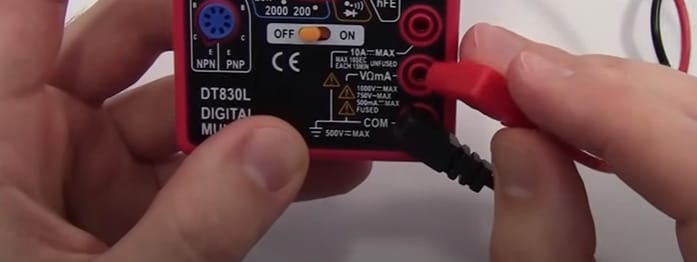
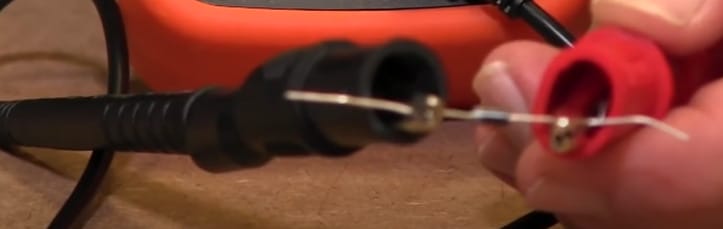
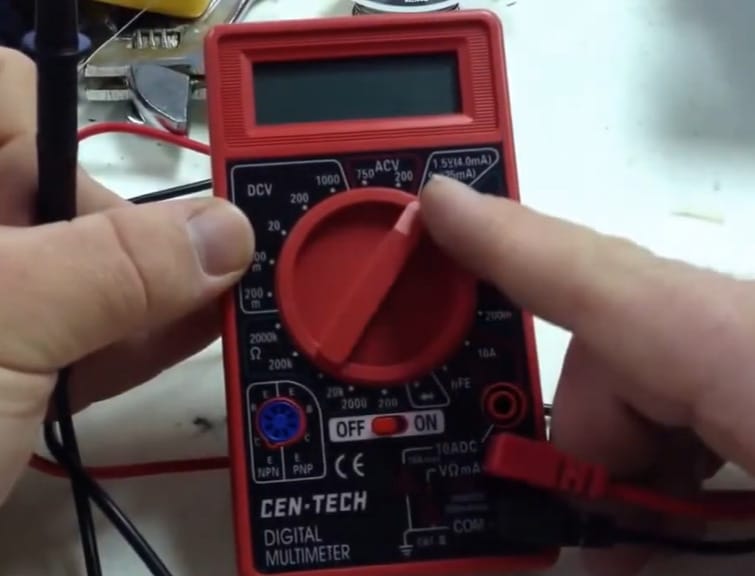
- Ports and Leads: The multimeter comes with black and red leads. Here’s a tip: the black lead always goes into the COM port, while the red lead switches between the VΩmA and 10ADC ports, depending on what you’re measuring. I’ve had leads with alligator clips, which are handy for hands-free measuring.
Using All Seven Functions of the Cen Tech Multimeter
This section will teach you how to use the seven functions of the Cen Tech multimeter. Here, you can learn from measuring resistance to testing a battery charge.
Function 1: Mastering Resistance Measurement with Your Cen Tech Multimeter
This is a skill I’ve honed over countless projects, and it’s crucial for any electrical DIY task.
Step 1: Setting Up Your Leads
- First, plug the black lead into the COM port – it’s like the home base for your leads. Then, take the red lead and connect it to the VΩmA port. This setup is your starting point for most measurements.
Step 2: Powering On and Dialing In
- Turn on your multimeter. Now, let’s get specific with our settings. Rotate the dial to the 200 mark in the Ω (ohm) area. This setting is your go-to for most resistance checks.
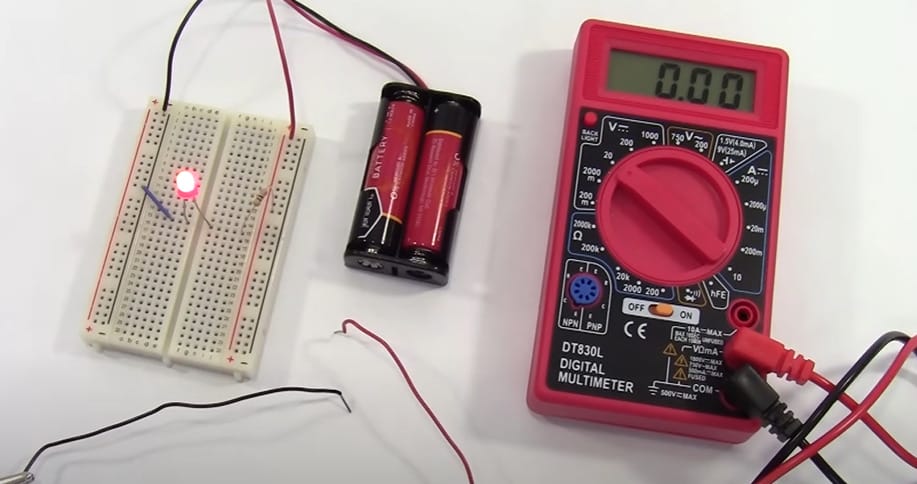
Step 3: Initial Lead Test
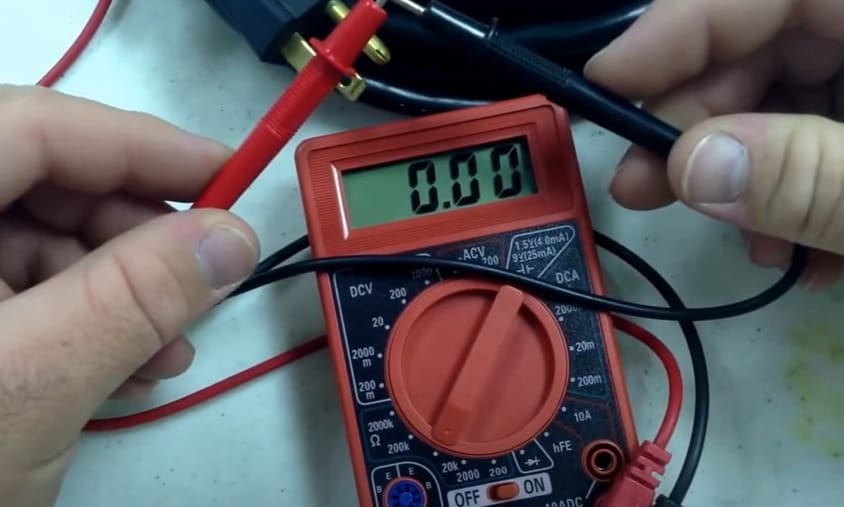
- Before diving into your project, let’s do a quick lead check. Touch the two leads together – the reading should be zero. This little step ensures your multimeter is ready to give accurate readings.
Step 4: Measuring Resistance
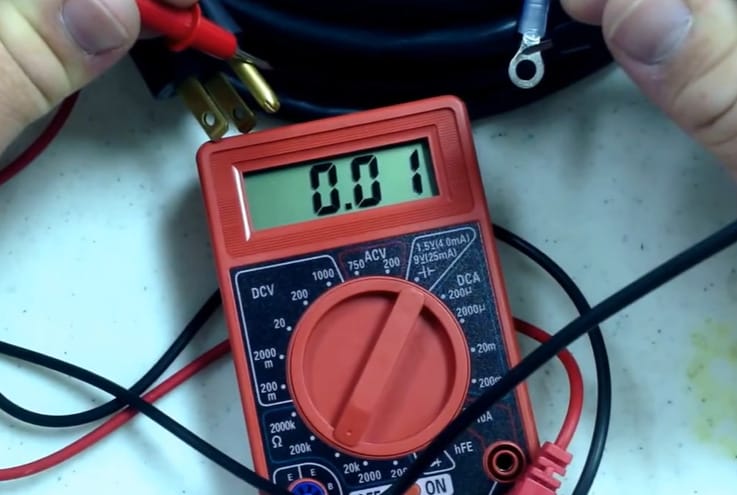
- Now, it’s showtime! Connect the red and black leads to the circuit wires you’re testing. Watch the display for the resistance reading. I’ve used this countless times to diagnose wiring issues and check if components are in good shape.
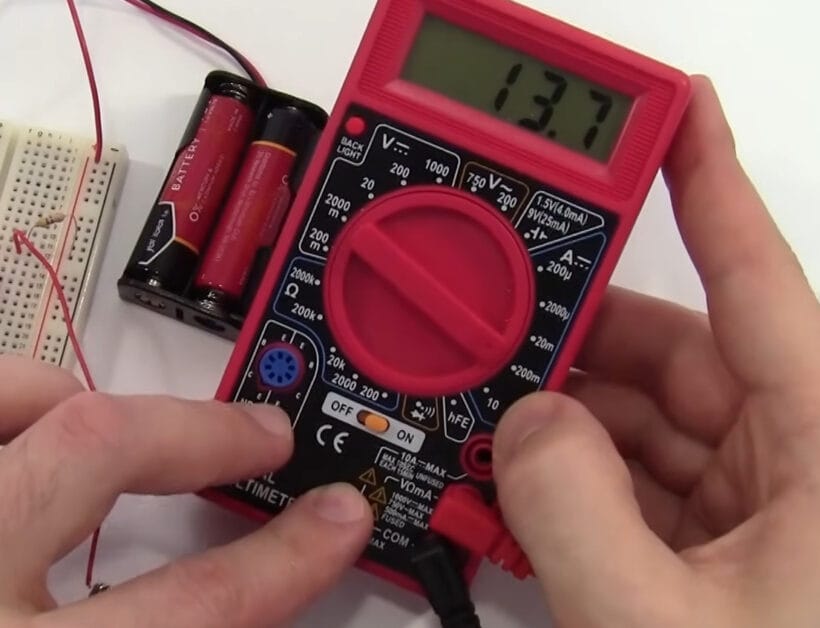
Step 5: Sensitivity Adjustment
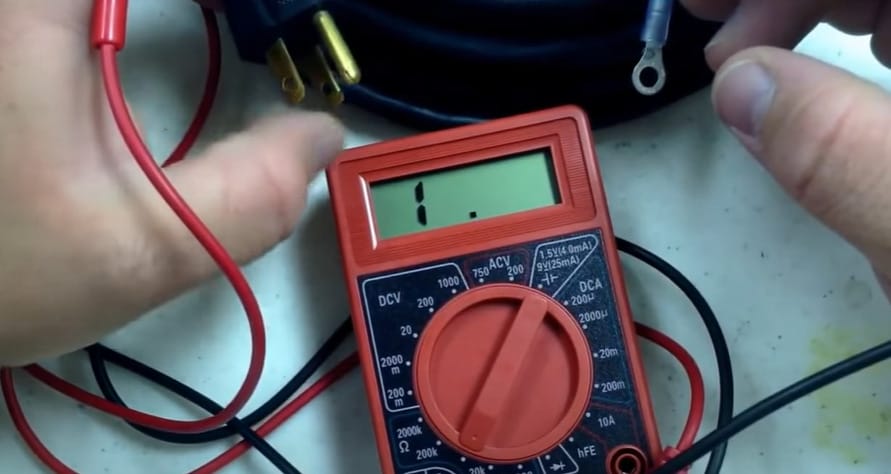
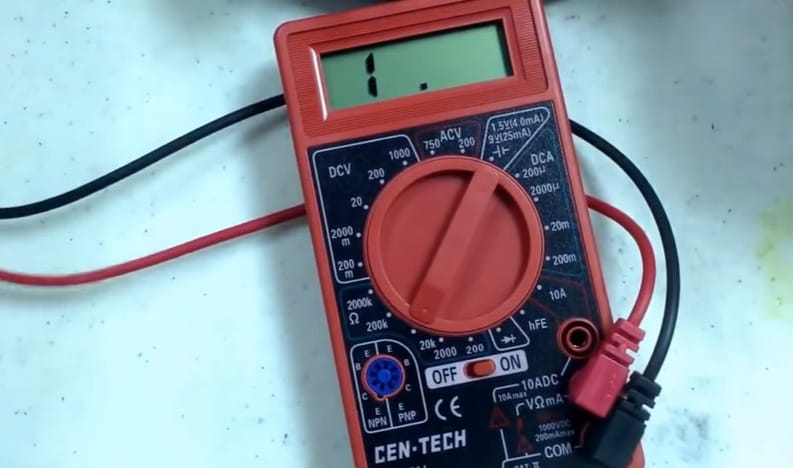
- Here’s a quick tip – if your multimeter reads ‘1’, that’s your cue to adjust the sensitivity. Turn the dial to a higher setting, like 2000, for a more precise reading.
And there you have it! With these steps, you’re well on your way to mastering resistance measurement with your Cen Tech multimeter. Remember, practice makes perfect, so don’t be afraid to get hands-on and experiment. Happy measuring!
Function 2 and 3: Voltage Measurement Mastery with Your Cen Tech Multimeter
We’re tackling voltage measurement with the Cen Tech multimeter. Whether it’s DC or AC voltage, getting this right is key to any electrical project.
I’ve measured voltage in all scenarios, from car batteries to household appliances, and I’m excited to share these steps with you.
Measuring DC Voltage
Step 1: Prep Your Multimeter
- Connect the black lead to the COM port and the red to the VΩmA port. This is your go-to setup for voltage measurement.
Step 2: Power Up and Select Range
- Turn on the multimeter. Now, we’re setting the stage for DC voltage measurement. Rotate the dial to the 1000 mark in the DCV (Direct Current Voltage) area.
Step 3: Connect and Measure
- Attach the leads to your circuit. Watch the numbers and get your reading. It’s that straightforward!
Step 4: Adjust for Accuracy

- Here’s a trick from my toolkit – if your reading is less than 200, switch the dial to the 200 mark.

- If it’s under 20, go for the 20 mark. This step fine-tunes your measurement for precision.
Measuring AC Voltage
Step 1: Set Up for AC
- Like with DC, start by plugging your black lead into the COM port and the red lead into the VΩmA port.
Step 2: Dialing In for AC
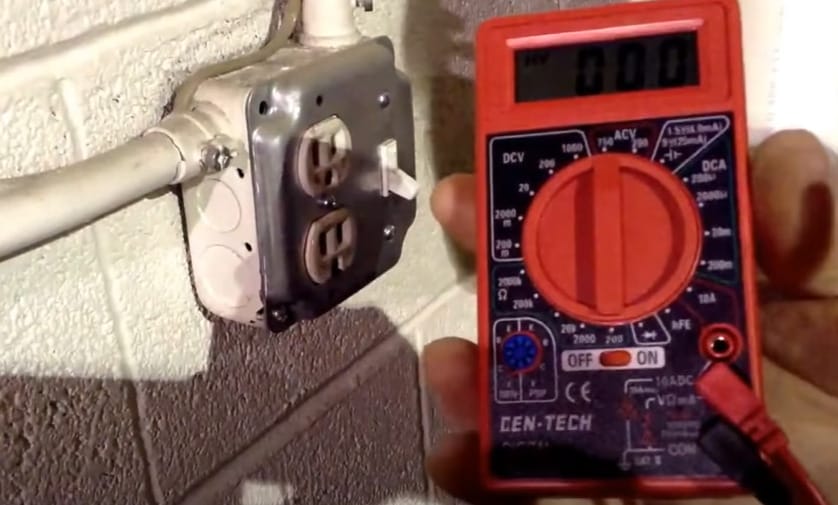
- Power on your multimeter. Rotate the dial to the 750 mark in the ACV (Alternating Current Voltage) area for AC voltage.
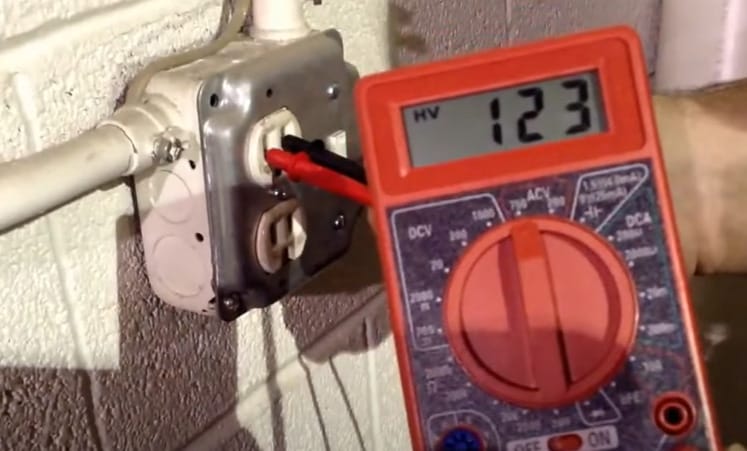
Step 3: Connect and Read
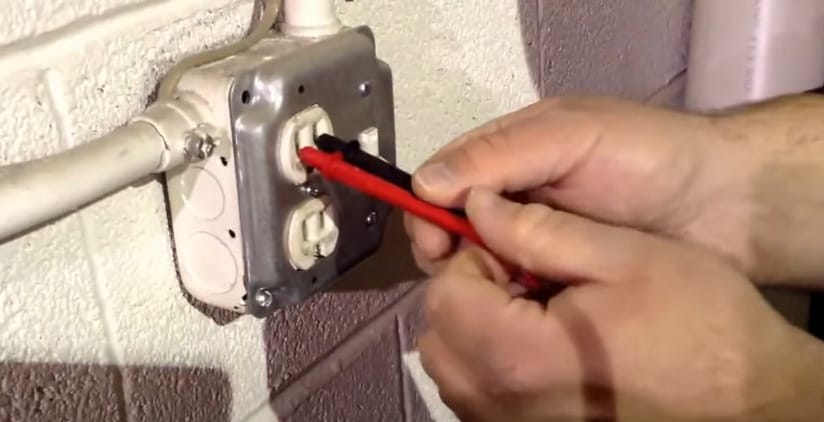
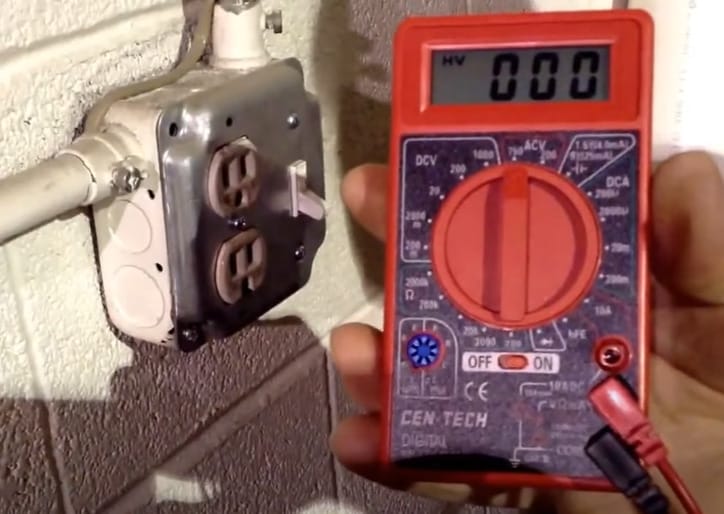
- Hook up the leads to the circuit and watch the display. AC voltage measurements are essential for in-home wiring and checking outlet voltage.
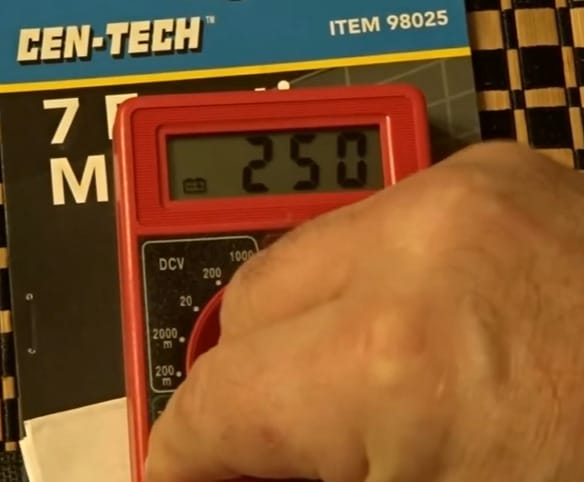
Step 4: Fine-Tuning the Range
- If your AC reading exceeds 250, adjust the dial to the 250 mark. This ensures your readings are spot-on.
Measuring voltage can seem daunting, but with these steps, you’ll be a pro in no time. Remember, always handle electrical tasks with care and respect for safety.
With your Cen Tech multimeter, you’re ready to conquer any voltage measurement challenge!
Function 4: Navigating Current Measurement with Your Cen Tech Multimeter
Now, we’re zeroing in on measuring current with our versatile Cen Tech multimeter.
Measuring current is a critical skill in our DIY toolbox, and I’ve had my fair share of adventures with it. Let me walk you through the steps so you can measure current with confidence and precision.
Measuring Current Up to 200 mA
Step 1: Initial Setup
- Start by connecting your black lead to the COM port. This is your anchor point for all measurements.
- For currents less than 200 mA, plug the red lead into the VΩmA port. This is perfect for small-scale electronics where lower currents are the norm.
Step 2: Dial It In
- Now, turn your multimeter dial to the 200m mark. This is your window into the world of smaller currents.
Step 3: Make the Connection
- Gently connect the leads to the circuit you’re testing. In my experience, steady hands and a keen eye for detail are key here.
Step 5: Fine-tuning
- Watch your readings and adjust the sensitivity as needed. Getting the right sensitivity can differ between an accurate reading and a head-scratcher.
Measuring Current Above 200 mA
Step 1: Setup for Larger Currents
- The process begins the same – black lead to COM port. For currents above 200 mA, your red lead should go to the 10ADC port. This is your gateway to measuring heftier currents, like those in larger appliances.
Step 2: Dial Setting
- Turn that dial to the 10A mark. This is where you step into the big leagues of current measurement.
Step 3: Connecting Leads
- Attach your leads to the circuit. Remember, precision is key, especially when dealing with higher currents.
Step 4: Sensitivity Adjustment
- Monitor your readings and tweak the sensitivity for accurate results.
Function 5: The Art of Diode Testing with Your Cen Tech Multimeter
Now, diving into diode testing using our handy Cen Tech multimeter. Diodes are like one-way streets in electronics; testing them is crucial for ensuring your circuits are on the right track.
I’ve tested my fair share of diodes and am here to share this straightforward yet vital process with you.
Step 1: Dialing In
- First, turn that dial on your multimeter to the diode symbol. This setting is specifically designed for testing these tiny but mighty components.
Step 2: Setting Up the Leads
- Connect your black lead to the COM port – our universal starting point. Then, plug the red lead into the VΩmA port. This setup is perfect for getting a clear read on your diode’s health.
Step 3: Connecting to the Diode
- Now, bring in your diode. Carefully connect the multimeter leads to the diode – black to one end, red to the other. In my experience, ensuring a firm connection here is key for accurate testing.
Step 4: Reading the Results
- Once connected, watch your multimeter’s display. A properly working diode will show a voltage drop. This little number is a green light, telling you your diode is doing its job.
Testing diodes might seem like a small part of a bigger project, but these details make or break your projects.
Function 6: Transistor Testing: Getting It Right with Your Cen Tech Multimeter
Transistors are the switches of the electronic world, and getting them right is crucial.
Step 1: Setting the Stage
- First off, let’s get our multimeter ready. Turn the dial to the hFE setting, where the magic happens for transistor testing. It’s usually nestled near the diode settings.
Step 2: Understanding and Connecting Transistor Types
- Before we get our hands dirty, remember there are two types of transistors – NPN and PNP. Identifying which one you have is crucial. I’ve learned it’s all about understanding their behavior in a circuit.
- Did you get your transistor type figured out? Great! Now, connect it to the NPN/PNP jack on your multimeter. This might seem a small step, but it’s a game-changer for accurate testing.
Step 5: Comparing Readings
- Once your multimeter is humming, it’s time to compare the reading with the rated value of your transistor.
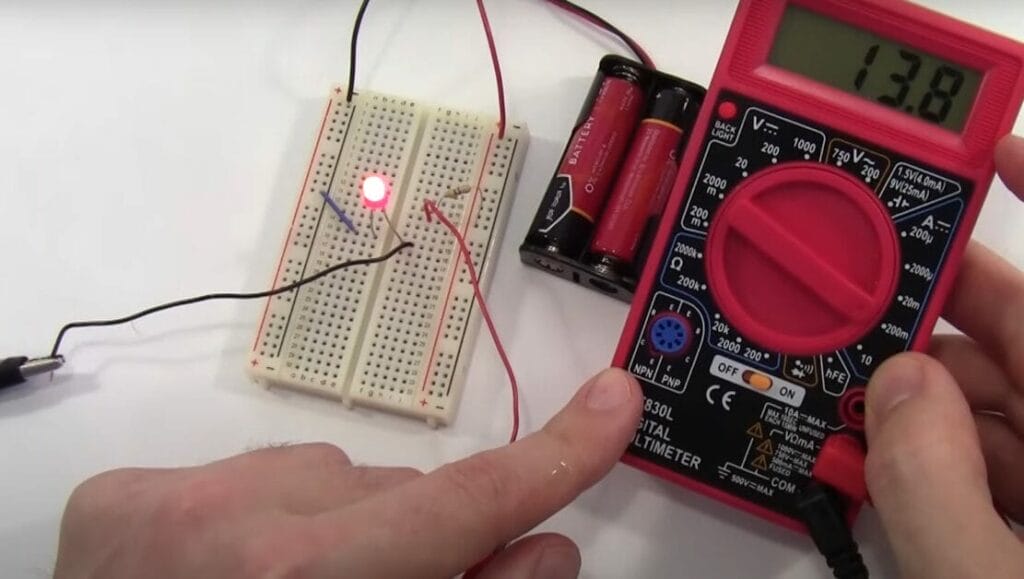
Function 7: Battery Testing: Powering Up with Your Cen Tech Multimeter
Lastly, let’s dive into battery testing with our Cen Tech multimeter. Testing batteries is a fundamental skill for anyone into electronics or DIY projects. I’ve tested more batteries than I can count, and I’m excited to share this essential process with you.
Step 1: Dial Into Battery Mode
- Let’s start by turning the dial to the battery testing area on your multimeter. It’s usually located near the ACV area. This setting is your gateway to understanding the health of your batteries.
Step 2: Setting Up the Leads
- Standard procedure here – connect the black lead to the COM port. Then, hook up the red lead to the VΩmA port. This setup is key for a successful battery test.
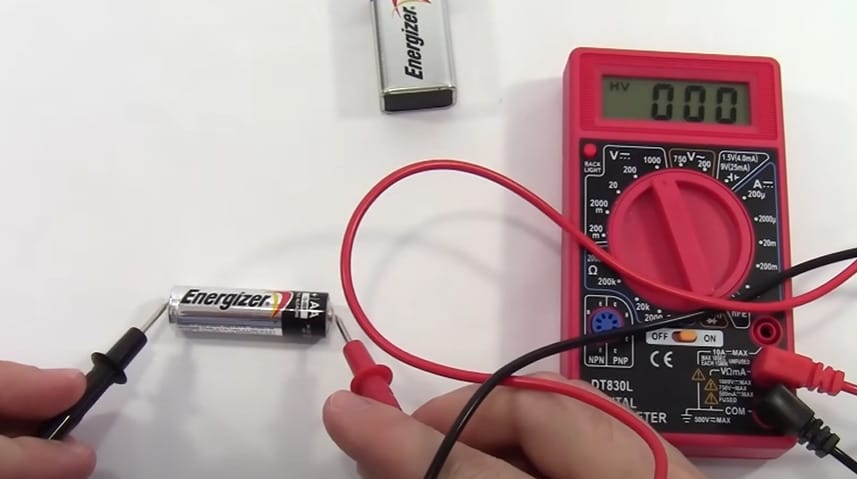
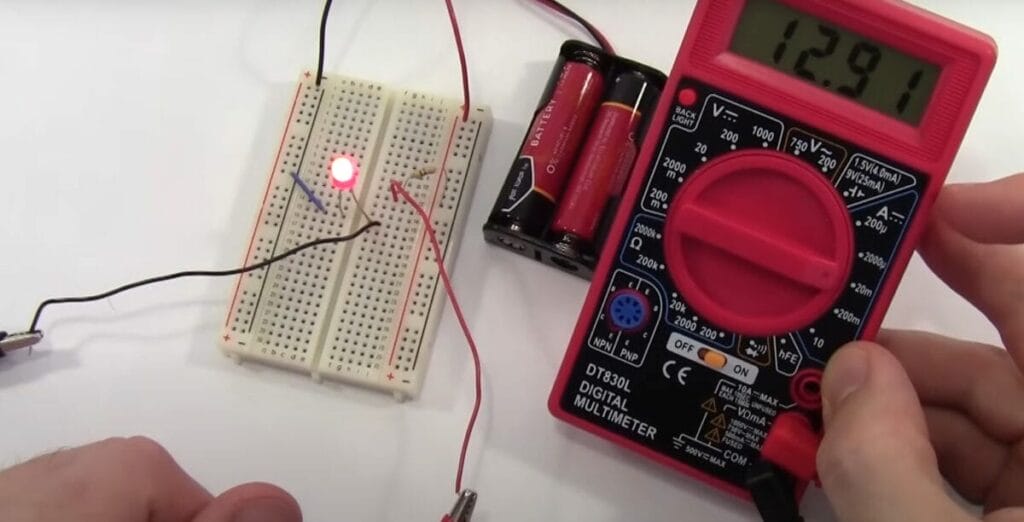
Step 3: Connecting to the Battery

- Here’s where the action happens. Connect the red lead to the battery’s positive terminal and the black lead to the negative terminal. Getting this polarity right is crucial – many get mixed up.
Step 4: Reading the Results
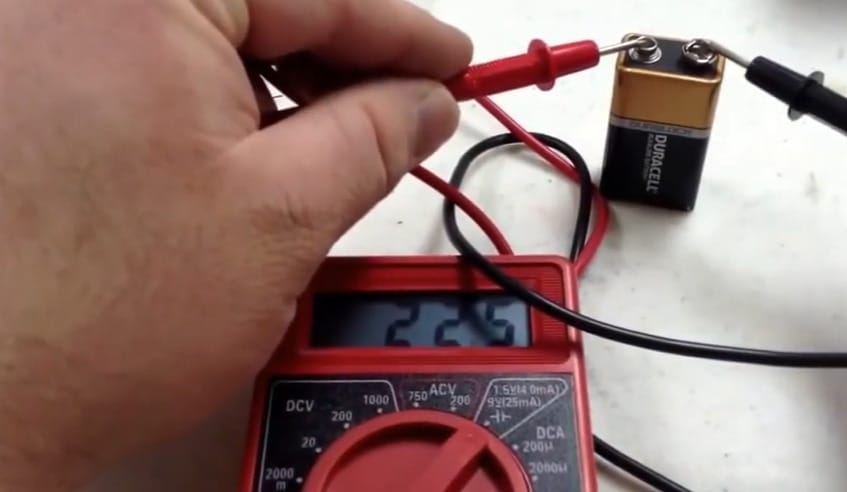
- Now, observe the reading on your multimeter. Compare this with the rated voltage value of the battery. This comparison tells you if your battery is still kicking or if it is time for a replacement.
RELATED How to Use Craftsman Multimeter
Mastering Your Multimeter: Top Troubleshooting Tips
Worry no more if you’ve scratched your head while using this nifty gadget. I’m here to share my top troubleshooting tips, gleaned from years of tinkering, testing, and, yes, a few mistakes along the way.
| Common Issue | Troubleshooting Tip & Personal Experience |
|---|---|
| No Reading or Display | Check and replace the battery if needed. I had this issue once; a new battery quickly fixed it. |
| Inaccurate Readings | Set the correct function and range. I’ve adjusted the dial wrongly before, leading to inconsistent readings. |
| Fluctuating Readings | Secure lead connections. I’ve found loose leads can cause unstable readings. |
| Continuity Test Issues | Ensure the correct mode and check the fuse. I had a silent continuity test due to a blown fuse. |
| Overload (OL) Display | Switch to a higher range. I encountered ‘OL’ on a low current setting; a range adjustment resolved it. |
| Erratic Resistance Readings | Clean the leads for better accuracy. Dirty Leads once gave me unreliable resistance readings. |
| Diode Test Failure | Confirm lead polarity and swap if necessary. I’ve reversed leads to identify functional diodes correctly. |
| Transistor Test Confusion | Identify transistor type and pins accurately. Mixing up transistor pins has been a learning curve in my projects. |
| Battery Test Inaccuracy | Use the correct setting for the battery type. I learned the importance of this while testing different batteries. |
This table provides a succinct overview, combining practical tips with real-life experiences to help troubleshoot common issues with the Cen Tech Multimeter.
Multimeter Magic: My Insider Tips & Hacks
Over the years, I’ve picked up a few tricks that have turned this already incredible tool into an absolute game-changer in my projects.
Whether you’re troubleshooting a finicky appliance or experimenting with a new gadget, these pointers will surely add some extra sparkle to your electrical endeavors.
- The ‘Hold’ Feature Is Your Best Friend: Many multimeters come with a ‘Hold’ button, but it’s often overlooked. I’ve used this feature to lock in a reading when I’m in an awkward spot and can’t see the display. It’s a lifesaver when you’re balancing on a ladder!
- Improvised Lead Holders: Have you ever needed an extra hand while measuring? I’ve been there. Clip one of your leads to a rubber band. Stretch the band around the multimeter, and voilà – your lead stays in place while maneuvering the other.
- The Art of Ghost Voltage Detection: Ghost voltages can be misleading. If you suspect it, switch your multimeter to a low-impedance mode if it has one. This can help differentiate real voltage from these phantom readings.
- Battery Testing Trick: Beyond measuring voltage, I test batteries under load. Connect a resistor in series with the battery and then measure the voltage. This gives you a better idea of how the battery performs under actual use conditions.
- The Power of the Backlight: Working in dim areas? Use the backlight feature. Not all models have it, but if yours does, it’s a game-changer in low-light conditions.
- Calibration Counts: Remember to calibrate your multimeter periodically if precision is key in your project. This ensures your readings are as accurate as possible, which is especially important in sensitive electronic work.
- Leads Matter: Invest in quality leads. I learned that cheap leads can break easily and give inaccurate readings. Good quality leads are more durable and reliable.
- The Rubber Case Hack: Consider using a universal rubber case if your multimeter lacks a protective case. It adds extra grip and protection – crucial for when your tool accidentally takes a tumble.
Incorporating these tips and tricks into your routine will streamline your work and unveil your multimeter’s full potential. Here’s to more efficient and enjoyable electrical adventures!
References
Books:
- “Digital Multimeter Principles” by Glen A. Mazur. https://books.google.com/books/about/Digital_Multimeter_Principles.html?id=NBpJSAAACAAJ
Website Resources:
- Hunker – How to Use a Cen-Tech Multimeter. https://www.hunker.com/13414156/how-to-use-a-cen-tech-multimeter
- All About Circuits – Cen-Tech 98025 User Manual. https://www.allaboutcircuits.com/test-measurement/multimeters/cen-tech-98025/manual/
Video Resources:
Time to Make Something Else
Science Buddies
The Cleaner6969
Klein Tools