6 min read
How to Use Craftsman Multimeter
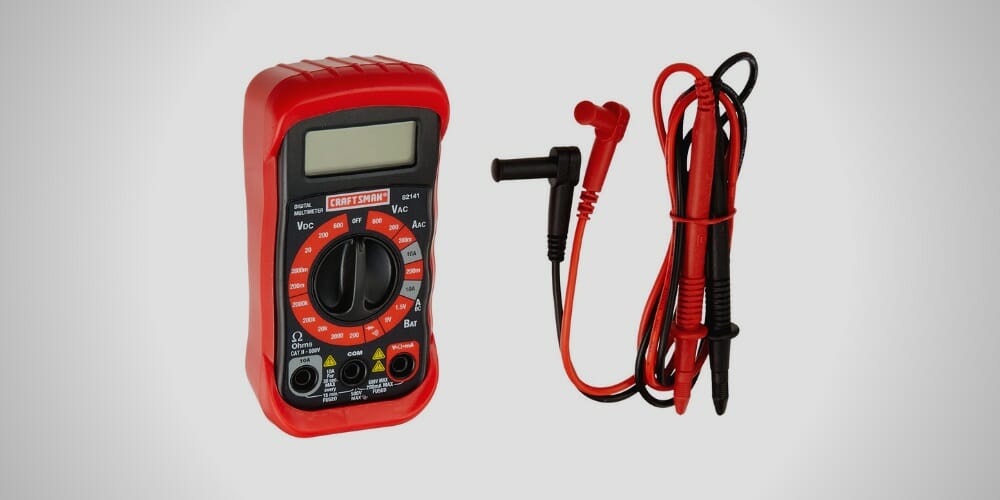
For those who are looking for a cheap and handy device to measure voltage, resistance, or electrical current, the craftsman digital multimeter might be the best option out there. Compared to other digital multimeters, it is a cheap and flexible device. Learning how to use a craftsman digital multimeter can make a huge difference in your home DIY project.
Unlike other digital multimeters, a craftsman multimeter comes with three different ports. Every time you measure a different parameter, you should change the position of the jacks. Also, you should adjust the range of the current or voltage. After properly setting up the multimeter, use the black and red probes to measure voltage, resistance, or current.
About Craftsman Digital Multimeter
Before we start our guide, it is crucial to understand the various features of the craftsman multimeter. So, in this section, we will introduce you to different parameters that you can measure and parts of the craftsman multimeter.
What Can We Measure?
With a craftsman multimeter, you can measure voltage, resistance, or current. Apart from that, you will be able to check continuity and diodes. For each operation, you should set up the multimeter properly.
Tip: Setting up a craftsman multimeter is a bit different from setting up a regular digital multimeter. Without proper setup, the device could get damaged, or you will end up with incorrect readings.
Parts of the Craftsman Digital Multimeter
The craftsman multimeter comes with three ports. These three different ports play an important role, and a proper understanding of them is a must.
Ports and Their Uses
COM Port: You can connect the black probe to the COM port. (1)
V-Ω-mA Port: To measure voltage or resistance, we use this port. Besides, you can measure up to 200mA current. Usually, the red probe connects to this port.
10A Port: To measure electrical current above 200mA, you can use the 10A port. Before measuring, you should connect the red probe to the 10A port.
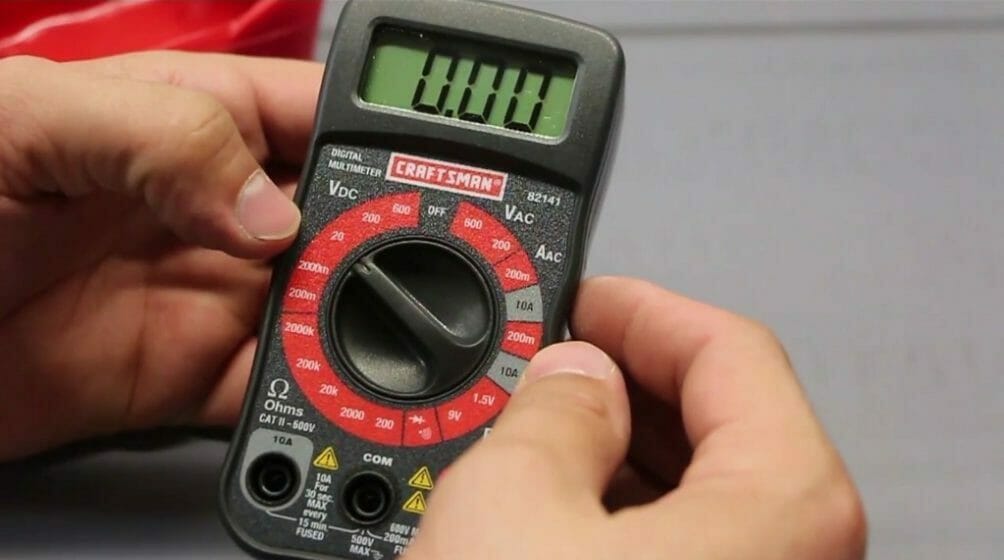
Selector Switch
Unlike other digital multimeters, the craftsman multimeter’s selector switch is unique. For instance, when using a digital multimeter, you can see a few selections such as OFF, V, Ã, or Ω in the selector switch area.
But, users must select the range of the parameter when using a craftsman multimeter. That means you have to choose the appropriate range. Otherwise, you won’t get the correct reading. In some cases, the multimeter won’t display a reading at all.
For instance, imagine a situation where you are trying to measure a 2V battery. For this demonstration, you have to set the voltage to 20V. Or you can set it to 2000mV too. But, you will get an inaccurate reading.
Display
The craftsman multimeter’s display is smaller compared to other digital multimeters. But, it is more than enough to display readings.
Probes
There are two different probes in a craftsman multimeter; black and red. The black probe is also known as the – probe, and the red one is known as the + probe. The black probe always goes to the COM port. Depending on the parameter, you might have to connect the red probe to V-Ω-mA or 10A ports.
Steps on How to Use Craftsman Multimeter
You now have a general idea about craftsman multimeter and its uses. However, taking an actual measurement can be a little tricky. So, here are five simple steps.
Step 1 – Find the Ports On Your Multimeter
First, you should find the appropriate ports you’ll need for your testing. For instance, if you are going to measure voltage, identify the COM port and the voltage port.
Step 2 – Set the Multimeter
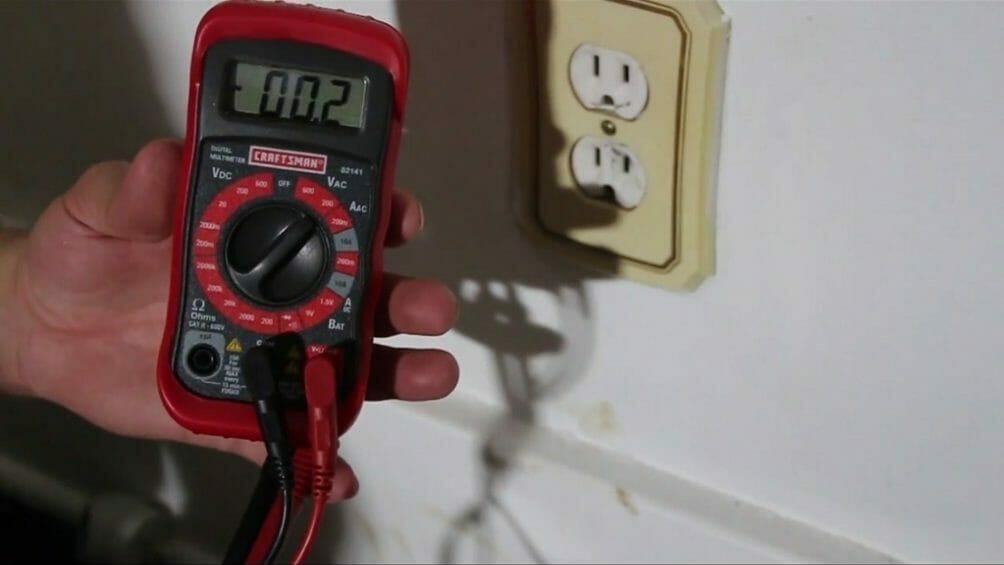
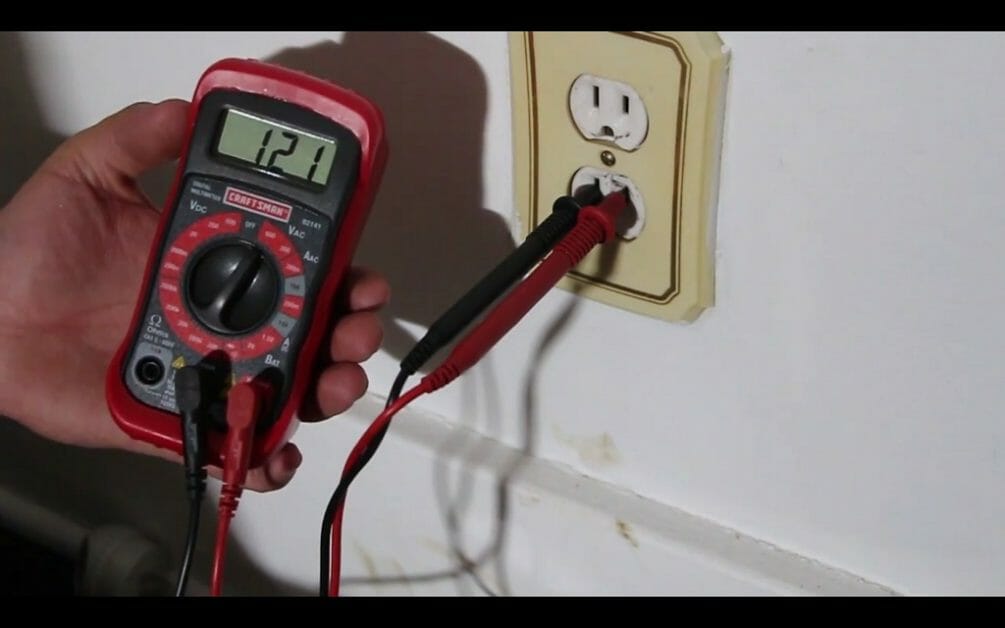
As mentioned in the above step, for this demonstration, we are going to measure the voltage of a 120V outlet. So, you need to set up the craftsman multimeter properly. To set up the multimeter, turn the selector switch to 200V under VAC settings.
Step 3 – Inspect the Multimeter Jacks
Now you have to determine which jack goes to which port. In this step, you should plug the blackjack into the COM port and the red jack into the voltage port.
Step 4 – Inserting Probes
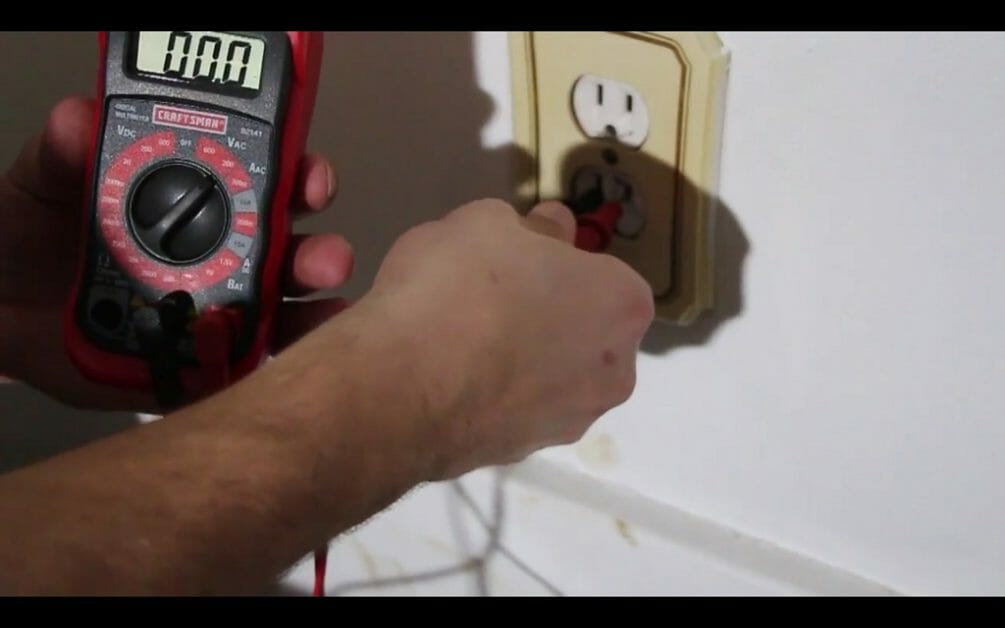
Now turn ON the multimeter. Then insert the two probes into the 120V outlet. The multimeter should display a reading close to 120V.
Step 5 – Check the Selector Switch
If you didn’t get any reading in the fourth step, check the selector switch again. Remember, wrong settings can cause these kinds of issues. Therefore, it is always healthier to double-check.
Keep in mind: Sometimes, 200V settings might not detect any reading. If so, don’t hesitate to set the multimeter to a higher value such as 600V.
If you follow the above how to use craftsman digital multimeter guide properly, you shouldn’t encounter any issues while using a craftsman multimeter. Most importantly, make yourself familiar with the parts of the multimeter. It will help immensely while you are using it. The craftsman digital multimeter is a great device and we’re sure you’ll appreciate its simplicity and strengths.
Take a look at some of our related articles below.
- Multimeter CAT ratings
- How to test a fuel gauge with a multimeter
- How to use a Cen-Tech digital multimeter to check voltage
References
(1) COM port – https://docs.microsoft.com/en-us/windows-hardware/drivers/serports/configuration-of-com-ports
Video Reference