7 min read
How to Test a Fuel Gauge With a Multimeter (Guide)
In this guide, we teach you how to test a fuel gauge with a multimeter and find out why it’s malfunctioning and if you need to replace it.
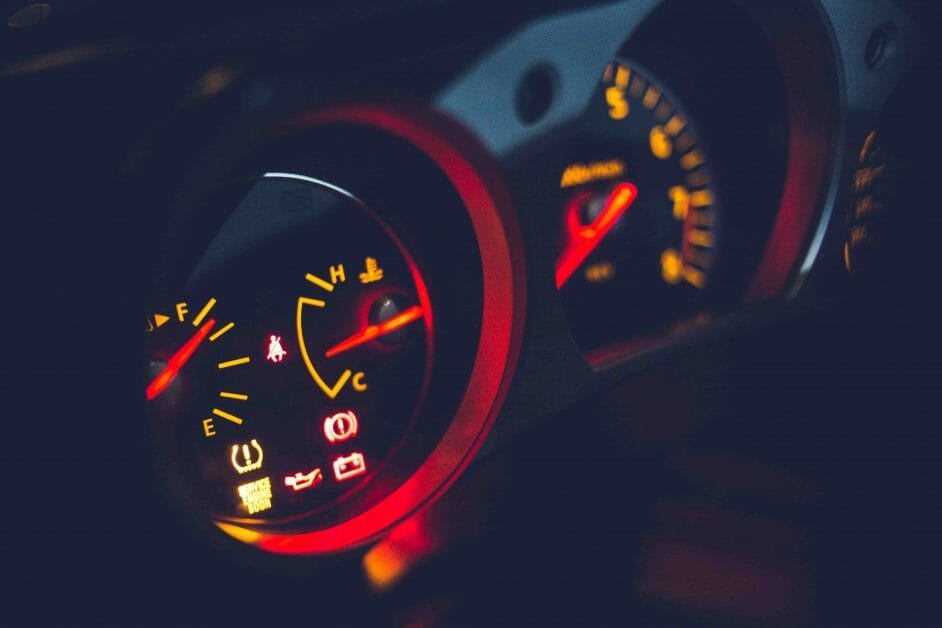
Your fuel gauge is an essential part of your vehicle. It tells you how much fuel, or gasoline, remains in your tank and alerts you when it’s time to refuel. This can be particularly useful if you’re driving through a barren area and there are no gas stations around.
Your fuel gauge doesn’t work? Several problems can cause this to happen. Fortunately, there is a simple way to test the gauge in your vehicle: by using a multimeter.
To Test the Fuel Gauge, You Will Need One of the Following:
- A multimeter to test the resistance of the sending unit.
- A handheld tester to test the resistance of the sending unit and voltage of the gauge.
- A fuel pressure gauge to test the resistance of the sending unit and the system’s pressure.
Symptoms of a Malfunctioning Fuel Gauge
If your car’s fuel gauge malfunctions, a few symptoms can alert you that something is wrong. The first symptom is obvious: the needle on the gauge will display an inaccurate reading. The needle may point to empty even though you just filled the tank, or it may show full even though the tank has little gas left.
Another symptom of a faulty fuel gauge is flickering needles; the needle will continuously bounce back and forth from one end of the gauge to another as you drive down the road. Or, it might simply drop all the way down and stay empty without bouncing at all. Either way, these are clear signs that something isn’t right with your gauge.
Another problem with the fuel gauge is stuck needles; the needle won’t read empty even when there’s no gas in the tank.
The gas gauge works sometimes but sometimes stops working. This is also the symptom of a malfunctioning fuel gauge.
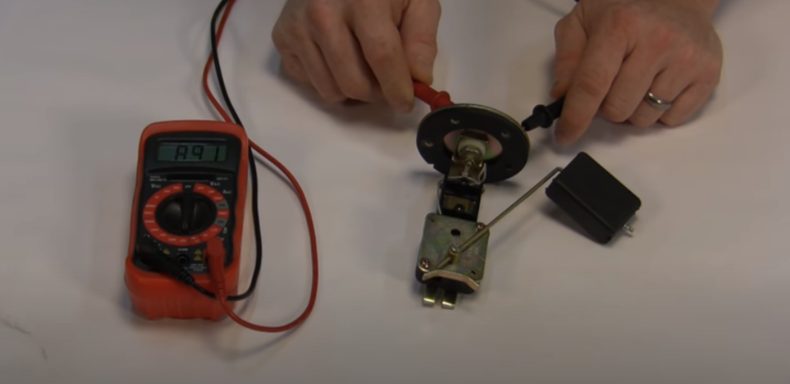
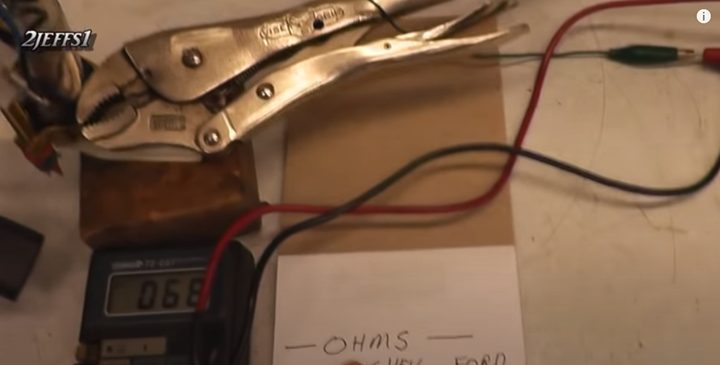
Measuring the Resistance on the Fuel Gauge
- Examine the fuel gauge and locate the two terminals on the back of the gauge.
- Set your multimeter to measure resistance in ohms. This can be any range above 20,000 ohms (20k ohms) and is often marked as “K” on the multimeter.
- Connect one lead of the multimeter to one terminal of the fuel gauge, and connect the other lead to the remaining terminal. The meter should read zero if the gauge is working correctly.
- Look in your vehicle’s manual for information about how much resistance should be present in a properly functioning fuel gauge.
Measuring Current on a Fuel Gauge
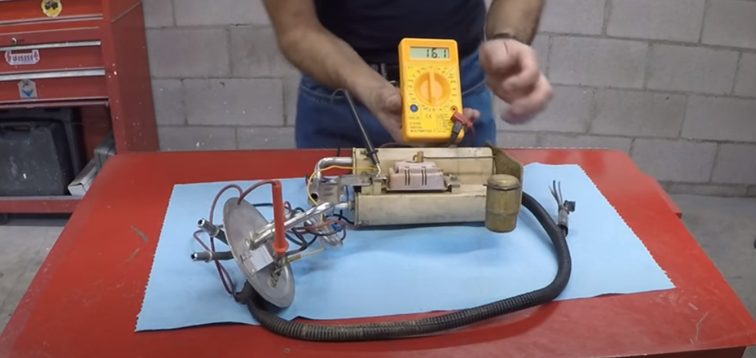
First, turn on the ignition. Now, set the multimeter to measure current. Next, touch the positive terminal of the multimeter to the positive terminal of the fuel gauge. Then, touch the negative terminal of the multimeter to the negative terminal of the fuel gauge. Finally, record the reading and compare it with your vehicle or gauge specifications.
FAQs
Will I be able to Drive with the Broken Fuel Gauge?
The short answer is yes. You can drive with a broken fuel gauge, but it will be more inconvenient and a bit riskier than if you had a working one.
Driving with a broken fuel gauge can lead to two main problems: running out of gas and running over your budget because you fill up too often.
Running out of gas is the more severe problem of the two. If you run out of gas, your car will stop operating, and you’ll be stuck in the middle of the road or wherever you happen to be at that moment. In some areas, this might not be terrible; in others, it could put you or your passengers in danger.
The other problem is that it becomes difficult to know how much to spend on gas when you don’t know exactly how much you’ve used. Too little, and you’re going backward; too much, and you’re wasting money that could be spent elsewhere.
Where is the Fuel Gauge Sending Unit?
The sending unit is located at the top right rear corner of your car’s gas tank. You can get it inside by removing the fuel pump access cover on your trunk floor and then disconnecting the electrical connector from it.
The fuel gauge sending unit, also known as the fuel level sensor or fuel sender, is an electronic device that measures the amount of gasoline in the gas tank. The fuel level sensor consists of two parts, one is mechanical float, and the other side is a variable resistor. (1)
The fuel level sensor basically works like a potentiometer. The float arm is connected to a variable resistor. As the float rises and falls with the fluctuation of gasoline level, it moves back and forth across the resistor to increase or decrease the resistance value. The signal voltage changes with respect to the change in resistance value.
How will I be able to Reset My Fuel Gauge?
If your fuel gauge is reading empty when you know there is fuel in the tank, the cause may be a faulty sender unit (the fuel sending unit) located in the fuel tank. This part is relatively inexpensive and can be replaced with simple hand tools. (2)
Step 1: Disconnect the Battery
Disconnect the battery by loosening the terminal clamps and lifting them off their posts.
Step 2: Open Fuel Tank
If your vehicle has a locking gas cap, use your ignition key to unlock it. If it has a non-locking cap, twist it one-quarter turn counterclockwise to loosen it, and remove it by hand. Carefully lift up the cover of the fuel filler and place it somewhere safe where it will not get damaged or dirty.
Step 3: Remove Fuel Pump Access Cover
Remove any screws or bolts holding down the access cover over the fuel pump module. There may be several on some vehicles, so check all four corners of the panel for fasteners. Once all fasteners are removed, pull up the access panel to remove it and set it aside for later installation.
Step 4: Remove Old Sending Unit
To remove the sending unit’s electrical connection, first, unscrew all screws holding down the ring around its top. You’ll need to use a deep socket or a similar tool.
Take a look at some of our related articles below.
- How to test a temperature gauge with a multimeter
- How to use a multimeter to test voltage of live wires
- How to test crankshaft position sensor with a multimeter
References
(1) gasoline – https://www.britannica.com/technology/gasoline-fuel
(2) hand tools – https://www.britannica.com/technology/hand-tool
Video References
American Autowire
HOWSTUFFINMYCARWORKS
2jeffs1