10 min read
Kohler Voltage Regulator Test (Guide)
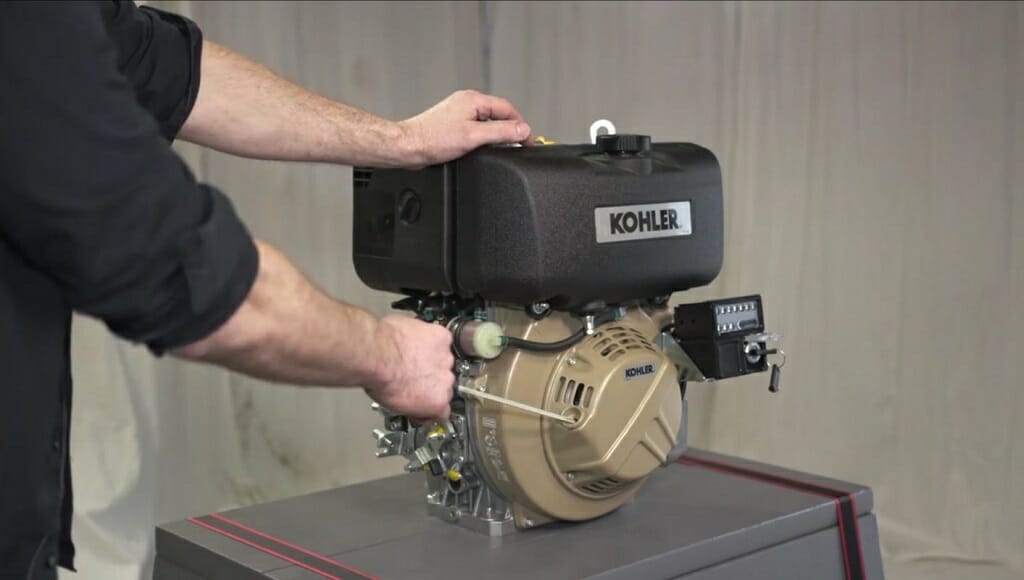
Having a properly functioning Kohler voltage regulator is a must. Otherwise, you’ll have a damaged wire harness or a battery. For instance, you might be experiencing the above signs on your lawnmower Kohler engine. So, it is vital to test the Kohler voltage regulator. That is why, in this post, we’ll talk about the Kohler voltage regulator testing process.
In general, to test the Kohler voltage regulator:
- First, set the multimeter to volt DC settings and keep the engine off.
- Then, connect the red probe to the battery’s positive terminal. Connect the black probe to the negative terminal.
- Confirm the battery voltage is above 12.5V.
- Now, start the engine and accelerate it to 3000 RPM.
- The voltage should be within 13-15V.
That’s it. Now you know how to test the Kohler voltage regulator.
Process of Kohler Voltage Regulator Testing
This process can be broken down into five parts. I’m hoping to discuss those parts in detail.
Part 1 – Testing the Battery (Engine OFF)
Here, you have to check the battery voltage. If the battery voltage is above 12.5V, the battery is okay. Always remember, during this part, you should keep the engine off.
Step 1 – Set up the Multimeter
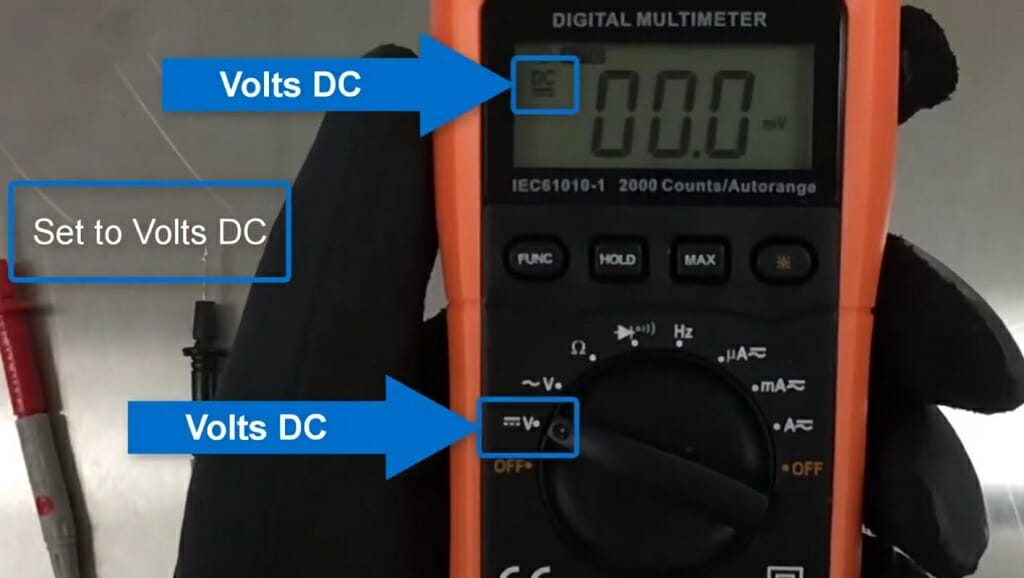
First, set your multimeter to volt DC. Remember to plug the jacks into suitable ports.
Step 2 – Connect the Probes to the Battery
Then, connect the multimeter red probe to the battery’s positive terminal. Connect the black probe and negative terminal, too. Make sure to turn off the engine during this test.
Step 3 – Check the Reading

Now check the multimeter reading. If the reading is above 12.5V, you can move to Part 2.

However, if the reading is below 12.4V, recharge the battery and redo the test.
Remember: Completing the testing process with a proper battery is vital. Also, if the battery voltage drops below 12.5V even after you recharge it, it indicates a failing battery. So, replace the battery.
Part 2 – Testing the Battery Voltage at the Rectifier Regulator (Engine OFF)
Here, you have to check the voltage regulator. During this step, keep the engine off. This part helps you identify broken connections or blown fuses between the regulator and the battery.
Step 1 – Place the Probe on the Regulator
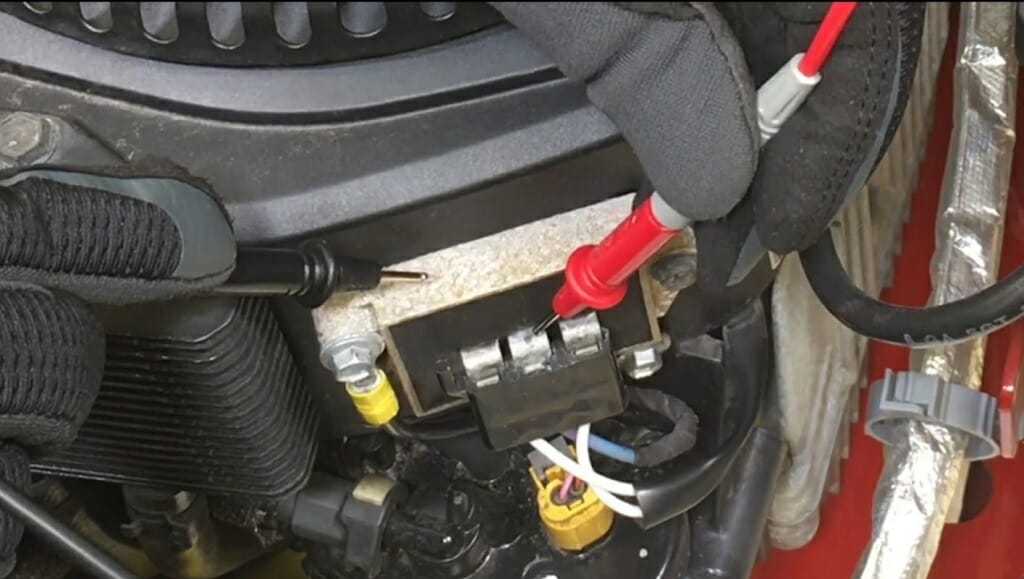
Place the red probe on the center terminal of the regulator and the black probe on the surface of the regulator.
Remember: Any surface corrosion on the regulator might give you incorrect results. So, make sure to remove any surface corrosion.
Step 2 – Check the Reading
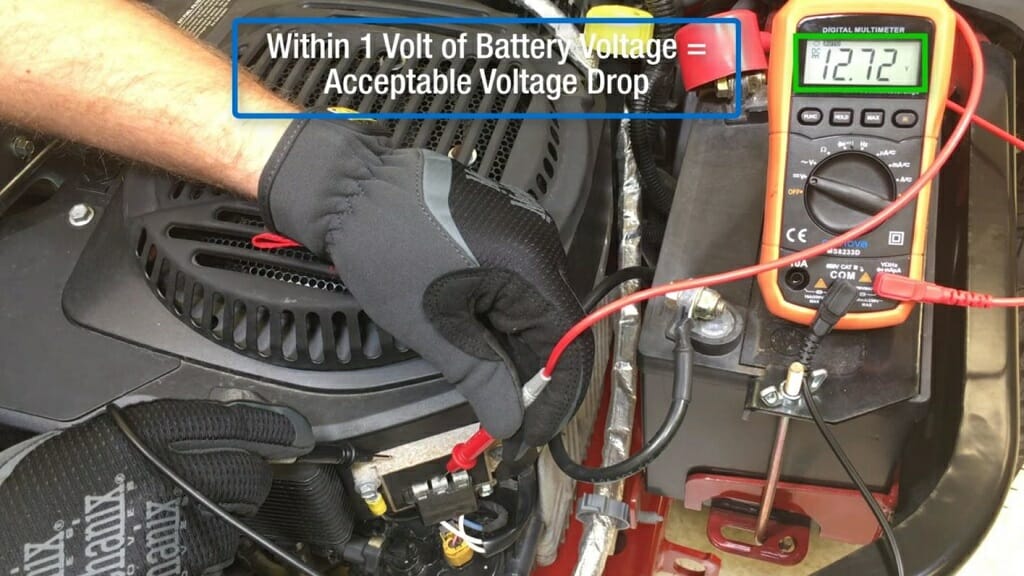
The multimeter reading should be within 1V of the battery voltage.
Tip: If the multimeter does not give any voltage, that is an indication of a broken connection or blown fuse.
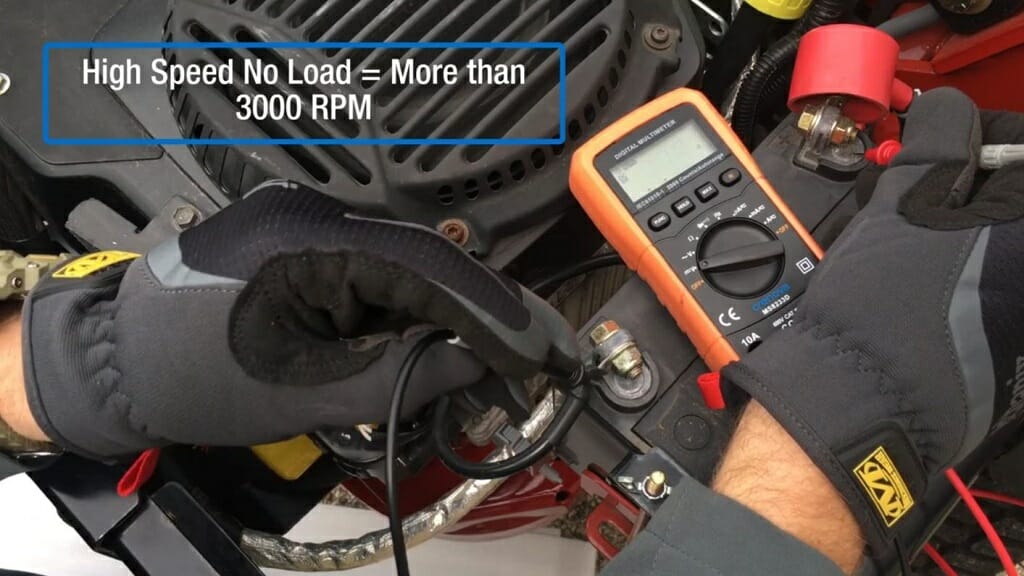
Part 3 – Identifying Bad Voltage Regulator (Engine ON)
In this part, you can test the Kohler voltage regulator. To do that, you need to keep the engine ON. The rectifier regulator takes AC voltage from the stator and converts it to DC voltage. The charging system uses this DC voltage.
Step 1 – Place the Probes on the Battery
Place the multimeter’s red probe on the positive battery terminal and the black probe on the negative battery terminal.
Step 2 – Reach the 3000 RPM Mark
Start the engine and accelerate it to the 3000 RPM mark. Keep the acceleration at least for one minute.
Step 3 – Check the Reading
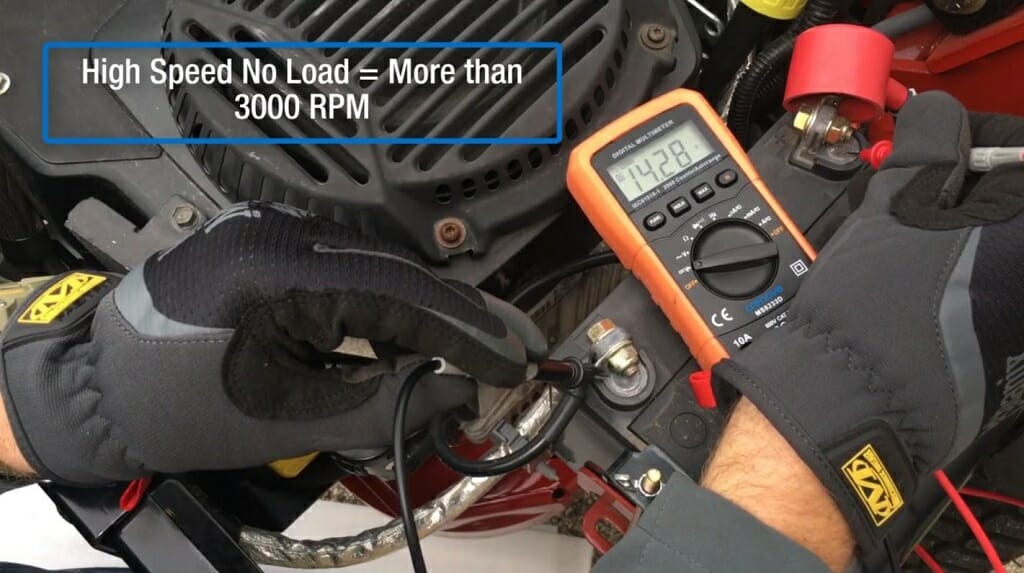
If the reading ranges between 13-15V, the charging system is working properly. If the voltage is above 15.5V, it indicates a bad voltage regulator. So, you might have to replace it. However, if the multimeter is below 12.5V, you’ll have to check the stator.
Remember: During Parts 1, 2, and 3, you should keep the multimeter on volt DC settings.
Part 4 – Stator Output Test (Engine ON)
The stator is capable of producing AC voltage. That voltage is directed to the regulator. Here, you’ll have to test the stator output voltage.
Step 1 – Set the Multimeter
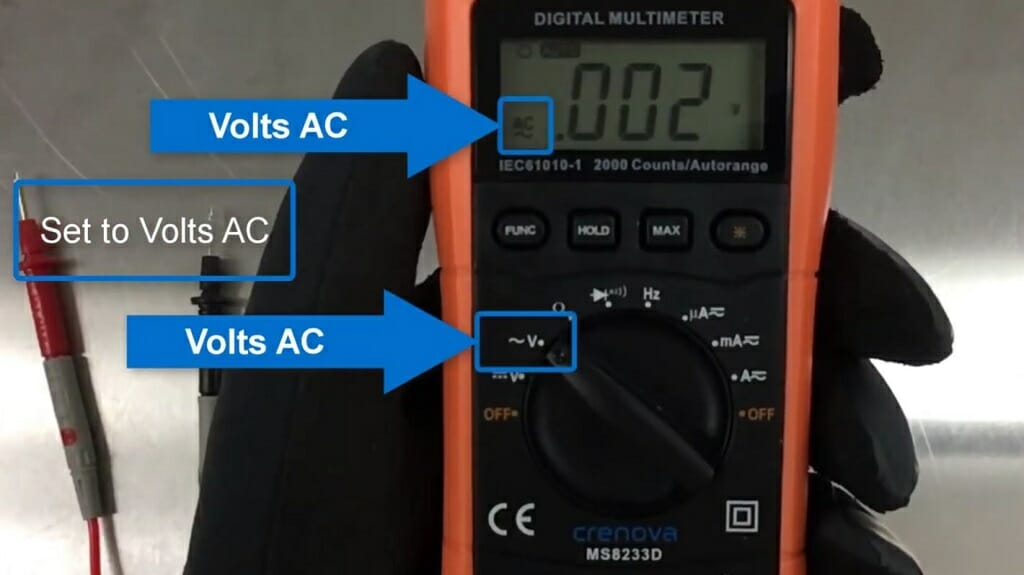
The stator is producing the AC voltage. So, set the multimeter to volt AC settings. Don’t forget to start the engine.
Step 2 – Test the Stator Terminal
Then, unplug the stator plug from the regulator. Place the multimeter probes on the white leads of the stator plug.
Step 3 – Check the Reading
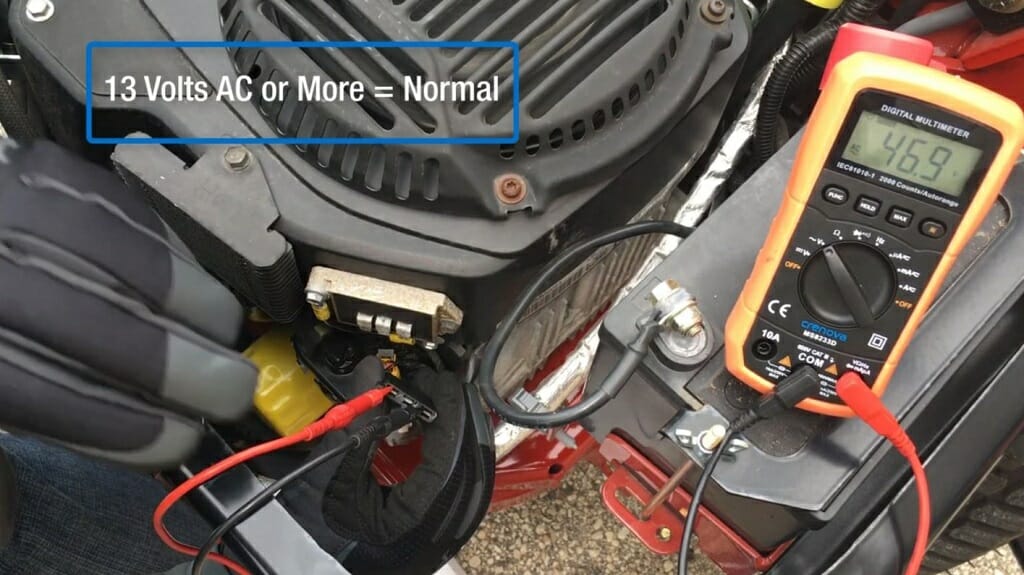
The stator is working properly if the multimeter gives you a 13V or more. If the reading is below 13V, that indicates a bad stator. However, we cannot determine the condition of the stator only through the output test. So, move on to Part 5 to confirm this.
Part 5 – Stator Resistance Test (Engine OFF)
This test is done to confirm the condition of the stator. If the multimeter is showing a reading above 13V in Part 04, there is no need to execute this test.
Step 1 – Set the Multimeter
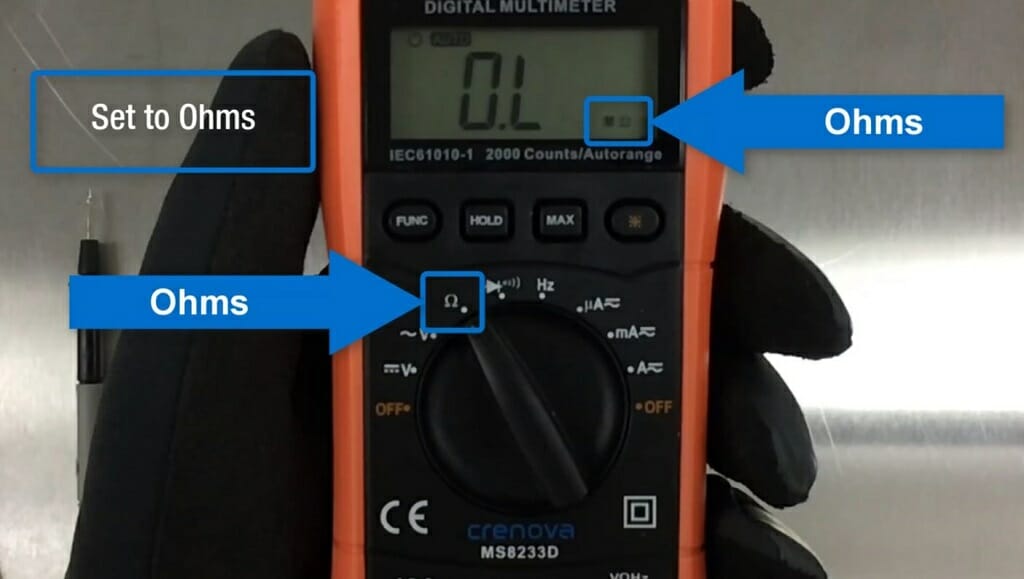
Here, you are going to measure resistance. So, set the multimeter to ohms settings. Keep the engine off during this test.
Step 2 – Check the Resistance of the Probes
In this test, you are trying to measure a small resistance. Therefore, make sure that the multimeter leads do not have any resistance. To check that, tap the two probes.
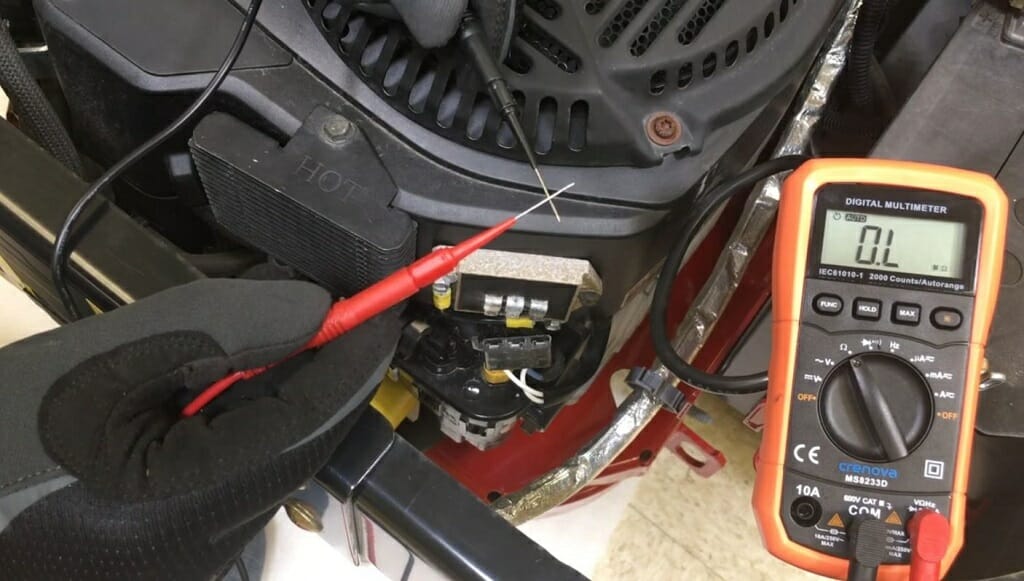
Step 3 – Measure the Resistance
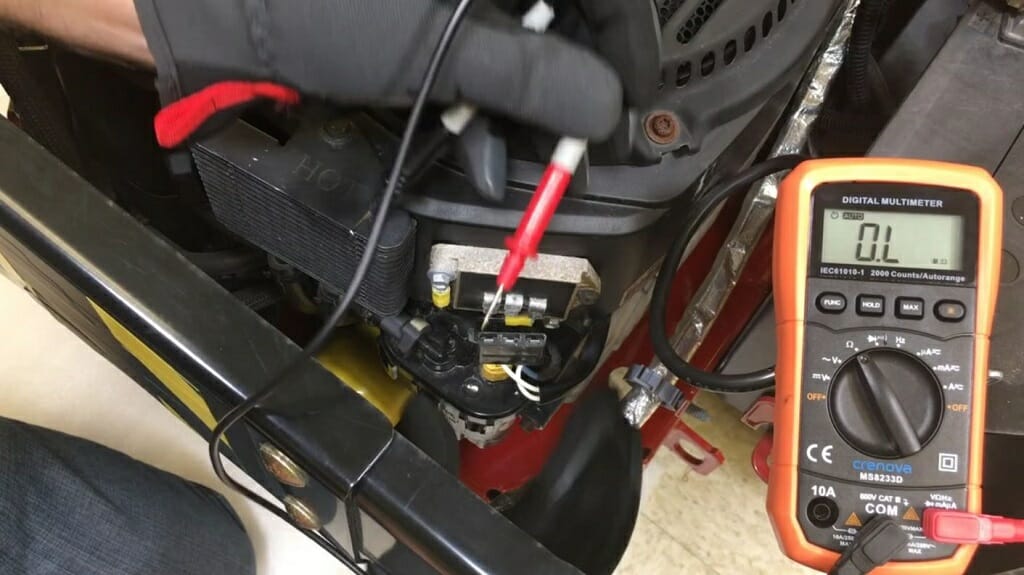
Then, unplug the stator plug from the regulator.
Next, place the multimeter probes on the white leads on the stator plug.
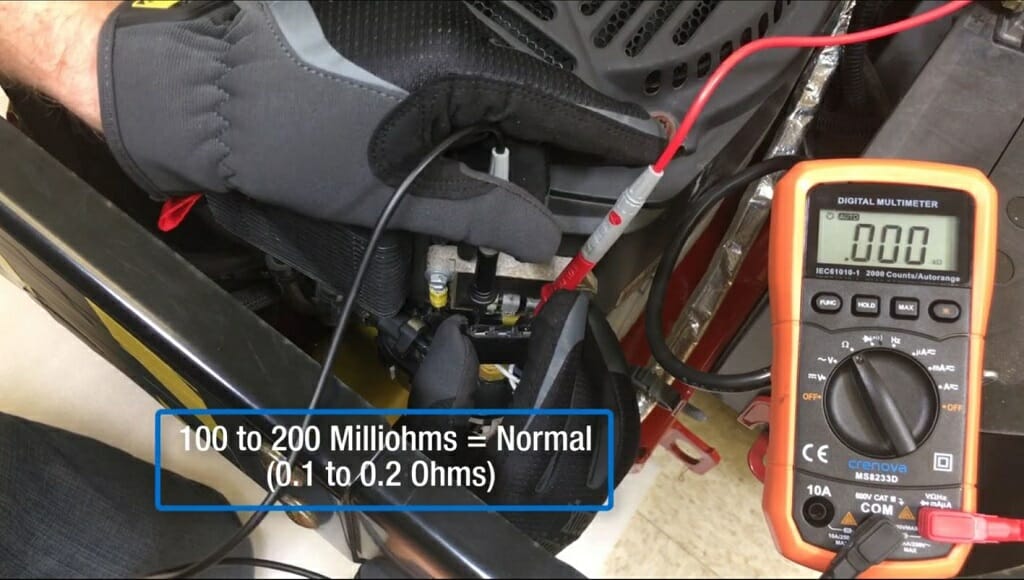
Step 4 – Check the Reading
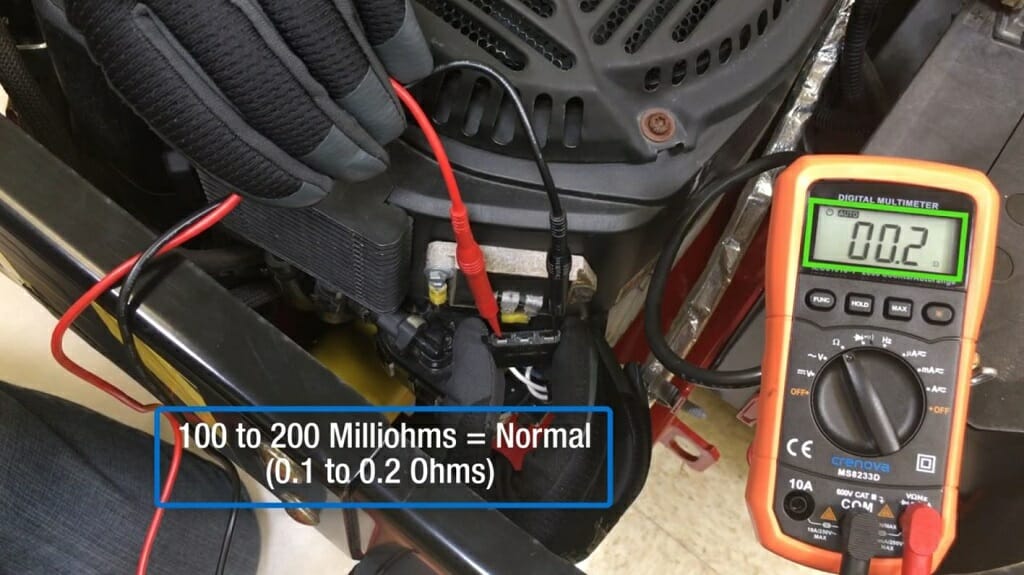
The resistance level is normal if the reading is 100-200mΩ (milliohms). If the reading is zero or infinite and the stator failed the earlier output test, you might have to replace the stator.
Wrapping Up
For some, the above testing process might be confusing. So, here is a little summary of the above five parts.
- Testing the Battery: This test can check whether the battery is good.
- Testing the Battery Voltage at the Rectifier Regulator: This test helps detect a broken connection or blown fuse between the regulator and the battery.
- Identifying Bad Voltage Regulator: This test is capable of testing the condition of the Kohler voltage regulator.
- Stator Output Test: Phase one of testing the stator.
- Stator Resistance Test: Phase two of testing the stator.
References
Website Resources:
- corrosion. https://www.sciencedirect.com/topics/engineering/corrosion
- acceleration. https://www.khanacademy.org/science/physics/one-dimensional-motion/acceleration-tutorial/a/acceleration-article
Video References:
Warped Garage
Kohler Engines University