13 min read
How to Wire a Blade Fuse Box (9 Easy Steps)
A blade fuse box is a useful means for organizing the +12V cables from your vehicle’s battery and extending its circuits if using a larger one than before.
Quick Summary: To wire a blade fuse box anew, you will need a wire for each circuit in your vehicle connected with a ring or spade connector. Connect them to the smaller terminals on the box. If extending an existing one, disconnect the positive cable from the battery first, which will then connect to the main terminal on the box (or the one marked positive if there are two).
I’ll show you in more detail, including exactly what you need.
Requirements
This section covers the wires, extra connectors, and wire gauges required.
Tools
- Screwdriver
- Wire cutter, wire stripper, and wire crimper
- Heat gun or lighter
- Fuse removal tool
Wiring Diagrams
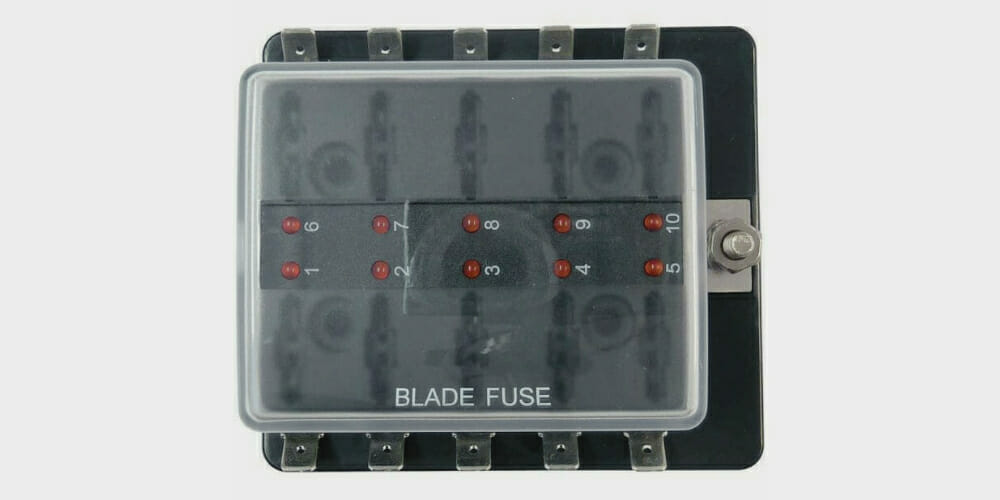
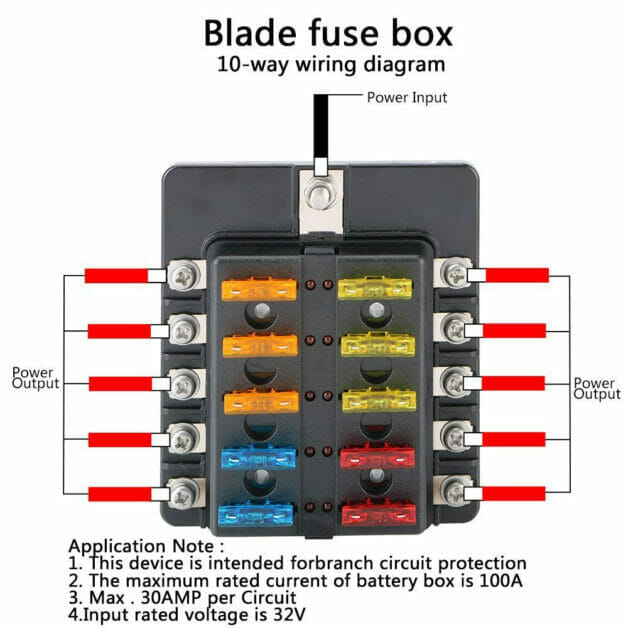
Below is a sample wiring diagram for a 10-way Blade Fuse Box. The main terminal is for power input, and the smaller terminals are power outputs for the individual branch circuits.
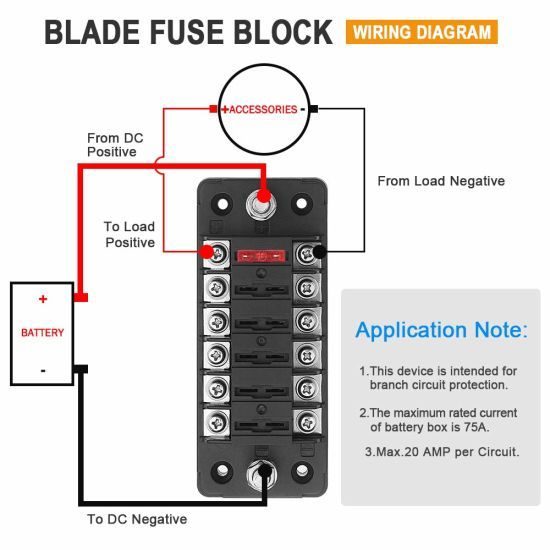
Here’s another wiring diagram showing two main terminals (positive and negative) if yours matches this instead, although this guide shows how to wire the simpler positive-only type. Note how the Blade fuse box connects with the vehicle’s battery.
Wires
Ensure you have wires with special connectors on their ends.
It would be best to have as many wires as the connections you will make. If you’re extending the system, it will be the total number of existing connections plus the new ones.
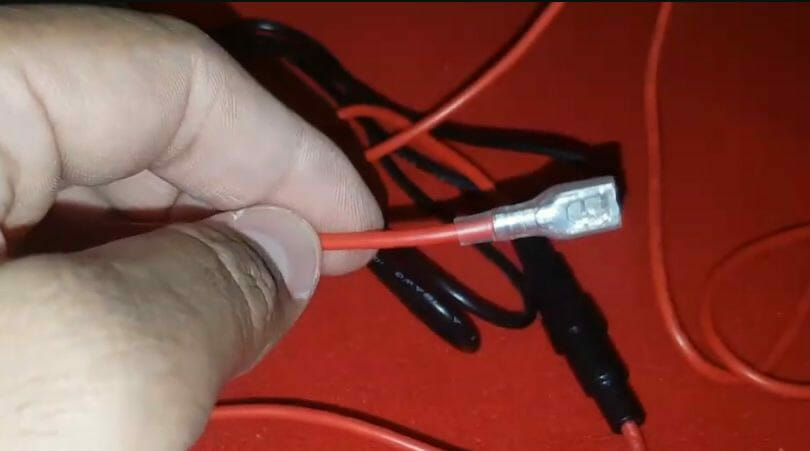
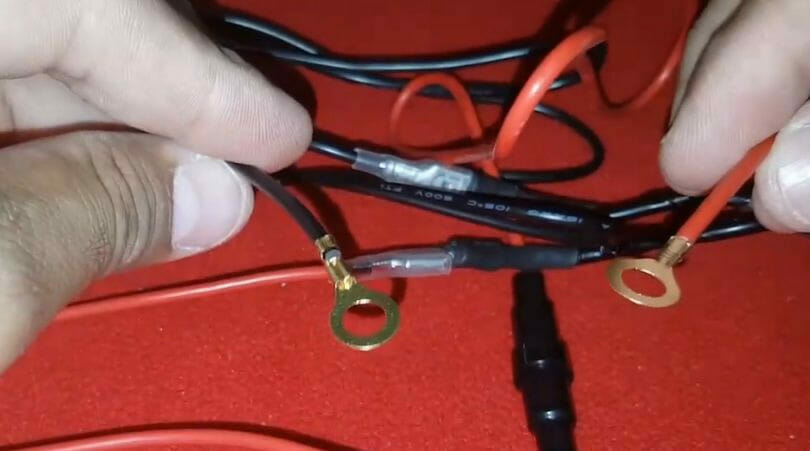
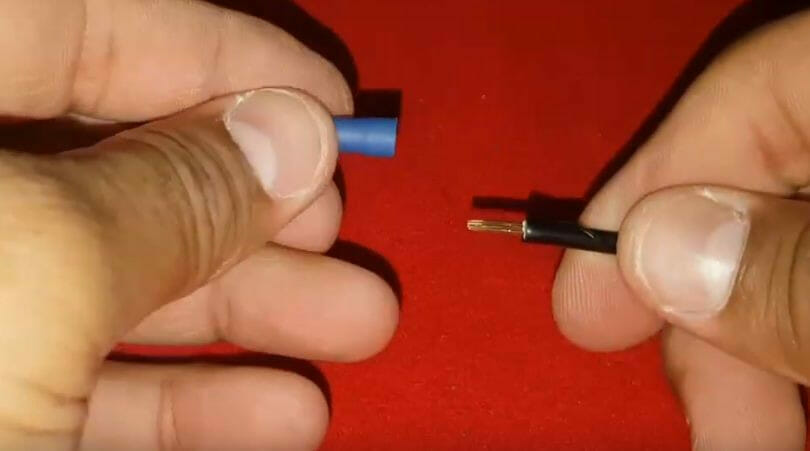
The red (positive) and black (negative) wires have ring connectors on one end, as shown below.
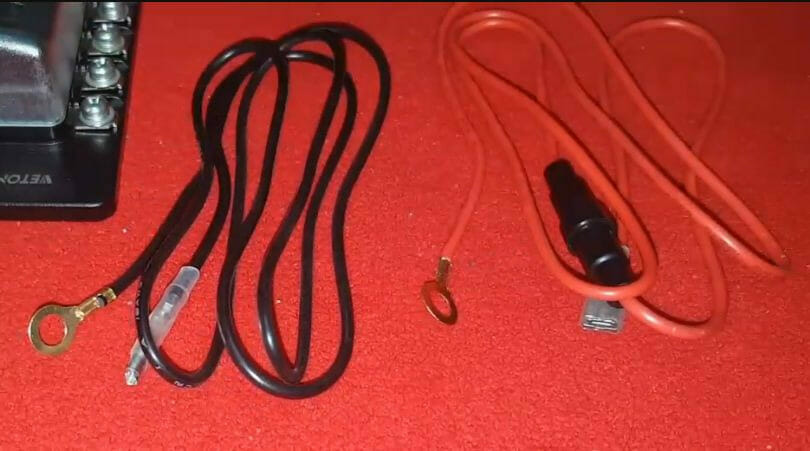
Notice the black connector in the middle of the red wire. If you open it, you will see a fuse inside. When closed, the two parts of the red wire join to function as a single, fused wire.
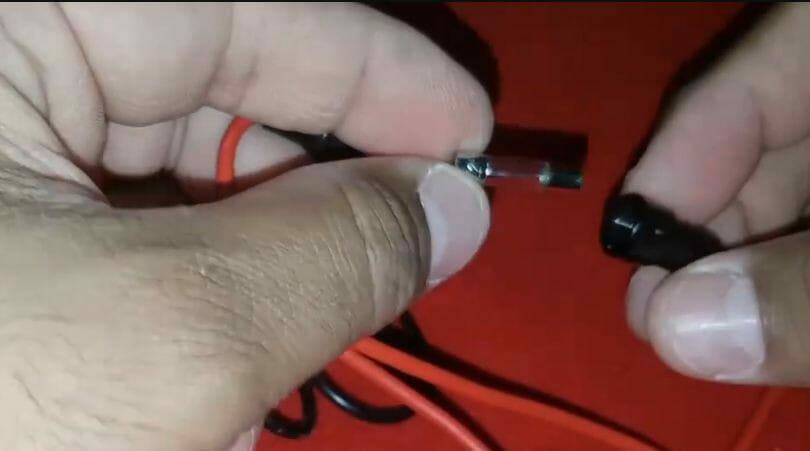
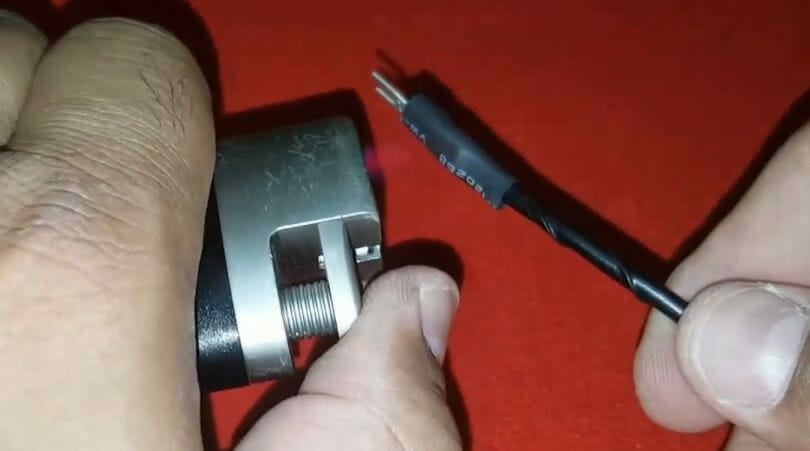
At the other end of the red wire is a spade connector.
It is designed to fit over the male socket on the thicker black wire (positive power cable), as shown below, as is the other black wire shown earlier. So when the red and black wires are connected, it will leave their ring connector ends free.
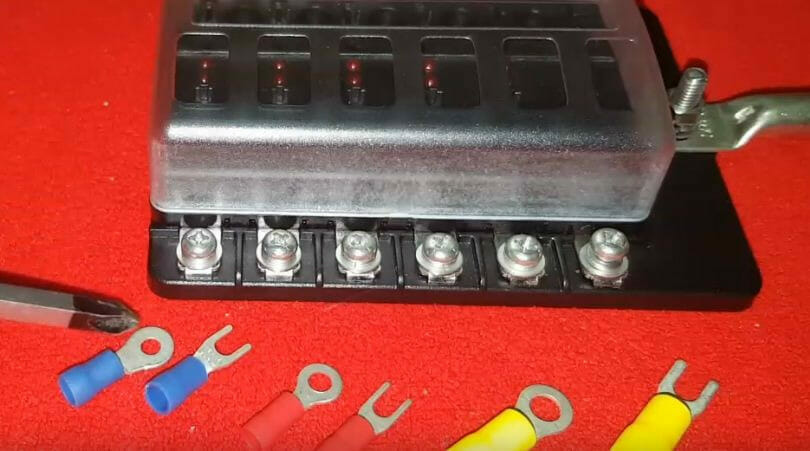
Extra Connectors
You will also need these extra connectors exactly as shown below. They are aligned next to the six terminals on the blade fuse box to which each one will connect. Notice the different ends.
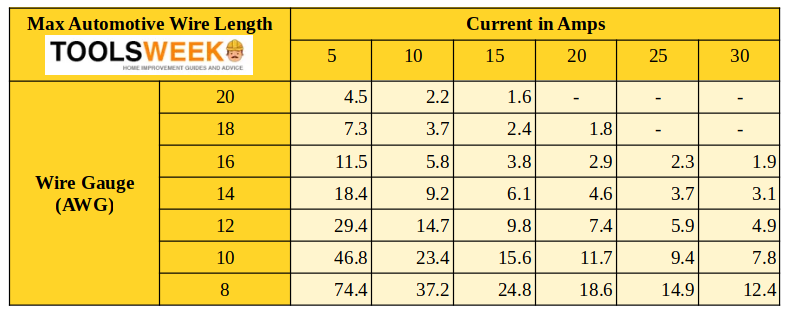
Wire Gauges
Another important piece of information you will need to know is the right gauge wire to use according to the current flow and wire lengths.
Refer to the chart below.
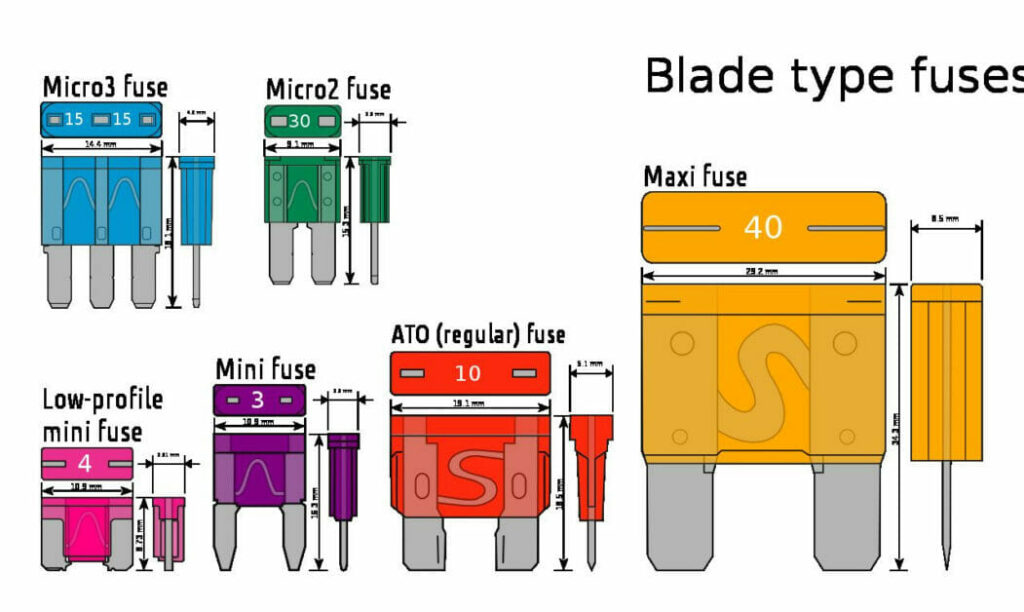
Fuses
Use blade fuses with the right amp ratings. They should match your existing ones if you’re replacing them. Otherwise, refer to the blade fuse types below to identify which one you will need.
Wiring the Blase Fuse Box (Demonstration)
This procedure is only a demonstration because the number of wires to connect and which ones they are depends on your vehicle and configuration. Once you know the general procedure, you can make the necessary connections.
Pre-Requisites
Before these steps, you must disconnect the cable from the car battery’s positive terminal and reconnect it at the end. Also, remove the old fuses if upgrading or extending an existing fuse box using a fuse removal tool. Ensure you know which wire and relay go where. Take a photo to help.
Step 1: Connect the Red and Black Wires
Connect the red and black wires as described and shown above. Only connect their spade ends for now. Ensure the connections are secure.
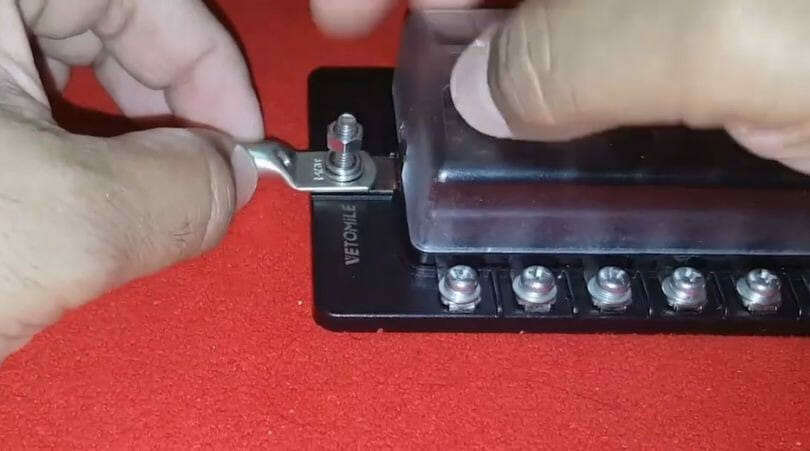
Step 2: Connect a Ring Connector to the Box
Connect a ring connector on the blade fuse box’s main (positive) terminal. If there’s only one, it’s the positive terminal, but if there are two, we will connect to the one marked positive (+). No wire is attached at present. This is for demonstration only, as you will connect the main wire to this terminal later.
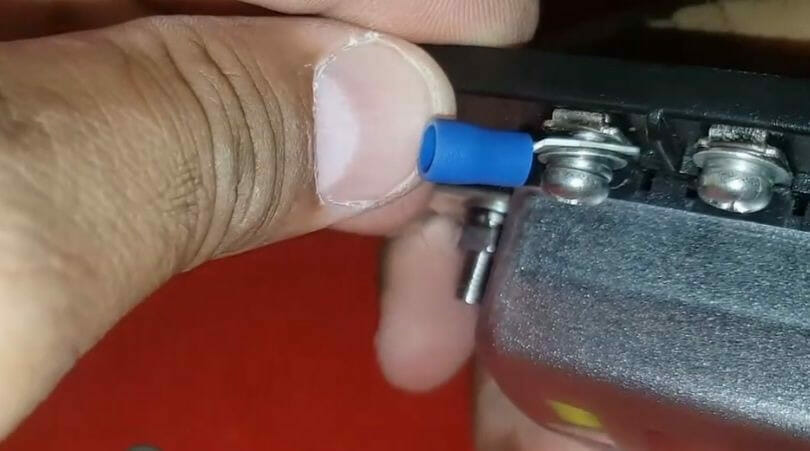
Step 3: Connect the First Small Connector and Orange Fuse
Refer to the requirements list above for the extra small connectors.
Now, connector (only) the first blue ring connector to the first terminal on the blade fuse box. Again, this is only for demonstration so that you remember which connector goes where, as it’s presently without a wire.
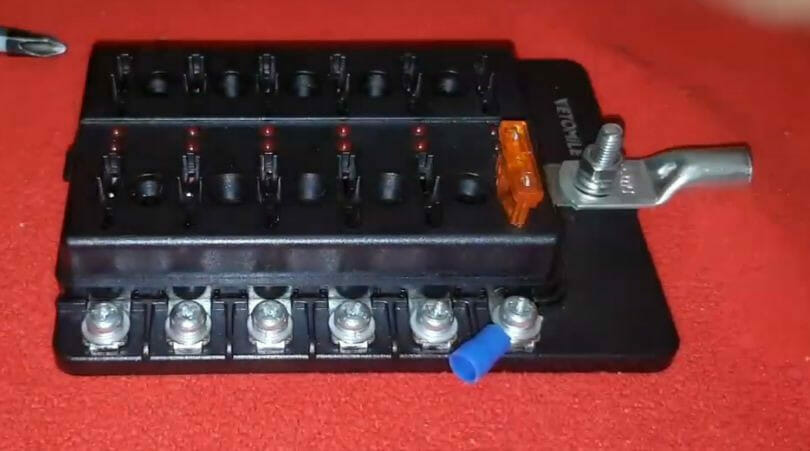
Then, insert the first orange fuse next to it after opening the box’s transparent cover. The blade fuse box should look like this presently:
Step 4: Connect the Main Wire
Connect the main wire from the car battery’s positive terminal to the blade fuse box’s main terminal (after removing the non-wired one you attached earlier in Step 2).
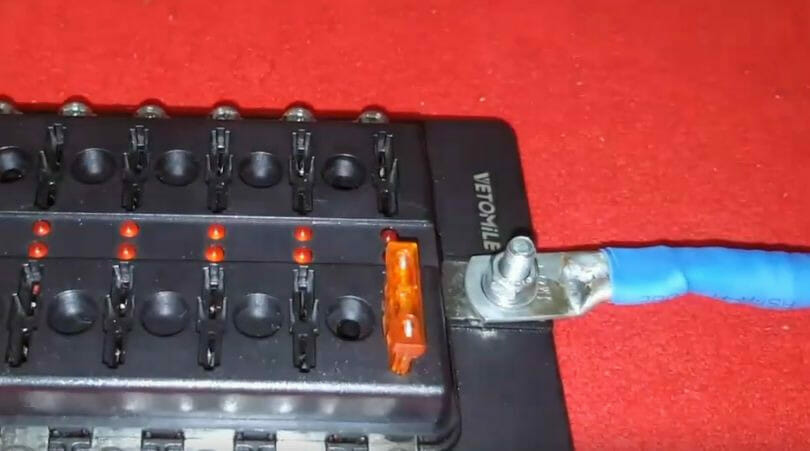
Notice the LED lights light up. Optionally, wrap electrical tape around the main terminal to secure it further.
Step 5: Attach the First Small Connector
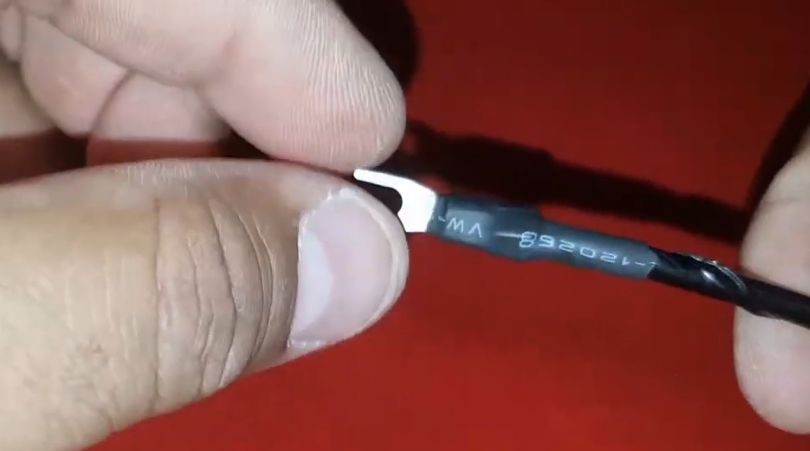
We will now start attaching the small wires to the blade fuse box’s small terminals using the small connectors I showed earlier.
Strip the ends of each wire using a wire stripper, as shown, before attaching a connector.
Step 6: Crimp the Connector
Crimp each connector using a wire crimping tool.
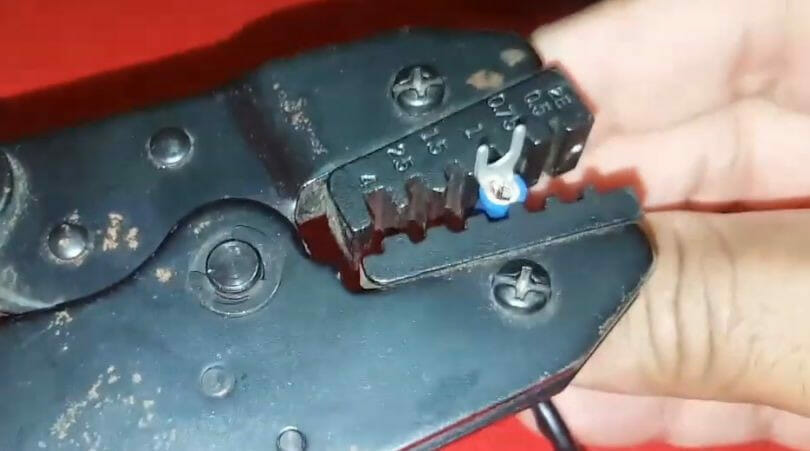
Gently pull the connector while holding the wire at the other end to ensure it is secure. It should have dent marks to confirm the crimping was done right.
Step 7: Attach Wire Sleeves
Attach a wire sleeve over the end of each small wire as far as the base of each connector. Then, use a heat gun or lighter to tighten the sleeve.
Each one should look like this when done.
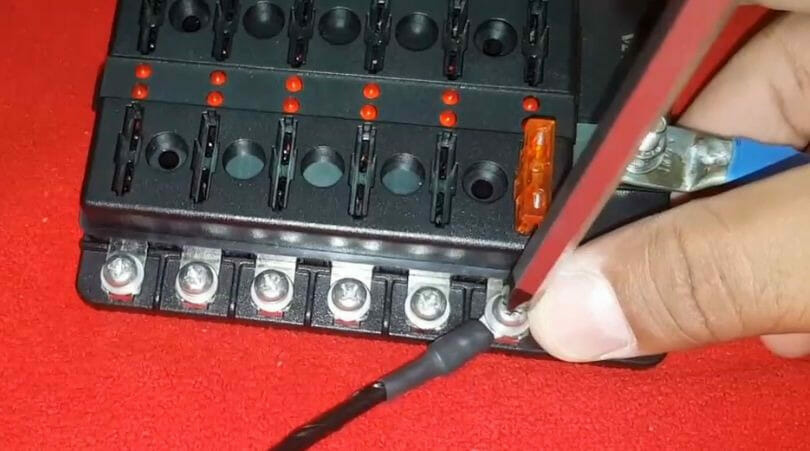
Step 8: Attach Each Connector
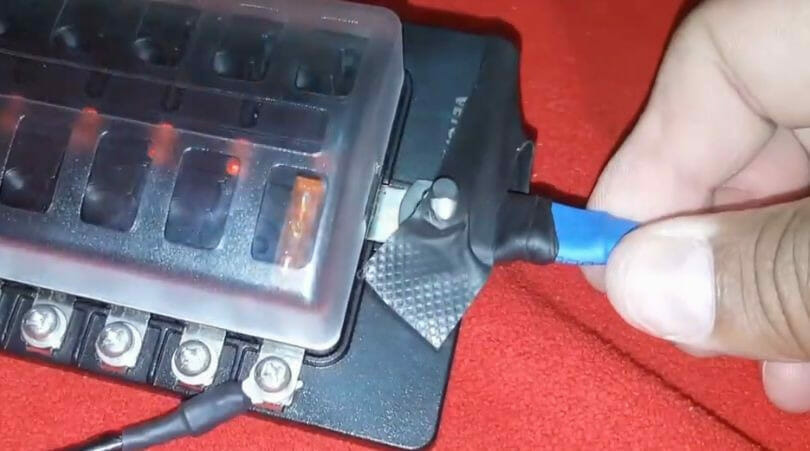
Attach each connector (along with its wire) to each smaller terminal on the blade fuse box, as shown.
This time they are all wired. Here’s the first wire with a blue ring connector. It’s covered by the sleeve you attached in the previous step, so you can’t see the blue portion anymore. You should hear an audible beep when connecting it.

Secure it using a screwdriver.
Step 9: Attach the Remaining Connectors
Repeat the above for the other individual wires.
How many there are depends on your vehicle and needs. Usually, you will reconnect all the existing ones, then the new ones for which you bought a larger box, if any.
Keep the connections organized by labeling them.
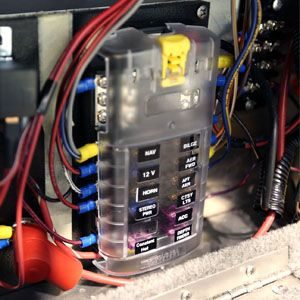
The End Result
Installing a Blade Fuse Box was to have the wires more organized. So, your result should look something like this, where each fuse is neatly labeled:
Troubleshooting Your Blade Fuse Box:
Alright, team! Even the best-laid plans sometimes hit a snag. If you’ve followed every step and that fuse box isn’t working like it should let’s roll up our sleeves and get to some troubleshooting.
1. No Power to the Fuse Box:
- Check the Basics: Sometimes, it’s the simple things. Ensure the main wire from the car battery’s positive terminal is securely connected to the blade fuse box’s main terminal.
- Inspect the Main Fuse: If you’ve got a main fuse, ensure it’s not blown. Swap it out and give it another go.
2. LED Indicator Not Lighting Up:
- Fuse Check: That handy LED is there to tell you if a fuse has blown. If it’s not lighting up, check the corresponding fuse and replace if necessary.
- Connection Inspection: Double-check that the wire connected to that fuse’s terminal is snug and secure.
3. Intermittent Power or Flickering LED:
- Wiggle Test: Gently wiggle the wires. If you notice the LED flickering or the power cutting in and out, you might have a loose connection.
- Wire Examination: Inspect the wires for any nicks, cuts, or frays. Sometimes, even a small break in the insulation can cause issues.
4. One Circuit Not Working:
- Individual Fuse Check: It’s likely the fuse corresponding to that circuit. Swap out the fuse and see if that resolves it.
- Wire Double-Check: Ensure the wire for that circuit is firmly connected to its terminal on the fuse box.
5. Fuse Keeps Blowing:
- Overload Alert: This usually means there’s too much current draw for that circuit. Make sure you’re using the correct amp rating for the devices on that circuit.
- Short Hunt: There might be a short in the circuit. Check the wiring for any spots where it might be touching metal or another wire.
6. Everything’s Connected, But Nothing’s Working:
- Master Reset: Disconnect the main wire from the battery, wait a few moments, and reconnect. Sometimes, systems need a quick reset.
- Full Inspection: Go back through each step of the installation. It might sound tedious, but sometimes retracing our steps can help us spot a simple oversight.
Now, I know this can be a bit overwhelming, but with a little patience and some elbow grease, you’ll have that blade fuse box working in no time. And if all else fails, don’t be afraid to call in a professional. Sometimes, it’s best to leave it to the pros. Keep at it, and you’ll be back on the road before you know it!
References
Blade fuse box. https://sinolec.co.uk/en/marine-and-automotive-fuse-boxes/1211802-atc-blade-fuse-box-with-ground-marine-boat-or-automotive-10-way.html
Blade fuse types. https://commons.wikimedia.org/wiki/File:Electrical_fuses,_blade_type.svg.
She labeled the blade fuse box. https://www.thecabindepot.com/products/blue-sea-systems-st-blade-ato-atc-fuse-blocks
Sample Blade fuse box wiring diagram. https://www.aliexpress.com/i/1005002281698190.html
Sample Blade fuse box wiring diagram with two main terminals. https://chinadaier.en.made-in-china.com/product/iZfGHOJDgRAj/China-6-Way-Fuse-Block-with-Negative-Bus-12V-Blade-Fuse-Holder-Atc-ATO-Standard-Fuse-Box-Label-Sticker-Waterproof-Cover1-9-Pieces.html
Video References:
Sherif Workshop