10 min read
How to Wire a Light Switch from a Plug Socket (11 Steps)
Wiring a light switch from a plug outlet is possible if it’s not on a dedicated circuit.
The light will be an extra load, taking power from the line wires into the outlet. You will see 3 wires from the outlet and 3 from the light fixture.
To wire a light switch from a plug outlet:
- Combine the ground wires with an additional small piece using a wire connector. Connect the extra piece to the ground terminal on the switch.
- Combine the neutral (white) wires with a wire connector and tuck them behind the switch. Don’t connect them to the switch.
- Connect the 2 hot wires to the brass terminals on the switch.
Continue reading below for more detailed instructions with illustrations.
Getting Started
You can wire a switch from an outlet to control the outlet or connect another appliance, such as a light.
You only have the first option if it’s supposed to be a dedicated circuit. But we’re going to wire a light switch, so it’s understood that it will be used to switch a connected light.
Considerations
You should only wire a light switch from an outlet if the wiring and circuit breaker support them. As the switch controls a connected light, you must consider the total current draw of the lighting circuit.
Assumptions
I assume the outlet, switch box, and light fitting are already connected, and the only remaining task is to wire the switch from the outlet.
Requirements
You will need the following tools and other materials:
| Tool | Materials | Instruments |
| Screwdriver Nose pliers Wire cutter Wire stripper | Cable Wire nuts or connectors Electrical tape | Tester, voltmeter, or multimeter |
Essential Prerequisites
We will cover both scenarios: Wiring a light switch
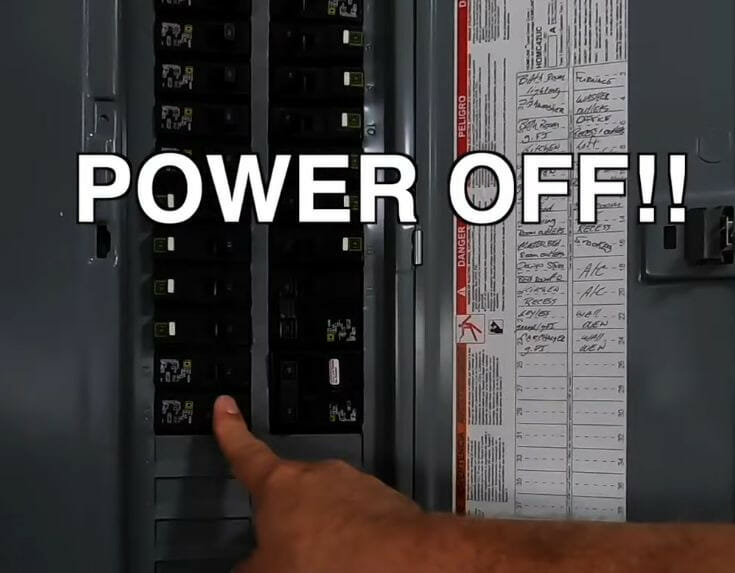
Before commencing the wiring, turn the circuit breaker OFF at the panel.

Turn the power off at the breaker panel before working on the wiring.
If installing a new switch box and light, install the former above 4 feet and secure the box to the stud wall. Attach the light fixture wherever you need to install it and run a cable to the switch box.
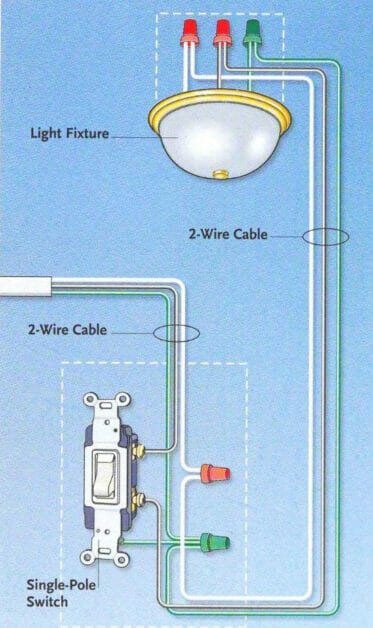
Wiring Diagram
I’ve illustrated below how the parts will connect. We will wire the switch to the wires coming from the outlet and light fitting, which will get power from the main panel.

Wires
The power source cable from the outlet is a regular 3-wire cable with one black (hot), one white (neutral), and one bare copper (ground) wire.
A 12/2 wire for the second cable from the outlet to the switch should be sufficient for a lighting circuit. You will also need an additional length of this cable from the switch to the light fitting.
Wiring a Light Switch from an Outlet
Step 1: Turn the Power Off
Turn the power off before opening the switch. Use a tester or voltmeter to ensure there is no power.
Step 2: Open and Attach the Switch Box
Open the switch if it is attached to the box, or open it from the packaging if you bought a new one and attach it securely.

Step 3: Feed the Cables
Feed the two cables through the switch box, one from the outlet and the other from the light fixture. Pull them out about 8” to 12”.

Step 4: Strip the Wires
Strip the cable and the wires’ ends using a wire stripper, about half to 5/8 of an inch.
Step 5: Identify the Wires
You will see 3 wires from the power cable and 3 from the light fixture.
They should be sticking out at least 8” to be adequate if the wire shortens. Ensure you can identify and distinguish the wires. The power cable from the outlet and the cable from the light fixture each have the following 3 wires in them:
- A black hot wire – The one from the outlet provides power, and the one from the light fixture will be live only when the switch is turned on. The former is “constantly hot,” and the latter is the load wire.
- A white neutral wire – Neither of the 2 will connect to the switch because the switch only makes hot connections. Connecting the neutral would cause a short circuit. I will tell you what to do with the neutral wires in the next steps.
- A bare copper or green ground wire.
Step 6: Combine the Ground Wires
Combine ground wires and a small piece using a twist-on cap, wire connector, or crimp sleeve.
The additional ground wire will connect from the joint to the switch in a later step.

Step 7: Combine the Neutral Wires
Combine the neutral (white) wires as you did with the ground ones.
But you don’t need an extra 3rd piece of white wire because the neutral never connects to a switch. Instead, tuck them inside the switch box after combining them with a wire cap or connector. We only need to join them to provide the light with a neutral connection to complete the circuit. So, they will bypass the switch without connecting to it.
Step 8: Create Hooks
Create hooks on the ends of the 2 hot wires from the outlet and light fixture and the single ground wire from the ground wire connector, which will connect to the switch.

Step 9: Connect the Wires
Connect the wires to the switch as follows:
- Connect the ground wire to the ground terminal with a green screw.
- Connect the 2 hot wires to the brass terminals on the switch.
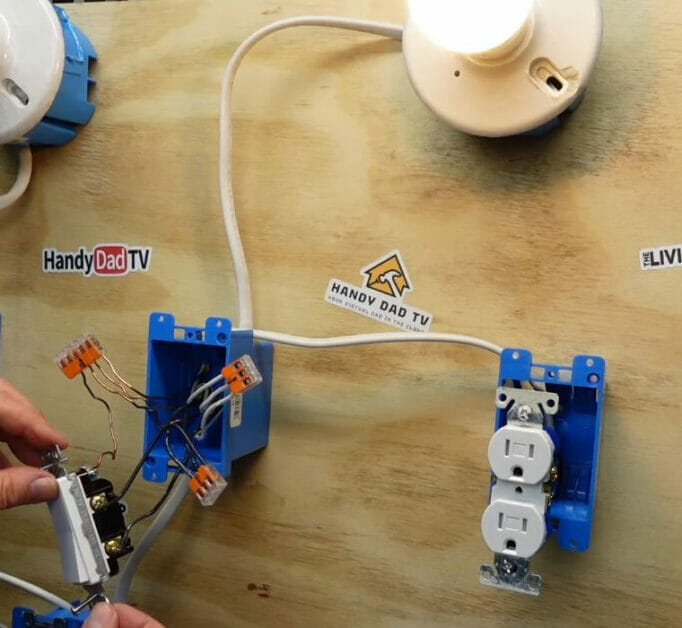
The wires should look something like this:

Step 10: Attach the Switch
Once wired, attach the switch to its box. Ensure it is attached securely. Then, attach the switch cover over it.

Step 11: Power On and Test
Turn the power on to test the switch.
FAQs
Alright, folks! Let’s tackle some of the most commonly asked questions about wiring a light switch from a plug outlet. Home improvements can be tricky, but you can make it happen with the right knowledge. Here we go!
1. Is this a project for a beginner? While it’s not the most complicated electrical job, I’d recommend understanding electrical wiring before diving in. It’s always best to call a professional electrician if you’re uncomfortable.
2. What’s the biggest mistake people make when attempting this? Not turning off the power! Safety comes first, always. Ensure you turn off the power at the circuit breaker before starting any electrical work. And double-check with a tester or voltmeter!
3. Can I use any outlet in my home for this? Not necessarily. You should only wire a light switch from an outlet if the wiring and circuit breaker support it. Make sure to consider the total current draw of the lighting circuit.
4. What if I don’t have all the tools and materials listed? It’s essential to have the right tools and materials for the job. If you don’t have something, visit your local hardware store. The right tools can make the job easier and safer.
5. The neutral wires don’t connect to the switch. That’s right! The switch only makes hot connections. Connecting the neutral would cause a short circuit. So, follow the steps closely and avoid connecting the neutral wires to the switch.
6. I’ve done everything, but the light isn’t turning on. What should I do? Double-check your connections and ensure that all wires are properly connected and secured. If everything seems right and it’s still not working, it might be a good idea to call in a professional to take a look.
Remember, home improvement is about patience, persistence, and safety. Take your time, follow the steps, and you’ll have that light switch wired up quickly!
References
Books:
- Creative Homeowner. The ultimate guide to wiring: complete home projects. 6th edition. Creative Homeowner. 2007. https://www.abebooks.com/9781580113502/Ultimate-Guide-Wiring-Complete-Projects-1580113508/plp
Video References:
HandyDadTV
Skills and Trade
The Excellent Laborer