10 min read
How to Wire a Light Fixture With Two Black Wires (Expert Guide)
Sometimes instead of a black and white wire, you’ll get two black wires. If you plan to install a new light fixture or do a repair job for an existing fixture, you should know which one is which.
I have experienced this issue in many wiring projects. In electrical circuits, the white wire is the neutral wire and the black wire is the hot wire. The ground wire will be green. When considering light fixtures, the above color-coding system is not always true and wiring it incorrectly can lead to costly damages.
In general, when wiring a light fixture with two black wires, follow these steps.
- Cut off the main power to the light fixture.
- Take a picture of the old setup.
- Identify the wires correctly.
- Remove the old light fixture.
- Install the new light fixture.
- Check the light fixture.
You’ll find more details below.
Must-Know Things About Light Fixture Wires
Usually, we don’t pay much attention to light fixture wires until a replacement or repair comes up. So, you might end up with two black wires while trying to replace the new light fixture. However, things are not that complicated for every light fixture. For instance, you’ll find some light fixtures with proper color coding.
Most light fixtures have these color-coded wires.
- Black wire – Live wire
- White wire – Neutral wire
- Green wire – Ground wire
Other than that, you might find the following variations too.
- You’ll get two same colored wires (black, white, or brown)
- In some light fixtures, you won’t find any ground wires.
- You might see a red wire. These red wires are connected to the light switch.
- You might see yellow or blue wires too. These wires belong to ceiling fans or three-way switches.
As you can understand, identifying light fixture wires is tricky, especially if you get two black wires.
Why Do Light Fixtures Come with Two Black Wires?
There are two reasons for this same color wire dilemma.
- Someone might convert a lamp into a hardwired light fixture. If that is the case, you’ll end up with two same-colored wires. it could be two black wires or white wires.
- If you use a light fixture made in another country, your light fixture might have two black wires.
Electrical wire color coding varies from country to country.
For instance, the wire color coding system in the US won’t be the same as China’s color codes. So, to avoid any confusion, manufacturers sometimes produce light fixtures with two black-colored wires.
Identifying the Light Fixture Wires
In this section, we’ll talk about two methods to identify light fixture wires. These two methods are entirely different, and I’ve used them many times successfully throughout my career.
Method 1 – Visually Identifying Wires

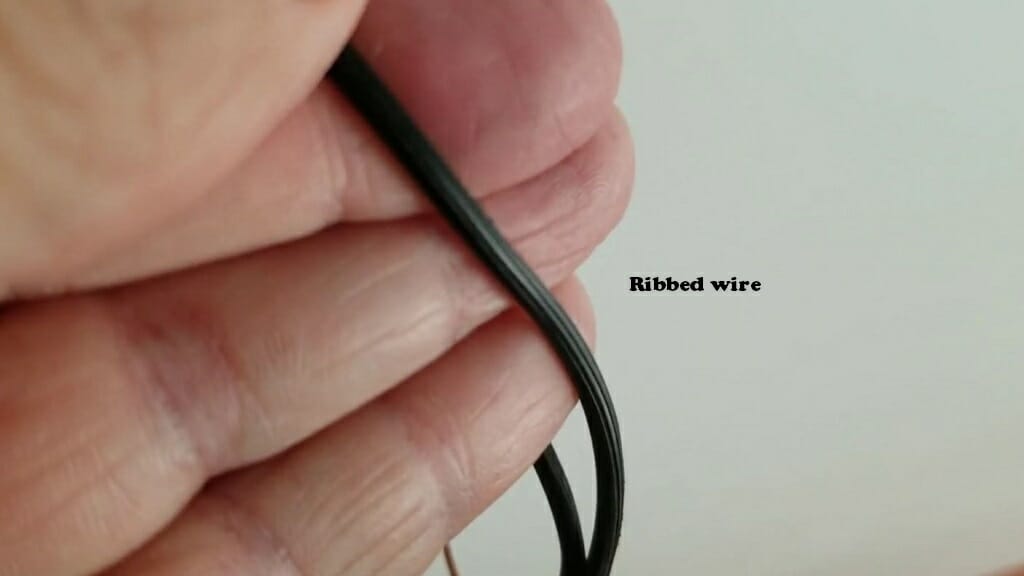
This is sometimes common with manufacturers…If you have a light fixture with two black wires, the smooth black wire is the hot wire.
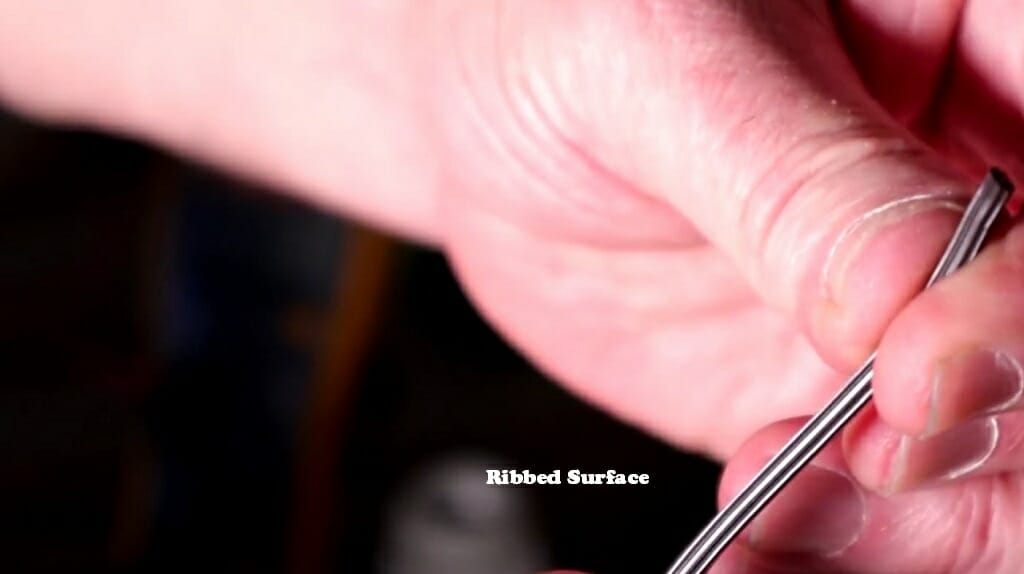
The wire that has a ribbed texture is the neutral wire. Sometimes, the neutral wire will have a stripe on it. This is the easiest and quickest way to identify light fixture wires.
Keep in mind: During the visual inspection, remember to keep the power off.
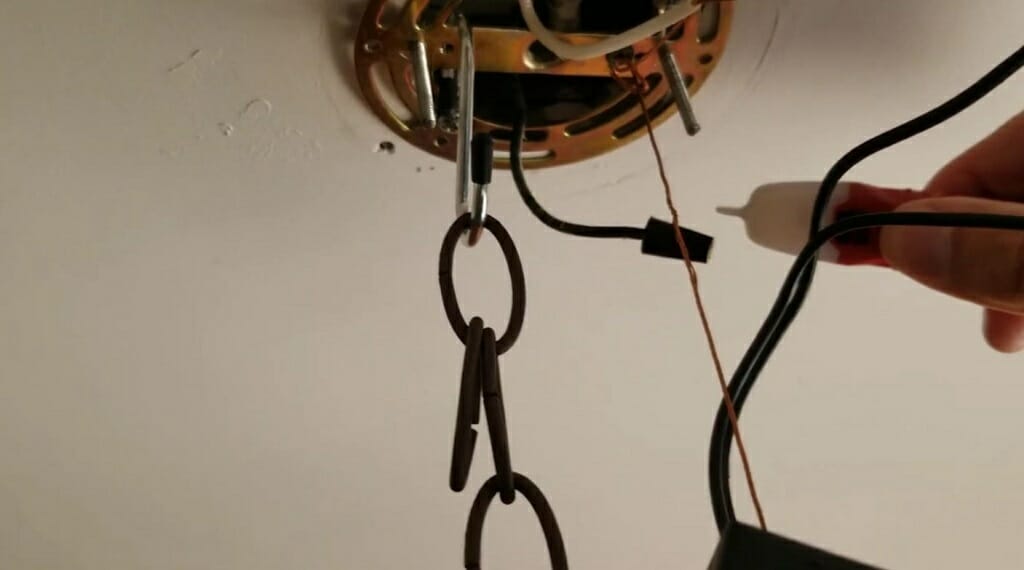
Method 2 – Use a Digital Multimeter
With this method, we are going to use a digital multimeter.
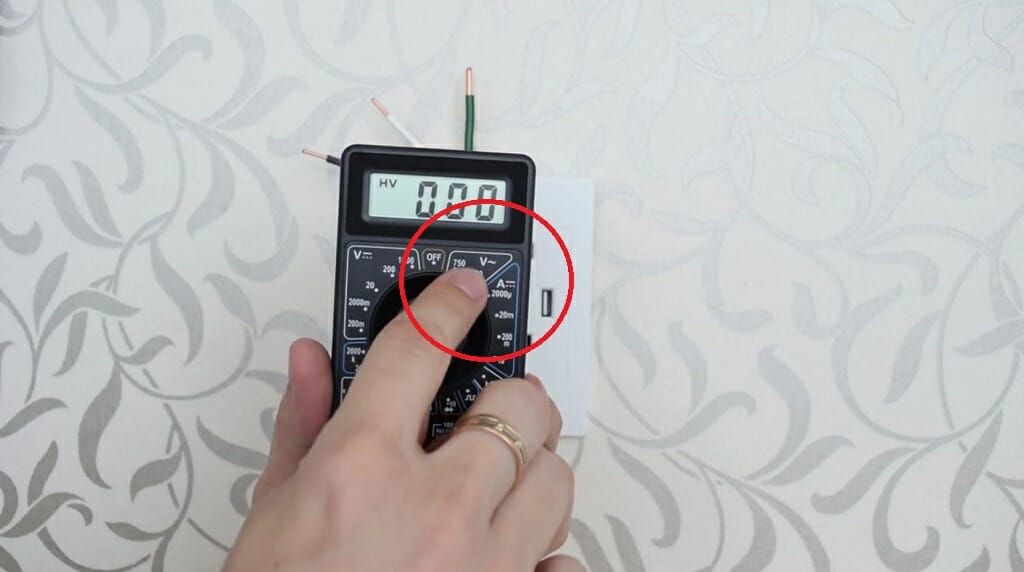
First, set the multimeter to voltage mode. Remember to select AC volts.
Then, connect the multimeter’s black probe to any ground point. It could be a water tap or fridge. Or connect the black probe to the ground wire on the light fixture.
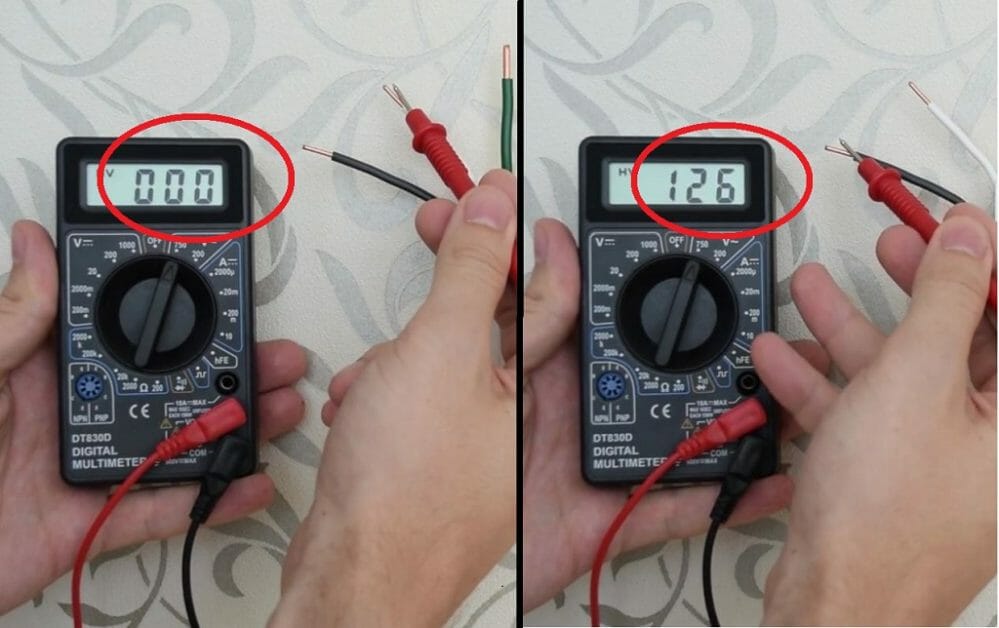
Next, connect the red probe to the 1st black wire. Then, connect the probe to the 2nd black wire. The wire that gives higher voltage reading is the hot wire. The neutral wire will not show any voltage on the multimeter. If you cannot find a multimeter, use a voltage sensor to check the voltage.
Sometimes, the color coding of light switch wires can be messy. So, using a multimeter is a great solution.
Keep in mind: During this method, supply the power to the light fixture. Also, the light fixture should be connected to the light switch wires.
Simple 6-Step Guide on How to Wire a Light Fixture with Two Black Wires
Now you know how to identify light fixture wires properly. So, we can start the light fixture wiring process.
Things You’ll Need
- Safety glasses
- Digital multimeter or voltage sensor
- Few wire nuts
- Screwdriver
- Electrical pliers
Step 1 – Cut Off the Power
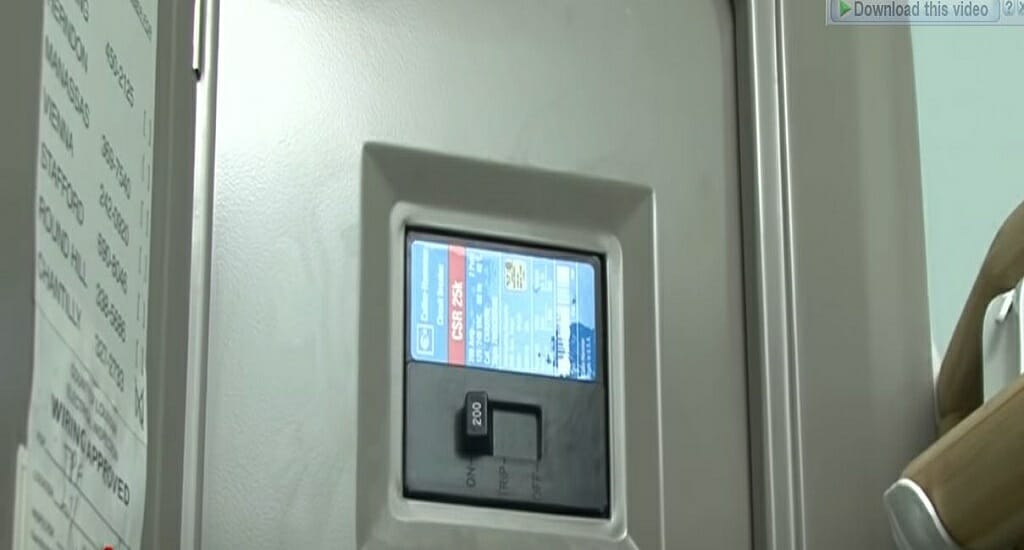
First and foremost, open the main panel and cut off the power to the light fixture that you are going to replace. Find the corresponding circuit breaker and switch OFF the breaker. Or switch OFF the main switch.
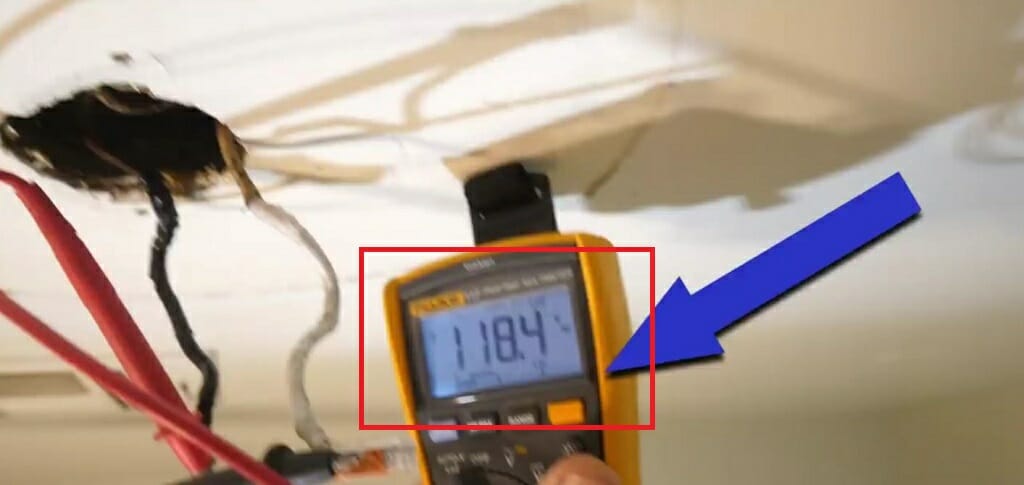
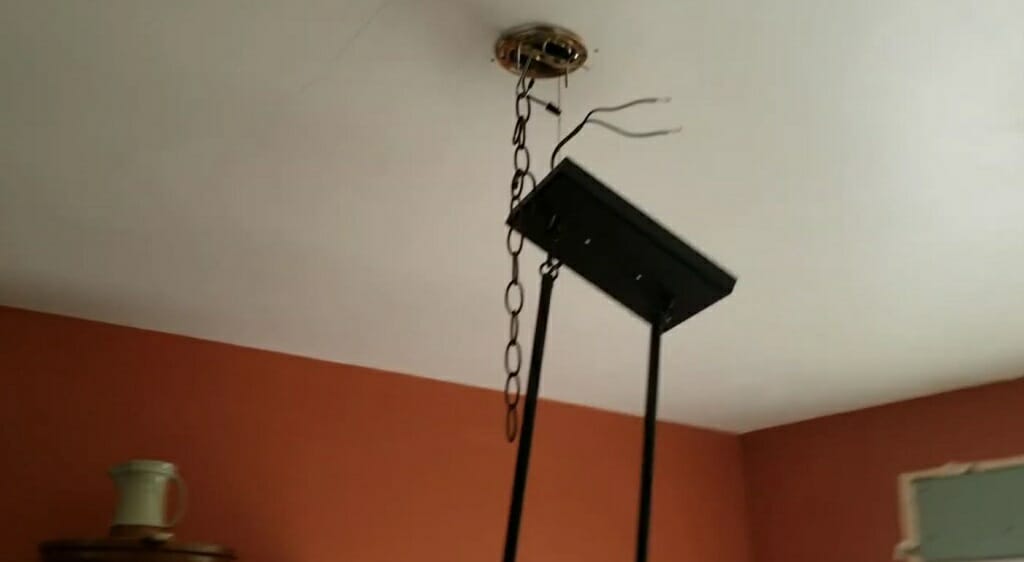
Step 2 – Take a Picture
Then, remove the outer housing of the light fixture to expose the wiring. Don’t remove the old light fixture yet. Take a picture of the exposed wiring with the light fixture. It will come in handy when replacing the new light fixture. (1)
Step 3 – Identify the Wires
Next, follow any given methods from the previous section to identify the light fixture wires.
I would recommend using both methods for better safety. It will help you identify the wires correctly. If needed label the hot or neutral wire using any kind of electrical tape. (2)
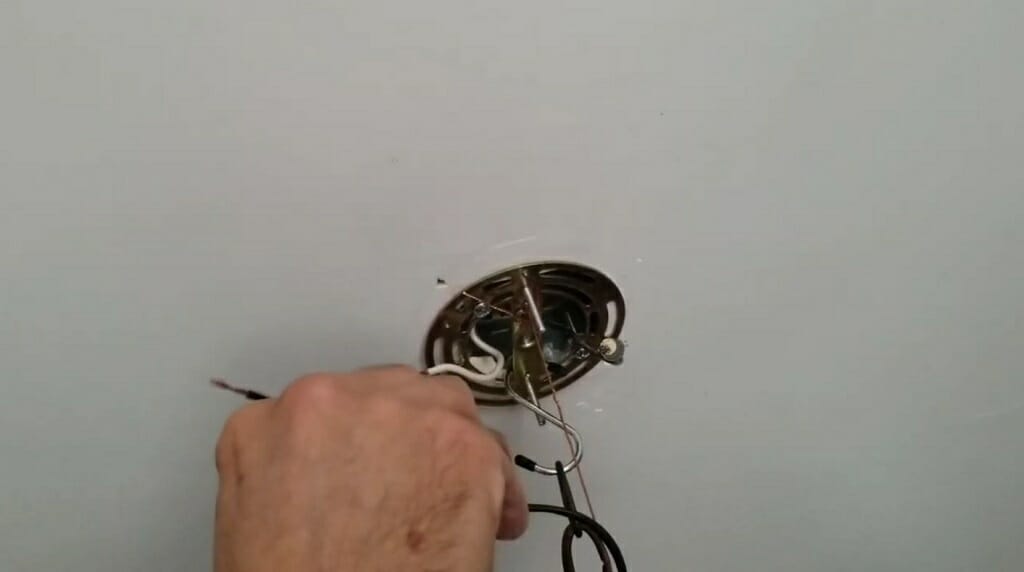
Step 4 – Remove the Old Light Fixture
Now, loosen the connected wires using the screwdriver and the plier. Then, remove the light fixture carefully.
Tip: Some wire connections might have wire nuts. If so, remove them smoothly.
Step 5 – Install the New Light Fixture
Then, take the new light fixture and connect its hot wire to the black wire that comes from the light switch. Connect the light fixture’s neutral wire to the white wire of the light switch.

Use wire nuts to tighten the wires. After that, install the light fixture on the ceiling.
Step 6 – Check the Light Fixture
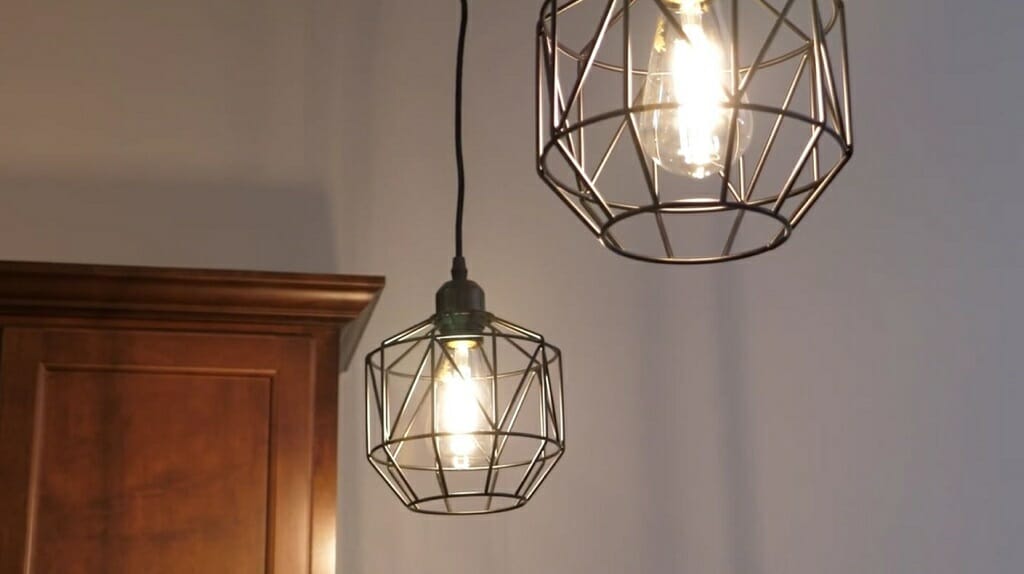
Supply the power to the light fixture. Then, turn ON the light switch to check the light fixture.
Wrapping Up
Before replacing or repairing the light fixture, you should identify the wires correctly. Wrong wiring setup can lead to electrocution or damaged electrical appliances.
So, try to identify the wires by closely inspecting them. If you are not getting any good results from it, use a multimeter or voltage sensor and follow the above-given steps. Also, if you are having trouble executing the above process, don’t hesitate to hire an electrician.
Take a look at some of our related articles below.
- What gauge wire for light fixture
- How to tell positive and negative wires on light fixture
- How to connect ground wires together
References
(1) housing – https://www.usnews.com/news/best-states/slideshows/10-states-with-the-most-affordable-housing
(2) electrical tape – https://www.bobvila.com/articles/best-electrical-tape/
Video References
Moore Approved
Basic Works
Electronics&Computers
Sparky Channel
Mja Handyman