9 min read
How to Wire a 220 Well Pressure Switch (6-Step Guide)
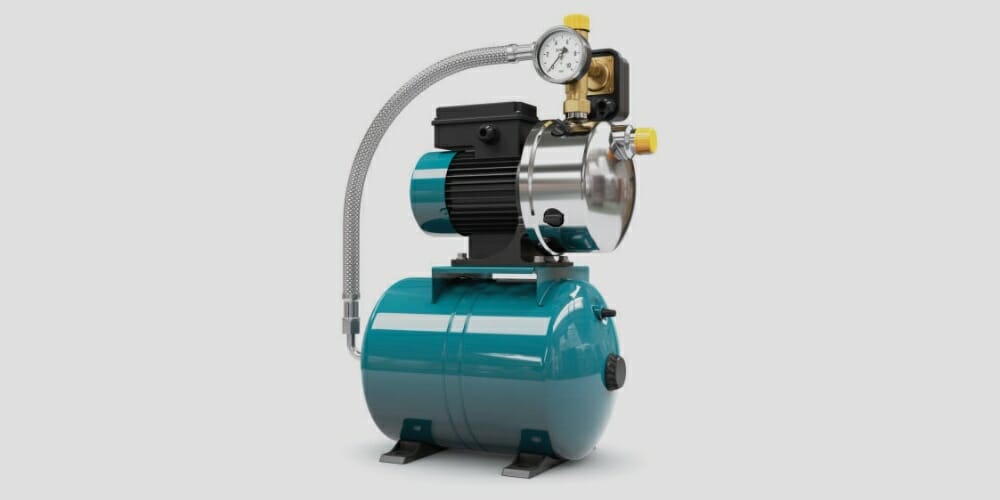
Having a pressure switch can be beneficial in many ways. It is a must-have safety mechanism for your water pump. Similarly, a pump pressure switch will save a considerable amount of water and electricity too. So, that is why today, I’m planning to discuss one of the exciting topics related to well pumps.
How do you wire a 220 well pressure switch?
In general, follow these steps for pressure switch wiring.
- First, cut off the power to the pump. Then, locate and open the pressure switch cover.
- Next, connect the ground wires of the motor and the electrical panel to the bottom terminals.
- Now, connect the remaining two wires of the motor to the middle terminals.
- Connect the electrical panel’s remaining two wires to the two terminals on the edge of the switch.
- Finally, secure the switch box cover.
That’s it! Now, your new pressure switch is ready for use.
Is It Possible to Run a Well Pump without a Pressure Control Switch?
Yes, the well pump will work without a pressure switch. However, it is not the best situation when we consider the consequences. But, you might ask why? Let me explain.
Notifying the well pump when to turn off and on is the primary objective of a pressure switch. This process goes according to the PSI value of the water. Most household pressure switches are designed to let the water flow at 30 PSI, and when the pressure reaches 50 PSI, the water flow stops immediately. You can easily change the PSI range according to your needs.
A pressure switch prevents the danger of burning out your pump. At the same time, it won’t allow water and electricity to be wasted.
6-Step Guide for Pressure Switch Wiring?
You now have a good understanding of the importance of the pump pressure switch. However, these pump pressure control switches might start to malfunction. Sometimes, it might not work at all. For that kind of situation, you need proper knowledge of pressure switch wiring. So, in this section, you’ll learn how to wire a 220-well pressure switch.
Tools Needed
- A Screwdriver
- Wire stripper
- Few crimps
- Pillars
- An electric tester (optional)
Step 1 – Cut off the Power
First and foremost, turn off the pump’s main power supply. To do that, locate the circuit breaker that provides power to the pump and switch off the breaker. Make sure there are no live wires. After turning off the power, remember to check the wires with an electric tester.
Keep in mind: Attempting to do plumbing work with live wires can be extremely dangerous.
Step 2 – Locate the Pump Pressure Switch
After ensuring the power is off, you’ll have to find the switch box on your water pump. Depending on the type of the pump, you can identify two different switch boxes; 2-wire machines and 3-wire machines.
2-Wire Machines
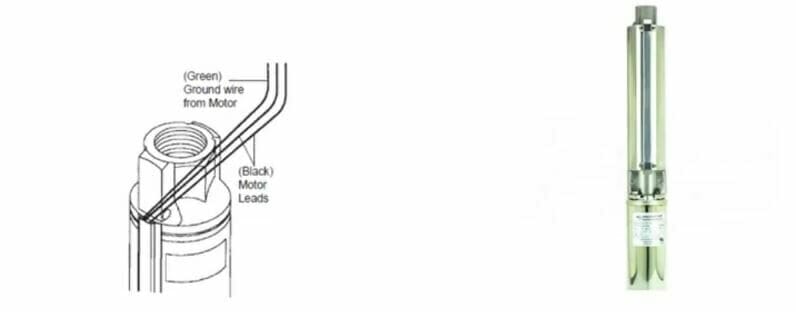
When it comes to a 2-wire well pump, all the starting components are inside the pump. So, the switch box is located inside the bottom of the well pump. 2-wire pumps have two black wires plus the earth wire. That means, a total of three pressure switch wires.
Tip: Here, starting components refer to start relays, capacitors, etc.
3-Wire Machines
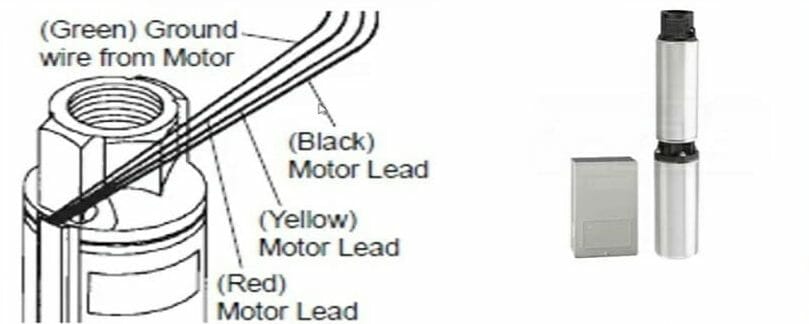
Compared to a 2-wire machine, a 3-wire one has a separate pump control box. You can install the control box in an outside location. 3-wire pumps have three wires (black, red, and yellow) plus the earth wire.
Keep in mind: For this demonstration, we are going to use a 2-wire well pump. Remember this when you are following the pump wiring process.
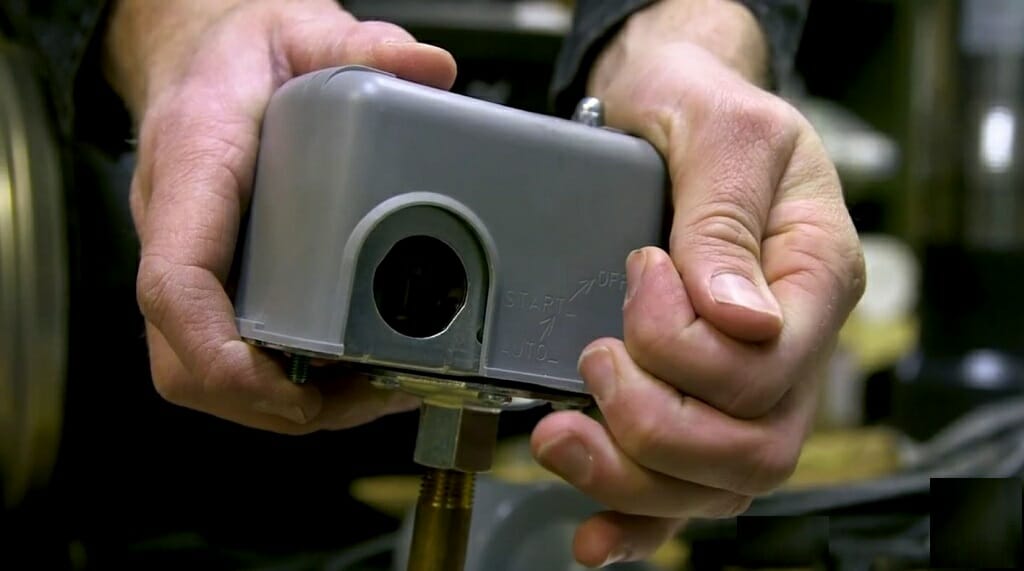
Step 3 – Open the Switch Box
Next, use the screwdriver to loosen any screws holding the switch box case. Then, remove the switch box case.
Step 4 – Remove the Old Pressure Switch
Now it’s time to remove the old pressure switch. But first, take a photo before disconnecting the wires from the old switch. It will help when you connect the new pressure switch. Then, carefully loosen the terminal screws and take out the wires. Next, pull out the old switch.
Keep in mind: Before removing the old switch, you’ll have to run the closest faucet. By doing this, you can remove the remaining water from the tank.
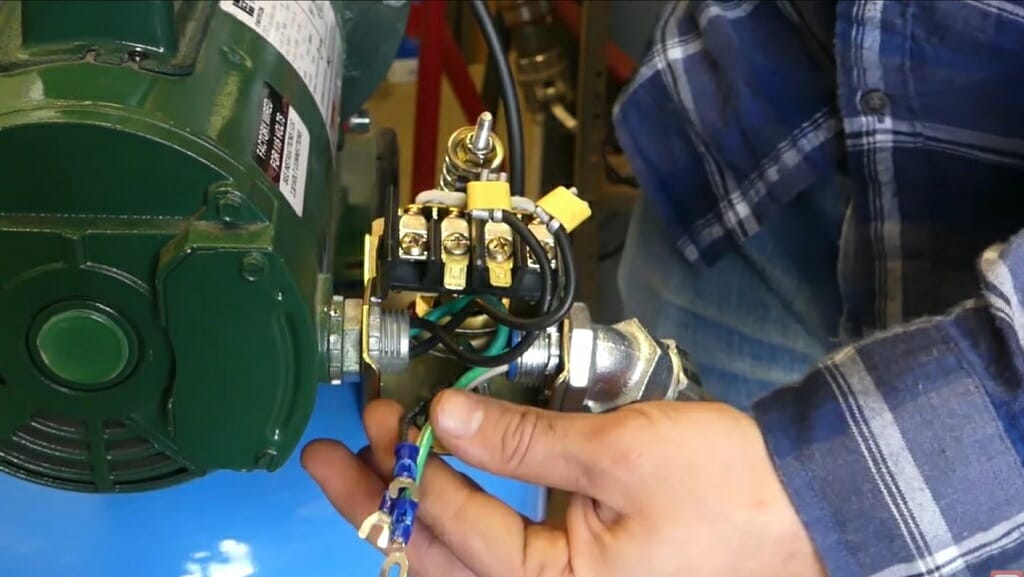
Step 5 – Secure the New Well Pump Pressure Switch
Connect the new pressure switch to the well pump and start the wiring process.
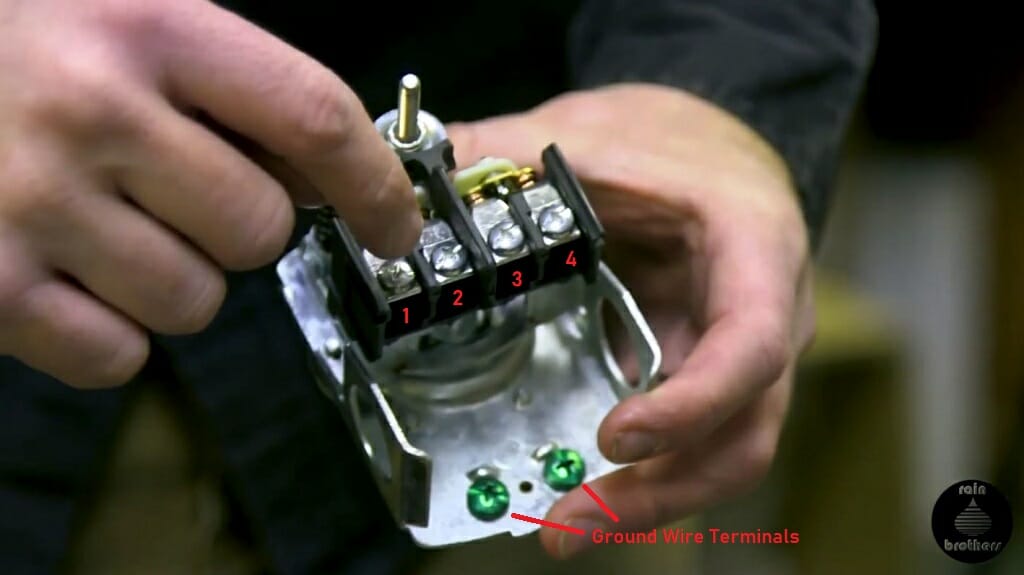
As you already know, there are four terminals on the top of the pressure switch, and you can find two screws on the bottom of the pressure switch. The bottom two screws are for the earth wires.
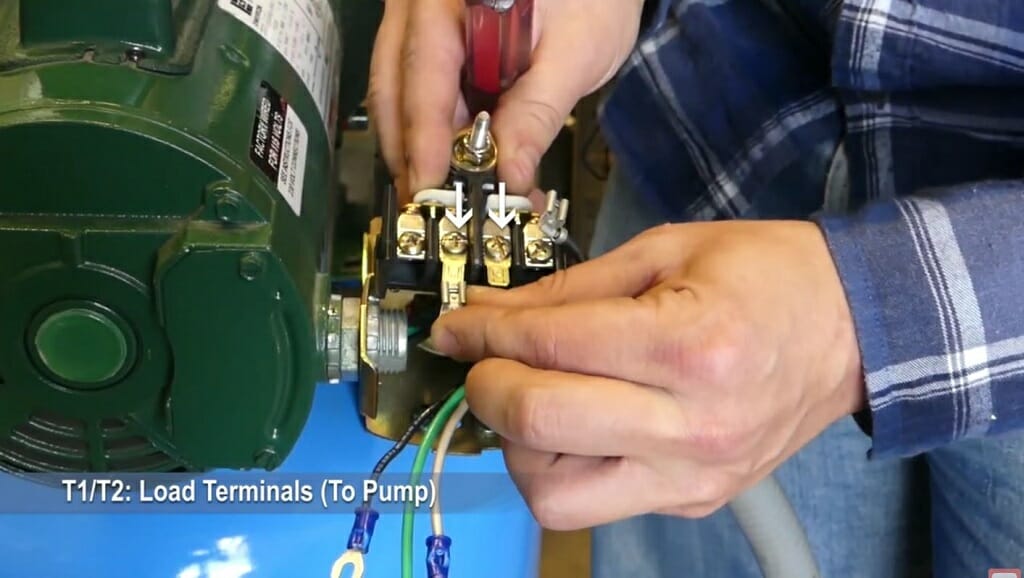
Connect the two wires coming from the motor to the middle terminals (2 and 3).
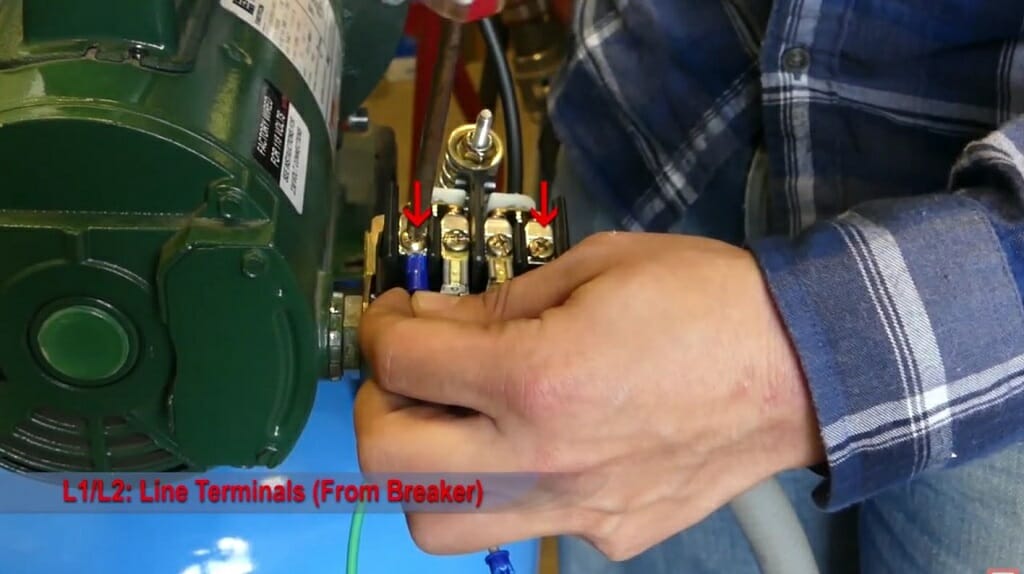
Then connect the electrical panel’s two wires to the terminals that are located at the edge. Try to follow the wire setup shown in the above image.
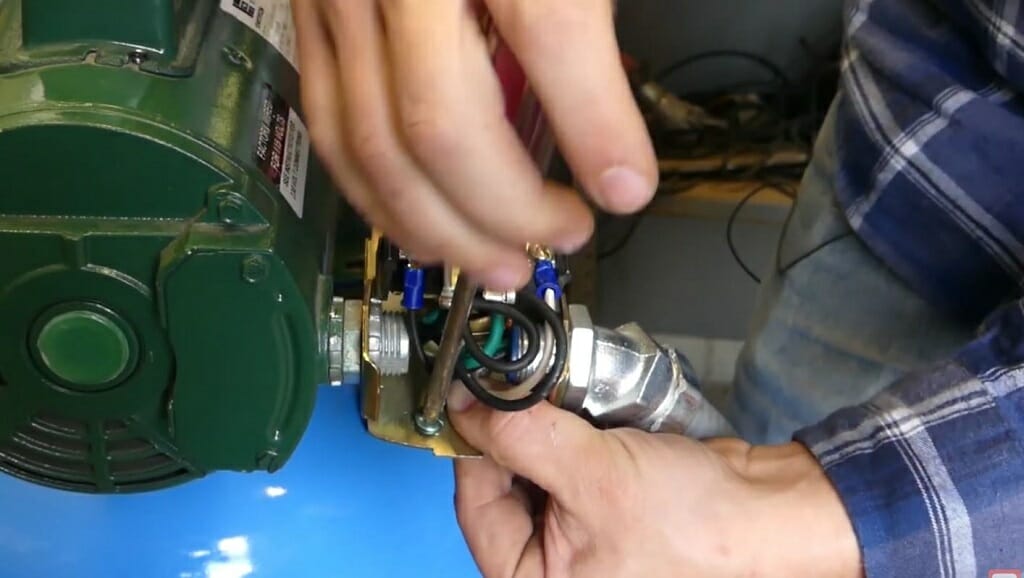
Next, connect the remaining earth wires (green) to the bottom screws. Don’t forget to use the crimps if necessary.
Tip: If needed, use the wire stripper to strip the wires.
Step 6 – Secure the Pressure Switch Box
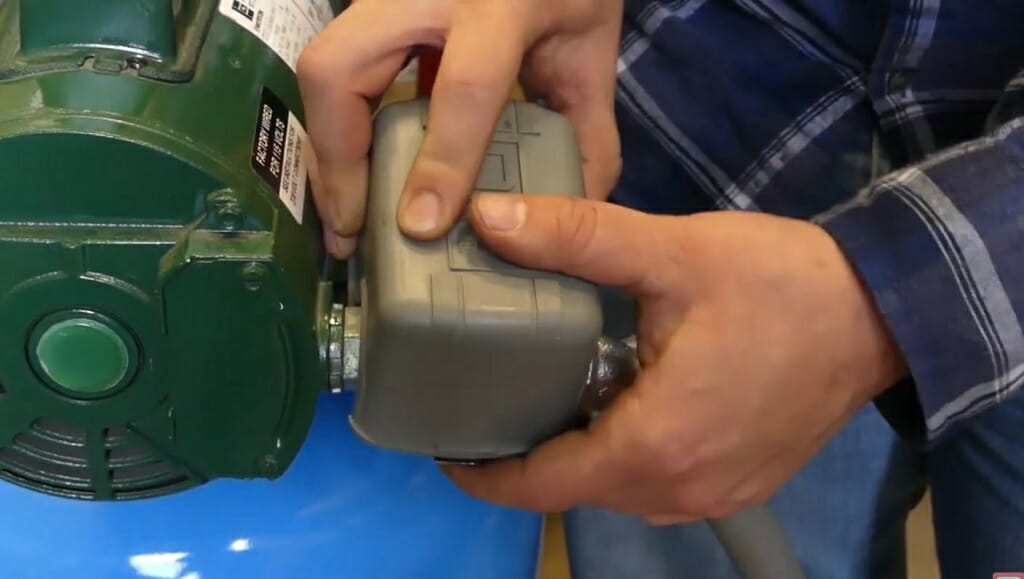
Finally, secure the switch box case properly. Use the screwdriver to tighten the screws.
Frequently Asked Questions
Do I Have to Ground My Well Pump?
What Wire Size Should I Use for 220 Well Pump?
If you are using a well pump at your home, use wires that have an AWG range between #6 and #14. For commercial use, 500 MCM is a good option too.
Is There a Difference Between 2-Wire and 3-Wire Well Pumps?
Yes, there are quite a few differences between 2-wire and 3-wire pumps. For starters, a 2-wire pump switch box is located at the bottom of the pump. Also, these pumps come with two hot wires and one earth wire.
However, 3-wire pumps have a separated pump control box, three hot wires, and one earth wire.
Can I Run My Well Pump Without the Pump Control Box?
Yes, you can. If you use a 2-wire well pump, you don’t need any control boxes. All the necessary components are inside the pump, including the switch box.
How Can I Reset the Well Pump Pressure Switch?
If you are using a standard well pump, you can find a lever arm that is connected to the switch box. Rotate it upward. You’ll hear the starting sound of the pump. Hold the lever until the pressure is up to 30 pounds. Then release it. Now the water should flow.
Wrapping Up
Whether you are using a well pump at your home or workplace, having a pump pressure control switch is a must. It could prevent lots of disasters. So, don’t take any unnecessary risks. If you are dealing with a broken switch, remember to replace it as soon as possible.
Take a look at some of our related articles below.
- How to test a furnace pressure switch with a multimeter
- How to test a car ground wire with a multimeter
- How to test power window switch with multimeter
References
(1) electrocution – https://www.sciencedirect.com/topics/medicine-and-dentistry/electrocution
(2) fire – https://science.howstuffworks.com/environmental/
earth/geophysics/fire1.htm
Video References
R.C. Worst & Co., Inc.
Rain Brothers LLC
Power Equipment Direct