13 min read
How to Run a Fuel Pump Directly to a Battery (3 Steps)
Running a fuel pump directly to a battery is not complicated if you can identify the relay pin sockets and have a small piece of wire, I will teach you how.
Quick Summary: To run a fuel pump directly to a battery, remove the fuel pump relay and directly connect the sockets for relay pins #87 and #30 using a small piece of around 12-gauge wire with connectors on its ends.
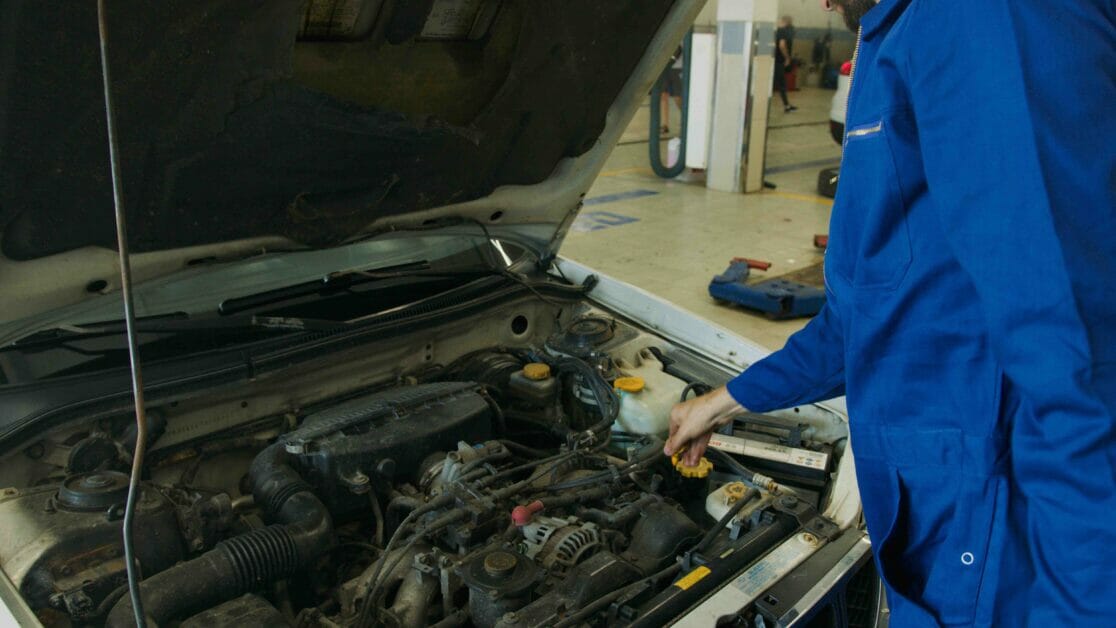
This method is called ‘Fuel Pump Relay Bypassing,’ as it bypasses the relay so that the fuel pump connects to the battery directly. I recommend only implementing this temporarily and revert to a relay. This article also covers the benefits of making such a direct connection, what to consider, and how to revert by reconnecting the relay.
Running a Fuel Pump Directly to a Battery
You can run a fuel pump directly to a battery in three ways: part of the way (in 2 ways) and all the way.
The first one, called ‘one-wire relay bypass,’ is easier, as it only requires attaching a small piece of the wire part of the way. You work inside the fuse box, so you don’t touch the fuel pump. It’s a quick and safe method, and you can easily revert it. I will show how to do this in the next section below.
Alternatives
The alternative is to wire the fuel pump directly by wiring from the fuel pump to the battery.
It would require removing and modifying the fuel pump, which is best avoided. You then connect a cable directly from the pump to the battery’s positive terminal. You should already have a ground connection from the battery’s negative terminal to a ground point to complete the circuit.
As you can imagine, this would require a very long cable stretch. Also, it’s best done by a professional because of the potential fire risk involved if wired incorrectly or unsafely. You still need a way to control the connection, as you don’t always want the fuel pump running.
A third way is a mix of the above two. You can remove or cut the fuel pump’s hot signal wire to the relay and extend that to the battery’s positive terminal. It’s another method of bypassing without touching the fuel pump, but it still requires a long cable.
Summary of Options
If possible, apply the first method instead of trying the others. Here’s a summary of your 3 options:
- Method 1 (one-wire relay bypass) – easiest, quickest, and safest. It requires only a small piece of wire, and you don’t need to touch the fuel pump.
- Method 2 (all the way) – best avoided.
- Method 3 (part of the way like Method 1) – an alternative option if Method 1 is not possible. It still requires a long cable like Method 2.
One-Wire Relay Bypass
Wire Connection
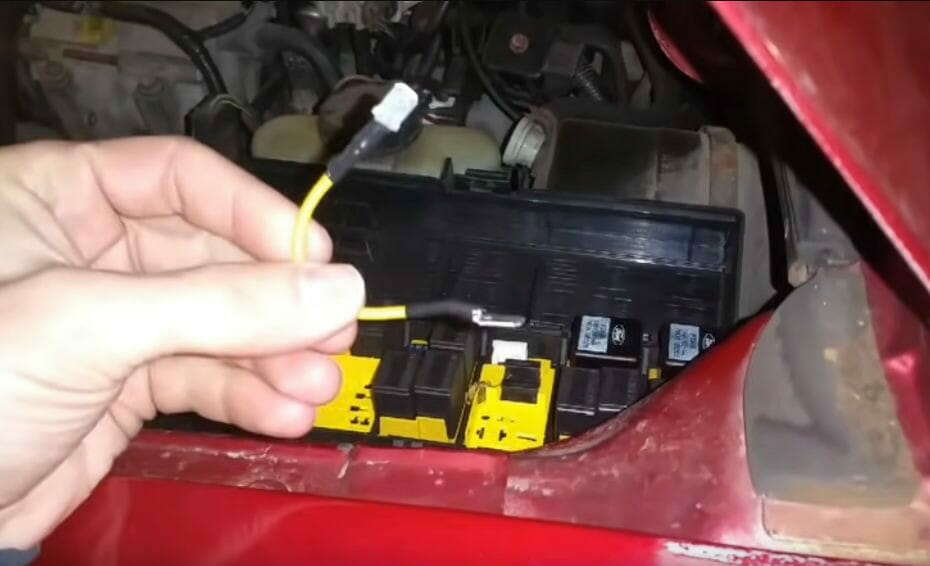
The one-wire relay bypass is achieved by directly connecting the sockets for pins #87 and #30 of the relay (after removing the fuel pump relay) using a small piece of wire with connectors on both ends.
As you can see in the relay pin diagram, only by directly connecting pins 87 and 30 will the switch be permanently closed and thus make the connection direct.

Pin #30 is connected directly to the battery, and Pin #87 connects to the fuel pump.
Requirement
One small piece of wire with connectors on both ends.
You can see in the picture below that the wire connectors are about the same thickness as the relay pins. It’s important to have connectors with the same thickness to ensure they fit snugly into the relay pin sockets.
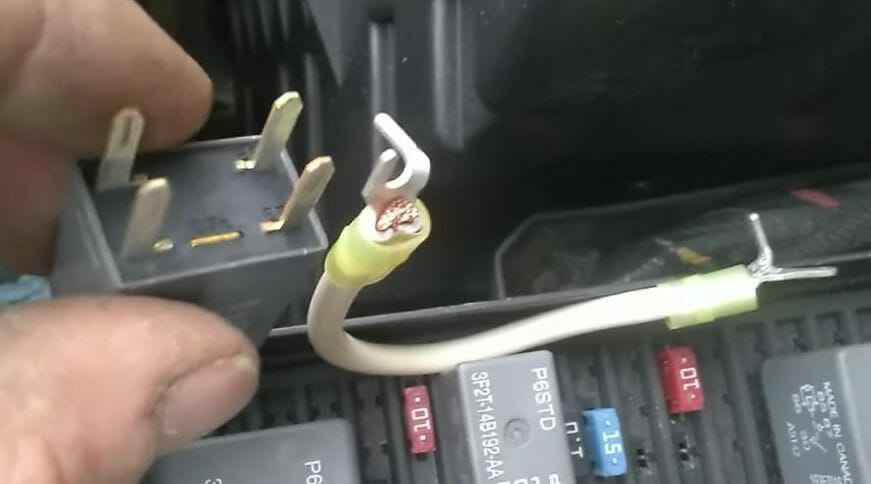
It’s safe to use thick wire. Don’t use a thin wire, though. You will need a thicker wire if upgrading to a larger fuel pump. A 12-gauge wire should be sufficient in most cases.
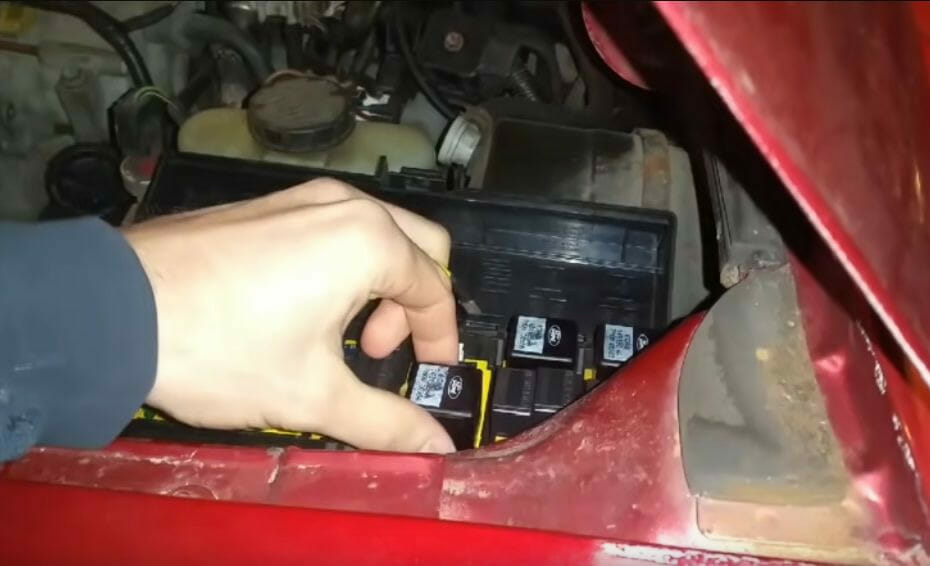
Step 1: Remove the Relay
Remove the fuel pump relay after identifying the right one, of course. Don’t remove any other relay or other component from the fuse box.
Step 2: Connect the Wire
Connect one end of the small piece of wire to the terminal that gives a constant 12V from the battery (#87) and the other to give power to the PCM (#30). See the pictures below. When connected to both, you might hear a small clicking sound of the fuel pump priming.
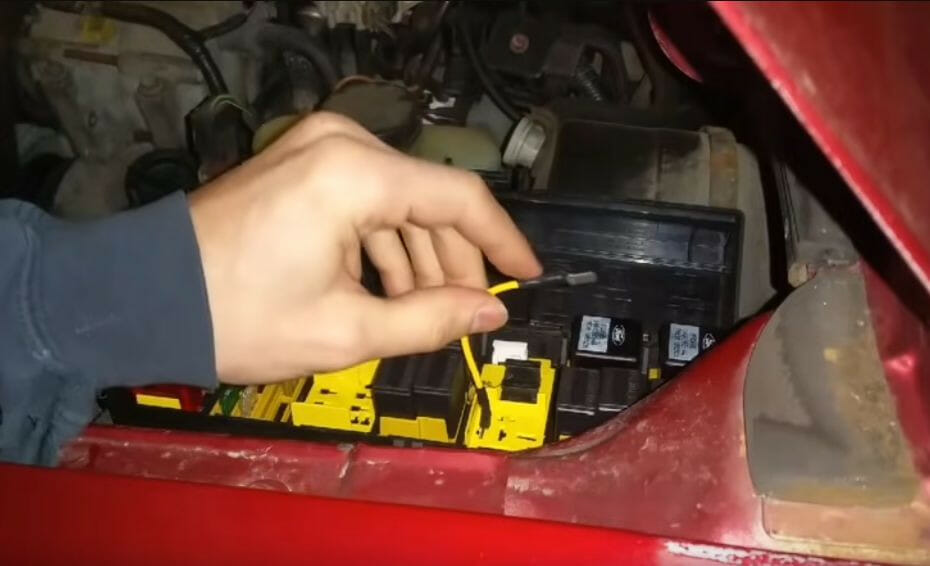

Step 3: Testing
When testing the direct connection, connect the ground wire to the ground pin socket for the relay and the red probe to the battery’s positive terminal. A reading of about 12.4-12.5V indicates the connection and voltage are fine.

Why You Might Want to Run a Fuel Pump Directly to a Battery
Running a fuel pump directly to a battery gives several benefits, if possible, but I don’t recommend doing it permanently.
Only some fuel pumps can run directly from a battery; even if yours can, it’s only a good idea to fix certain things temporarily. It’s not a long-term solution. The potential short-term gains are:
- Improved Performance – Wiring directly to a battery can bypass a damaged wire until you replace the wire.
- Increased pressure – You can raise the fuel pressure by applying a higher and more stable voltage to the fuel pump, which can also improve fuel economy.
- Better Lighting – By wiring the fuel pump directly to the battery, the higher amperage reduces the chances of the light dimming and flickering.
- More Consistent Flow – A direct battery connection ensures more consistent gasoline flow to the engine. It minimizes performance fluctuations and improves overall reliability.
- Preventing Corrosion – Corrosion is a common problem on fuel pump terminals, as it is also on battery terminals. Wiring directly to the battery can help prevent it. It is especially worthwhile if you live in a highly humid environment.
- Cost Savings – Wiring a fuel pump directly to the battery bypasses the fuel pump relay to reduce its wear and tear. You can expect cost savings in the long term by not having to replace the relay or wire as often.
High-Power Fuel Pumps
A high-power fuel pump is a major draw on the vehicle’s ECU besides the fuel injection computer.
“Fuel injection systems require a continuous, high-pressure fuel source that is much more powerful than stock.” (White, 2009, p. 141) It is typically 20 amps and 30 amps in high-performance pumps. This is another justification for wiring the fuel pump directly via a switch with a high-current relay. The relay controlled by the fuel injection computer can allow the computer to switch off the fuel pump in case the engine stalls.
So, if you have a high-power fuel pump, it is yet another justification for wiring directly to the battery.
This would increase the fuel pump’s capacity while the ECU’s pump output is wired to trigger a heavy-duty relay in the wire instead of energizing the fuel pump directly. (Hartman, 2004, p. 166)
Drawbacks and the Importance of Reverting
Despite the above benefits, running the fuel pump directly to the battery will shorten its lifespan. Fuel pumps are not designed to operate this way. Due to higher voltage (or incorrect wiring), there is also a risk of the fuel pump burning out, so if you rewired it recently, recheck the wiring and monitor the temperature on the fuel pump.
Considerations when Rewiring the Fuel Pump
There are some important considerations to make when rewiring the fuel pump.
Consider them before directly wiring the fuel pump to the battery. Four important ones are:
- Fuel pump compatibility
- Checking the fuel pressure
- Using a heavy gauge wire
- Using a wiring harness
- Testing before driving
Fuel Pump Compatibility
If its voltage is compatible, you can only wire a fuel pump to the battery.
Usually, this is not a problem because most fuel pumps operate on 12 volts, but it’s best to be sure before changing the wiring scheme. Otherwise, replacing the fuel pump with a compatible one would be best before wiring it directly to the battery.
Checking the Fuel Pressure
The pressure should neither be too low nor too high.
Low pressure makes the fuel pump ineffective, whereas too high pressure can damage the engine. Although directly wiring the fuel pump to the battery can improve pressure by raising it, ensure it’s not too high. Refer to your vehicle’s owner manual for the manufacturer’s recommended range.
Using a Heavy Gauge Wire
The wire connecting the fuel pump to the relay must have sufficient thickness.
If it’s too thin, the current could cause it to overheat, creating a fire risk. Refer to your vehicle’s owner’s manual to know the right gauge. It should be thick enough to handle the electrical load and ensure the fuel pump gets sufficient power without experiencing significant voltage drop and overheating.
Using a Wiring Harness
A wire harness helps to secure the wires to the vehicle’s chassis. Loose wiring could come loose at the terminals, preventing the circuit from functioning.

Testing before Driving
Rechecking the wiring and testing before driving is essential before driving on the roads. You don’t want to be left stranded somewhere due to faulty wiring.
Reconnecting the Fuel Pump Relay
As I said, connecting the fuel pump directly to the battery should only be done temporarily for various benefits.
Eventually, it would be best to reconnect the fuel pump relay to protect it from wearing out quickly. It performs an important function, which is to control the electrical supply to the fuel pump. So, in this section, I will show you how to reconnect the fuel pump relay.
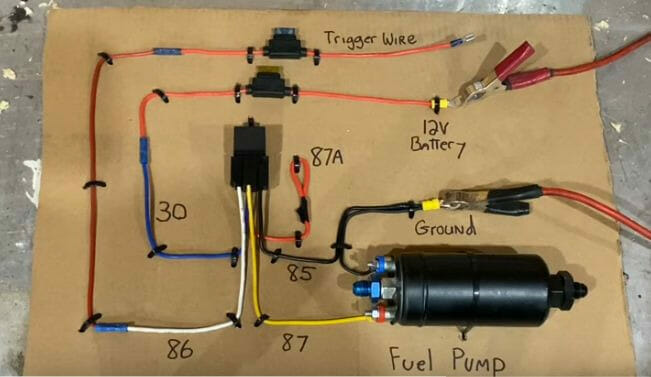
Wiring Diagram
We will follow this wiring diagram:

Here’s another view of the wiring, which you might find helpful:
Requirements
Besides the wires, you will need a 40-amp 4-pin relay if the reason for bypassing was a damaged relay. You can use a 5-pin one instead, but if you do, ignore the 5th pin for connection 87A.
Step 1: Trim the Cables
Cut and trim the cables to the required length to run from the fuel pump to the battery.
Step 2: Fuse Connection
Place the fuse inside the holder in an appropriate location in the vehicle.
The wire from the fuse hold will go to the battery terminal’s bottom end.
Step 3: Fuel Relay Connection
Connect another piece of wire from the fuse holder to the fuel relay.
Step 4: Battery Connection
Connect one end of the relay cable to the battery’s positive terminal and the other to the fuel pump.
Step 5: Grounding
The remaining wire is for grounding the electronic system.
Step 6: Relay Pin Connections
Connect the 12V power relay as follows:
| Relay Pin | Connection |
| 85 | Ground connection |
| 86 | Hot signal or trigger wire |
| 87 | To fuel pump |
| 30 | To relay unit with 12V battery |
- Connect the ground connection to pin #85.
- Connect the hot signal wire to pin #86.
- Connect the wire from the fuel pump to pin #87.
- Connect the relay unit to pin #30.
The above configuration will allow a proper electronic distribution flow while the vehicle operates when connected.
Step 7: Routing and Rechecking
Try to simplify the wiring layout inside the vehicle so that you can easily work on it again in the future without confusion.
Rechecking the wiring is essential to ensure it is correct and avoid problems. Use a voltmeter to check if you are unsure.
References
Clean Corroded terminals. https://commons.wikimedia.org/wiki/File:Battery_Terminal_Corrision.jpg
Electric fuel pump relay kit. https://www.amazon.ca/ZOZOMOTORS-Electric-Waterproof-Universal-30247/dp/B0BGHL8FKV
Fuel gauge for increased pressure. https://www.wallpaperflare.com/search?wallpaper=fuel+gauge
Save your money. https://www.flickr.com/photos/194550014@N08/51718657547
Video References:
American Autowire
Blaser Builds
Singular Automotive
Wiring Rescue