8 min read
How to Wire a 110 Outlet (11 Steps)
Following this illustrated and beginner-friendly Tools Week guide, you can wire 110V outlets easily and quickly.
Here’s an outline of the main steps involved: To wire a 110 outlet, connect the wires as follows:
- Connect the bare copper wire to the ground terminal with a green screw.
- Connect the neutral (white) wire with a silver screw to the terminal.
- Connect the hot (black) wire to the terminal with a brass screw.
Read the Getting Started section first before following the procedure.
Getting Started
Requirements
You will need the following items to wire a 110 outlet:
- Main item: the outlet (aka receptacle)
- Tools: screwdriver, pliers, wire cutter, wire stripper, utility knife
- Instruments: tester
- Materials: electrical tape
Precautions
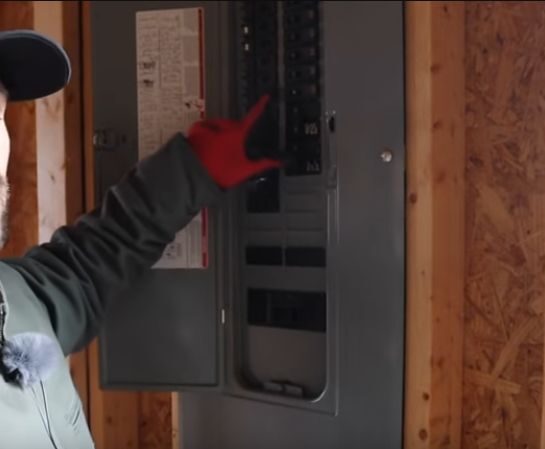
Turn the power off at the main panel before wiring the 110 outlet. Switch the circuit breaker controlling the circuit you will work on to the OFF position.
Assumptions
I assume the outlet’s box is attached to the wall, the right cable is inserted and sticking out, and the outlet is regular (non-GFCI/AFCI). Also, it’s the only or last outlet on the circuit, so there’s no further outlet downstream.
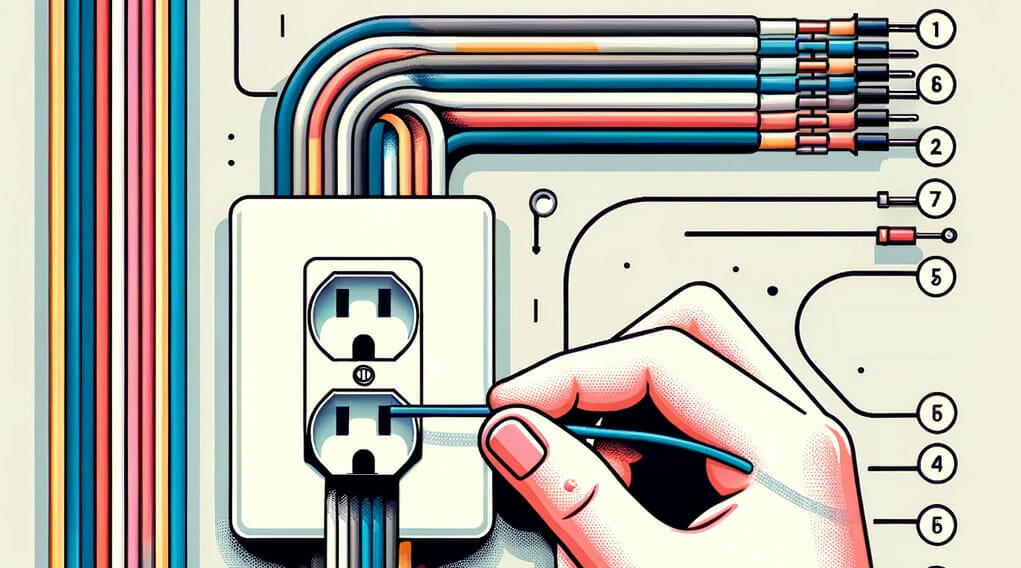
Cable, Wires, and Terminals
The cable to power the outlet will come from the power source, usually the main panel.
It should be a 2-wire cable, which has 3 wires inside. We will connect them (after forming hooks at their ends) directly to the terminals on the 110 outlet. The table below mentions what the 3 wires are for, according to the US system for domestic, single-phase AC circuits, and the terminals they connect.
| Wire | Type | Terminal Screw |
| Black wire | Hot (or live) | Brass |
| White wire | Neutral | Silver |
| Bare copper (or green) wire | Ground (or earth) | Green |

Wiring a Receptacle
We will follow these 11 steps to wire a 110 outlet:
- Step 1: Turn the Power Off
- Step 2: Strip the Wires
- Step 3: Form Hooks
- Step 4: Connect the Ground Wire
- Step 5: Connect the Neutral Wire
- Step 6: Connect the Hot Wire
- Step 7: Tuck the Wires Inside
- Step 8: Attach the Outlet
- Step 9: Attach the Faceplate
- Step 10: Turn On the Breaker
- Step 11: Test the Power
Step 1 is an essential safety measure. Steps 2-7 describe the wiring procedure, and steps 8-10 are for securing the 110 outlet and switching the power back on. Additionally, you should test the outlet before using it.
Step 1: Turn the Power Off
Turn the power off to the circuit you will work on.
Step 2: Strip the Cables and Wires
Strip the outer sheathing using a utility knife.
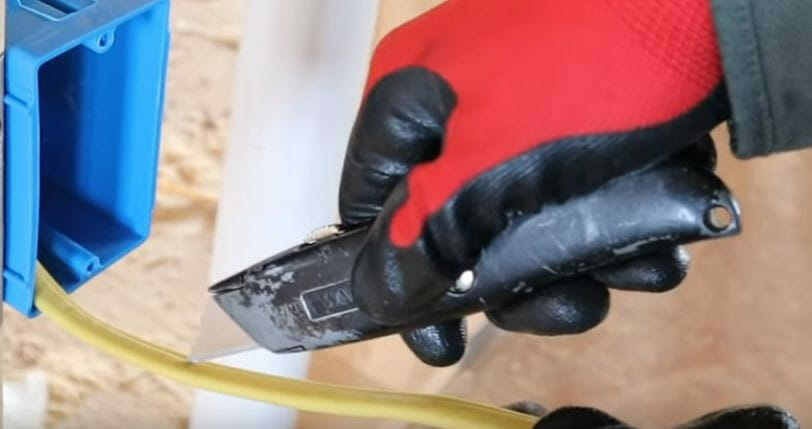
Be careful not to dig too deep. Peel it off to reveal the three wires inside.
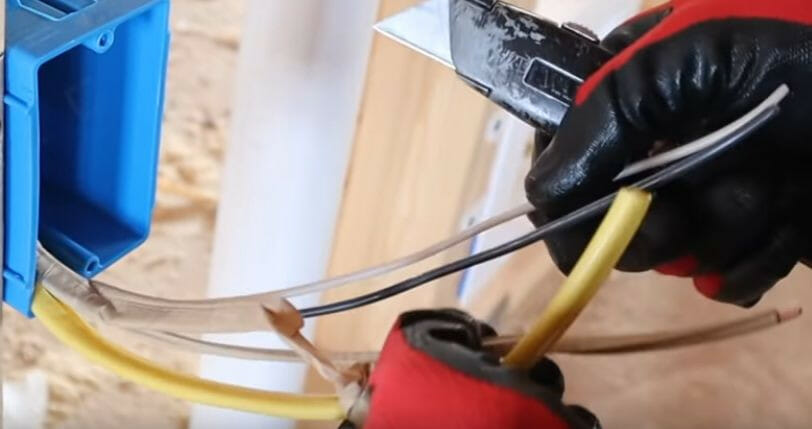
Strip the ends of each individual hot (black) and neutral (white) wire using a wire stripper. Remove approximately half or 5/8 of an inch of the insulation layer.
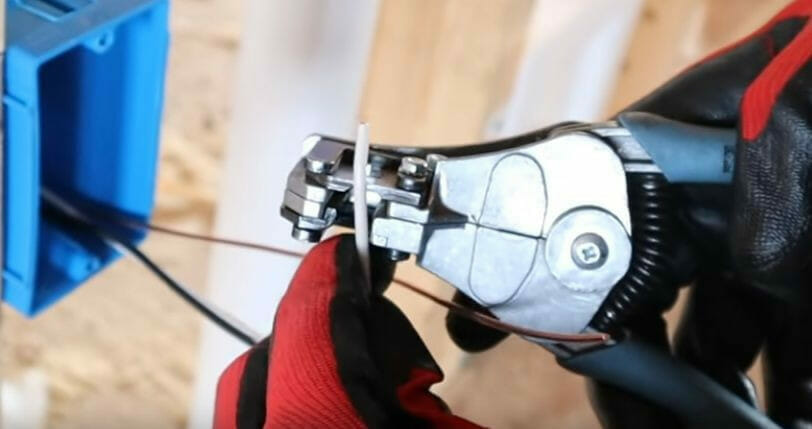
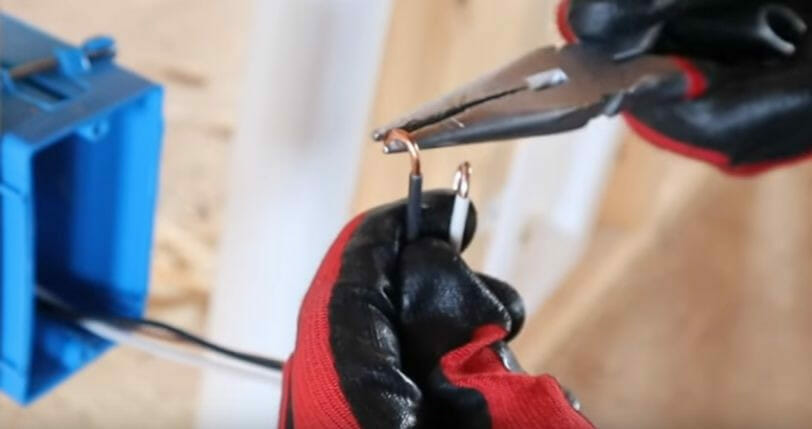
Step 3: Form Hooks
Form hooks at the end of each of the hot and neutral wires.
Some wire strippers have a loop bending hole to insert a wire end into which you bend 180° to form a hook. Form a hook at the end of the third piece of ground wire.
Step 4: Connect the Ground Wire
Connect the ground wire to the outlet’s terminal with a green screw.
Always put the loop around the terminal screw in a clockwise direction. Ensure the green screw is tight.
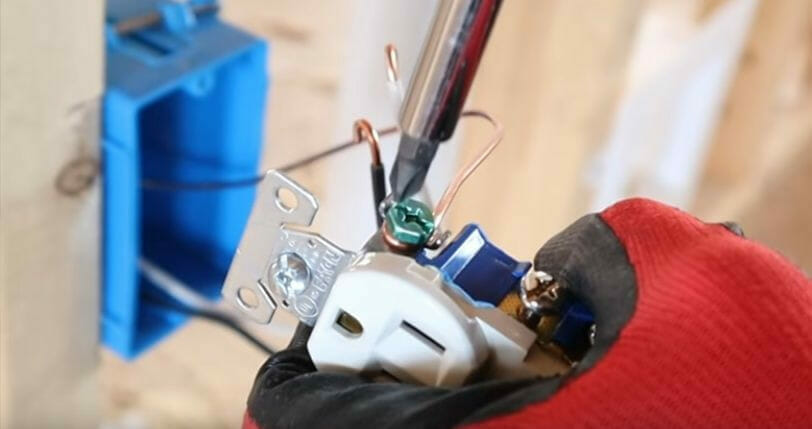
Step 5: Connect the Neutral Wire
Connect the neutral (white) wire to the silver screw.
It doesn’t matter which silver terminal you connect to because a hunt connects both. Ensure the connection is tight.
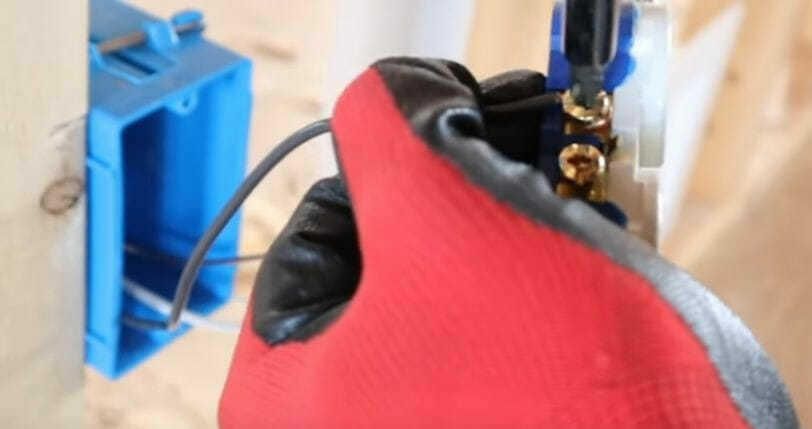
Step 6: Connect the Hot Wire
Similarly, connect the hot (black) wire to the brass screw. Ensure the connection is tight.
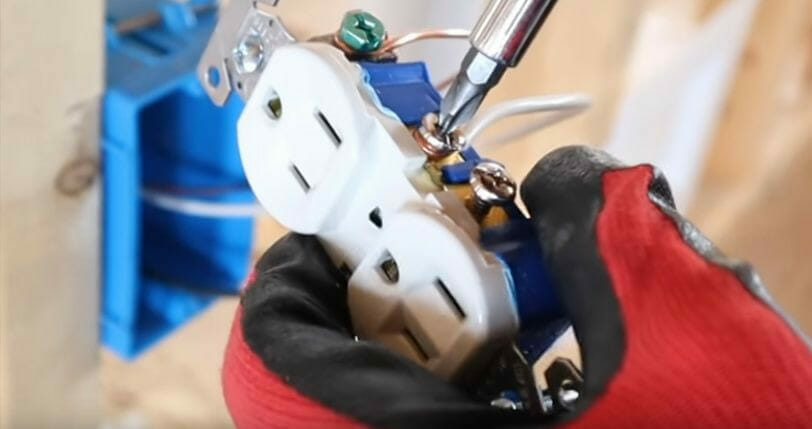
Step 7: Tuck the Wires
Tuck all the wires neatly inside the outlet’s box.
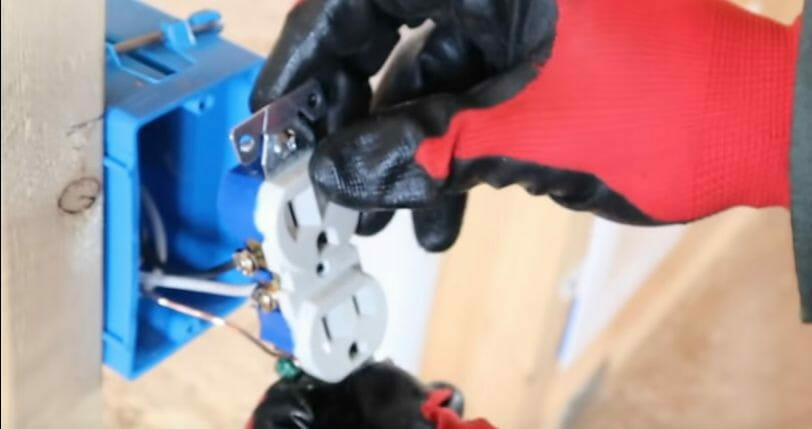
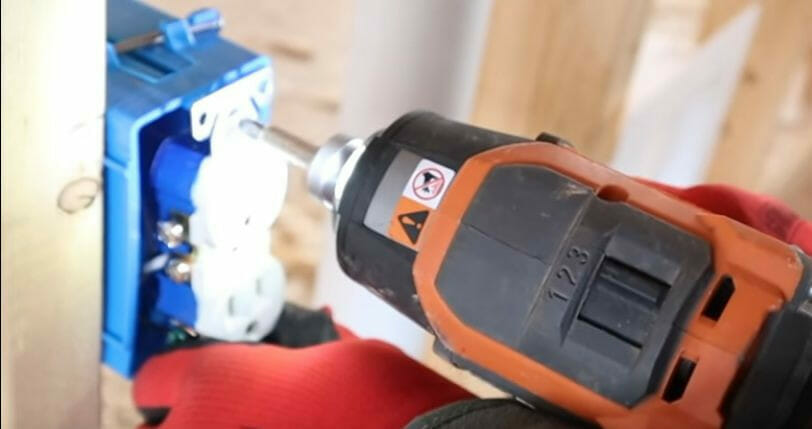
Step 8: Attach the Outlet
Attach the receptacle to the outlet’s box with the device screws.
Ensure the screws are tight and the receptacle is attached securely. The receptacle should automatically be straight if the box is straight because the holes for the device screws are vertically aligned.
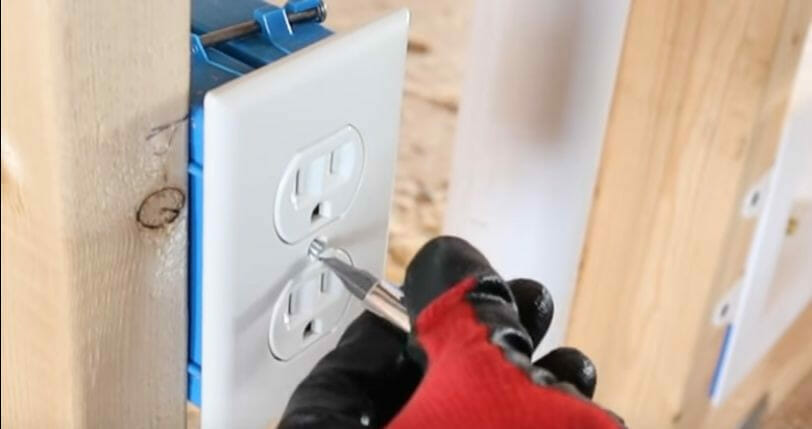
Step 9: Attach the Faceplate
Attach the faceplate and screw it on using a screwdriver.
Don’t use an impact driver on this screw. If possible, try to finish by aligning the groove in the screw’s head vertically or horizontally.
Step 10: Turn On the Breaker
Turning the breaker back on once the outlet is wired is safe.
Step 11: Test the Power
It’s a good idea to test the outlet before making it available. Use a tester or plug a simple appliance in to confirm.
FAQs
Alright, folks! Let’s break it down and answer some burning questions about wiring a 110 outlet. Home projects can be fun and empowering if you’ve got the know-how, so let’s dive in!
- Why do I need to turn off the power at the main panel?
Safety first! Turning off the power ensures you won’t be shocked when working with the wires. It’s always better to be safe than sorry. - Can I use a screwdriver for this?
While any screwdriver might work, I’d recommend a flat-head or Phillips-head screwdriver, depending on the screws on your outlet. And hey, having a quality toolset on hand is always a good idea. - What’s the deal with the wire colors?
Great question! In the US, black is typically hot, white is neutral, and bare copper or green is ground. Always stick to this color code to avoid confusion and hazards. - What if my wires aren’t long enough?
You’ll want to ensure the wires are long enough to connect securely to the outlet. If they’re too short, you might need to add a junction box and extend the wires using wire connectors. - How do I know if I did everything right?
Test the outlet with a simple appliance or tester once everything’s connected and you’ve turned the power back on. If it’s working, you’ve nailed it! If not, double-check your connections. - Any pro tips for a smooth project?
Absolutely! Keep your workspace clean, take your time, and always double-check your connections. And remember, if you ever feel unsure, don’t hesitate to call in a professional.
Remember, home improvement is all about taking things step by step and enjoying the process. With patience and the right tools, you’ll have that outlet wired up in no time! Keep rockin’ those DIY projects!
References
Website Resources:
- Self-grounding duplex outlet. https://www.homedepot.com/p/Leviton-20-Amp-Industrial-Grade-Heavy-Duty-Self-Grounding-Duplex-Outlet-White-R72-05352-0WS/100356852
Video References:
The Excellent Labororer