14 min read
How to Wire a Hot Water Heater (7 Steps & Tips)
Are you considering taking this upon yourself and wiring your hot water heater? Well, I’m here to help!
Quick-Step Summary: Wiring a hot water heater is easy.
- Step 1: Shutting off the electricity to your unit before beginning.
- Step 2: Locate the junction box.
- Step 3: Identify the wire cable from the walls
- Step 4: Strip wires.
- Step 5: Connect each wall wire to its matching lead in the junction box.
- Step 6: Tighten all connections.
- Step 7: Power on the breaker or fuse to test.
In this article, I’ll outline how to wire an electric hot water heater. So whether you’re installing a brand new unit or fixing an old one – I’ve got your back!
Let’s roll up our sleeves and start together.
Importance of Properly Wiring a Hot Water Heater
Let’s get serious for a moment. Imagine entering a cold shower on a winter morning because your hot water heater is malfunctioning. Not the best way to start the day, right?
That’s where properly wiring your hot water heater comes into play.
- Safety is paramount. Incorrect wiring can lead to electrical shocks or fires, which are dangerous and potentially life-threatening. It’s not just about getting that perfect warm shower; it’s about ensuring you and your family are safe.
- Efficiency Matters. When your water heater is wired up right, it works like a dream – smoothly and efficiently.
Energy Star states that an incorrectly wired heater might use up to 25% more energy. Let me put this into perspective with some numbers:
| Condition | Energy Usage | Lifespan |
|---|---|---|
| Properly Wired | Normal | Longer |
| Improperly Wired | +25% More Energy | Shorter |
- Lifespan Benefits: Properly wiring your water heater also extends its lifespan. Think about it: if it’s working harder than it needs to because of incorrect wiring, wear and tear will happen faster.
- Home Value Considerations: A properly wired and functioning water heater can add to the home’s value. Potential buyers view properly installed appliances as a sign of overall home care.
- Environmental Impact: Efficiently operating heaters consume less energy, reducing carbon footprint. Proper wiring supports sustainable and environmentally friendly living.
- Cost Savings: Besides saving on utility bills, you also avoid frequent maintenance or replacements. Reduced risks of damage to other home systems due to electrical issues.
- Peace of Mind: Less stress about potential hazards or sudden breakdowns.
Tools and Materials Needed
Before we get our hands dirty, gathering all the necessary tools and materials is essential.
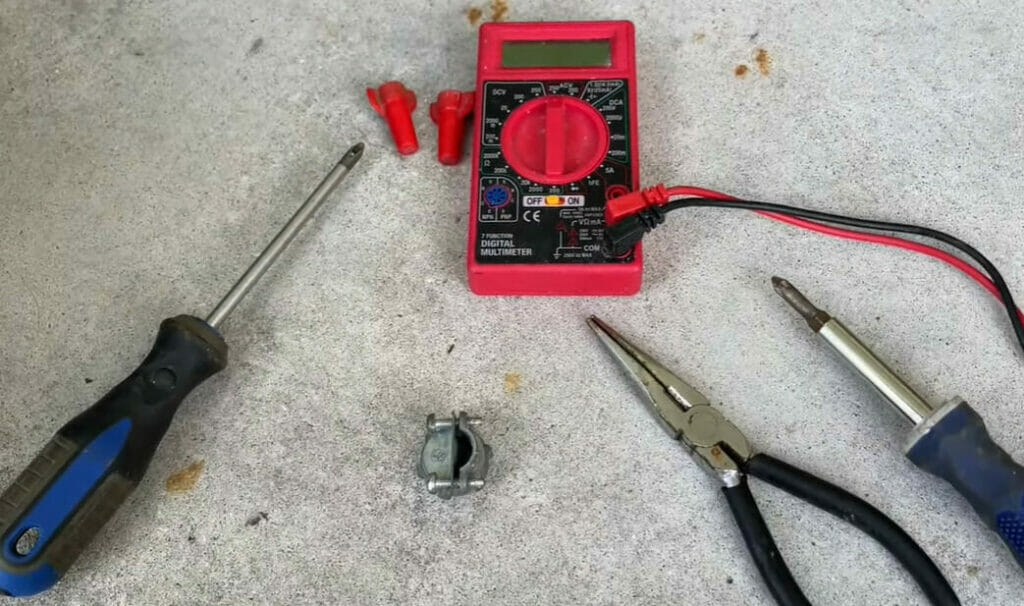
So, let’s make sure we’ve got everything we need.
| Item | Purpose |
|---|---|
| Multi-meter | This handy tool will help you check voltage levels and ensure everything is disconnected properly before you start working – don’t forget safety first! |
| Wrench Set | Different sizes may be needed depending upon your hot water heater model, so having an assortment can save time adjusting connections. |
| Circuit Tester | It’s always safer to double-check that electricity isn’t flowing where you’re about to work! |
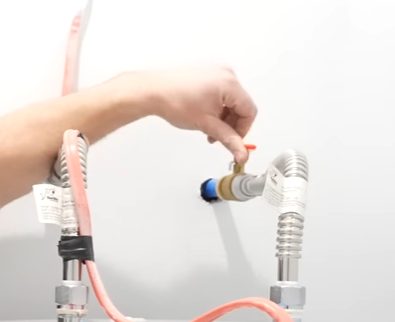
| Flexible Copper Connectors | These are crucial for hooking up your water supply. |
| Teflon Tape | It helps in creating watertight connections. |
| Electrical Wires | You’ll need black (hot) and white (neutral) 10/2 wires and a grounding wire. |
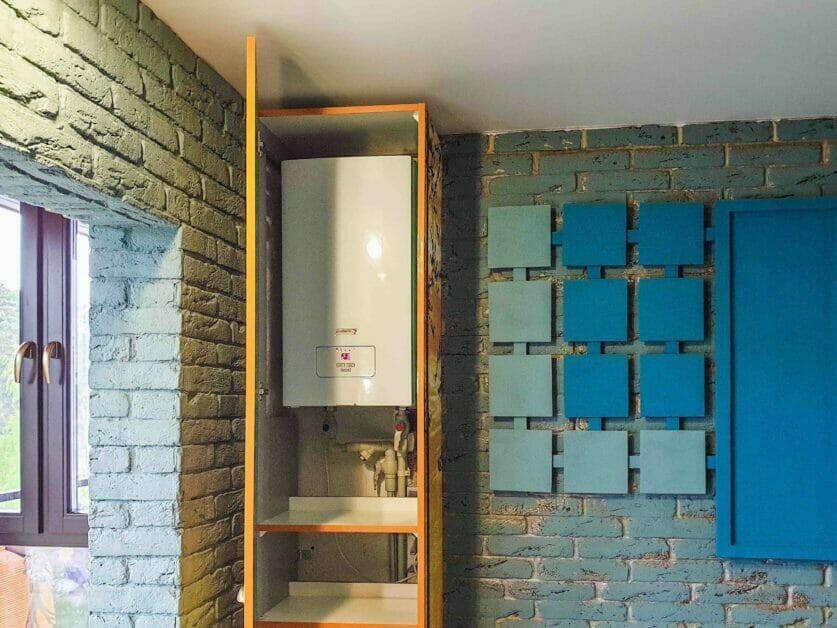
Understanding Basic Hot Water Heater Wiring
The first thing to know is that all heaters aren’t created equal. They come in different voltage options, specifically 120V and 240V.
Differences Between 120V and 240V Heaters
A typical American home uses an electrical power supply of 120 volts (for smaller appliances) and 240 volts (for larger ones like dryers or stoves). And yes, your hot water heater falls into this latter category.
Here’s how these two types compare:
| Type | Size | Capacity | Installation | Use | Pros | Cons |
|---|---|---|---|---|---|---|
| 120V Heater | Compact & tidy | Suited for single points | It’s pretty straightforward, almost DIY-friendly, | Ideal for spots like that kitchen sink or dishwasher | Perfect for lone rangers. Easy setup. | Might get overwhelmed in larger homes. |
| 240V Heater | A bit more on the hefty side | Ready for the whole house | Needs some expertise; a bit more hands-on | Catering to an entire home, from showers to dishwashers | Quick on the heat. Energy-smart. | Wiring can be a tad more intricate. |
Step-By-Step Guide on Wiring a Hot Water Heater
It might seem daunting at first, but I assure you that with the right tools and patience, it’s something you can accomplish.
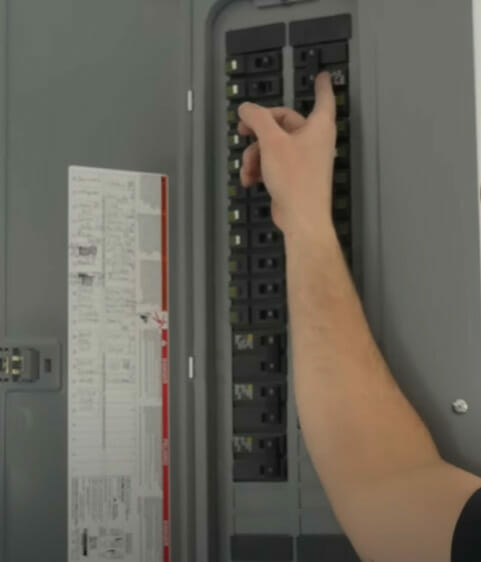
Step 1: Safety First
- Before we start, remember that safety is paramount. Always shut off any electricity running to your unit before starting work.
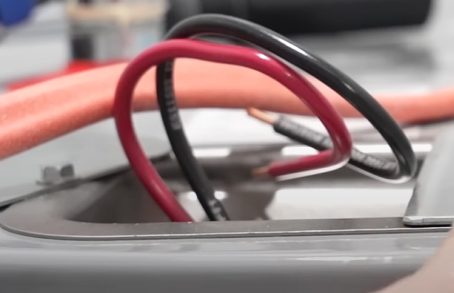
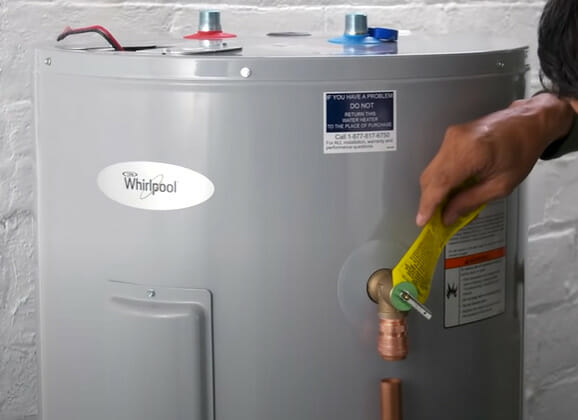
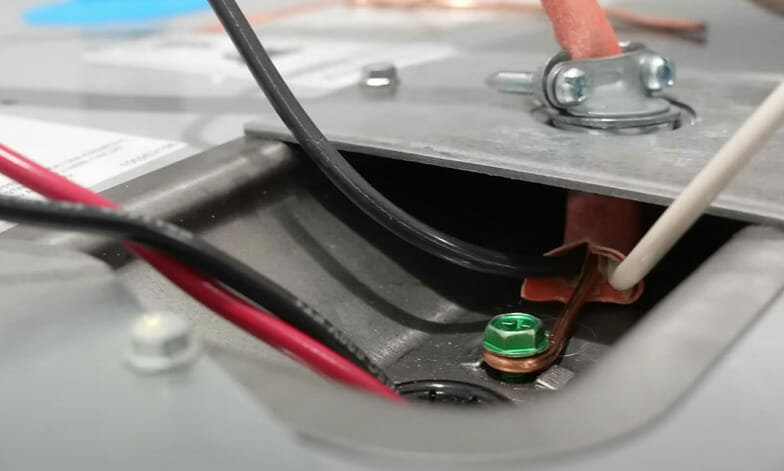
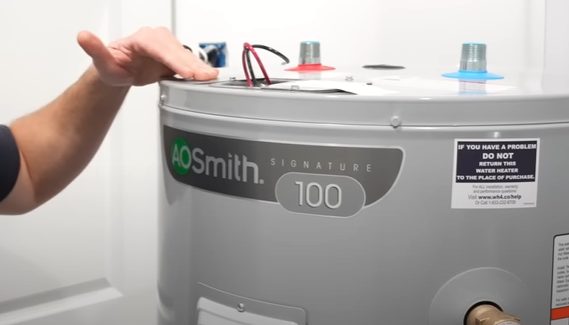
Step 2: Locate the Junction Box
- That’s where all the magic happens – we’ll connect our wires. Open up that bad boy, and you’ll see two main leads: red and black. These are your hot wires.
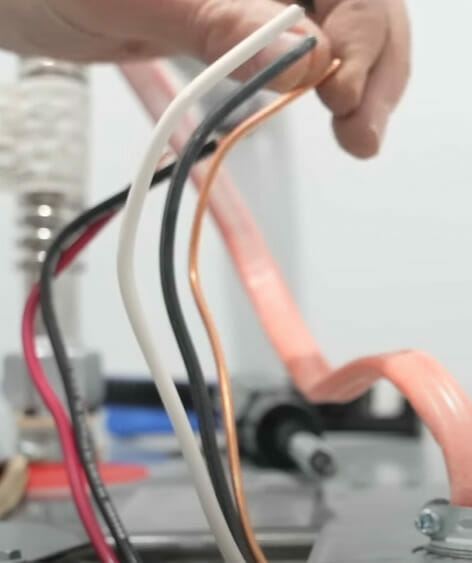
Step 3: Open the Junction Box
- Now, here comes your wire cable from the wall: three wires cloaked in sheathing – black (hot), white (neutral), and green or bare copper (ground).
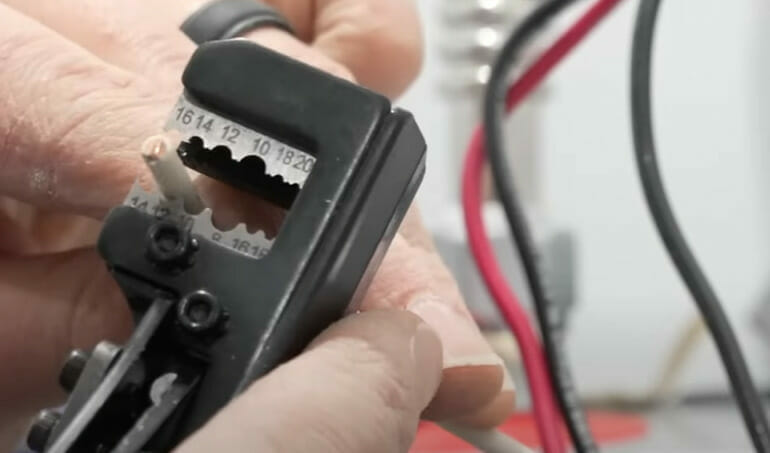
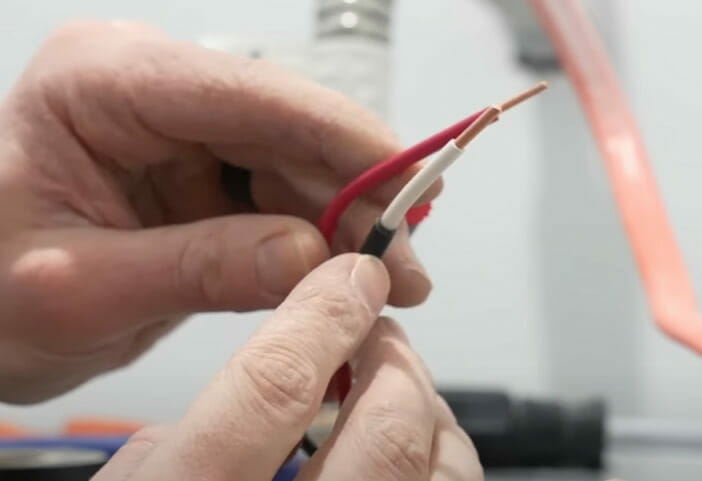
Step 4: Prepare the Wire Cable
- Cut off enough of the sheathing to expose about six inches of each wire using wire strippers.
Step 5: Time for Connections
- Connect each wire from the wall to its corresponding lead in the junction box:
- Connect the green or copper ground wire to the ground screw in the box.
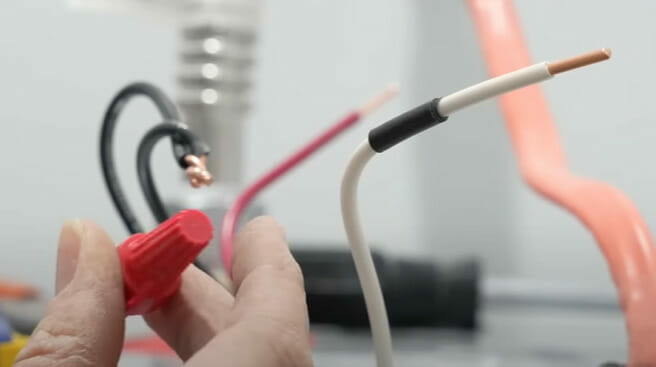
- Connect the black wire to its corresponding black lead.
- Link the white wire to the red lead.
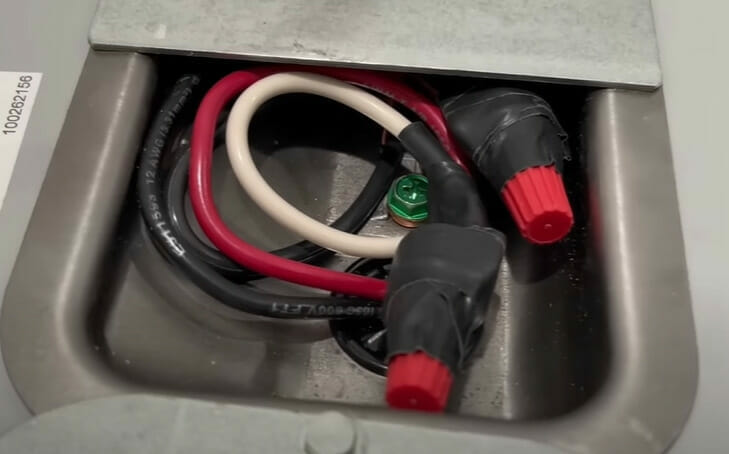
Step 6: Secure the Wires
- Don’t forget those little screws that came with your unit – they’re important too! Tighten them down onto each connected pair until they’re snug as a bug in a rug!
Step 7: Test Your Work
- We’re going to test our handiwork! Flip back on your breaker or fuse for your unit – if everything’s done right, you should have hot water flowing again!
Safety Precautions
Before diving into safety, remember that working with electricity and hot water can be dangerous if not done properly. I will share some important safety precautions you should always take when wiring a hot water heater.
- Disconnect Power: Ensure all circuits connected to the heater are switched off from your home’s main circuit breaker box.
- Test Before Touching: Use a voltage tester to ensure no current flows even after shutting off the power.
- Use Proper Tools and Equipment: Always check that these tools are in good condition before starting your project.
- Wear Protective Gear: Always remember to wear protective gear while working on your project. This includes:
- Rubber gloves will protect you against electrical shocks.
- Safety goggles will keep your eyes safe from sparks or debris.
- Protective clothing To avoid any potential injuries.
- Ventilation: If working in an enclosed space, ensure it’s well-ventilated, especially if soldering or using chemicals.
- Avoid Extension Cords: When using electrical tools, plug them directly into outlets to avoid tripping or electrical hazards.
- Grounding: Ensure the heater and all electrical components are properly grounded to prevent potential shocks.
- Follow Local Codes: Be sure you follow all local codes and regulations regarding electric water heaters, as they vary from place to place.
- Read Instructions: Always read the manufacturer’s instructions for the hot water heater. They often contain specific safety guidelines and tips tailored to that product.
- When in Doubt, Call a Professional: If there’s ever a point where you feel unsure or uncomfortable doing this yourself – don’t hesitate to call a professional electrician for help! There’s no harm in seeking expert advice when needed.
Maintenance and Care
Regular maintenance extends the life of your hot water heater and ensures it runs efficiently and safely.
By adhering to this maintenance schedule, you can enjoy consistent hot water and save money in the long run.
| Maintenance Task | Purpose | Frequency | How-To |
|---|---|---|---|
| Inspect the Temperature & Pressure Valve | Ensure it’s functioning correctly to prevent overpressure. | Annually | Lift the valve’s lever and let it snap back; water should burst out of the overflow tube. |
| Drain & Flush the Tank | Remove sediment buildup, which can hamper efficiency. | At least once a year | Connect a hose to the drain valve, open it, and drain a few gallons of water out. |
| Check the Anode Rod | Prevent the tank from rusting. | Every 1-2 years | Remove and inspect the rod. If it’s worn out or corroded, replace it. |
| Insulate the Heater | Increase efficiency and reduce heat loss. | Once, if not pre-insulated | Wrap the heater in an insulation blanket. Make sure not to cover any vents or controls. |
| Test for Leaks | Early detection to prevent water damage. | Every 6 months | Check around the base and valves for any signs of water. |
| Inspect Heating Elements (Electric Heaters) | Ensure consistent heating. | Annually | Turn off the power. Use a multimeter to check for continuity. Replace faulty elements. |
| Check the Gas Burner (Gas Heaters) | Ensure efficient combustion. | Annually | If the flame is yellow instead of blue, it might indicate incomplete combustion. Clean or consult a professional. |
| Set Optimal Thermostat Temperature | Save energy and prevent scalding. | As needed | 120°F (48.9°C) is usually adequate for most homes. Adjust as per individual needs. |
| Insulate Hot Water Pipes | Reduce heat loss and get hot water faster. | Once | Use foam pipe insulation around accessible hot water pipes, especially within 3 feet of the heater. |
Troubleshooting Tips
Have this comprehensive troubleshooting guide to help you navigate through common hot water heater problems. Ready to dive in?
| Problem | Possible Cause | Solution |
|---|---|---|
| No Hot Water | Power isn’t reaching the heating element. | Check the circuit breaker and reset it if it tripped. |
| Thermostat failure. | Replace or reset the thermostat. | |
| The Water is Too Hot | The thermostat is set too high. | Adjust the thermostat to a lower setting. |
| Malfunctioning thermostat. | Test and replace if necessary. | |
| Insufficient Hot Water | Heating element failure. | Inspect and replace the faulty heating element. |
| Water heater size inadequate for demand. | Consider upgrading to a larger tank or a tankless system. | |
| Noisy Heater (Rumbling) | Sediment build-up at the bottom of the tank. | Drain and flush the tank to remove sediment. |
| The heating element is burning out. | Replace the heating element. | |
| Water Leaking Around Base | Faulty temperature & pressure relief valve. | Check the valve; replace if it’s dripping or leaking. |
| Loose heating element or connections. | Tighten the elements or connections. Replace if necessary. | |
| Discolored or Smelly Water | Presence of bacteria in the tank. | Flush the tank. If the issue persists, consult a plumber. |
| Rusty anode rod. | Replace the anode rod. |
Frequently Asked Questions
- How long is my hot water heater going to hang around for?
- Hey! If you’ve got a traditional tank, expect it to party for 8-12 years. Those sleek tankless models? They can groove for more than 20 years with some love and care!
- Tankless or tank: which one steals the show?
- Oh, it’s a close call! Tankless heaters are the eco-friendly rockstars with a long encore, but they come with a heftier ticket price. Meanwhile, tank heaters are like that trusty opening act—easy on the wallet, simple setup, but might cost more on the energy tour.
- Do you have any secret moves to boost my heater’s efficiency?
- Absolutely! Throw on an insulation jacket, give it some regular tune-ups, insulate those hot water pipes, and maybe dial down the thermostat a notch. Your heater will thank you!
- Water heater vs. boiler: what’s the gig?
- So here’s the scoop: both can lay down a hot track, but while boilers are heating the dance floor (or your home), water heaters ensure you get that steamy encore in the shower.
- Are you looking for an eco-friendly opening act for my water heater?
- Dive into the world of solar-powered heaters or try the ground-breaking (literally!) heat pump heaters that jam with Earth’s natural vibes.
- Can I swap out a mobile home water heater with a regular home one?
- Easy there! They’re like two different genres. Stick to the tune, and make sure you’re using the right heater for the venue.
- When’s the curtain call: a repair or a whole new show?
- If your water heater’s been touring for close to its typical lifespan and keeps missing a beat, it might be time for a fresh act.
- Got an ear for a water heater’s swan song?
- Keep an ear out for inconsistent tunes (or water temperatures), some funky beats from the tank, a change in the lighting (discolored water), or any unexpected stage dives (leaks). That’s your cue to get a new headliner!
References
Website Resources:
- Energy Star. https://www.energystar.gov/
- National Association of Home Builders (NAHB). https://www.nahb.org/
- PlumbingSupply.com. https://www.plumbingsupply.com/
Video Resources:
Lowe’s Home Improvement
The Excellent Laborer
PLUMBING WITH TIM