10 min read
How to Wire a Switch and Light From an Outlet (Mastering Circuits)
This article will show you how to wire a switch and light from an existing electrical outlet.
To wire an independent switch to an existing outlet to control a light, you will need two extra cables, one extending from the outlet’s box to the switch and one from there to the light fitting.
I’ll show you how to do all the wiring step-by-step in detail (in 13 steps) below, so stay with me.
Equipment
I assume you already have an outlet attached and want to attach a switch to it.
You will need the following tools and other materials:
| Tools | Materials |
Switch with its box Screwdriver Nose pliers Wire stripper Hammer | Single-pole switch Cable Wire nuts Cable staples Electrical tape |
Wiring and Wires
Wiring Diagram
Below is the wiring diagram for this circuit, assuming the cable comes from the outlet.
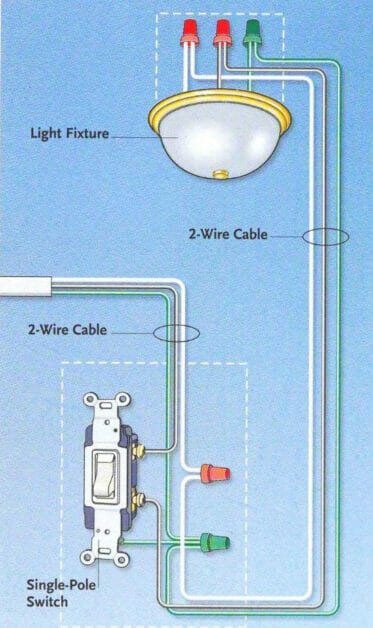
Wiring diagram for a switch-light extension from an outlet [Creative Homeowner]
Wires
The power source cable to the outlet is a regular 3-wire cable with one black (hot), one white (neutral), and one bare copper (ground) wire.
A 12/2 wire for the second cable from the outlet to the switch should be sufficient for a lighting circuit. You will also need an additional length of this cable from the switch to the light fitting.
Strip the ends of all the wires using a wire stripper, about half an inch.
Outlet
I assume the outlet is already wired and fixed, or at least its box is attached, and the wire is passing through it.
The ideal outlet box to use for this project is at the end of a run if you have multiple boxes connected in a series.
Also, it’s only safe to use an outlet in certain rooms, not just any outlet. A bedroom or hallway outlet is usually fine, but probably not if it’s in the kitchen, bathroom, or garage. Basically, avoid outlets that are meant to be on their own circuit and only use one that is on a shared circuit.
Consult an electrician or check your local wiring regulations if you’re unsure.
Outlet Box
The hole in the outlet box should be large enough to let all the wires through it, so you might need to remove more of the knockouts if it was a small one designed only to let enough wires through for a single outlet.
Method
Step 1: Turn Off the Circuit Breaker
This is a vital step for safety reasons. Turn off the circuit breaker so that there’s no power in the circuit while you are working on it.
You can test the outlet to ensure there is no power (using a voltmeter or tester) before opening it.
Step 2: Open and Remove the Outlet
If necessary, open and remove the chosen outlet if you haven’t done so already, and prepare the wires by stripping off their ends.
Wire the Setup
See the wiring diagram above. The two types of cables required are also explained.
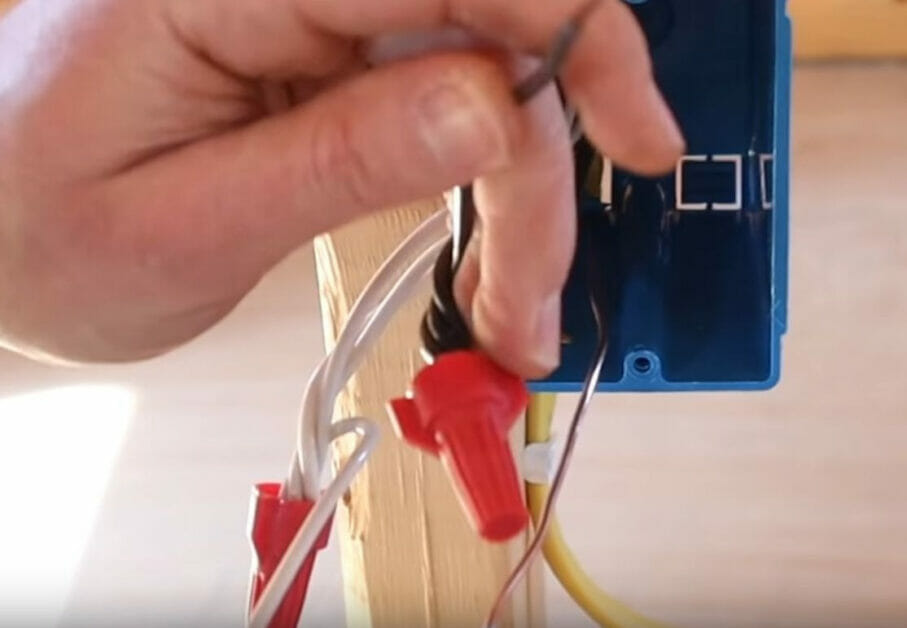
Pass the second cable for the light switch through a knockout on the outlet’s box, as shown. Pull through at least 8”. Secure the cable using cable staples.

Strip the ends of the wires in the second cable, too.
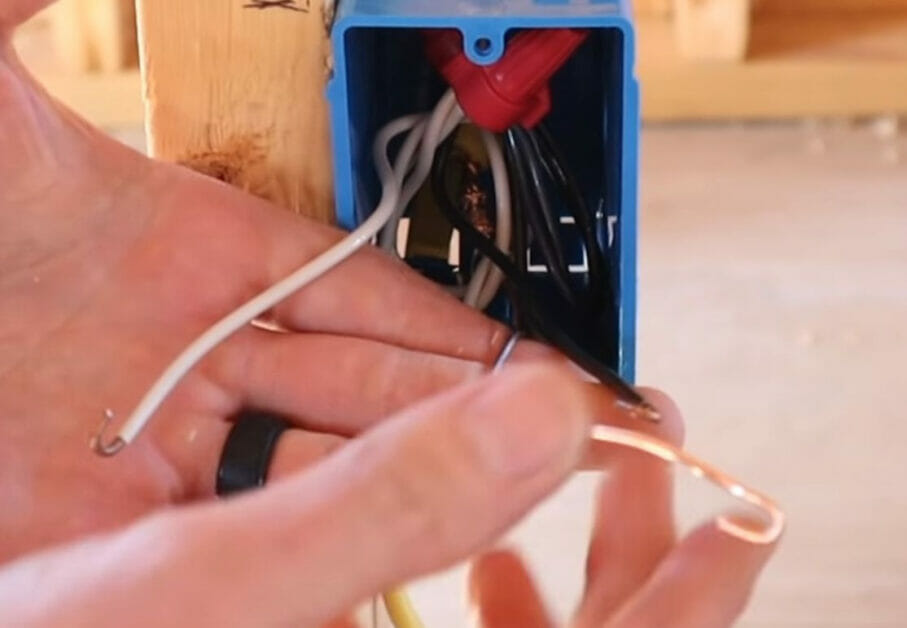
Step 3: Combine the Ground Wires
Tie all the ground wires together.
Use a wire connector or copper crimp sleeve. If you use the latter, as in the picture below, crimp it tight afterward. Then, twist the ground wires together.
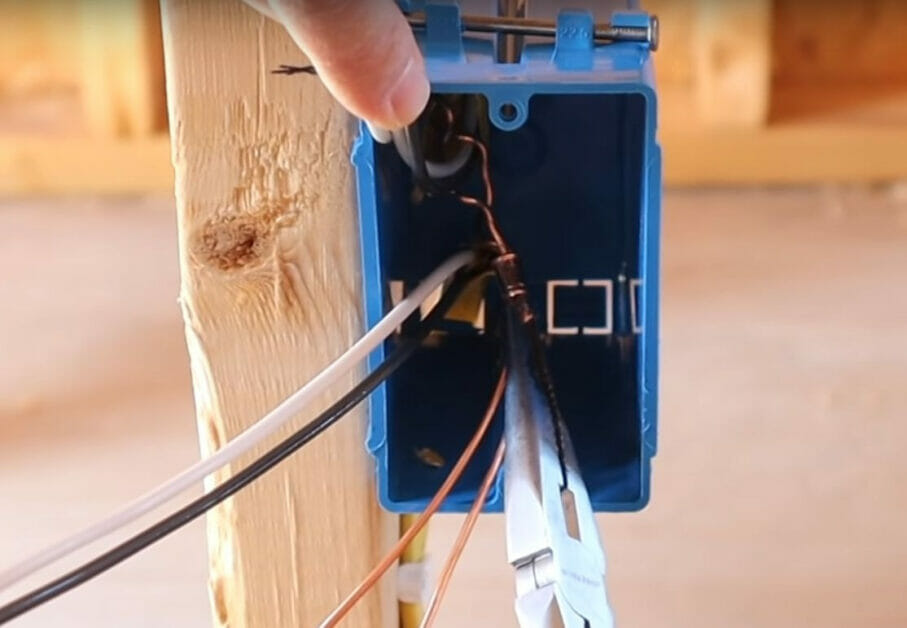
Clip all but one of the ground wires if you have more than one because they are all connected together securely, and you only need to connect one to the outlet.
Step 4: Pigtail the Hot and Neutral Wires
You may need two small lengths of one black and one white wire for this.
Put all the wire ends of the same kind together and twist them to form a pigtail if you’re using wire nuts. Otherwise, you can use a wire connector instead.
Do the same for the other set of wires. So, all the white wires should be pigtailed together, and all the black ones should be pigtailed together before attaching wire nuts to the ends of each pigtail.
Step 5: Create Hooks
Bends the ends of the three wires sticking out (one ground, one white, and one black) from each set using a nose plier.
Form a hook so they can attach easily to the outlet’s terminals. Push all the wiring inside the box except for these three with hooked ends, which will be one of each type.
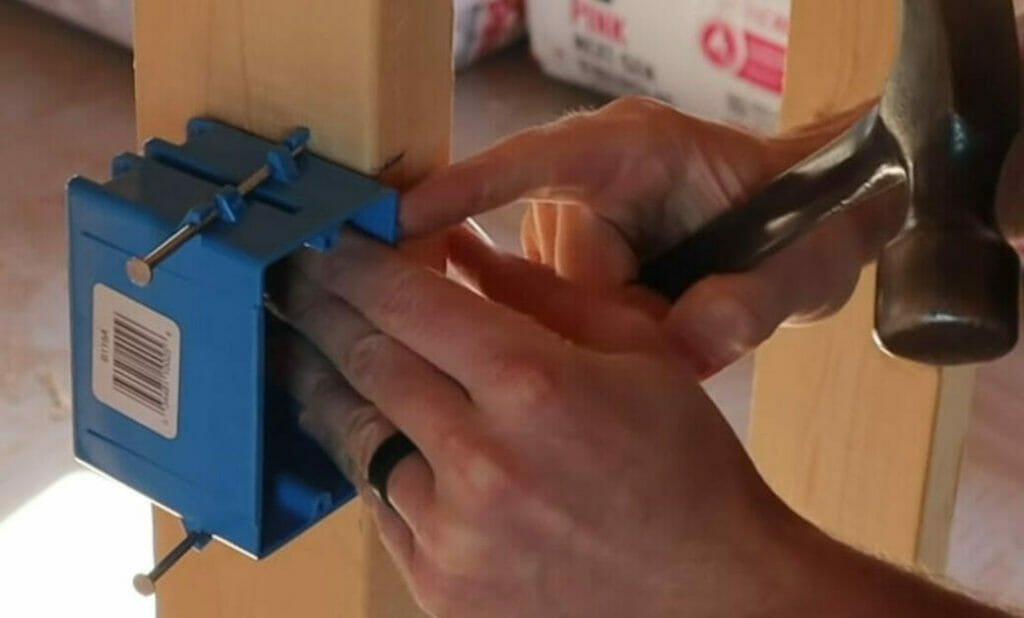
Step 6: Attach the Switch Box
Normally, a switch box is attached at a height of at least 4’ (4 feet or 48”).
Secure the box to the stud or wall using a hammer.
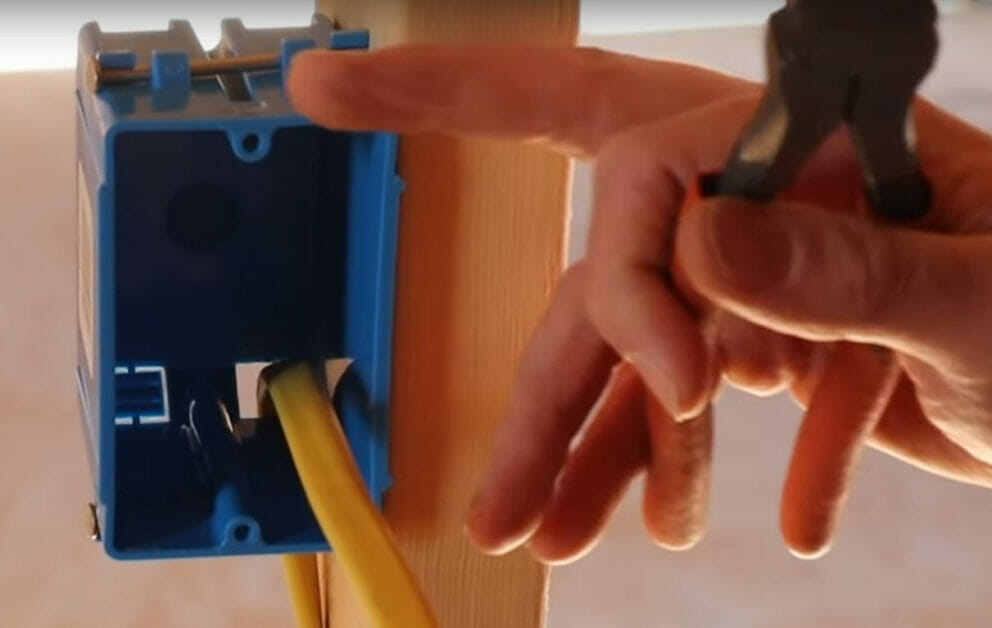
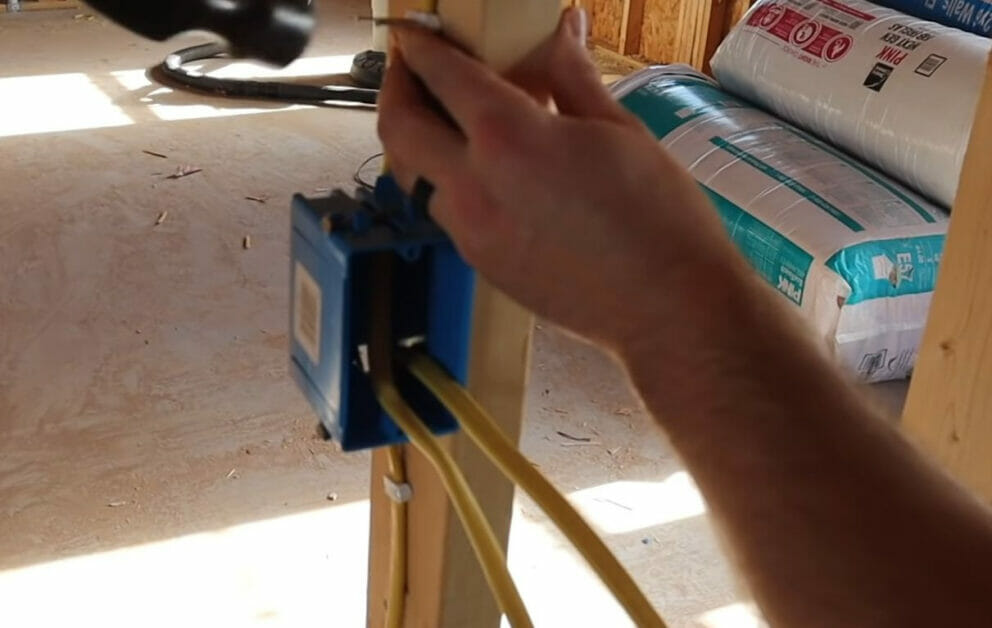
Step 7: Wire through the Switch Box
Pass the second cable through the switch box. Pull out about 8” again.
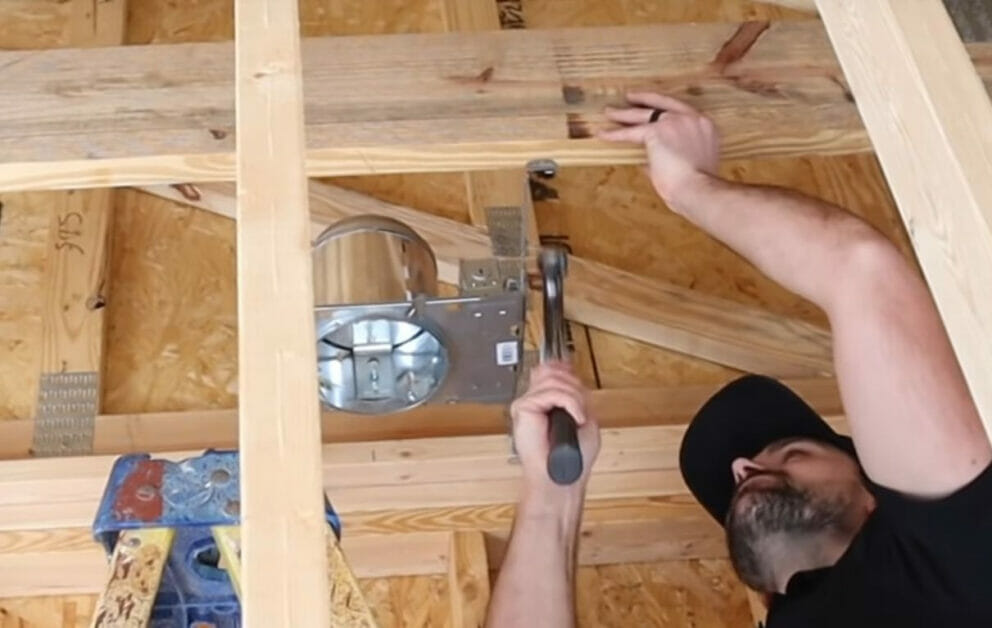
Step 8: Attach the Light Fitting
Attach the light fitting to where you want it positioned, which is usually on the ceiling.
Step 9: Prepare the Third Cable
Pass the third cable from the switch box to the light fitting.
Staple it to the stud or wall, as you did before, with the second cable. You should now have two (12/2) cables sticking out from the switch box: one to the outlet and the second to the light fitting.
Step 10: Prepare the Wires
Strip off the outer sheathes of the second and third cables to reveal the insulated wires inside.
Don’t press the cutter too hard so as not to accidentally cut the wires. Strip the ends of all the wires, about half an inch, using a wire stripper. Separate the like wires: so combine the two white ones together, the two black ones together, and the two ground ones together.
Step 11: Combine the Same Wires
Combine the two ground wires by using a crimp sleeve, as you did in Step 3, in the outlet box.
Twist the wires after crimping them. Again, cut off one of the two after the sleeve, leaving only one ground wire to connect to the switch.
Repeat this for the two pairs of white wires but using a wire nut, as you also did before at the outlet in Step 4. Tuck the pair of isolated white wires inside the box because we’re not going to connect them to the switch.
This time, however, don’t combine the two black wires.
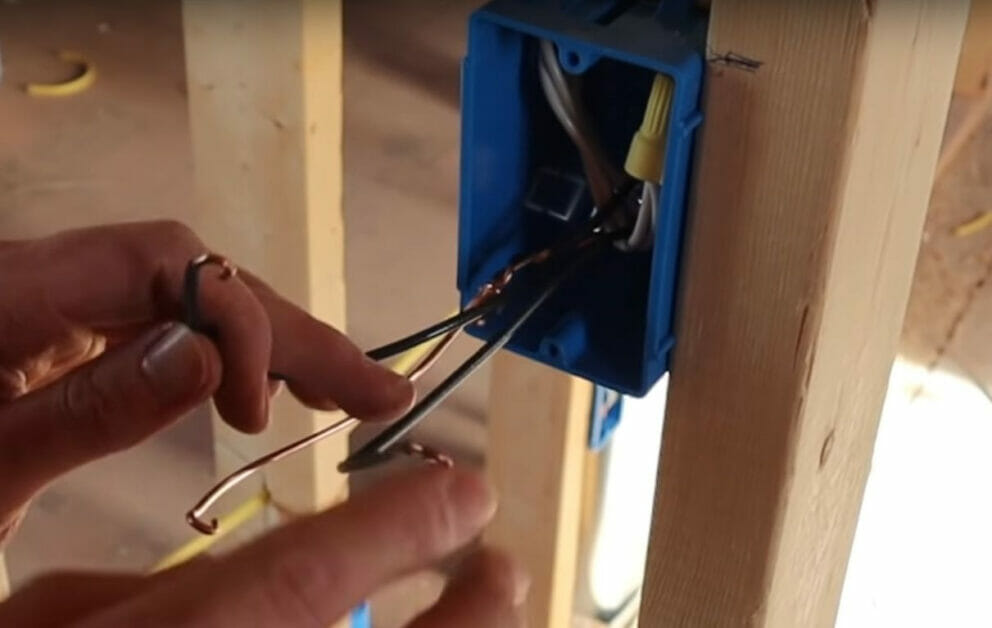
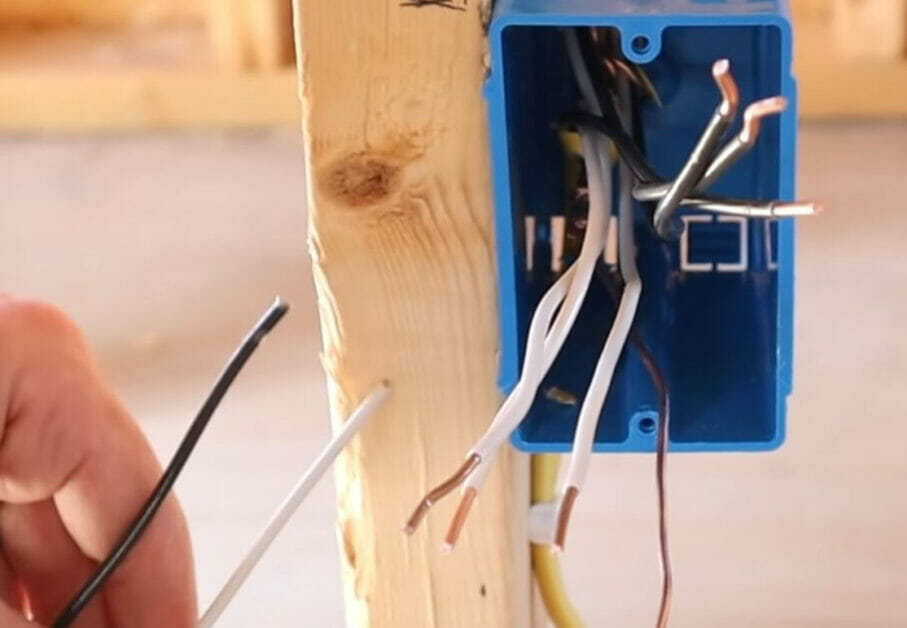
Step 12: Form Hooks
Instead of combining the black wires, form a hook at the end of each, as shown in the above picture for Step 11.
Step 13: Connect the Wires
You are now ready to connect the wires to the outlet, switch, and light fitting.
Follow the wiring diagram given at the top.
Troubleshooting Common Issues
Even with careful attention to detail, it’s common to encounter issues while wiring a switch and light from an outlet. Here are some troubleshooting steps to handle common problems:
Problem: The Light Doesn’t Turn On After Installation
- Double-check your connections: Ensure all wires are tight and properly secured with wire nuts. Loose connections can prevent the circuit from completing and the light from turning on.
- Power test: Use a multimeter or non-contact voltage tester to check if the switch is getting power. The problem could be at the outlet if there’s no power.
- Check your bulbs: Sometimes, the simplest solution is the right one. Ensure the light bulb is working by testing it in a different light fixture.
Problem: The Switch Box Doesn’t Fit Properly
- Measure before installation: Always measure the switch box and the hole you plan to install before securing it.
- Trim the hole: If the hole is too small, use a drywall saw to trim it until the box fits snugly.
- Use an adjustable box: If your box is too small, consider using an adjustable switch box that can fit various hole sizes.
Problem: The circuit Breaker Keeps Tripping
- Overload: This usually means too much power demand on the circuit. Try reducing the load by unplugging other devices or using a lower-wattage bulb.
- Short circuit: A short circuit could be another reason. This happens when the hot wire (black) touches another hot wire or touches a neutral wire (white). Check your connections to ensure the wires are not touching where they shouldn’t be.
Problem: Light Flickers When Turned On
- Loose connections can be a symptom of a loose connection at the switch, the light, or the outlet. Ensure all connections are secure.
- Bulb issue: The light bulb might be faulty or not screwed in properly. Check to make sure it’s secure, or try a new bulb.
Remember, if you can’t find the source of the problem or if the issues persist after your attempts to fix it, it’s best to consult a professional electrician. Electrical work can be dangerous if not handled properly, so there’s no shame in seeking professional help when needed.
RELATED What Does a CDI Box Do? (Guide)
References
Creative Homeowner. Ultimate guide to wiring: complete home projects. 6th edition. Creative Homeowner. 2007
Video Reference
The Excellent Laborer