9 min read
How to Install a Neutral Wire (DIY)
Need some help adding a neutral wire to a light switch, outlet, or home device? One of my most common calls relates to houses that come with old outlets and require neutral wires. Most people do not understand the importance of a neutral wire. If the load is ideal, there is no need to add a neutral wire. But, in real life, having a balanced load is nearly impossible. If we consider that, adding a neutral wire is crucial.
So, below ill go through some steps to install a neutral wire.
In general, to add a neutral wire, you can follow two different methods.
- Extend the neutral wire from the old light switch to the new one. This is a cheaper and simple method to follow.
- Or you can install a neutral wire to all the switch boxes at home. This process is quite painstaking, and you’ll need good electrical knowledge.
Depending on your situation, you can follow either one of them.
Why Do I Need a Neutral Wire?
Most modern outlets and electrical devices come with a neutral wire. But, you might find some switch boxes that do not have a neutral wire. Adding a neutral wire might be the best option for that type of switch box. You might be wondering why?
Well, that is an excellent question. If the load is ideal in your AC system, there is no need for a neutral wire. Practically, it is nearly impossible to have an ideal load. So, the circuit needs a path to carry the imbalance current. If you have a neutral wire, it will act as the path for an imbalance current.
Two Methods to Add a Neutral Wire
Depending on your home electrical system, you might have to follow two different methods to install a neutral wire. Sometimes, the issue might lie with one or two switch boxes. Or sometimes, none of the switch boxes have a neutral wire. Sometimes, the issue might lie with one or two switch boxes. The first situation is much easier. You’ll get a better idea when we talk about these two situations in detail.
Method 1 – Connecting Your Switch Box to an Existing Wire
This is a much easier method than the second one. If only one of your switch boxes needs a neutral wire, you can easily connect the neutral wire from the nearest switch box that already has a neutral wire. Follow these steps.
Step 1 – Find the Nearest Switch Box

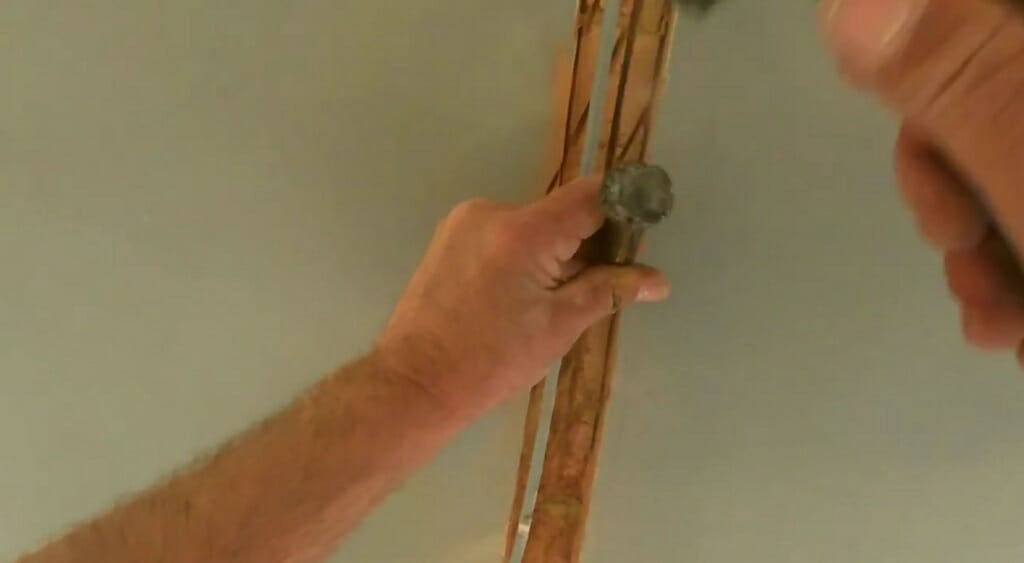
First, find the nearest switch box that has a neutral wire. Then, measure the distance of the neutral wire (from the old switch to the new switch). Run a neutral wire from the old switch to the new switch.
Tip: If the two switch boxes are connected, you don’t need to run new conduits for the neutral wire. Use the old conduits.
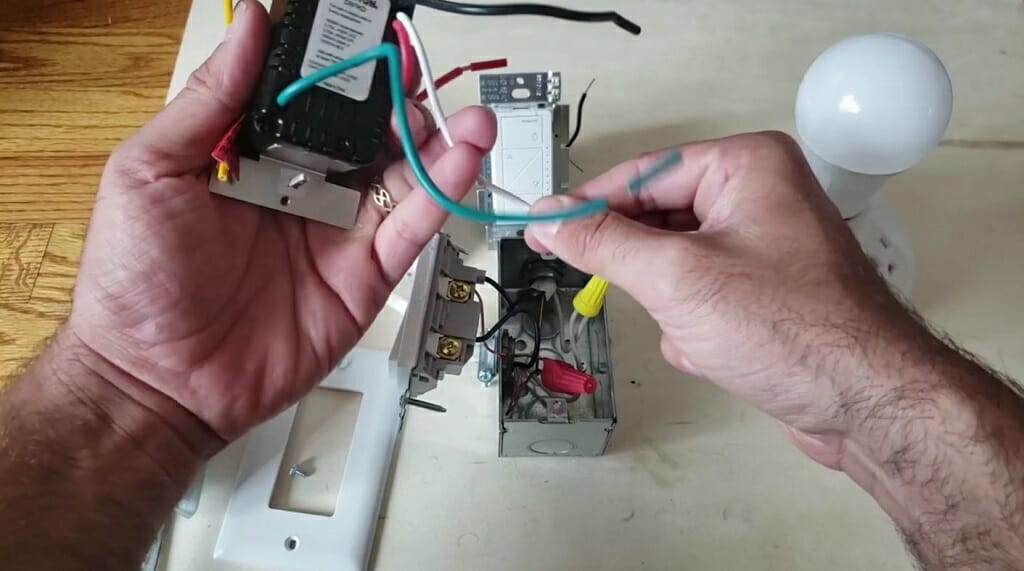
Step 2 – Connect the Neutral Wire
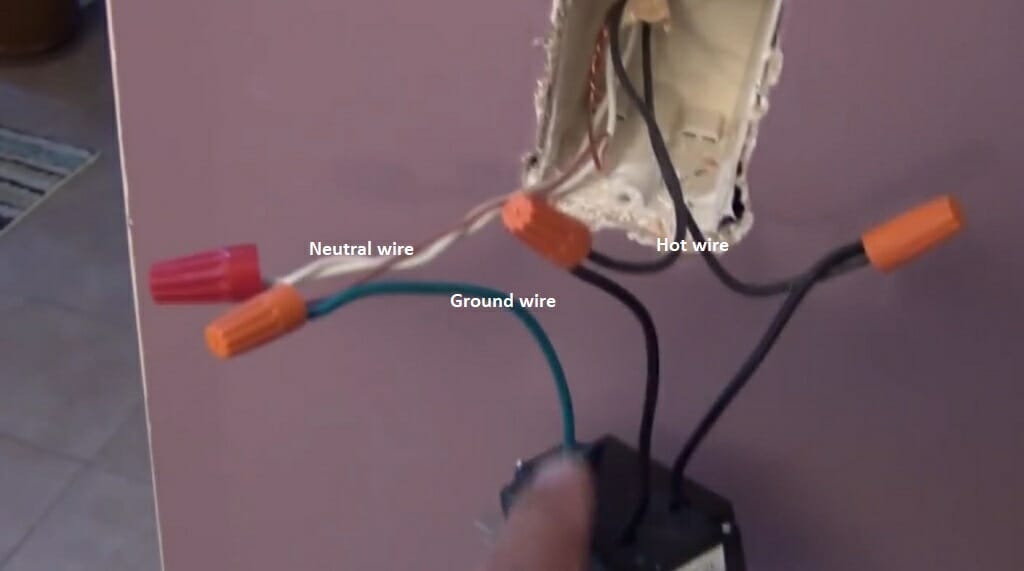
Then, connect the neutral wire to the new switch box.

Follow the above diagram.
If needed, install conduits inside the wall. Or use the ceiling to run conduits.
Method 2 – Adding a Brand-New Neutral Wire
If none of the switch boxes have a neutral wire, you must bring the neutral wire from the main panel to the switch boxes.
But remember, the neutral line should go through all the electrical lines at your home. So, this is a complicated task. If you are not comfortable with wiring, do not try to do this. Instead, hire an electrician. (1)
In the case that you do feel comfortable with DIY wiring, here are the steps I recommend you follow.
Step 1 – Cut Off the Power
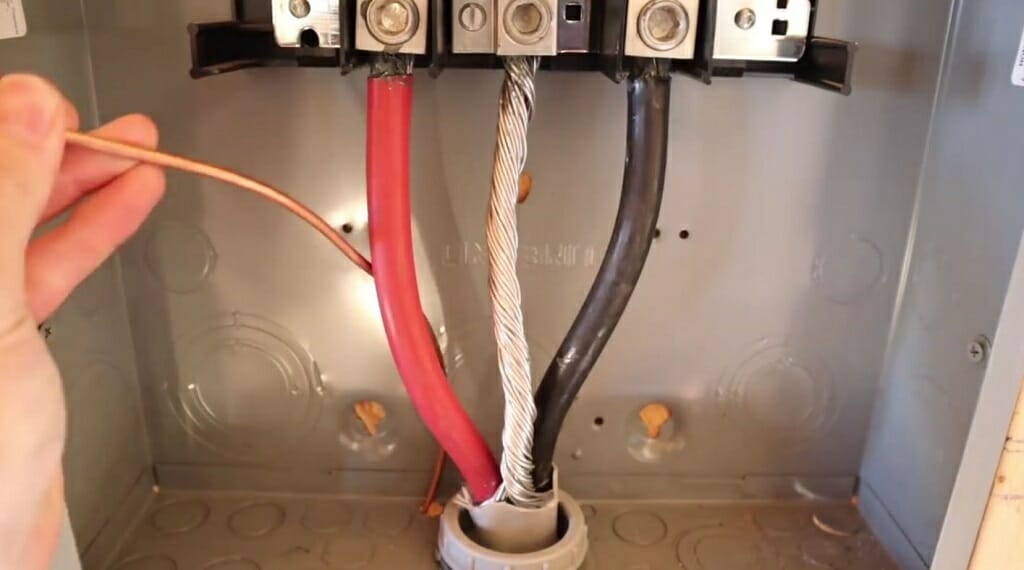
First, remove the main panel casing. Then, disconnect all the hot wires from the main panel. We are going to install the neutral wire to the breakers. So, cutting off the power is vital.
Step 2 – Inspect the Main Panel
Inspect the main panel and choose the breaker you need to install the neutral wire to.
Step 3 – Install the Neutral Wire
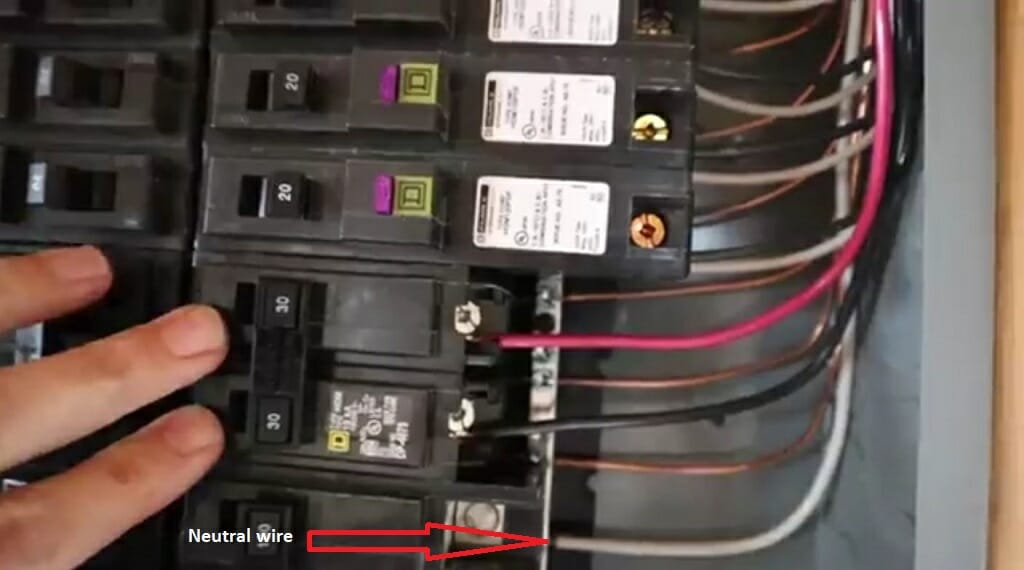
After properly determining where it will go, add the neutral wire. For this demonstration, I’m only showing one breaker.
Tip: Usually, the neutral wires are white.
Step 4 – Measure the Distance
Now measure the distance from the panel to the switch, outlet, light bulbs, etc. Note it down. Then, buy the wires and conduits according to that distance.
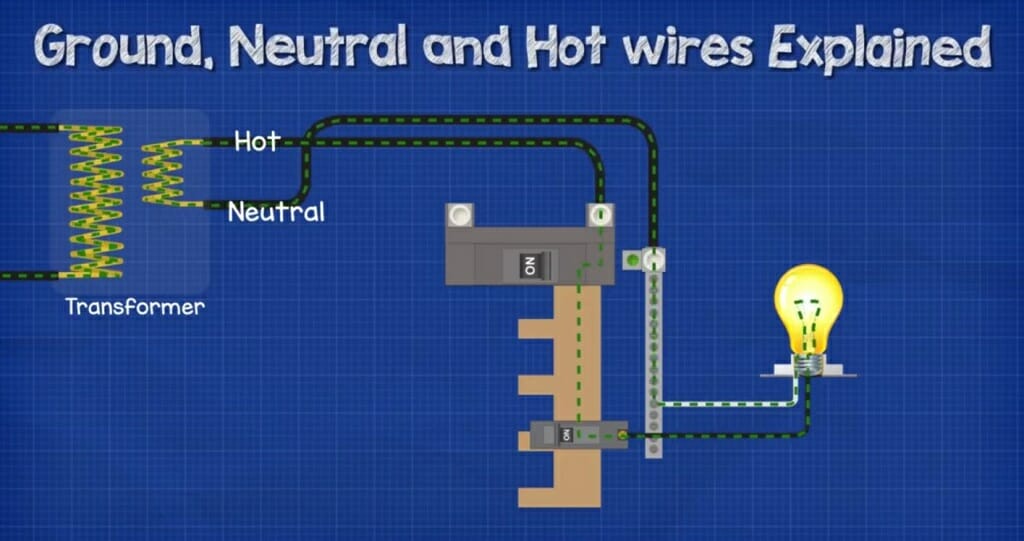
Step 5 – Carry the Line According to the Diagram

Check out the above diagram. Use it to properly set up your installation.

First, run the neutral wire from the panel to the outlet and the light bulb. Then, run the neutral wire from the outlet to the switch.
You might have to damage the wall and run conduits to properly install the neutral wire. In some locations, you can run the neutral wire through the old conduits.
Tip: The above diagram will have more hot wires for a three-phase system.
Step 6 – Repeat
Repeat the same process for every switch that needs a neutral wire.
Keep in mind: In the above diagram, there is no ground wire. Assume the ground wire is already installed. Adding another wire to the above diagram might confuse you.
Cost of Adding a Neutral Wire
Installing a neutral wire takes a lot of time and effort, given that you plan to complete it as a DIY project. Even though the above steps can help you with the installation to some degree, the actual job is much harder than one might think. So if you are not up to the task, don’t hesitate to hire an experienced electrician. For two switches, an electrician will charge $50 to $100. Sometimes, it will be much higher. So, remember to get an estimate before starting the project. (2)
RELATED Solar Panel Testing (3 Methods)
Wrapping Up
Whether you choose method one or method two, running conduits through walls takes more time and effort since you have to drill the wall. So, if you can run the neutral wire on the ceiling, it will be much easier. Instead of connecting the outlet and the switch, try the light bulb and the switch for a neutral connection.
Take a look at some of our related articles below.
- How to identify neutral wire with multimeter
- How to test an electrical outlet with a multimeter
- How to test a light switch with a multimeter
References
(1) hire an electrician – https://www.forbes.com/advisor/home-improvement/how-to-hire-an-electrician/
(2) DIY project – https://www.apartmenttherapy.com/10-best-sites-for-diy-projects-151234
Video References
One Hour Smart Home
The Engineering Mindset
Fix It With Zim
CREATIVE CRAMBO
The Excellent Laborer