11 min read
How to Tune a Monoblock Amp (7-Step Guide)

Are you looking for a way to tune your monoblock amp? If so, here’s the correct technique to tune it for maximum performance.
You might be looking for better sound quality or trying to protect your speakers and subwoofers. Either way, knowing how to tune a monoblock amp will help you immensely. I usually tune the amp to get rid of distortion. And it is a simple enough process that doesn’t require advanced tools or skills.
Quick summary, to tune a monoblock amp:
- Turn the gain down and turn off all the filters.
- Increase the car audio until you hear distortion.
- Reduce the audio level a little bit.
- Adjust the gain until you hear clear sounds.
- Turn off the bass boost.
- Adjust the low and high pass filters accordingly.
- Repeat and Repeat.
I’ll cover more on this in the below article.
7-Step Guide to Tune a Monoblock Amp
Step 1 – Turn off Everything
Before starting the tuning process, you should do two things.
- Turn the gain down.
- Turn off all the filters.
Most people skip this step. But if you need to tune the amp properly, remember to do the above two things.
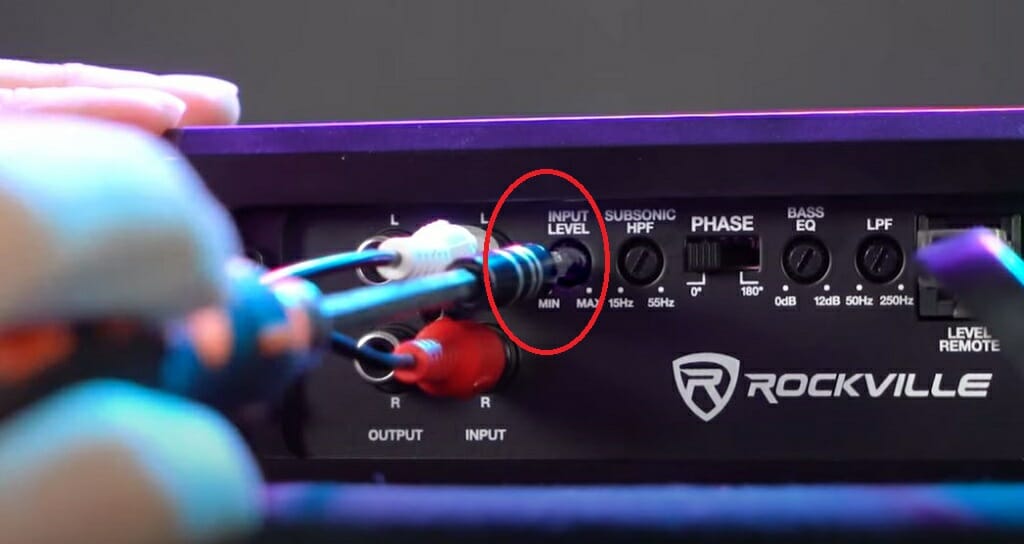
Quick Tip: The gain, low pass, and high pass filters are located at the monoblock amp.
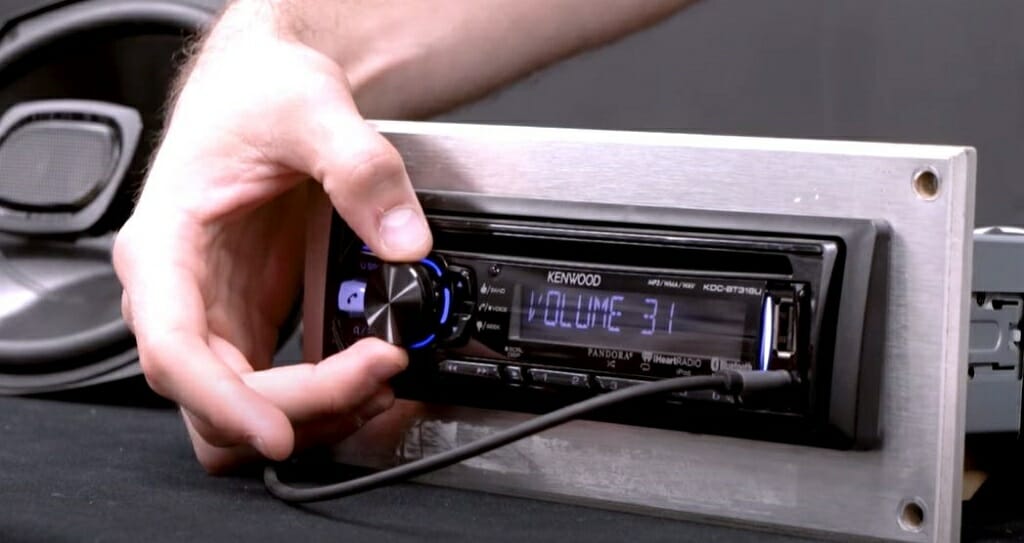
Step 2 – Increase the Car Audio
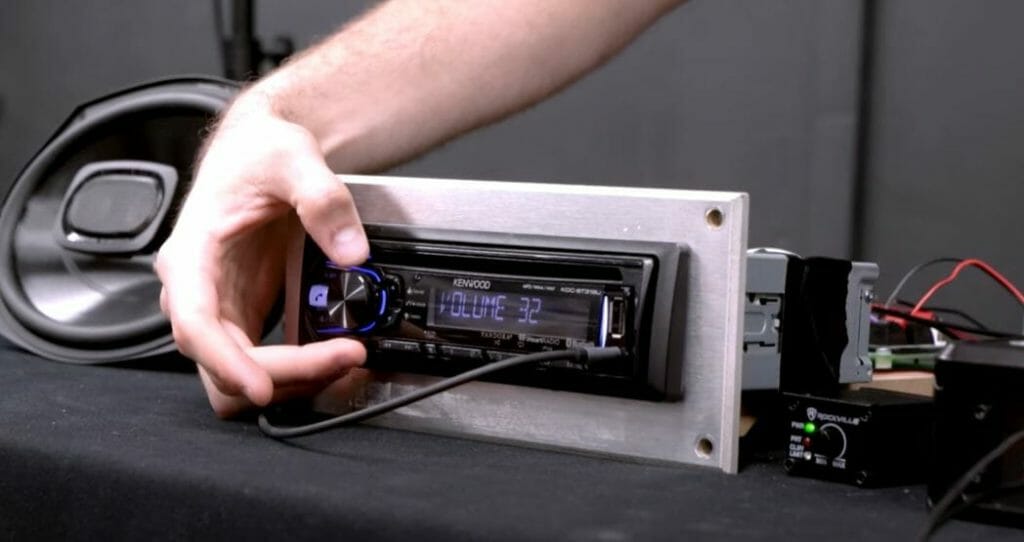
Then, increase the volume of the head unit. You should do this until you hear any distortion. As per my demonstration, you can see the volume is at 31. And at that point, I got distortion from my speaker.
Therefore, I reduced the volume to 29. This process is all about hearing the sound and fine-tuning.
Important: You should be able to identify the distortion correctly during this step. Otherwise, the tuning process will go to waste. Play a song that you are familiar with. It will help you identify the distortion easily.
Step 3 – Adjust the Gain
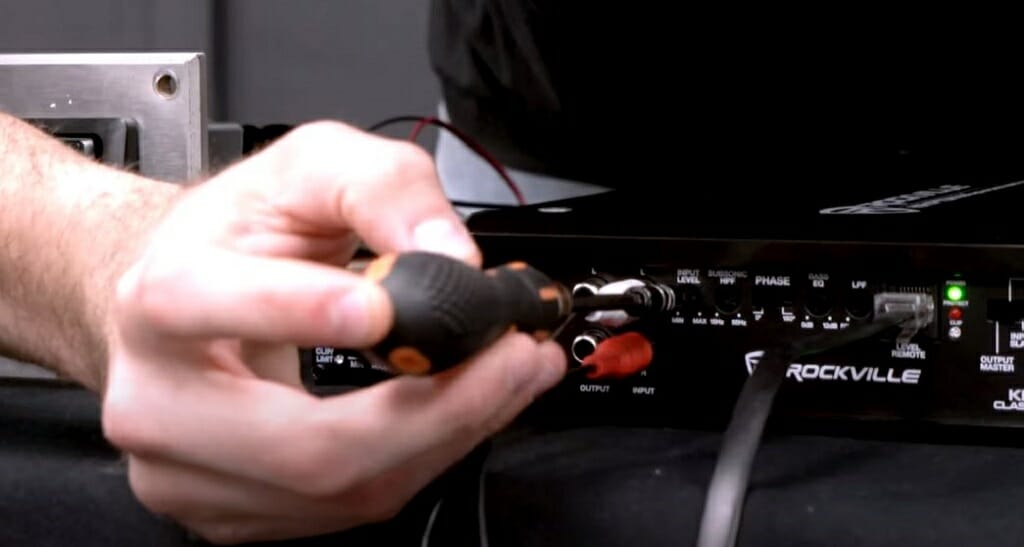
Now, go back to the amp and adjust the gain until you hear a clear sound from your speakers. To adjust the gain, turn the corresponding node in a clockwise direction. Do this until you hear any distortion. Then, turn the gain in a counter-clockwise direction until you get rid of the distortion.
Use a flat-headed screwdriver for this process.
Step 4 – Turn off the Bass Boost

If you want the best sound quality from your car speaker, turn off the bass boost. Otherwise, it will cause distortion. So, turn the bass boost node to zero using a flat screwdriver.
What is Bass Boost?
The bass boost is capable of boosting the low frequencies. But this process can be hazardous if not handled correctly. So, it is wise not to use it.
Step 5 – Adjust the Low Pass Filter
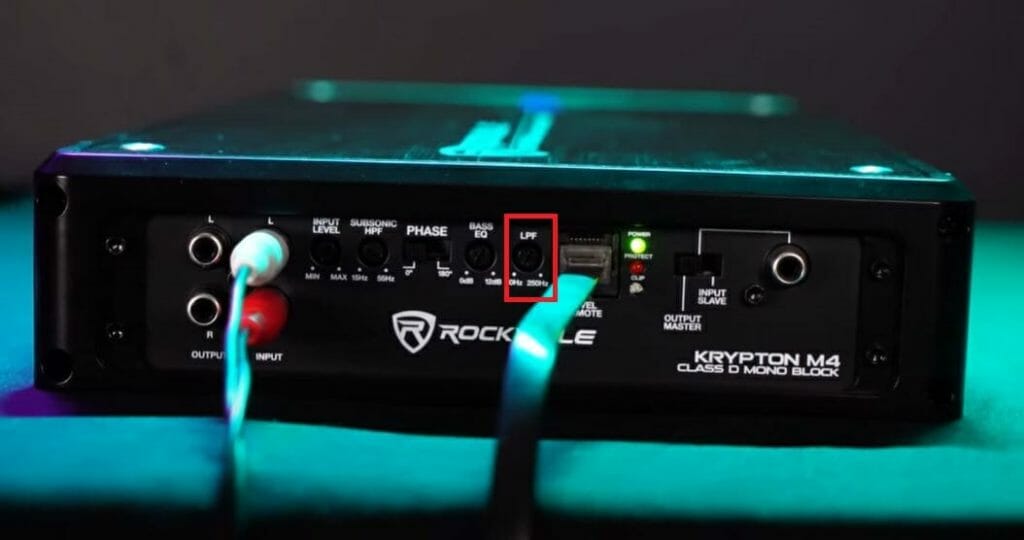
Low-pass filters are capable of filtering out the selected frequencies. For instance, if you set the low pass filter to 100Hz, it will only allow below 100Hz frequencies to pass through the amp. So, it is crucial to set the low pass filter correctly.
The low pass filter frequency range changes according to the size of the speaker. Here is a simple chart for different-sized subwoofers.
| Size of the SubWoofer | Low Pass Frequency |
| 15 inches | 80Hz |
| 12 inches | 100Hz |
| 10 inches | 120Hz |
So, if you use a 12-inch subwoofer, you can set the low pass frequency to 100Hz. That means the amp will play all the frequencies below 100Hz.

Quick Tip: If you are unsure, you can always set the frequency to 70 -80Hz, which is a good rule of thumb.
Step 6 – Adjust the High Pass Filter
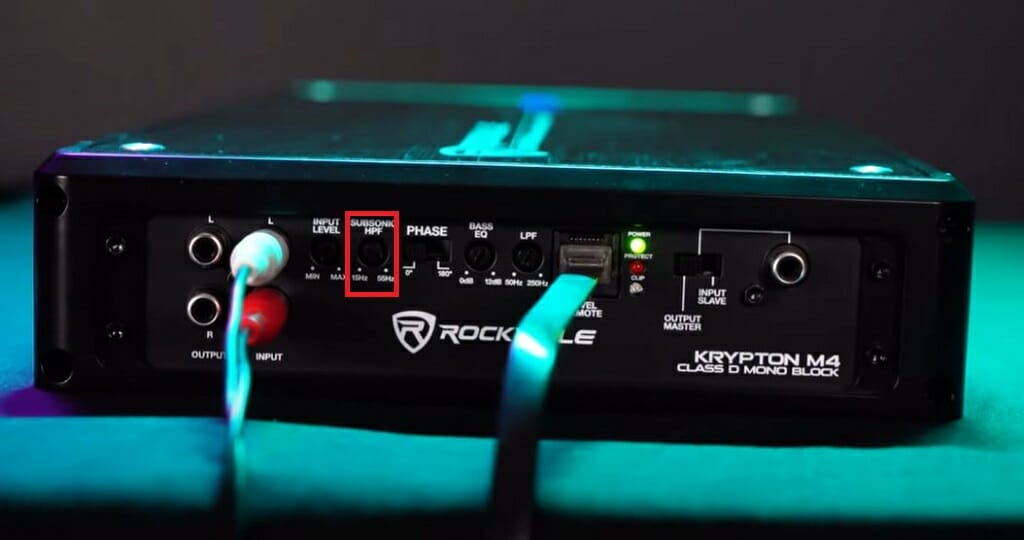
The high pass filters only play frequencies that are above the cut-off mark. For instance, if you set the high pass filter to 1000Hz, the amp will only play above 1000Hz frequencies.
Most often, the tweeters connect to the high-pass filters. Since tweeters catch above the 2000Hz frequencies, you should adjust the high pass filter to 2000Hz.
However, if your settings are different from the above, adjust the high pass filter accordingly.
Step 7 – Repeat and Repeat
If you follow the above six steps correctly, you have completed about 60% of the work for tuning your monoblock amp. We only reach the 30% mark for volume, and you should tune the amp to at least 80% (without distortion).
So, repeat steps 2 and 3 until you find that sweet spot. Remember, don’t change filter settings or other special settings. Just tune the amp with the head unit volume level and the amplifier’s gain.
Quick Tip: Remember to listen to the speaker’s sound carefully.
Few Things That You Should Pay Attention to During Above Process
In truth, the above 7-step guide is a simple process. But that doesn’t mean you can get it right on the first attempt. There are lots of things that can go wrong.
- Don’t set the gain too high. It might damage the subwoofers or speakers.
- When adjusting the low pass and high pass frequencies, adjust them according to your speakers or tweeters.
- Never block all the low pass frequencies. It will affect the sound quality significantly. And same goes for the high pass frequencies.
- You might have to repeat steps 2 and 3 a few times. So, be patient.
- Always complete the above tuning process in a quiet place. That way, you’ll hear the speaker’s sound clearly.
- Play a familiar song for the tuning process. It will help you identify any distortion.
Can I Tune My Monoblock Amp with a Multimeter?
Yes, you certainly can. But the process is a bit more complicated than the above 7-step guide. With a digital multimeter, you can measure the speaker’s impedance.
What is Speaker Impedance?
The speaker’s resistance to the amp’s current is known as the impedance. This impedance value will give you the amount of current flow through a speaker at a given voltage.
So, if the impedance is low, the amount of current will be higher. In other words, it can handle more power.
Tuning the Monoblock Amp with the Digital Multimeter

To tune the amp with a multimeter, follow these steps.
- Cut off the speaker power.
- Set the multimeter to resistance mode.
- Connect the multimeter red and black leads to the speaker’s positive and negative terminals.
- Note down the speaker impedance (resistance).
- Get the recommended wattage for your amp from the user manual.
- Compare the wattage with the speaker impedance.
How to Compare:
For comparing process, you’ll have to do some calculations.
P = V2/R
P – Power
V – Voltage
R – Resistance
Find the corresponding voltage using the above formula. Then, follow these steps.

- Disconnect all the accessories (speakers, subwoofers, and others)
- Set the equalizer to zero.
- Set the gain to zero.
- Adjust the volume in the head unit to 80%.
- Play a test tone.
- While playing the test tone, turn up the gain knob until the multimeter reaches the above-calculated voltage.
- Connect all the other accessories.
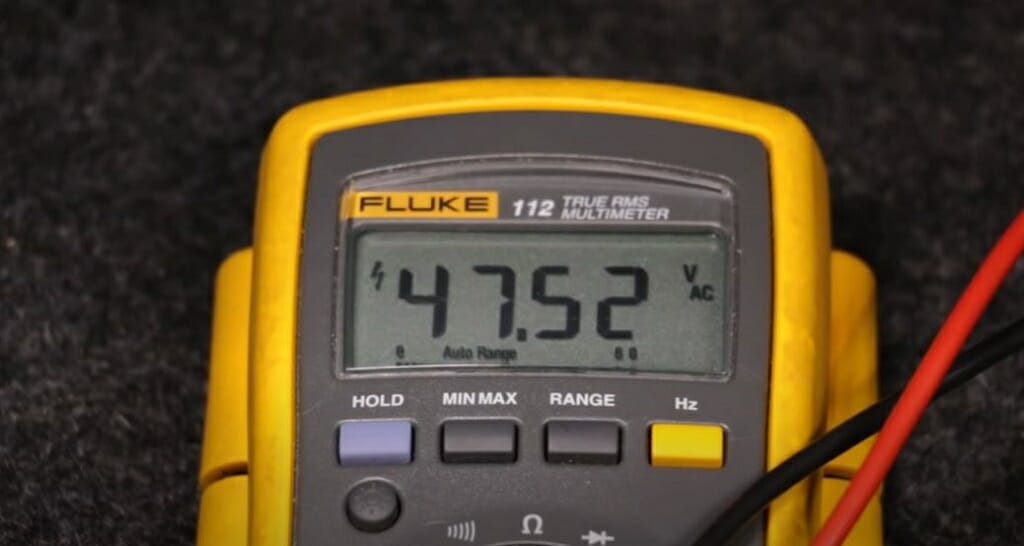
Important: The amp should be connected to the power source during this process. And set the multimeter to measure the AC Volts and connect it to the amp.
Which Method Should I Choose?
As per my experience, both methods are excellent for tuning your monoblock amp. But the manual tuning method is less complicated than the second one.
On the other hand, for manual tuning, you only need a flat screwdriver and your ears. So, I would suggest the manual tuning method might be a good option for a quick and easy turnaround.
Why Should I Need to Tune the Monoblock Amp?
There are several reasons for tuning a monoblock amp, and here are a few of them.
To Get Maximum Output from Your Amp
What is the point of having a powerful amp if you don’t use it to its full potential? Sometimes you might be using 50% or 60% of amp power. But after properly tuning the amp, you can use it for at least 80% or 90%. So, remember to tune the amp properly to get maximum performance.
To Improve the Sound Quality
A well-tuned monoblock amp will give you better sound quality. And it will make your car audio system louder.
To Prevent Damage to Your Speakers
Distortion can damage your subwoofers, mid-range speakers, and tweeters. So, after you tune the amp, you don’t have to worry about that.
Types of Monoblock Amplifiers
A monoblock amp is a single-channel amplifier that can reproduce low-frequency sounds. They can send one signal to each speaker.
However, there are two different classes.
Class AB Monoblock Amp
If you are looking for a high-quality monoblock amplifier, this is the model you want to choose. When the amp detects an audio signal, it allows a small amount of power to flow to the switching device.
Class D Monoblock Amp
Class D amps have one channel, but the working mechanism differs from Class AB. They are smaller and need less power than Class AB amps, but they lack sound quality.
Take a look at some of our related articles below.
- How to wire component speakers to 4-channel amp
- How to measure amps with a multimeter
- How to tune an amp with a multimeter
Video References
Rockville Audio
JL Audio
HowcastTechGadgets