17 min read
How to Wire Component Speakers to 4 Channel Amp (Expert Guide)
Are you thinking of adding a 4-channel amp to your component speakers and wondering how to go about it?
Well, you have come to the right place. Having installed several amps on vehicles and being an electrician, I have what it takes to guide you through the process. Let me assure you; it’s something you can do all by yourself and within a reasonable budget.
Generally, to wire component speakers to a 4-channel amp:
- Get the right tools and appropriate length of wire.
- Connect the speaker outputs to the speaker-level inputs of your amp.
- Connect a line-level adapter to the radio.
- Directly connect the radio to the amp with RCA cables.
Below, I’ll walk you through the step-by-step process in more detail.
First Things First: Important Things to Know
Planning is crucial to the success of this project.
In fact, it can make all the difference between a seamless installation and a dud install. So, take the time to organize yourself before you start. Itemize the tools, parts, and wires, among other things, that you need for the installation.
Know the length of wires you need (buying extra is the way to go because you never can tell).
More on Wires
As I mentioned above, having extra materials for your installation is better than not having enough. So, when buying your RCA cables and speaker wires, make sure you buy plenty.
Make sure you choose the right length of speaker wire for the amp installation.
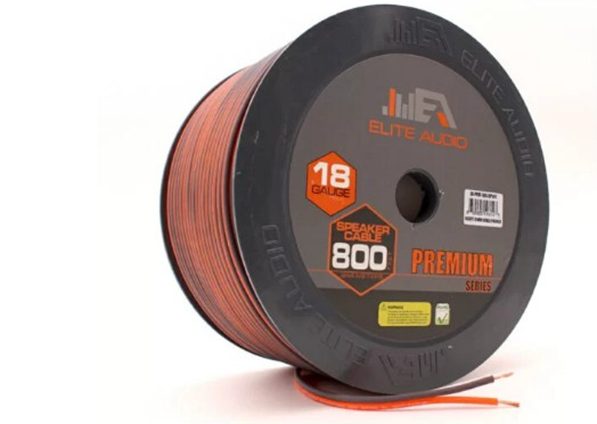
What is the correct size and length of speaker wire that you need? Your best bet is to get 18-gauge. If you have a budget constraint, a 16-gauge speaker wire will also do just fine.
On length, get a 100-foot roll as this will do for multiple installations using 4 channel amps.
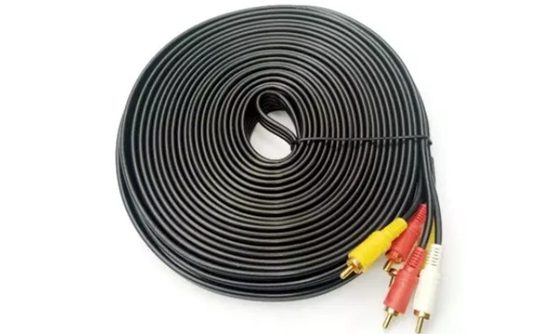
Now, if you are using RCA cables to install a 4-channel amplifier, you should consider buying a second pair in addition to the amp wiring kit.
I usually recommend 18-inch length cables for installation because it is often long enough for any type of vehicle. It will also be ample enough to hide the installed cables under the rear seat and interior of the car.
Really, you don’t have to spend a fortune to get wires, tools, and cables. You can settle for any high-quality materials without considering the brands.
What Tools Do You Need?
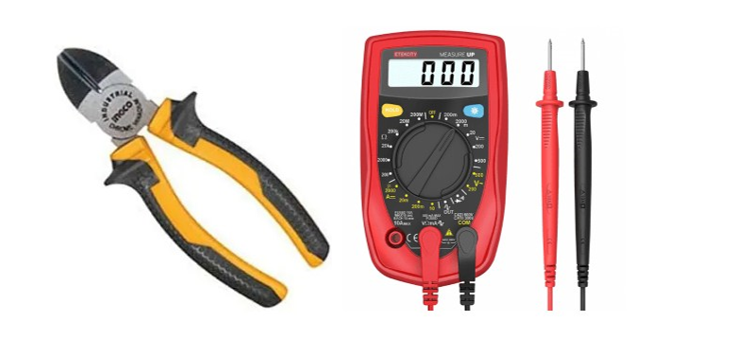
When it comes to tools, crimp tools are your go-to.
These are effective for installing speaker wiring and an amp channel. You can go for an inexpensive crimp tool, It will get the job done. You should note that you need to buy crimp connectors separately as they don’t come with the crimp tool. They are actually affordable and easily accessible in general stores and automotive parts stores.
Another tool that I recommend is a cordless drill.
You can use this to drill holes in the metal part of your vehicle to connect the ground wire or mount the channel car amplifier to bare metal.
Other tools I recommend include:
- Wire Cutters
- Wire Ties of 6-inch length
- A digital test meter
- Roll of electrical tape
Checklist for Material Shopping
When it comes to shopping for installation materials, the first thing is to identify the type of installation you want to do.
Let’s look at the materials you need to shop for in the case of three types of installations.
Type One or Two Installation: Factory Radio / No RCA Connections
For either of these, you need to get the following materials for your installation:
- 4-channel amplifier with speaker-level inputs. You can also go for an amp and line level adapter
- Amp wiring kit
- At least 120-feet speaker wire with a size of at least 18-gauge
- Cutting pliers
- Test meter
- Electrical tape
- 6-inch wire ties (bag of 100)
- Crimp tool and wire crimp connectors. (Get at least 25)
Type 3 Installation: RCA Connections
- An amp and line level adapter or 4-channel amplifier with speaker-level inputs
- Amp wiring kit
- Extra 18-inch RCA cables
- 100-feet 18-gauge roll speaker wire
- Electrical tape
- Test meter
- 6-inch wire ties (bag of 100)
- Cutting pliers
- At least 25 Crimp tools and wire crimp connectors
Verify you have a good estimate of the speaker wire that you need.
You should also consider getting an 18-feet length second pair of RCA cables. While you don’t have to spend so much, make sure you spend enough to get all you need so you don’t get stranded along the way.
Getting a Signal to the Amp: Tips and Guide
The biggest challenge you will encounter during your installation of a 4-channel amp and a component speaker is getting a signal for the amp.
If you can cross this hurdle, the rest is easy.
So, how do you get a signal to your amp?
There are generally three ways you can get a signal to a 4-channel amplifier:
- Connect the speaker output to the speaker-level inputs of your amp
- Directly connect the car audio to the amp with RCA cables

- Connect a line-level adapter to your car radio and connect RCA cables to the amp
What Connection Type Do You Need?
If your car has a stereo without RCA jacks, you need to buy either an amplifier with speaker-level inputs or a line-level converter.
Let’s look at these two briefly.
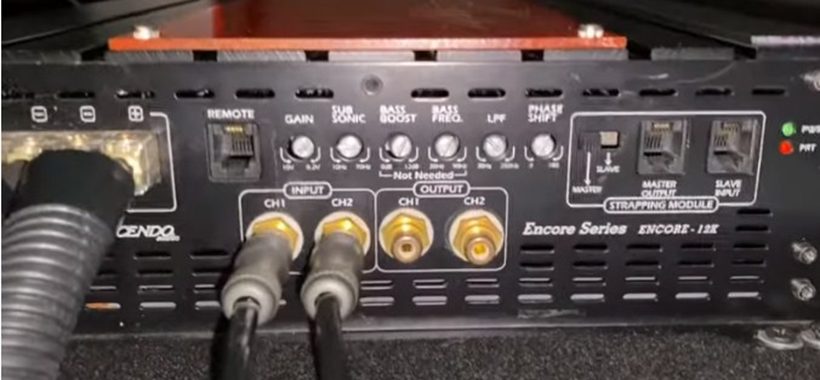
- Speaker-level Inputs
Speaker-level inputs, also known as high-level inputs, are common with 4-channel amplifiers.
The amps have electronics that minimize the wiring signals of the speaker to a low signal that is safe for the input circuit of the amplifier.
The best part is that they are easy to connect with.
Simply connect both the positive and negative wiring for the speaker channels on the small wiring harness.
Next, plug it into the input connector of the speaker level.
- Line-level Converters
These are designed to let you connect to the RCA inputs of an amplifier.
This is done by converting the speaker outputs from your stereo to a low signal level that an amp power can use.
When shopping for line-level converters, make sure you buy a high-quality line-level adapter. With this, you will avoid poor sound quality and noise, among other issues.

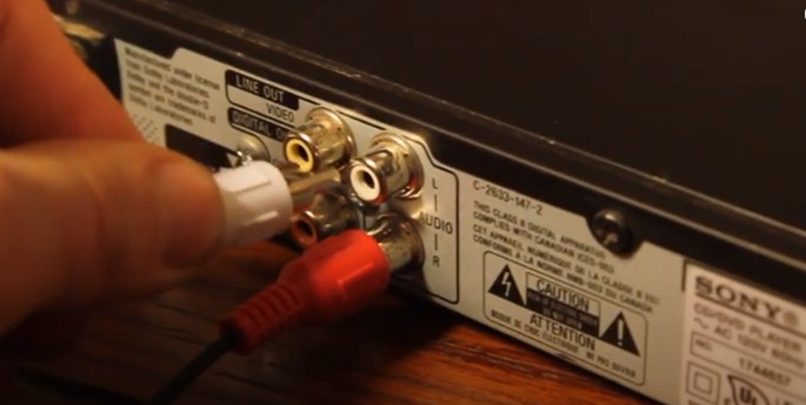
What to Know about RCA Jack Connections
Also known as line-level, RCA jacks provide a lower-noise, clean, and clear connection compared to speaker-level adapters.
Let me mention that the difference may not be obvious to a regular average Joe. However, RCA cables are often the most preferred method of connecting a signal to an amp – that is if you have the option.
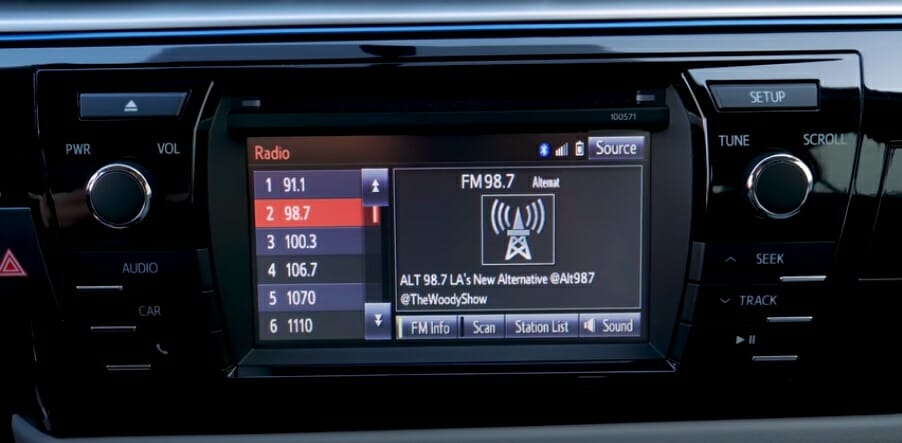
By the way, it will be easier if your stereo already has RCA jacks.
You are also guaranteed better sound. You need two stereo RCA 4 audio channels (male-to-male cables) to connect the radio to the 4-channel amp. These are 4 signal channels, covering left and right, front and left, and right rear.
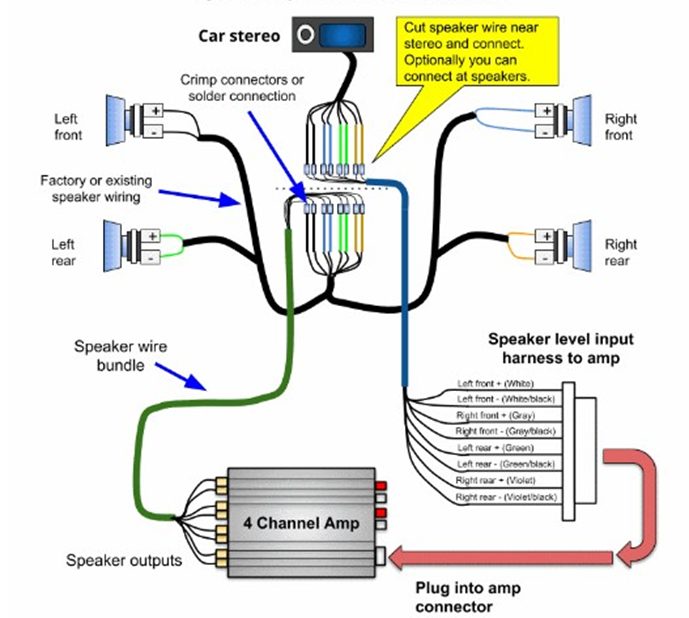
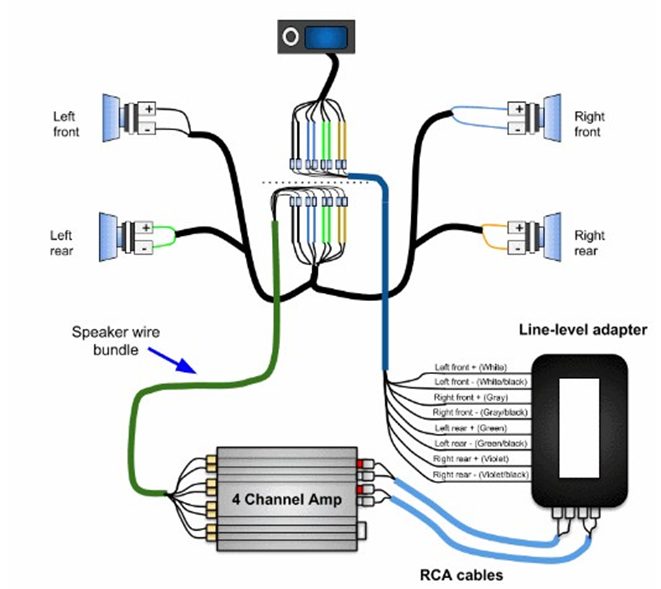
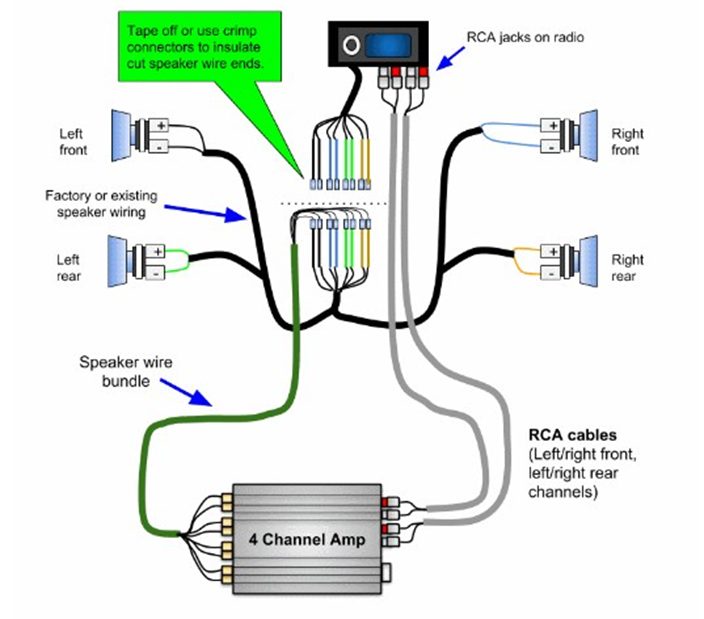
Helpful Diagram of 4-Channel Amp Signal Connection
Usually, you have to create one of the three standard scenarios I referred to earlier, which is connecting to the speaker-level inputs of your amp, connecting the amp and the RCA jacks on your radio, and utilizing a line-level convert.
Here are the three diagrams and the specifics of what you should know about each of them.
Speaker Level Connections
Line-Level Adapter Connection
RCA Cable Connection
How to Connect and Run Signal Wiring: Using Speaker-Level Connections
You need to connect wires if you want to use speaker-level outputs for getting a signal from your radio.
You should do this connection close to your radio before running the wire as a bundle together. You can use wire ties to bundle the speaker wires together to make the installation process easier and also keep things clean.
Step 1. Estimate Wire Length
Estimate the speaker wire length that will be enough to get to the amp for each channel.
Step 2. Run the Wire
Run the wire length from the radio to the location you want to install the amp and allow some extra that will be enough to run the interior parts and curves in your vehicle.
Step 3. Cutting Wires
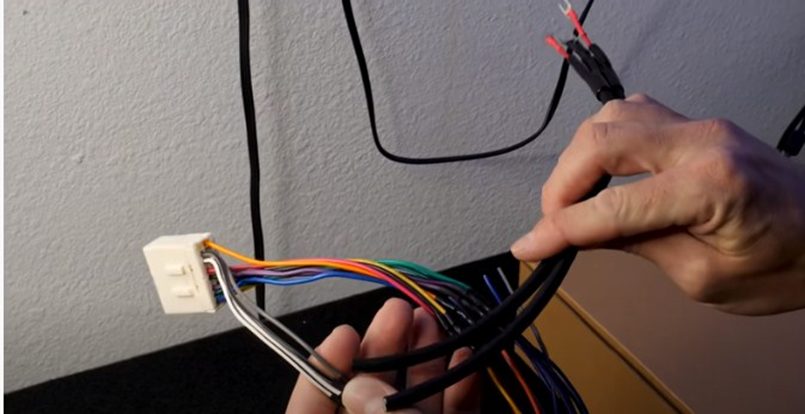
Cut 7 additional wire lengths to make a total of eight. These would be 4 channels running to the speaker-level inputs on the amp and 4 channels running from the amp to the factory speaker wiring of the radio.

Note that if you have a factory-fitted stereo, you need to get the wiring colors for your speaker wiring.
You will find resources online where you can find wiring diagrams specific to your vehicle and its color codes.
How to Make the Connections
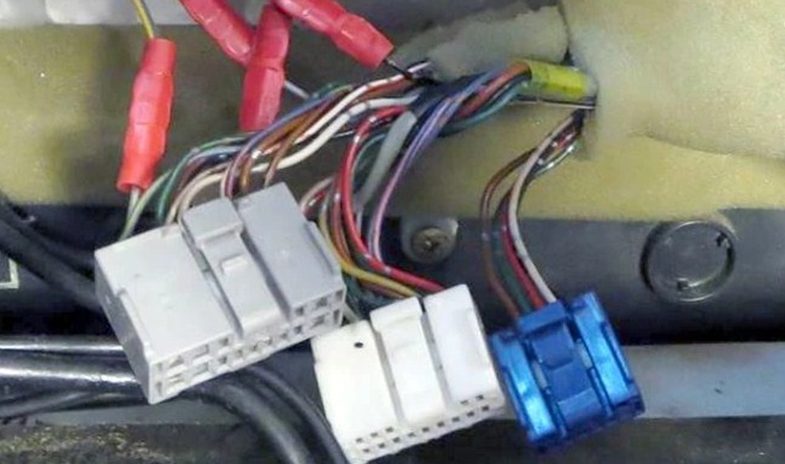
Step 1. Disconnect Plugs
Remove the radio carefully from the car and disconnect the plugs of the factory wiring.
Step 2. Cutting the Speaker Wires
Now cut the speaker wires. Make sure you leave an adequate length to get the wire around with enough length for connecting the wire.
Step 3. Stripping the Wires
Next, strip a little part of the wire of the stereo speaker and amp speaker wiring. You should connect to the speaker of the stereo output side if you are using a line-level adapter.
Step 4. Connecting the Four Pairs of Wires
After this, connect the four pairs of wires to the speaker wiring within the harness.
Step 5. Soldering the Wires
Slot in the stripped wire of about a quarter inch into the connectors and carefully crimp them with a crimp tool. You can also twist the wire together and solder it and then wrap it carefully with an electrical take.
Step 6. Speaker-level Inputs
If you are using speaker-level inputs on the amp, connect the same four wire pairs to the stereo output.
Step 7. Wrap Wires with Electrical Tapes
When you are done connecting the wires, bundle them up with wire ties or wrap them up with electrical tape. Make sure you space out the tape or wire ties about one or one-and-a-half inches along the wire length. (1)
How to Connect RCA Cables
If your stereo comes with RCA jacks or you want to use a line-level converter, you should connect all four cable plugs to the rear and front outputs.
You may notice that your RCA cables are labeled with the right and left symbols. Sometimes, clear, white, or some lighter shades can be used to indicate the left channel. Try to connect the cables using the right color to enable you to identify which is which.
You can also use a marker, pen, or masking tape to mark the rear and front if the RCA cables have the same color.
How to Connect to Remote-on Amp Wire
Of course, the remote wire is also important.
Usually, the amp wiring kits come with a small wire used for connecting the amp to enable it to switch off and on with the ignition switch’s accessory position.
To connect to remote-on amp wire:
Step 1. Find a +12V Wire
Find a +12V wire with power when you switch the ignition to ACC but also turn it off with a key.
Step 2. Install the Radio
Before you install the radio, connect this wire and run it beside the speaker wiring.
How to Connect a 2-Channel Car Stereo to a 4-Channel Amp
It’s possible to connect the head unit of your car stereo with 2 channels to a 4-channel amp.
For this, you need two female-to-male RCA Y adapter cables.
Connect the left channel RCA jack of the head unit to the left rear and left front amp inputs. Do the same for the right channel.
You can be sure that the sound quality will be the same because the amplifier will receive the same signal and the same quality in both the front and rear channels. However, note that you would not have a front-to-rear fader control such as you have with head units with outputs with four channels.
When you are done connecting the stereo to the amp, you have to fine-tune the rear gain and set the level of volume for the rear speakers based on your preference. Usually, this will depend on the signal strength of the stereo.
How to Install the Amp
Your amplifier generally needs a sound metal connection to the ground.
Additionally, you have to run the wire of the positive battery to the engine compartment. Note that the amp wiring kit will come with a fuse holder, which you have to install close to the battery. (2)
You will find the instructions for connection on the kit you purchase. Also, you need to connect both the wire you installed from the radio with the speaker outputs of the amp.
Step 1. Connect the Fuse Holder
Connect the fuse holder to a positive battery clamp stud with a ring terminal. Ensure that the fuse holder is within 12-inch wire length from the post and make sure that all metals are clean with good contact.
Step 2. Route Positive Cable
Route positive cable via rubber seal where possible and pull the wire using straightened coat hanger. Next, route the wire through any nearby hole.
Step 3. Run the Wire
Run the wire down the side of the interior and hide it under the carpet or the battery side of the car. Using a zip tie, bundle them together.
Step 4. Connect the Ground Wire
Connect the ground wire to bare metal on the body of the car and use self-tapping screws to hold it in place.
Step 5. Connect the Remote Lead
Connect the remote lead to the stereo remote and connect RCA cables to RCA jacks. You can also connect the wire to the rear speaker output for signal.
Step 6. Connect Signal Inputs
Connect signal inputs and speaker wire to the amp.
How to Set up the Amp
After completing the amp installation, the next step is to set up the crossovers and gain levels of the amp.
To do this, follow the steps below:
Step 1. Reduce the Gain Controls
Reduce the gain controls on the amp.
Step 2. Turn Down the Volume
Turn down the volume of the stereo to a maximum of 2/3.
Step 3. Raise the Gain Controls Slowly
Raise the gain controls slowly until you achieve the right volume.
With this, you should have the right volume on the stereo and the noise would be minimal. You also still have to tweak it a little bit if you feel the volume is too low or too high.
How to Set the Crossover
When you use a high-pass crossover, you achieve more volume and less distortion.
It also helps to protect your speaker from very high bass. To set the crossover, turn on the high-pass element for both the rear and front channels. If it has an adjustable dial, set it close to 50-60Hz.
If the cutoff doesn’t have an adjustable frequency, chances are that it is already preset.
Final Phase: Test and Tweak
For this, play some familiar music and adjust the fader, treble, and bass to check for any problem with the sound.
If you notice anything off, simply tweak it to suit your preference. You should use a song that you are familiar with for the test so that you can recognize any off sound or noise easily.
Take a look at some of our related articles below.
- How to wire speakers with 4 terminals
- What gauge speaker wire for subwoofer
- How many watts can 16 gauge speaker wire handle
References
(1) space out – https://www.verywellhealth.com/what-is-spacing-out-3145946
(2) engine compartment – https://www.volvocars.com/uk/support/
manuals/s60/2016w17/maintenance-and-service/engine-compartment/engine-compartment—overview
Video References
Quality Mobile Video
NextLevelCarAudio
CFilms