How to Tune an Amp With A Multimeter

Music is powerful, and a good sound system makes it even better. Get the most out of your car stereo and sound system by correctly tuning your Amp with a multimeter. It not only protects your equipment but gives you excellent sound quality too.
You can set your amplifier’s gain by matching the head unit’s output A.C. voltage to the amp’s input voltage. This also prevents the clipping of sound.
To tune the gain controller, you need the following:
A digital multimeter, speakers, your amplifier’s manual, a calculator, and a CD or pen drive with a test tone. Here are the step-by-step instructions to tune an amp by different methods.
How to Tune an Amp with a Multimeter?
Step 1: Measure the speaker’s resistance using a multimeter
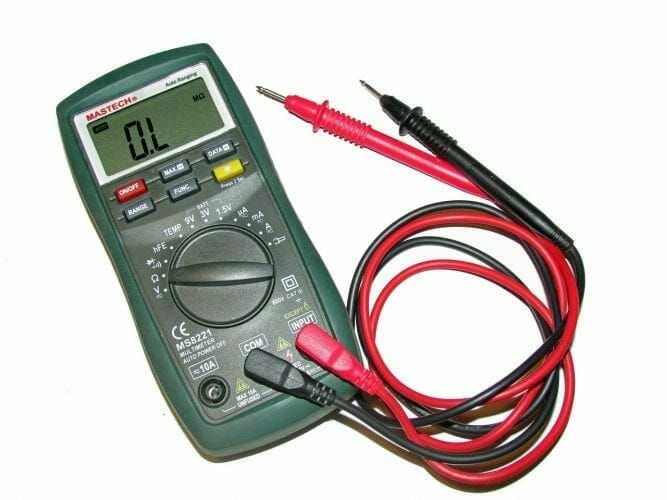
Test the speaker’s resistance. You’ll be connecting to the amp using a digital multimeter. For this, cut off the power supply of the speaker. Then determine which terminal on the speaker is positive and which is negative. Connect the multimeter’s red probe to the positive terminal and the black probe to the negative terminal.
Record the ohm resistance visible in the multimeter. Remember, the resistance of maximum loudspeakers is 2, 4, 8, or 16 Ohms. So, it is safe to note the closest one to the value recorded.
Step 2: Note the amp’s recommended wattage output
Pick up the amplifier’s user manual and find the recommended wattage output. Compare this against the ohm resistance of your speaker.
Step 3: Calculate the required A.C. voltage
Now, we need to find the target voltage for the amp. This is the output voltage at which we need to set the amp’s gain. To calculate it, we need to use a variation of Ohm’s Law, V = √(P.R.), where V is the target A.C. voltage, P is the Wattage, and R is the Resistance (Ohm).
Let’s assume that your manual says the amplifier should be at 500 Watts, and the resistance of your speaker, which you found by the multimeter, is 2 Ohms. To solve the equation, multiply 500 Watts with 2 Ohms to get 1000. Now use a calculator to find the square root of 1000, and your output voltage is supposed to be 31.62 V in case of a one gain control.
If you have an amplifier with two gain controls, they will be treated independently.
For example, if the amplifier is 200 Watts by four channels, use the power output of one channel for your voltage calculation. The voltage for each gain control is the square root of 200 Watts x 2 Ohms.
Step 4: Unplug all accessories
Unplug all the additional accessories, including speakers and sub-woofers, from the amplifier you are testing. Disconnect only the positive terminals to remember the setup for when you need to plug them back.
Step 5: Equalizer settings to zero
Either turn off the equalizer or set all its settings like Loudness, Bass, Treble, Processing, Bass Boost, and Equalizer Functions to zero. This prevents the filtering of sound waves and hence, gives the maximum range of the bandwidth.
Step 6: Set gain to zero
For most amplifiers, the minimum setting is achieved by turning the dial in the counter-clockwise direction as far as it will go.
Steps 4, 5, and 6 leave the amplifier connected only to the power source.
Step 7: Set the volume to 75%
Turn the head unit to 75% of the maximum volume. This prevents the stereo from sending distorted sounds to the amplifier.
Step 8: Play the test tone
Make sure that the speaker is disconnected from the amp before moving further.
Now, you need a test tune to test your system. Play a test tone on the stereo with its sine-wave at 0 dB. The sound must have a frequency of 50 – 60 Hz for a subwoofer amp and a wavelength of 100 Hz for a mid-range amp. It can be created by using a program like an Audacity or downloading it from the internet. (1)
Set the head unit such that the tone plays on a loop continuously.
Step 9: Hook up the multimeter to the amplifier
Set your digital multimeter to A.C. Volts and choose the range in which the target voltage is present. Connect the multimeter leads to the speaker output ports of the amplifier. The multimeter’s positive probe must be placed in the positive terminal, and the negative probe of the multimeter in the negative terminal. This allows you to measure the A.C. voltage across the amp.
If the immediate output voltage displayed on the multimeter is higher than 6 V, then repeat steps 5 and 6.
Step 10: Adjust the gain knob
Slowly turn up the amplifier’s gain knob while keeping an eye on the voltage value displayed in the multimeter. Stop adjusting the knob as soon as the multimeter reads the target A.C. output voltage you calculated earlier.
Congratulations, you’ve set the gain on your amp correctly!
Step 11: Repeat for other amplifiers
Adjust all the amps in your music system using this method. This will give you the output that you’ve been looking for – the best one.
Step 12: Turn the volume to zero.
Reduce the volume on the head unit until it reaches zero, and turns the stereo off.
Step 13: Plug everything back in
Reconnect all the accessories, like other amplifiers and speakers; you removed before setting the gain. Ensure all the wires are connected correctly and switch on the head unit.
Step 14: Enjoy the music
Remove the test tune from the stereo and play one of your favorite songs. Surround yourself with gritty music and enjoy the perfect distortion.

Other Methods to Tune an Amp
You can adjust your amp’s gains and bass boost by manually tuning it and listening to what sounds best. But this method isn’t recommended because we often can’t capture the minute distortions.
Conclusion
Using a digital multimeter for setting your gains is one of the most effective and easy methods. It enables you to set the benefit for almost all amplifiers. The best method to prevent any distortion in your system is to use an oscilloscope. It pinpoints all the clippings and distortions. (2)
With the best multimeter with you, we hope this guide helps you tune in an Amp correctly.
You may also want to check and read other guides using a multimeter that may help you in the future. A few articles include: How To Test a Capacitor with a Multimeter, and How to Test Battery with Multimeter.
References
(1) wavelength – https://economictimes.indiatimes.com/definition/wavelength (2) oscilloscope – https://study.com/academy/lesson/what-is-an-oscilloscope-definition-types.html
