12 min read
How to Tune a 4-Channel Amp? (3 Methods)
Tuning a 4-channel amp can be somewhat complicated. Here are three methods that can solve everything.
Proper tuning of a 4-channel amp comes with many benefits. Good sound quality, long lifespan of speakers, and eliminating distortion are a few of them. But for beginners tuning the amp can be uncharted waters because of the complicated process. So, I’ll teach you three different methods to tune a 4-channel amp without destroying your car audio system.
In general, to tune a 4-channel amp, follow these three methods.
- Manual tuning
- Use a distortion detector
- Use an oscilloscope
Read the below separate step-by-step guide for more details.
Method 1 – Manual Tuning
The manual tuning process might be the best option if you are looking for quick tuning. For this process, you only need a flathead screwdriver. And you should be capable of identifying distortion just by listening.
Step 1 – Turn Off the Gain, Filters, and Other Effects
First and foremost, adjust the amp’s gain to the lowest. And do the same for low and high pass filters. If you use special effects such as bass boost or treble boost, turn them off.
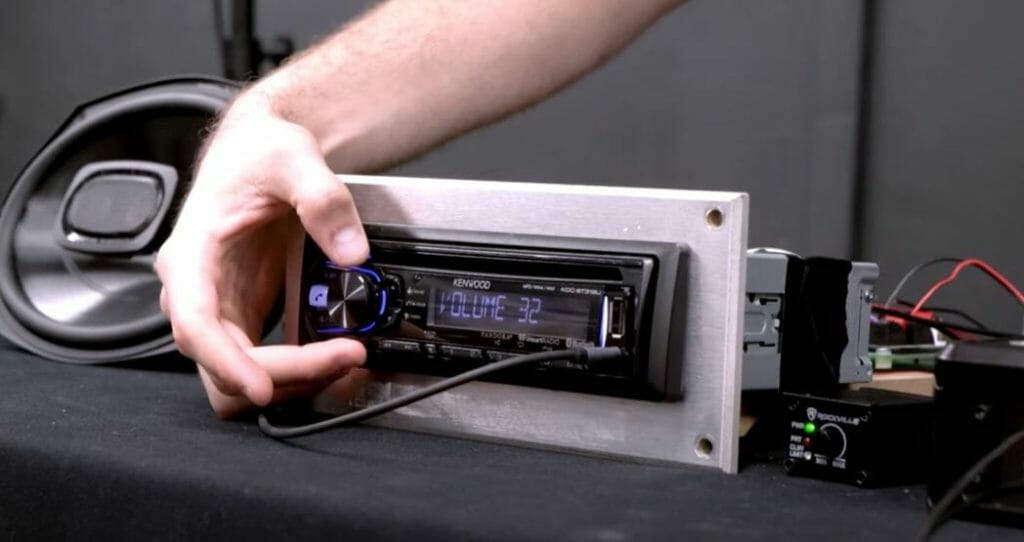
Ensure to turn off the above setting in the head unit too. Keep the head unit volume at zero.
Step 2 – Increase and Reduce Volume in the Head Unit
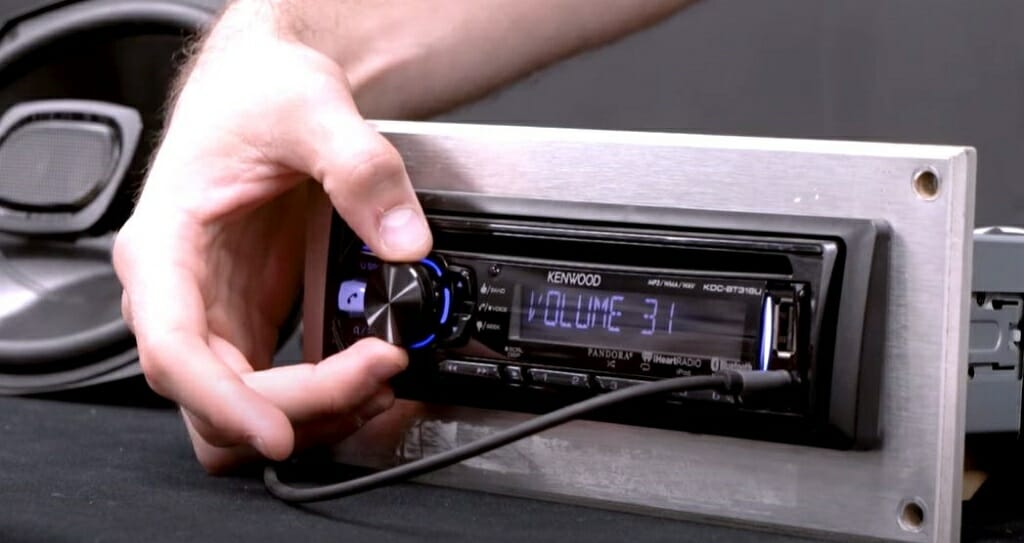
Then, slowly increase the head unit’s volume and start playing a familiar song. Increase the volume until you hear any distortion. Next, reduce the volume by one or two levels until you eliminate the distortion.
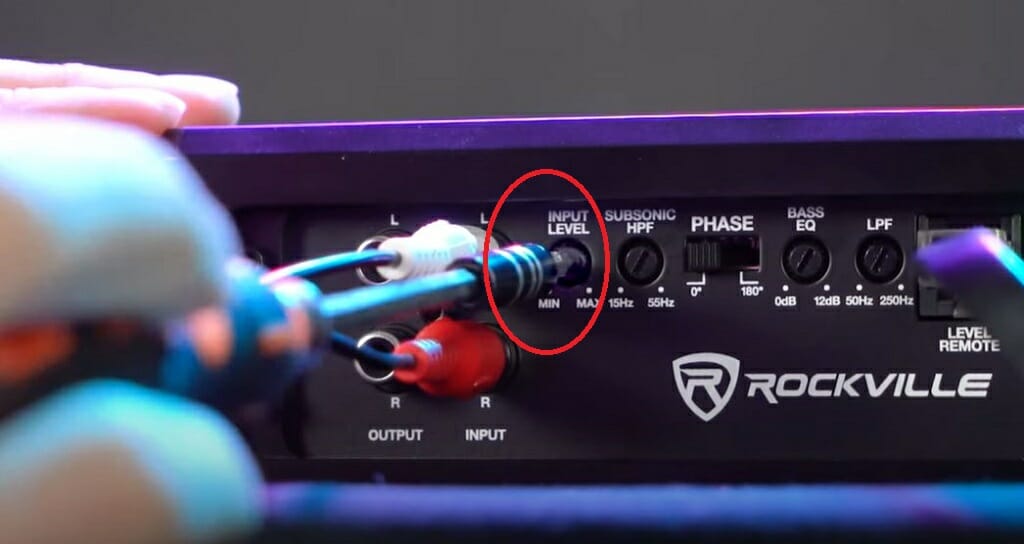
Step 3 – Increase and Reduce Gain in the Amp
Now, grab the flat screwdriver and locate the gain knob on the amp. Gently turn the gain knob in a clockwise direction until you hear any distortion. When you hear distortion, turn the nob in a counter-clockwise direction until you get rid of the distortion.
Keep in mind: The song should play without disruptions throughout steps 3 and 4.
Step 4 – Turn off the Bass Boost and Adjust the Filters
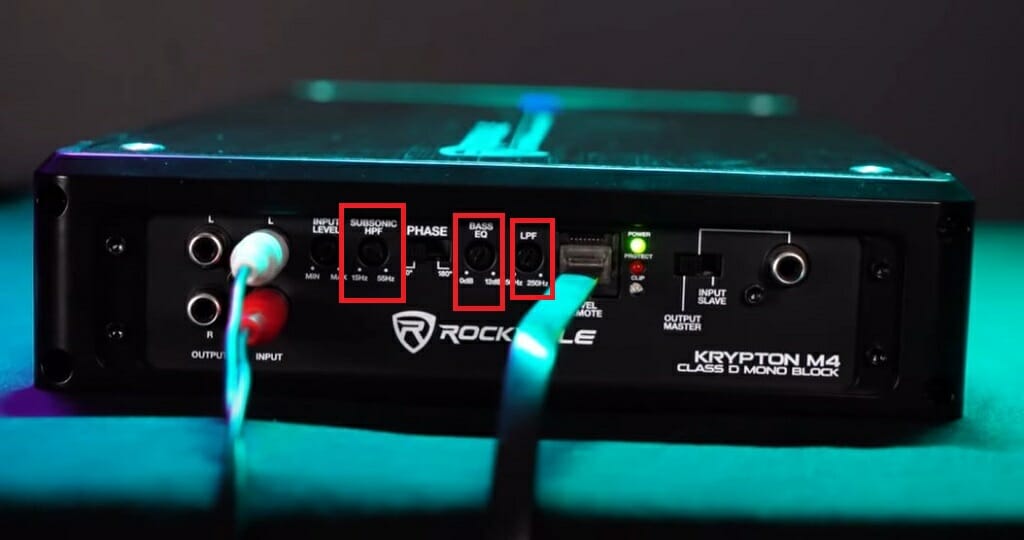
After that, turn the bass boost node to zero. Dealing with bass boost can be troublesome. So, stay away from the bass boost.
Next, set the required low pass and high pass filter frequencies. These frequencies might vary depending on the sub-woofers and tweeters you are using.
However, adjusting the low pass filter to 70 – 80Hz and the high pass filter to 2000Hz is sensible (sort of a rule of thumb).
Step 5 – Repeat
Repeat steps 2 and 3 until you reach at least a volume level of 80%. You might have to repeat the process 2 or 3 times.
Now your 4-channel amp is tuned properly.
Important: Although the manual tuning process is straightforward, some might have trouble identifying distortion. If so, use any method from the below two.
Method 2 – Use a Distortion Detector
A distortion detector is an excellent tool for tuning a four-channel amplifier. Here, you can learn how to use it.
Things You’ll Need
- Distortion detector
- Flat head screwdriver
Step 1 – Turn off the Gain, Filter, and Other Effects
First, turn off all the settings like in method 1.
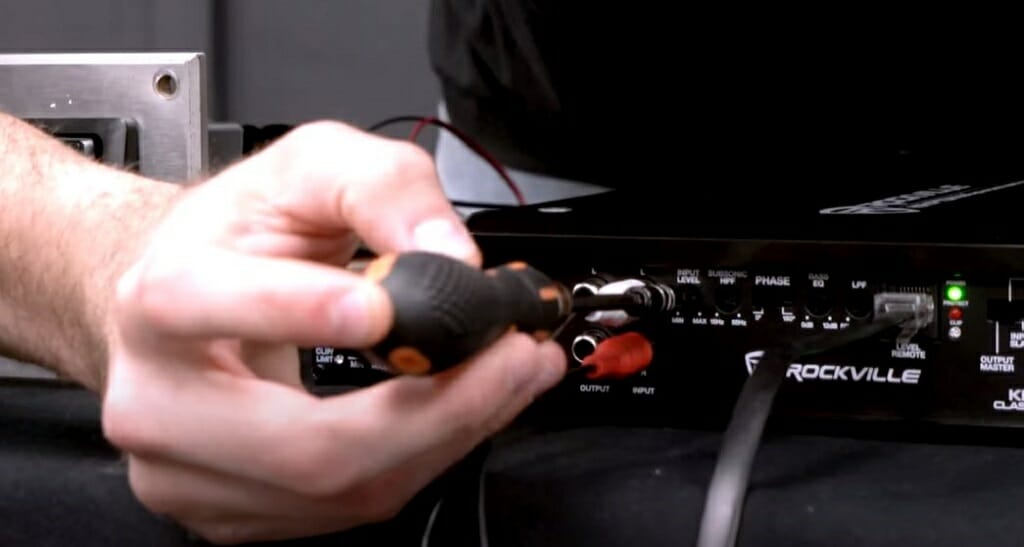
Step 2 – Connect the Probes
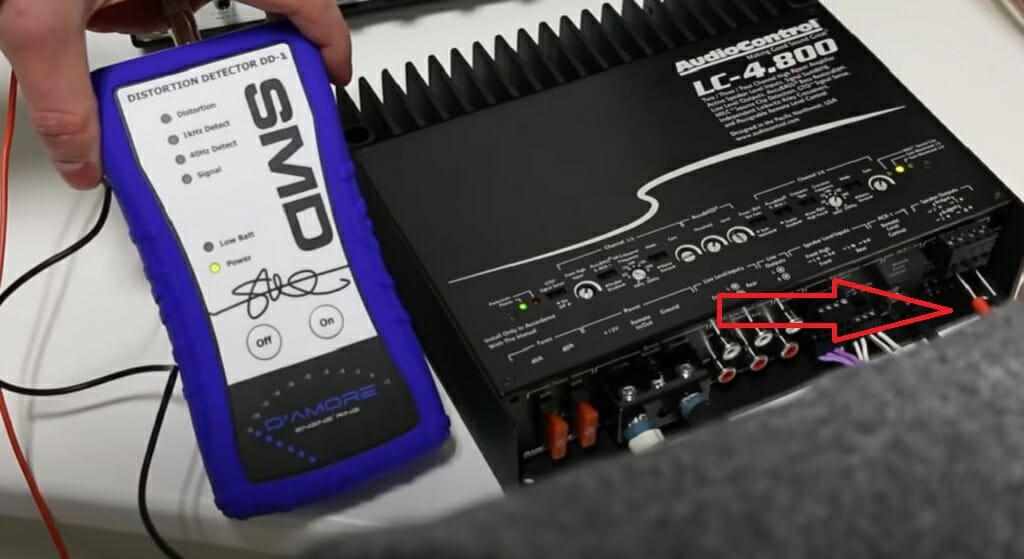
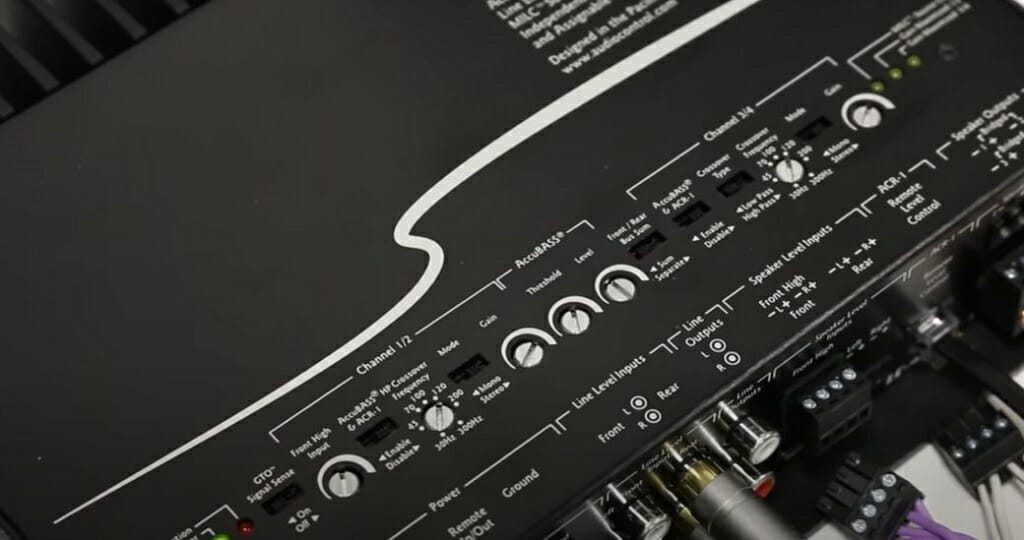
The distortion detector comes with two probes. Connect them to the speaker outs of the amp.
Step 3 – Adjust the Head Unit Volume
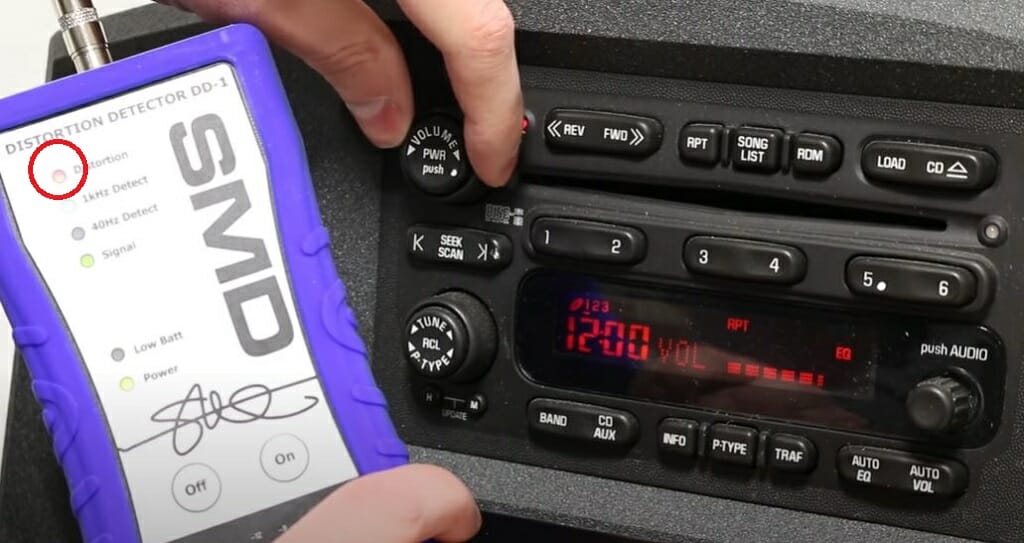
Then, increase the head unit volume. And at the same time, check the distortion detector’s LED indicators. The top red one is for distortion. So, when the device detects any distortion, the red light will be turned ON.
At that point, stop increasing the volume and reduce the volume until the red light goes away.
Step 4 – Adjust the Gain
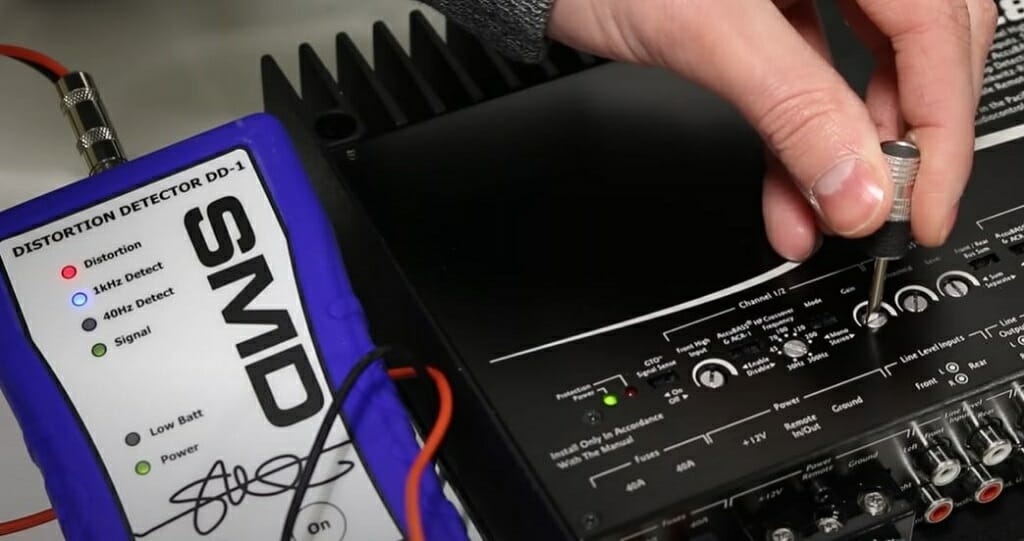
Follow the same process for the amp’s gain as in step 3 (increase and decrease the gain according to the distortion). Use the screwdriver to adjust the gain node.
Step 5 – Adjust the Filters

Set the low pass and high pass filters to the correct frequencies. And turn off the bass boost.
Step 6 – Repeat
Repeat steps 3 and 4 until you reach 80% volume without distortion.
Method 3 – Use an Oscilloscope
Using an oscilloscope is another way to tune the four-channel amplifier. But this process is a bit complex.
Things You’ll Need
- Oscilloscope
- Old smartphone
- Aux-In cable for phone
- Few test tones
- Flat screwdriver
Step 1 – Turn off the Gain, Filter, and Other Effects
First, turn off the amp’s gain, filter, and other special effects. Do the same for the head unit. Also, adjust the head unit volume to zero.
Step 2 – Disconnect All the Speakers
Then, disconnect all the speakers from the amp. During this tuning process, you might accidentally damage speakers. Hence, keep them disconnected.
Step 3 – Connect the Smartphone
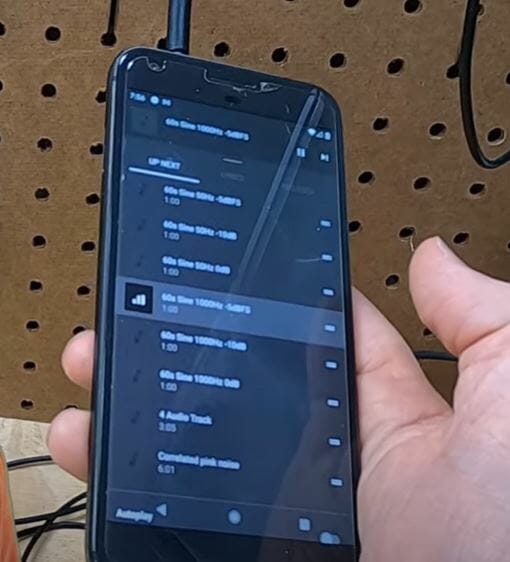
Next, connect the smartphone to the auxiliary inputs of the head unit. Use a suitable Aux-In cable for this. Then, play the test tone. For this process, I choose a 1000Hz test tone.
Note: Remember to turn ON the head unit during this step.
Step 4 – Set up the Oscilloscope
The oscilloscope is designed to display a graph of an electrical signal. Here, you can inspect the voltage graph. But to do that, first, you’ll have to set the oscilloscope correctly.
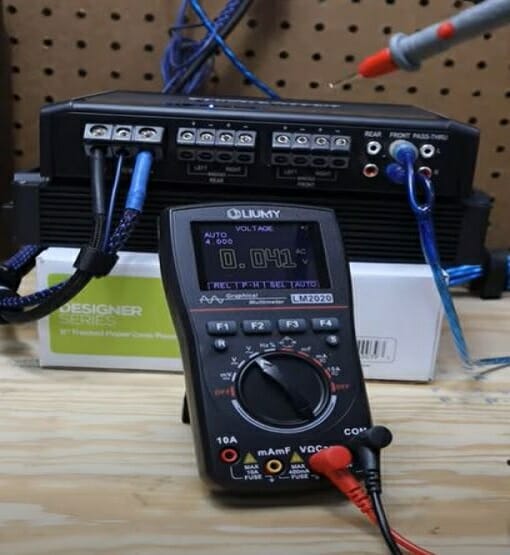
The oscilloscope is very similar to a digital multimeter. There should be two probes; red and black. Connect the red probe to the VΩ port and the black probe to the COM port. Then, turn the dial to the AC Volts settings.
Remember: If needed, adjust the low pass and high pass filters before starting step 5. And turn off the bass boost.
Step 5 – Connect the Probe to the Speaker Outs
Now, connect the oscilloscope probes to the speaker outs.
In this 4-channel amp, two channels are for the front two speakers. And the other two are for the rear speakers. As you can see, I’ve connected the probes to the one front channel.
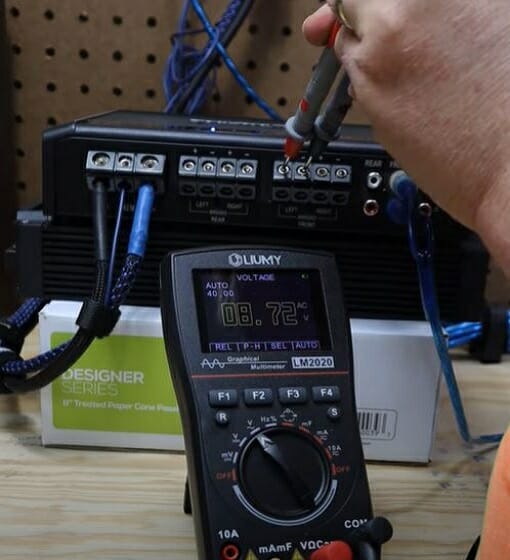
Most oscilloscopes come with a default mode and display numbers (voltages, current, and resistance). But you need the graph mode. So, follow these steps.
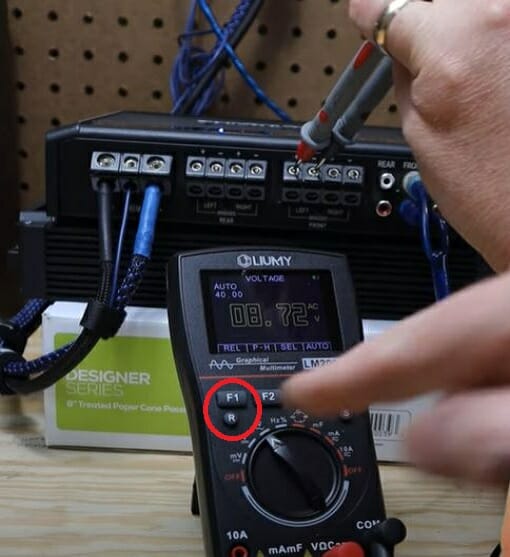
Hold the R button for 2 or 3 seconds (below the F1 button).
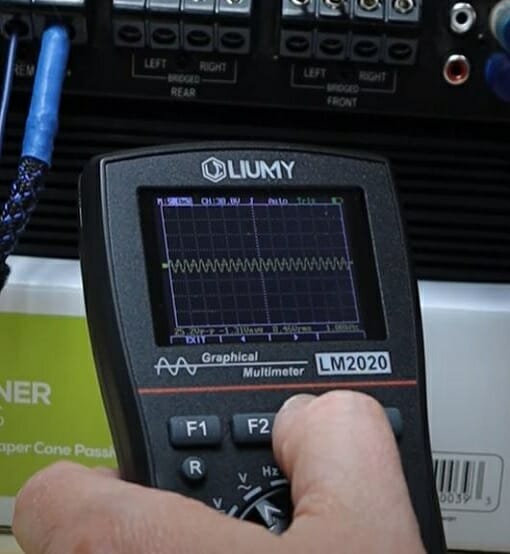
Adjust the sensitivity of the graph using the F1 button.
Step 6 – Turn the Volume Up
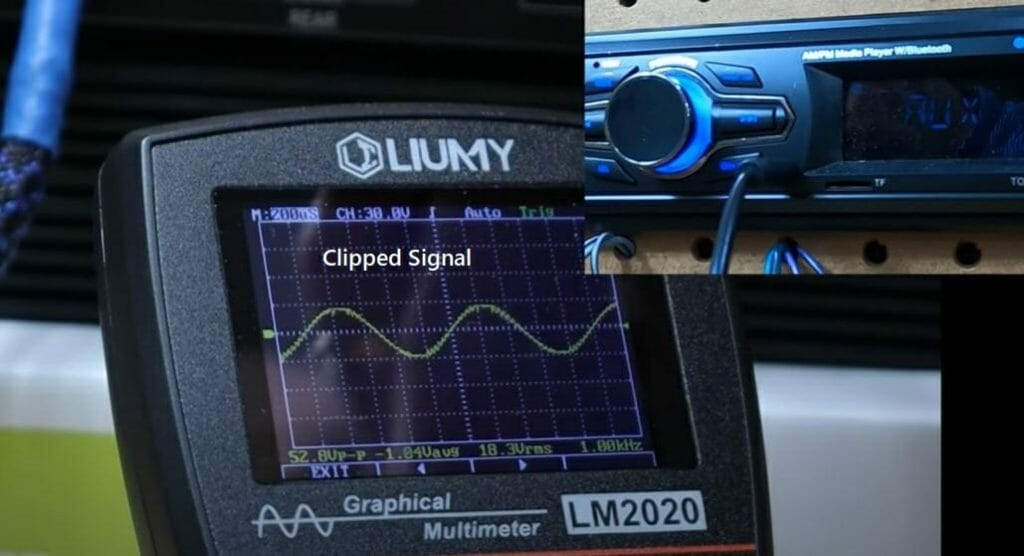
After that, turn up the head unit’s volume until the top and bottom of the waveform flatten (this signal is known as a clipped signal).
Next, turn down the volume until you get a clear waveform.
This is how you can get rid of the distortion using an oscilloscope.
Step 7 – Adjust the Gain
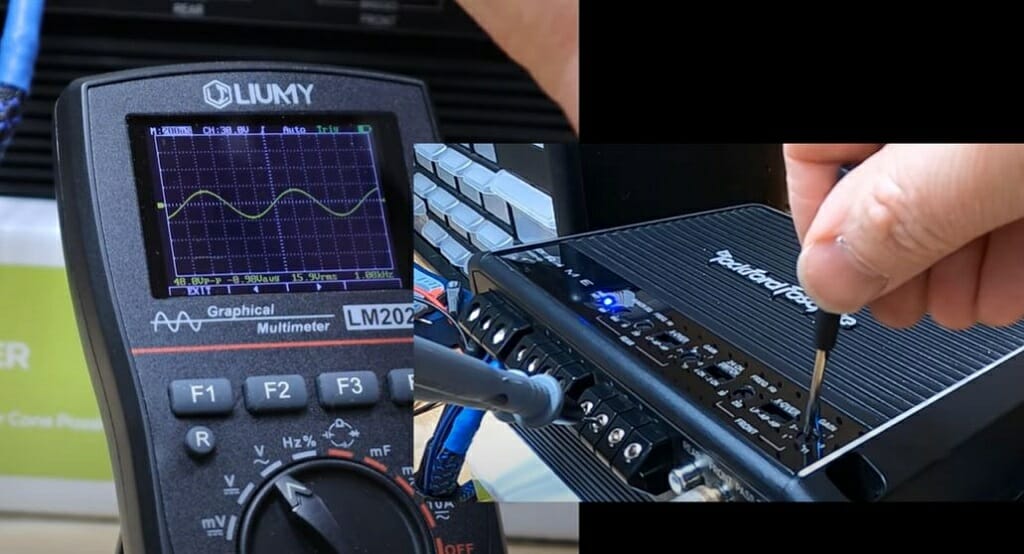
Now, you can adjust the amp gain. To do that, place the two probes on the same front channel as in step 6.
Grab the flat screwdriver and turn the amp gain nod clockwise. You should do this until the oscilloscope displays a clipped signal. Then, turn the nod in a counter-clockwise direction until you get a clear waveform.
Repeat steps 6 and 7 if needed (try to reach at least 80% volume without distortion).
Step 8 – Tune the Rear Channels
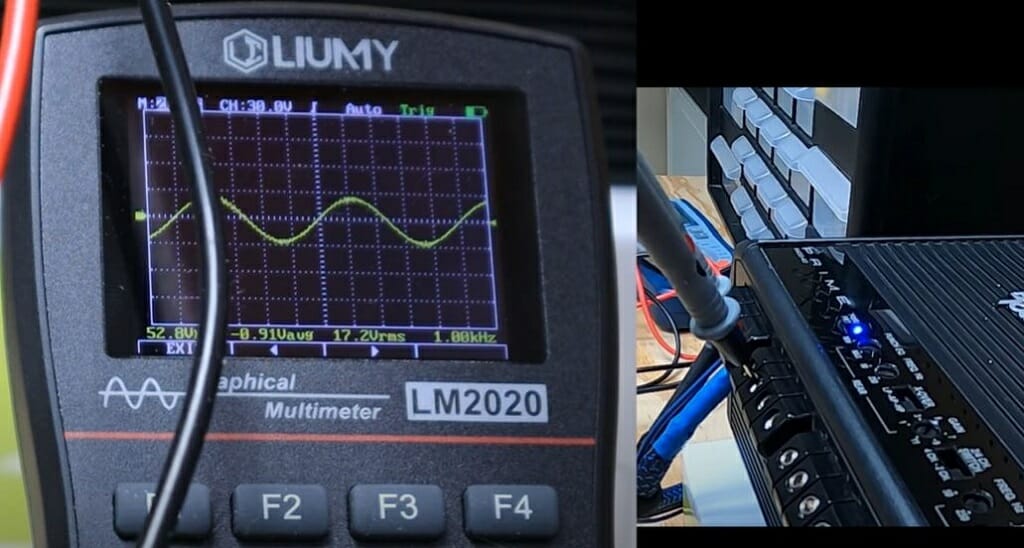
Follow the same process as in steps 5,6, and 7 to tune the rear channels. Test one channel each for both front and rear channels. Now your 4-channel amp is tuned and ready to use.
Take a look at some of our related articles below.
- How to turn on amp without remote wire
- How to tune an amp with a multimeter
- Where to connect remote wire for amp
Video References
HifiVega
Rockville Audio
CarAudioFabrication
DIY Audio Guy
Fender
EMF Audio