13 min read
How to Measure Amps with a Multimeter (6-Step Guide)
Ever wondered how to measure DC amps with a multimeter? I’m here to break it down for you.
Quick Summary:
🔍 Step 1: Know Your Circuit’s Normal Current
🎚️ Step 2: Set the Multimeter
🔌 Step 3: Connect the Probes
⚡ Step 4: Jump Into the Circuit
🔛 Step 5: Power on the Circuit
📝 Step 6: Record the Reading
We’ll dive into the fundamentals of using a multimeter, from knowing the amp rating of your circuit to selecting the right multimeter for the job. By the end of this, you’ll feel comfortable and confident about measuring current safely.
Go-To Tools for Measuring DC Amps
Hey DIYers, let’s chat about gearing up for measuring DC amps. We’re not just diving in with any tools – we’re picking the best ones for the job, just like I do in my projects.
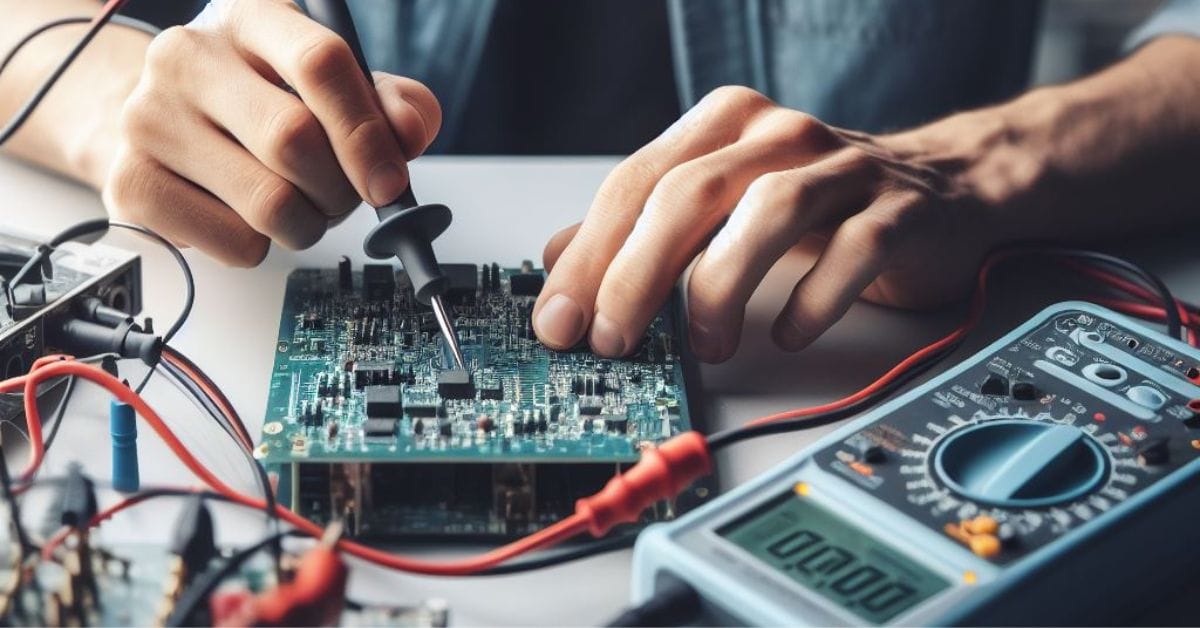
- Digital multimeter. Now, this isn’t just any old multimeter. We’re talking about a beast that can handle up to 10 amps. I’ve relied on mine more times than I can count, whether I’m tinkering with my car or fixing up an old radio. It’s the cornerstone of our toolkit and the key to precise measurements.
- Resistor. Next in our arsenal is a resistor, and not just any resistor. This little guy needs to be spot-on for the power source and the current you’re measuring. Choosing the right size is crucial – it’s like finding the perfect puzzle piece.
- Alligator Clips. These aren’t your average desk accessory. When I’m measuring amps, these clips are a game-changer. They free up my hands and keep me safe from the circuit. I remember once working without them – let’s say it was a juggling act I don’t want to repeat. With alligator clips, I can focus on the task without worrying about holding the probes in place.
Remember – don’t underestimate the humble multimeter. Sure, it might not look like much, but trust me, it packs quite the punch in your home DIY or hobbyist arsenal.
How to Measure Amps with a Multimeter
Ever wondered how to measure DC amps with a multimeter? Let me take you on this electrifying journey, a skill that’s been a game-changer in my world of DIY electronics and car repairs.
Here’s my step-by-step approach, peppered with some of my own adventures.
Step 1: Know Your Circuit’s Normal Current
Before jumping in, it’s crucial to know the normal current of the circuit you’re working on. It’s like knowing the normal tempo before you start dancing.
Dive into the device’s manual or specs to get these crucial details. It sets the stage for what’s to come.
Step 2: Set the Multimeter
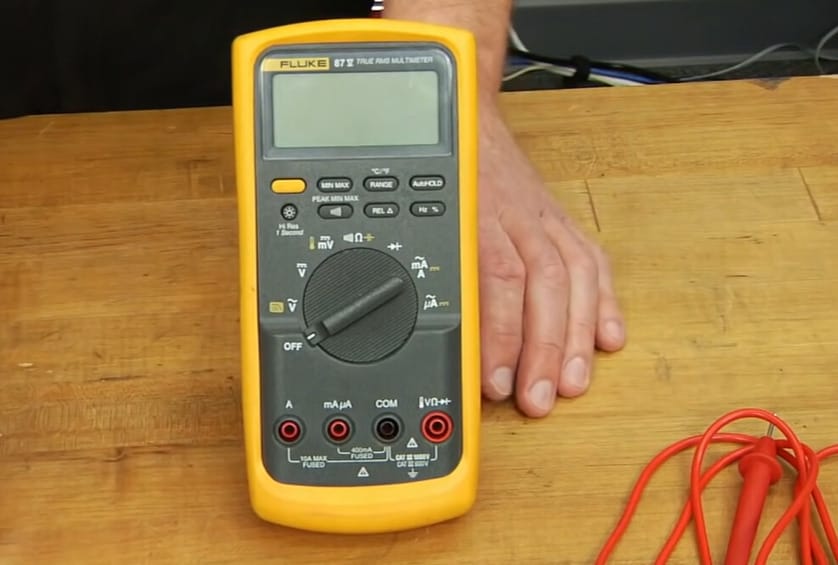
Now, let’s grab that multimeter. This tool has been my loyal companion in countless projects. Set it to measure current (Amps), and make sure you’re on the DC setting.
It’s like picking the right tools before you start building something amazing.
Step 3: Connect the Probes
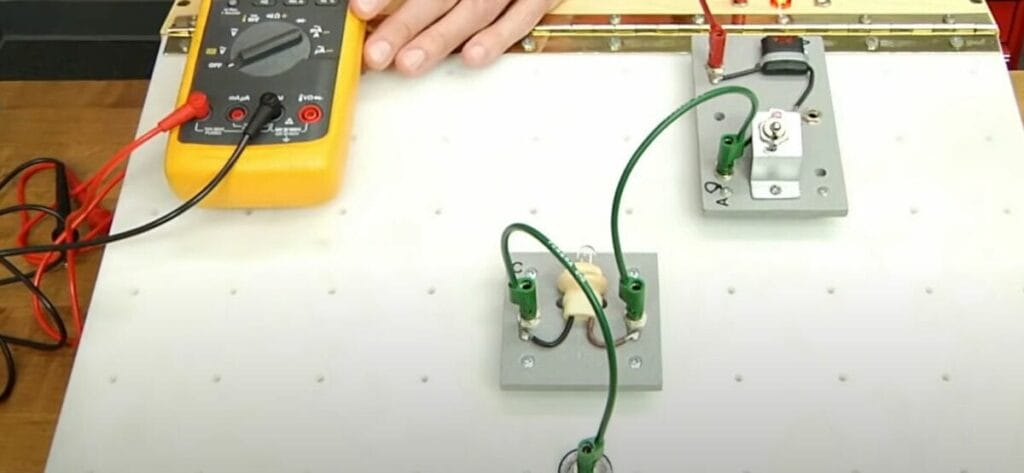
Time for some action. Plug the black probe into the COM port – this is our grounding superstar.
Then, depending on the current we’re measuring, the red probe either goes into the mA slot for smaller currents or parties with the 10A slot for the big league.
It’s like choosing the right partner for a dance – you’ve got to match their moves.
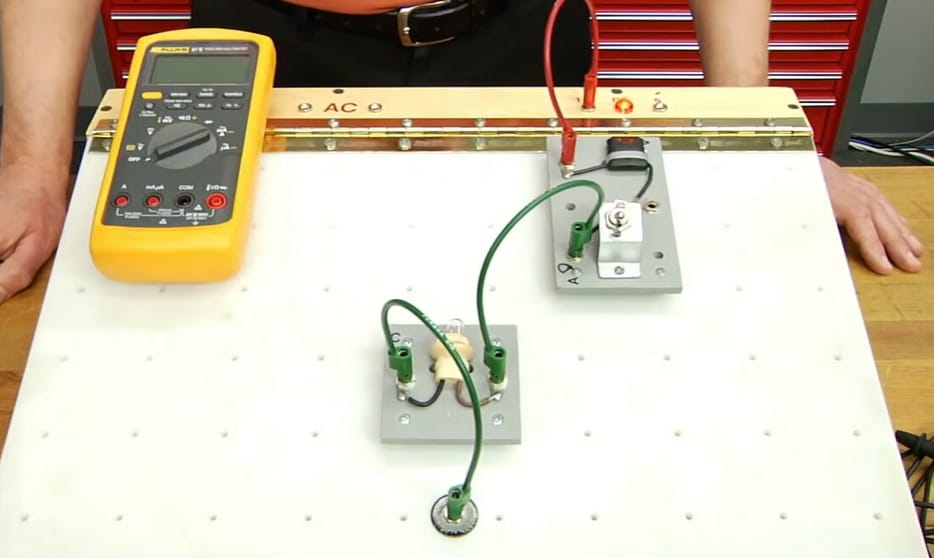
Step 4: Jump Into the Circuit
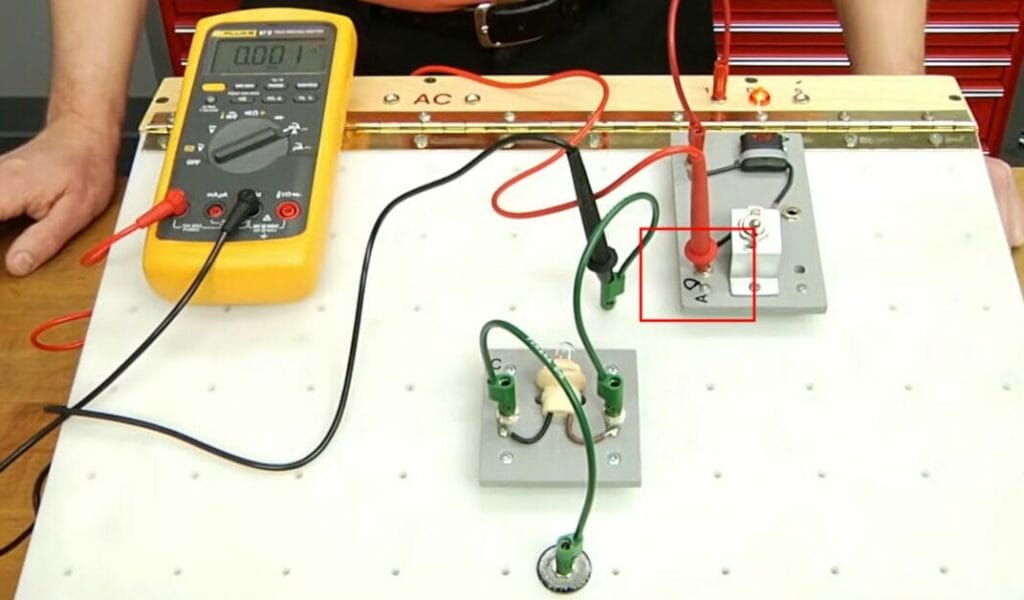
Now, let’s get into the heart of the circuit. Open it up at a spot that makes sense and line up those probes – red goes to the power source, black heads towards the ground.
It’s like finding the perfect spot to jump into a dance circle – you’ve got to find the right spot to fit in smoothly.
Step 5: Power on the Circuit
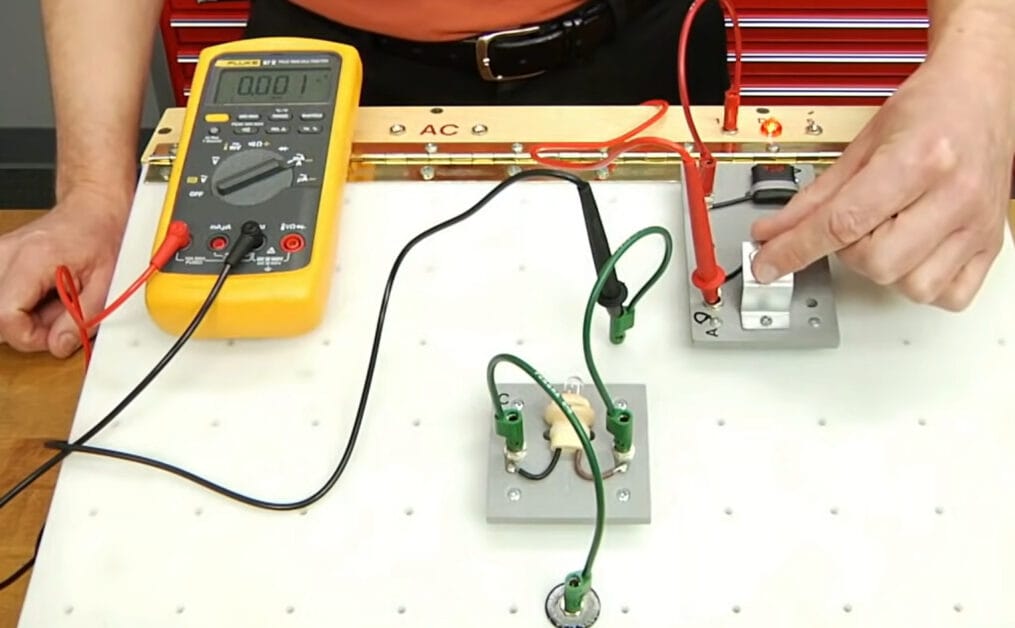
Alright, time to bring some power into the mix. Treat this step with respect – electricity is a powerful dance partner. I’ve had a few surprises when I rushed this in the past.
A slow and careful approach here is the key to success.
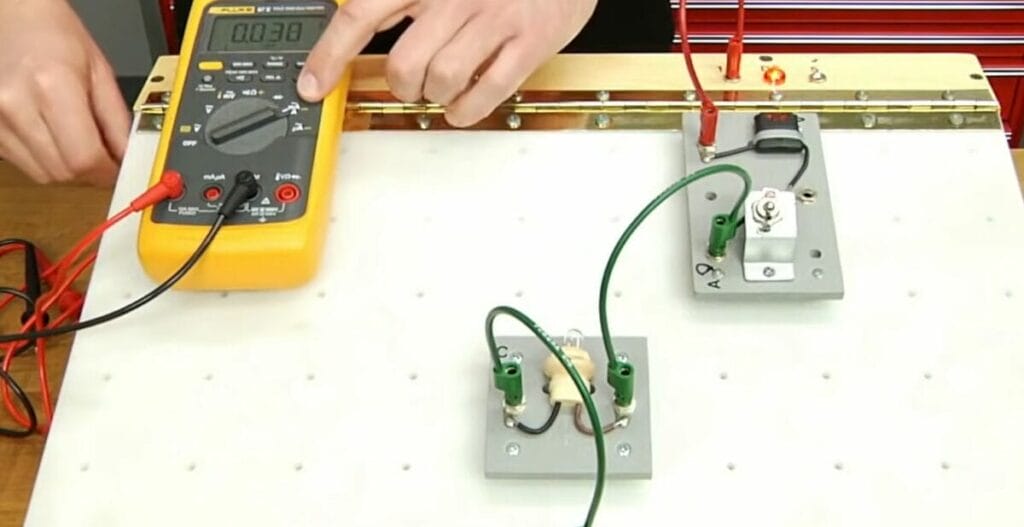
Step 6: Record the Reading
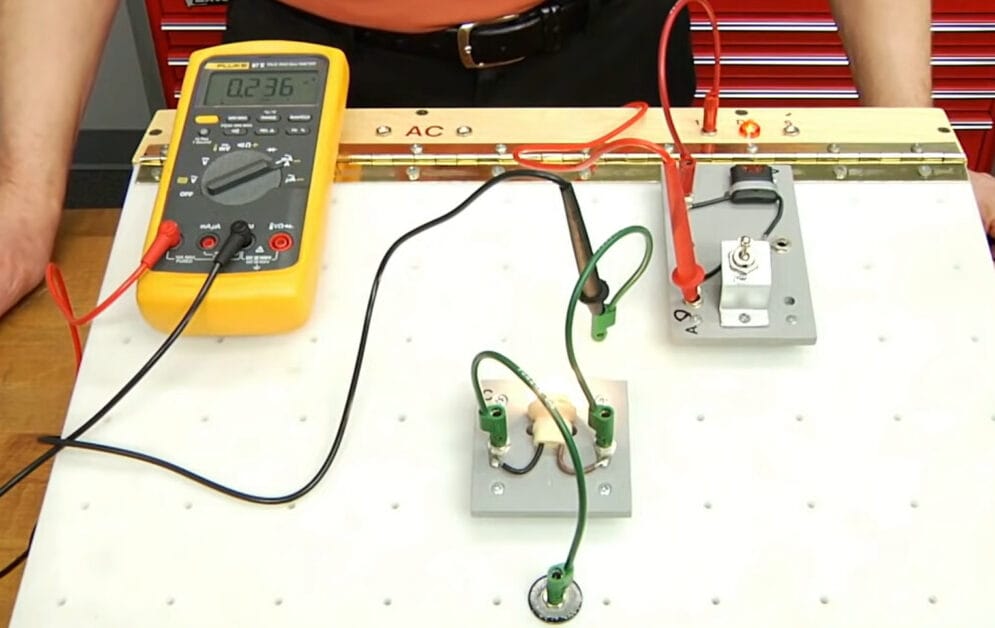
Now, watch as your multimeter display comes to life with a reading. This is the heartbeat of your circuit. Compare this to what’s expected and see if your circuit is dancing to the right rhythm.
I recall a time I was chasing an electrical ghost in my car. When I finally measured the amps, it turned out to be just a greedy stereo system hogging the juice! It’s moments like these that remind me why I love this stuff – it’s like solving a mystery one clue at a time.
So there you have it, folks. Measuring amps with a multimeter isn’t just about numbers. It’s about understanding the rhythm and flow of your circuit, and sometimes, it’s about catching that one odd beat that tells the whole story. Happy measuring!
Multimeter Troubleshooting: Navigating Unusual Readings
Hey, DIYers! Ever felt like a detective while handling electrical issues? I sure have. Let’s jump into some trickier situations I’ve encountered with my trusty multimeter.
Here’s a breakdown in a neat table – because who doesn’t love an organized approach to a good mystery?
| Challenge Faced | Unusual Reading Encountered | How I Tackled It |
|---|---|---|
| Random Shutdowns in a Classic Car | Voltage drops at irregular intervals | Had a classic beauty of a car that just loved to shut down randomly. My multimeter was showing voltage drops at no particular pattern. After some head-scratching, I discovered it was due to an old, frayed grounding strap. Replacing it got the car purring steady again. |
| Unexplained Flickering in Home Wiring | Inconsistent resistance in multiple spots | This one was a doozy. A house with lights flickering like a haunted mansion. The multimeter showed resistance all over the place. Turned out, it was a combination of old wiring and some DIY attempts gone wrong by the previous owner. Rewiring part of the house solved this spooky scenario. |
| RV Electrical System Malfunctioning | Sudden voltage spikes | I was helping a buddy with his RV, which had electrical systems going haywire. My multimeter caught sudden voltage spikes. After a thorough investigation, I pinpointed it to a malfunctioning inverter. Swapping it out brought peace back to the RV. |
| Boat Navigation Lights Dimming | Low amperage in the circuit | A friend’s boat had navigation lights that were dimming. When I checked with the multimeter, the amperage was lower than expected. It was a corroded connector – a common villain in marine electronics. Cleaned it up, and the lights were bright as new. |
Remember, troubleshooting with a multimeter isn’t just about reading numbers; it’s about understanding the story behind those numbers. Keep these examples in mind the next time you’re faced with an electrical enigma!
Comparing Amp Measurement Techniques
Let me share my take on why multimeters often come out on top when measuring amps, compared to other methods. Over the years, I’ve had my fair share of experiences with different tools, and here’s what I’ve found:
- Multimeter vs. Ammeter: Using an ammeter is straightforward, but it’s kind of like only having a screwdriver in your toolbox. When I use my multimeter, it’s like opening up a whole set of tools. I can jump from measuring current to checking voltage or resistance without missing a beat. It’s about versatility. I remember once, while working on an old radio, I had to constantly switch between current and voltage measurements. That’s where my multimeter shined, making it a breeze.
- Multimeter vs. Clamp Meter: Clamp meters are cool, especially when dealing with larger wires or tight spaces. I mean, clip it on, and you get your reading. However, a multimeter gives me the accuracy for more detailed work, like when fiddling with small electronics or car repairs. I recall troubleshooting a car battery issue where the precise current measurement from my multimeter was key to finding the problem.
- Multimeter vs. Benchtop Meters: Benchtop meters are the big guns, no doubt about it. They’re precise but also like having a stationary workshop – not something you can easily lug around. I’ve always found my multimeter to be the perfect middle ground. It gives me enough accuracy for most projects and is easy to carry around. It’s like having a reliable friend to call on for various tasks.
- Multimeter vs. Smartphone Apps: Many apps claim to measure electrical stuff. But, let’s be real, they’re more for fun than serious work. I’ve tried a few, and they’re nowhere close to the real data my multimeter gives me. It’s about having a tool that does what it says, with the accuracy you can trust.
In my journey with electrical DIY projects, the multimeter has always been my go-to tool. It’s like a trusty sidekick, ready to take on whatever electrical challenge comes my way. Whether I’m fixing something at home or helping a friend with their car, my multimeter is the one tool I know I can always rely on.
Advanced Tips and Hacks for Mastering Multimeter Use
Hey folks, let’s dive into some of my secret multimeter tricks that have revolutionized the way I tackle electrical mysteries.
These are not your run-of-the-mill tips – they’re game-changers I’ve learned through years of tinkering and troubleshooting. Let me share my favorite advanced hacks to make your electrical work a breeze.
- Back-Probing Connectors for Live Testing
- I remember working on a car stereo and needing to test connections without pulling everything apart. That’s when I discovered back-probing connectors.
- Just slide the probe into the back of the connector, and voilà – live testing without any disconnections. It’s a neat trick that saves a ton of time and hassle.
- Min/Max Function for Catching Sneaky Faults
- Chasing intermittent electrical faults is like playing hide and seek. My multimeter’s Min/Max function has been a lifesaver. It records the lowest and highest readings, helping me track down those fleeting gremlins that pop in and out.
- Parasitic Drain Test: A Battery Life-Saver
- I once had a buddy with a car battery that kept dying. Using my multimeter set to Amps, I found a parasitic drain over 50 mA, pointing to a hidden power draw when the car was off. It’s an easy test that can save you from unexpected dead batteries.
- Relative Mode: The Comparison Guru
- The Relative mode on a multimeter is perfect for comparing voltage or resistance across different circuit points. I used it once to check a home theater system’s wiring consistency. It highlighted some inconsistencies that were causing audio issues.
- Temperature Probe: Hotspot Hunter
- I stumbled upon the temperature probe feature when I suspected my old computer’s CPU was overheating. Sure enough, the probe showed a higher-than-normal temperature. It’s a great tool for pinpointing hotspots in any electronic device.
- Frequency Measurements for Fine-Tuning Electronics
- When I worked on an old inverter, measuring the frequency with my multimeter ensured it ran optimally. It’s essential to prevent efficiency or longevity issues, especially for sensitive electronics.
- Peak Hold for Capturing Transients
- Dealing with voltage spikes can be tricky. The Peak Hold function on my multimeter captures these spikes, making diagnosing and fixing the issue easier. It’s like having a snapshot of the exact moment things go haywire.
- Fine-Tuning Sensitivity: A Delicate Dance
- Working with low voltages once, I learned that fine-tuning the multimeter’s dial could give more precise readings. It’s all about finding that sweet spot where your multimeter is sensitive enough to detect small changes without going overboard.
Integrating these advanced tips into your multimeter routine will elevate your electrical troubleshooting to a whole new level. Remember, every circuit tells a story, and with these tricks up your sleeve, you’re set to uncover every twist and turn in that tale!
Frequently Asked Questions
- Can A Multimeter Detect Faults In Car Electrical Systems?
- Absolutely! It’s like having X-ray vision for your car’s electrical system. Whether checking the battery health, tracking down a parasitic drain, or testing alternator output, a multimeter is your best pal. Remember safety first – don’t test while your car runs unless you’re a seasoned pro.
- Can I Measure Both AC And DC Amps With The Same Multimeter?
- Most digital multimeters can measure both AC and DC amps. Before measuring, switch to the appropriate setting (AC or DC) on your multimeter. This ensures accuracy and prevents potential damage to the device.
- Why Does My Multimeter Show An Overload When Measuring Amps?
- If your multimeter displays an overload (often shown as “OL” or a similar indicator), it means the current exceeds the multimeter’s range. In this case, disconnect immediately and switch to a higher current range before trying again. Overloading can damage your multimeter or the circuit you’re testing.
- Can I Measure Amps On A Live Circuit?
- Measuring amps on a live circuit is possible but requires extreme caution. Ensure your multimeter and probes are rated for the current level and that you’re comfortable with the process. If you’re new to using a multimeter, start with safer, non-live testing until you gain more experience.
References
Organizations:
- InterNational Electrical Testing Association (NETA). https://www.netaworld.org/
- IEEE (Institute of Electrical and Electronics Engineers). https://www.ieee.org/
Books:
- “The Art of Electronics” by Paul Horowitz and Winfield Hill. https://artofelectronics.net/
- “Practical Electronics for Inventors” by Paul Scherz and Simon Monk. https://www.barnesandnoble.com/w/practical-electronics-for-inventors-fourth-edition-paul-scherz/1124288626
Website Resources:
- Fluke Corporation. https://www.fluke.com/
Video References:
GM Genuine Parts & ACDelco