5 min read
How to Test a Subwoofer with a Multimeter (Guide)
Over time a subwoofer’s vibration weakens or disappears. In my experience, I have had almost every subwoofer start making a buzzing sound after years of overuse. The good news is it’s easy to fix and it’s easy to test if your subwoofer is having issues.
One of the easiest ways to test a subwoofer is through the use of a multimeter.
In general, to test a subwoofer with a multimeter, you need to remove the main component from its housing. That said, you need a small to medium star screwdriver for this task. Connect your multimeter’s positive and negative probe to the voice coil’s positive and negative terminal, respectively. Finally, turn on the multimeter and switch it to its Ohms setting to determine your subwoofer’s resistance.
There’s a simple method to test a subwoofer, and it’s through a digital multimeter. As we continue, I will walk you through the complete process.
7 Steps to Test Subwoofer with a Digital Multimeter
The simplest approach to determine whether or not your subwoofer is blown out is to use a multimeter. You can determine if the subwoofer is in good working order or has blown out by testing the voice coil’s resistance.
The steps are as follows.
Step 1. Disconnecting the Subwoofer
Turn off or disconnect the power source of your subwoofer. Otherwise, you’ll have incorrect or improper measurements.
Step 2. Untangling All Cords
Then, untangle all of the cords and wiring from your subwoofer. Remove all of your subwoofer’s input and power cables.
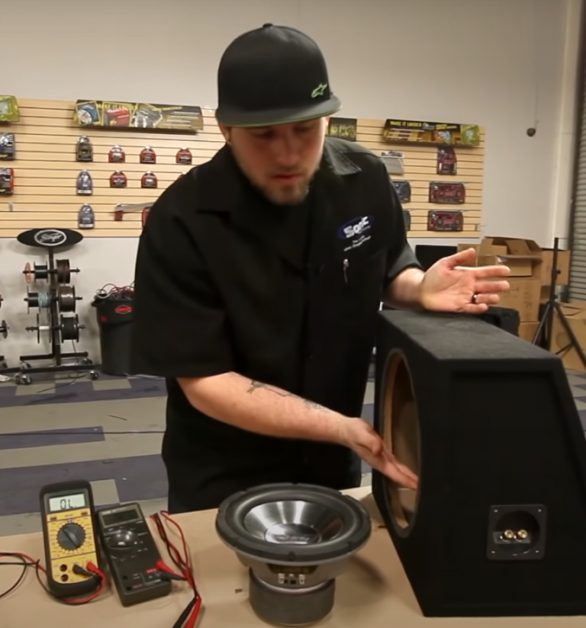
Step 3. Removing the Subwoofer from its Housing
To adequately access the subwoofer, remove it from its housing. You must now disassemble the woofer to gain access to the voice coils. This is dependent on your subwoofer type.
Step 4. Accessing the Subwoofer’s Voice Coil
After accessing the subwoofer’s voice coil, take your multimeter and connect it to the voice coil terminals.
Step 5. Connecting the Multimeter’s Probe
Connect your multimeter’s positive probe to the positive terminal on your device’s voice coil.
Step 6. Attaching Multimeter’s Probe
Then, attach your multimeter’s negative probe to the negative terminal of your subwoofer’s voice coil.
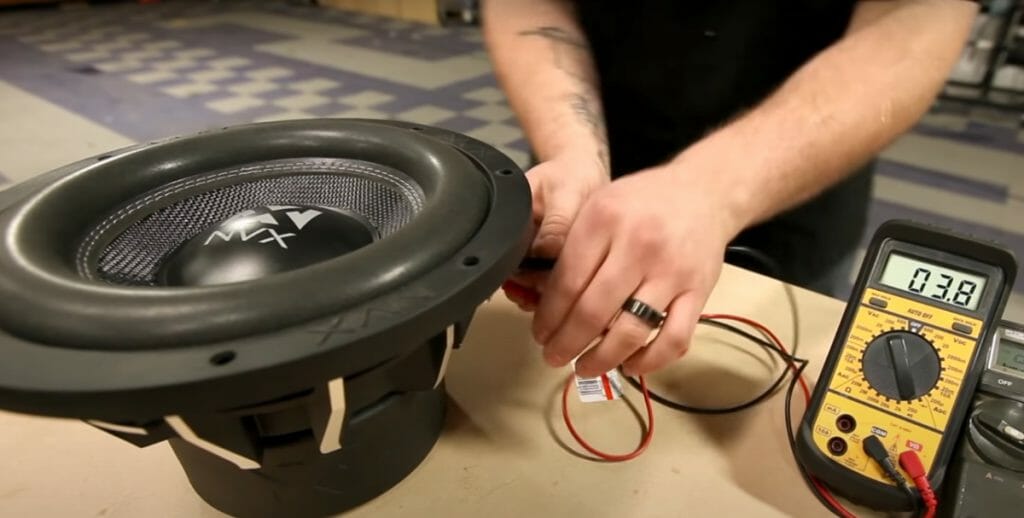
Step 7. Turning the Multimeter On
Finally, turn your multimeter on and set it to its Ohms setting to determine the resistance of your subwoofer.
Possible Results
- The multimeter reading shows no reaction or resistance at all. It indicates that your car subwoofer is blown or your voice coil is damaged.
- The multimeter reading is constantly shifting. It signifies that your voice coil is fully damaged. It’s a sure sign of a blown voice coil, and your device is already severely damaged.
- The multimeter reading is greater than 1.0 ohm. It means that your coils are safe and in good condition, and the problem could be elsewhere.
FAQs
What are the signs of a blown subwoofer?
A subwoofer unquestionably improves the sound quality of your system. So, if your car subwoofer isn’t working correctly, you’ll be able to tell right away by hearing its sound production. When you hear distorted sounds or gaps between frequencies, there’s a big chance that your subwoofer is blown. Aside from that, if the quality of your subwoofer begins to deteriorate, it may have blown out.
However, you can’t easily determine if it’s blown out or has other problems just by listening to it. Hence, to determine if your subwoofer speaker is blown out, you must test it with a tool such as a multimeter. (1)
What are the causes of a blown subwoofer?
Subwoofers are loudspeakers that reproduce low-pitched audio frequencies such as bass and sub-bass. The frequency of this bass and sub-bass is lower than that of a woofer.
However, a subwoofer is prone to blow, especially if you offer a lot of power or keep your subwoofer running above the RMS power for a long time. Also, a subwoofer can potentially blow if it gets an excessively distorted signal. Providing excessive signals to the automotive audio amplifier is the most prevalent cause of subwoofer failure. When there’s an excess of signal, clipping occurs.
Moreover, clipping occurs when the audio signal voltages reach the amplifier’s power supply. As a result, the signal becomes “clipped,” potentially damaging the amplifier and subwoofer. When there’s continual clipping, a subwoofer can be severely damaged.
Wrapping Up
Knowing how to test a subwoofer with a multimeter can save you money on maintenance. It will indicate whether or not there are any difficulties with the voice coil or its positioning. (2)
However, after you’ve identified the problem, I recommend hiring a professional rather than trying to mend and repair things yourself. The important thing is that you have tested the problem, and in that way, the cost you’ll be paying to professionals will be substantially lower than you expect.
Take a look at some of our related articles below.
References
(1) listening – https://www.forbes.com/sites/womensmedia/2012/11/09/10-steps-to-effective-listening/
(2) voice coil – https://electronics.howstuffworks.com/voice-coil-speaker.htm
Video Reference