How to Remove Wires from Harness (5-Step Guide)
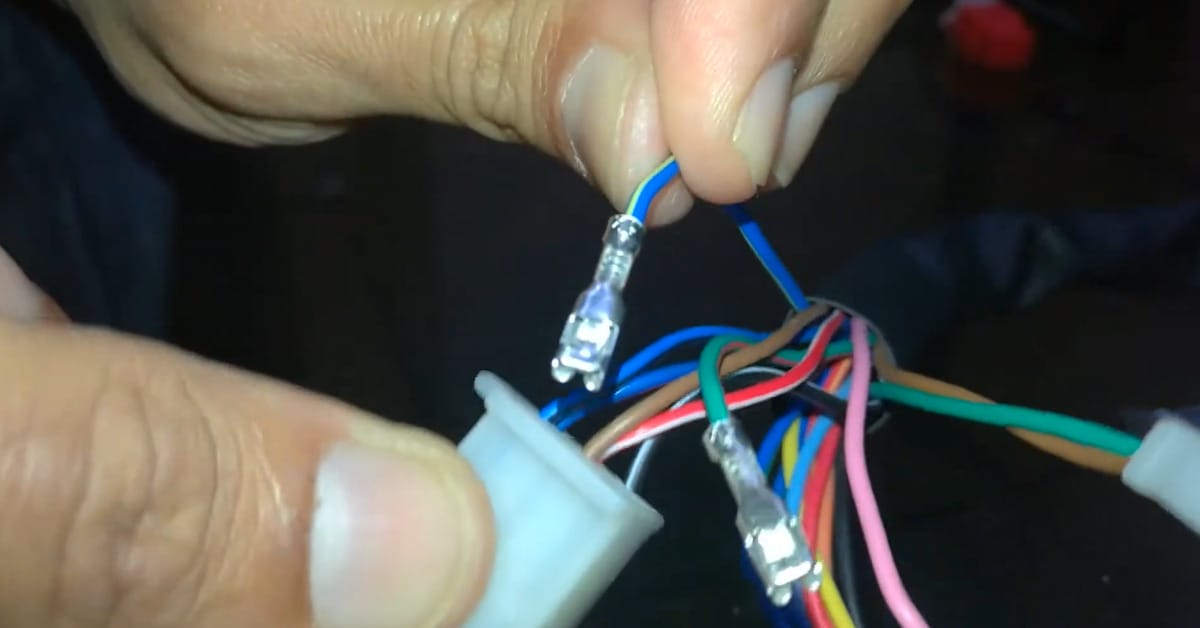
By the end of this article, you should know how to remove wires from a harness quickly and efficiently.
A faulty wire harness can result in line breakage, a typical cause of car failure that’s why I have tried to create this article to prevent any common issues people have when doing these repairs themselves.
In general, removing the wiring harness is relatively easy. You will pull the wire near the pin’s rear as feasible. And then pull the wire out slowly while still keeping the barbs in place, taking the hook with that as well. You can use a screwdriver but using your fingertips is preferable.
In my years as an electrician, I encountered a lot of minutia in this process which I will share below.
What are the Possible Causes of Engine Connection Harness Failure?
Prolonged usage can result in rusting, cracking, crumbling and other electrical issues. For instance, a harness might flex when conditions change from hot to cold. Everyday use can harden the harness over time, causing sections to soften and break off. When harsh weather conditions exist, degradation might occur.
User mistakes can produce problems such as faulty wire arrangement, inadequate connection to the harness chassis, or approximate dimensions that prohibit the complete wiring harness from fitting correctly in the lack of sufficient maintenance or adjustment. It can also cause failure to engine connection and electrical issues to the rest of the electrical components.
Instructions to Remove Wiring Harness Connectors
1. Remove the Retaining Latch
Before inserting or removing wires, you must open a retention latch on the bottom or top of the wiring connection shell. To create a lever, use a flat-bladed knife or screwdriver.
There are tiny square holes on the rear edge of the lock where you can insert the screwdriver. Smaller shells will contain only one slot. Larger shells have two or three. To open the latch, press it open.
Do not try to release the latch entirely; it will only pop up approximately 1 mm. The latch’s cross-section resembles a harp, with each terminal going through one of the holes. You will harm the terminals if you push the latch open too much.
If the latch is stubborn, slowly pull it up through the openings on the left and right sides of the shell. If you insert your screwdriver too far into the side holes, you risk damaging the outside terminals.
Even once the latch is released, the shell or terminal retains spring clips that keep the terminals in place (so they don’t fall out).
2. Pin Holes
If you look carefully at the pin slots on the back of the shell, you’ll notice that they’re all coded (structured like the symbol “P” or “q” for surfaces with a bottom latch or “b” for shells with a top latch). The contact terminal features a small fin that must be directed down or up to fit inside the aperture.
3. Disconnect the Wiring Harness
Plastic plugs with receptacle terminals come in two varieties.
To extricate wires, each type needs a unique process. By looking at the front of the shell, you can determine its type. The exterior diameters of both plugs are similar, as are the relative placements of the smaller square pin holes. As a result, both designs will fit the same socket on the back of a wiring harness.
Type “B” shells are typically used for opposite-gender shells (female shells with male terminals).
Extraction — Type “A” Shell
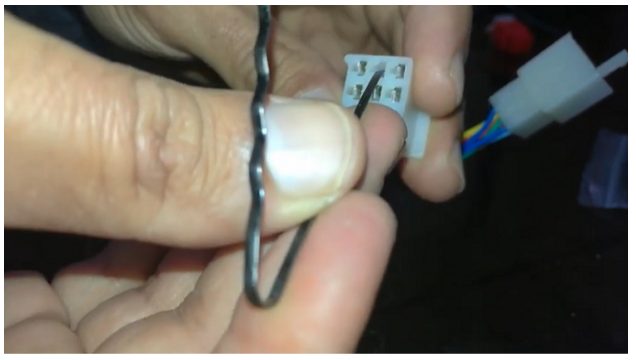
This type of plastic shell is most commonly seen in factory harnesses or those made by automobile manufacturers. I’ve never seen these on aftermarket cables.
Each terminal is held in place by a small plastic spring clip on the shell. In the above image (shell type “A”), the springs may be inside the bigger aperture above each pinhole. The spring clip is almost the same width as the huge hole.
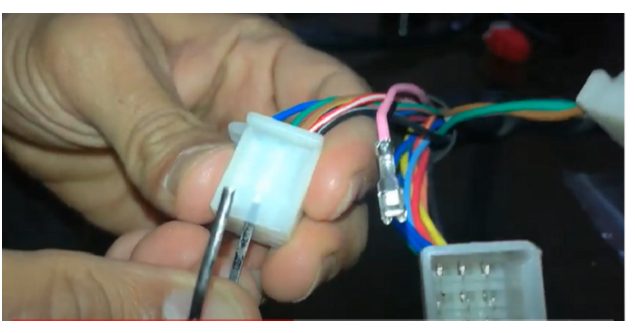
Swing the clip up and out of a hole on the nose of the metallic terminal. It will free the terminal, allowing you to draw the wire out the back of the shell.
You will use a little screwdriver (yellow) to capture a ridge on the front edge of the spring clip and push up the spring.
Procedure
You might need another person to tug on the wire (after you’ve detached the plastic spring clamp).
- Open the retaining latch if you haven’t previously (see instructions above).
- Hold the connection shell securely by the sides to avoid pressing the bottom retention lock.
- Insert the wire gently into the plug. It relieves strain on the spring clip. Use a small flat-bladed screwdriver (such as one for eyeglasses) as a lever. Your screwdriver should be tiny and have a straight, chisel-shaped edge (not rounded, bent, or worn). Place the end of a screwdriver into the giant hole above the terminal you want to remove in front of the shell. Nothing should be inserted into the smaller hole drilled.
- Adjust the screwdriver’s tip, so it glides along the top of the metal terminal. Push it just far enough to capture the plastic spring clip’s tip. Maintain little inward pressure on the screwdriver (but not excessive).
- Swing the spring clip up now. Use your fingers and thumb to apply upward force to the screwdriver rather than the plastic casing.

- Listen for and feel for the spring to click closed – it’s easy for the screwdriver to slip past it. If this occurs, gently try again.
- The plastic spring clasp doesn’t have to swing up very much – maybe less than 0.5 mm or 1/32″
- When a connection is unlocked, you must be able to remove the wire easily.
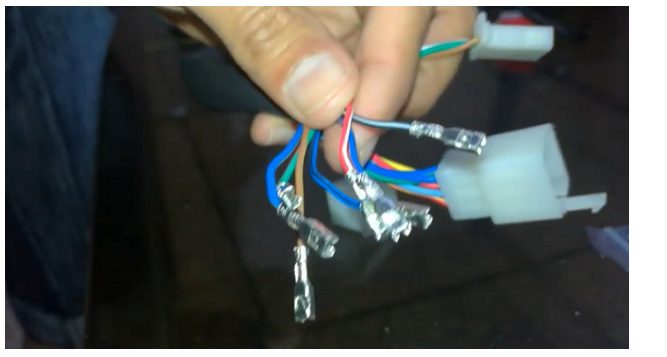
If you begin to damage the rubber spring clip that secures the terminal, you’ll have to abandon this method and solder or crimp onto the tail that goes into the connection. When deciding where to cut the wire – make the stub long enough to work with.
Remember to lock the retention clasp on the bottom of the shell once you’ve completed removing and inserting wires. If you don’t, you won’t be able to place the electrical components into the head unit’s connection.
Extraction — Type “B” Shell
This type of plastic casing is commonly found on aftermarket harnesses. They’ve also been seen on OEM components (e.g., add-on subwoofers, navigation modules, etc.).
Each terminal includes a small metal spring clip that secures it to the plastic shell. You’ll need to find or make an extraction tool to free the spring clip.
The tool must have a section long enough for you to grip onto and a tip tiny sufficient to go into the shell’s screw extraction hole.
The tip should be 1 mm broad, 0.5 mm tall, and 6 mm long. The point should not be too sharp (it may just pierce through the shell’s plastic.)
Procedure
You may need the assistance of a second person to tug on the wire (after opening the plastic spring clasp).
- Open the retaining latch if you haven’t previously (see instructions above).
- Hold the connection shell securely by the sides to avoid pressing the bottom retention lock.
- Insert the wire gently into the plug. It relieves strain on the metal spring clamp.
- Insert your extraction tool through the extraction hole (the rectangular hole below the terminal you wish to remove). Nothing should be inserted into the square hole.
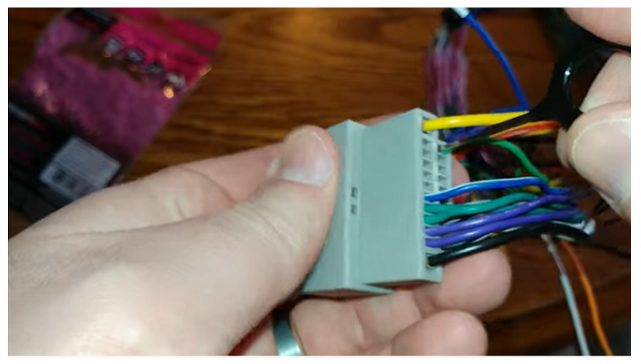
- You can hear a slight click where you inserted the tool 6 mm. The tool’s tip is pressing down on the spring clamp.
- Push the extraction tool into the hole with little pressure. You should then be able to remove the wire by tugging on it. (1)
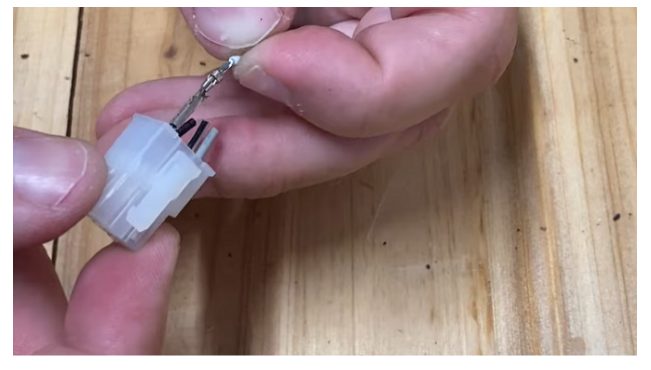
If the wire refuses to budge and you’re pulling too hard, back off the removal tool by 1 or 2 mm and repeat.
I do not advise pulling a wire using needle-nose pliers. Using your bare fingertips will allow you to feel how much strain you’re applying and when to quit. It’s also too easy to crush the 20 gauge wires using pliers or even smaller. (2)
How to Make an Extraction Tool
Some have utilized a huge staple. On the other hand, those don’t give you anything to grip onto and tend to draw by hand.
Someone mentioned using the eye end of a sewing needle. I attempted a little one, but it was slightly too thick vertically. Using a hammer to flatten the future could have helped. You’d also need to tweak the sharp end – remove the tip and bend it so you can push it without repeatedly stabbing your finger.
Making changes to a straight pin has worked well for me. It would help if you used sharp wire cutters to remove the pointed tip.
Then flatten the end by striking it a few times with a smooth-faced hammer on a hard, smooth surface. You might also be able to insert the tip in a bench vise with smooth jaws. Keep flattening the point until the last 6 mm (top to bottom) is thin enough to fit comfortably into the extraction hole. If the tip is too broad (from left to right), file it to fit into the extraction holes.
Take a look at some of our related articles below.
- How to remove wire from push in connector
- How to cap off electrical wires
- How to check wiring harness with multimeter
References
(1) pressure – https://www.khanacademy.org/scienc
(2) fingertips – https://www.sciencedirect.com/topics/medicine-and-dentistry/fingertip
Video Reference
