11 min read
How to Cap Off Electrical Wires (5 Step Guide)
If you plan to tackle electrical work around your house, you’ve come to the right place. I’m here to guide you through one of the most crucial parts of any electrical project: capping off electrical wires.
Here’s how I do it, step by step. Let’s roll up our sleeves and get to it:
- Step 1: Start using an electrical stripper to cut off the bare ends of the wires.
- Step 2: Select the right size wire caps (or nuts) for your wires. Twist the plastic wire caps onto the wire strands with a firm, clockwise motion. This ensures a secure fit.
- Step 3: Always reinforce the connection with a bit of tape. This helps keep the caps in place, especially in areas where there might be movement or vibrations.
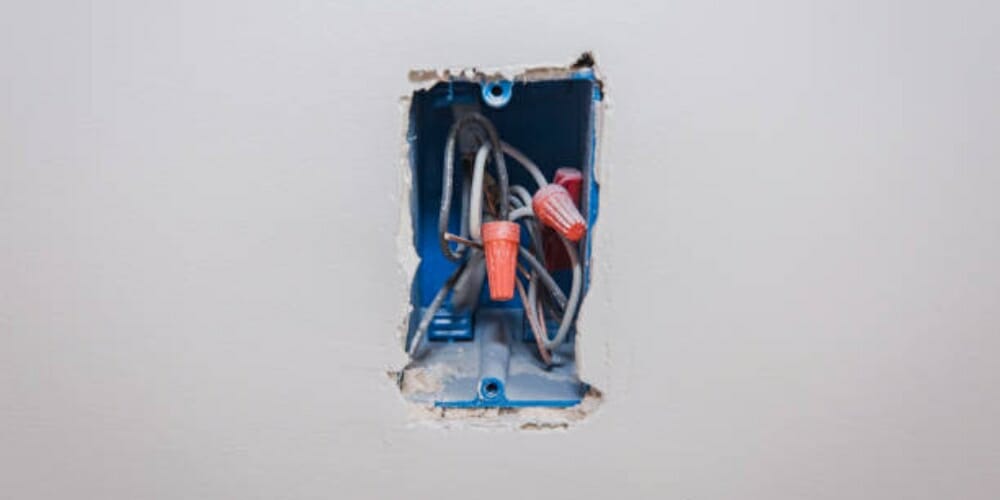
- Step 4: Carefully push the wires back into the electrical box once all the wires are capped.
- Step 5: The final step is to add a blank wall plate to the electrical box. This gives your project a neat, finished appearance and helps protect the wires.
In this guide, I’ll walk you through everything you need to know about capping off electrical wires. From the tools, you’ll need some common pitfalls to avoid. So, grab your tools, and let’s get started.
The Things You Need to Cap Off Electrical Wires
Let’s talk about what you’ll need to cap off electrical wires. When I tackle a job like this, there are a few tools and materials I always make sure to have on hand.
Tools You Need
- First up, a wire stripper is a must. It’s your go-to tool for cleanly stripping the insulation off the wires.
- Then, you’ll need a non-contact voltage tester. Safety comes first, always. This little gadget tells you if current flows through the wires you’re about to work on.
- A good, sturdy, flat-head screwdriver is next on the list. It’s great not just for screws but also for prying things open or holding things in place. I’ve used mine in more ways than I can count.
- And don’t forget a utility knife. Whether you’re trimming wires or opening packages, it’s incredibly handy. I always keep one in my tool belt.
Materials You Need
- First, you need an electrical box. This is where all your wire connections live, so make sure it’s sturdy and the right size for your project.
- Electrical tape is next. You’d be surprised at how essential this is for safety and organization. I’ve used it for everything from marking wires to making temporary fixes.
- Of course, you can’t cap wires without wire caps. These little guys are crucial for safely covering the wire ends. I’ve learned that using the right size cap is not just a suggestion – it’s a necessity.
- Lastly, a blank wall plate gives everything a clean, finished look. It’s like the cherry on top of your electrical project sundae.
And there you have it. With these tools and materials, you can cap off those wires safely and efficiently. Remember, the right tools make the job easier and ensure it’s done safely and correctly. Happy wiring!
How to Cap Off Electrical Wires
I will walk you through a crucial part of any electrical project: capping off electrical wires. Let’s dive in, and I’ll show you how I do it.
Step 1: Preparing the Bare Tips of the Wire
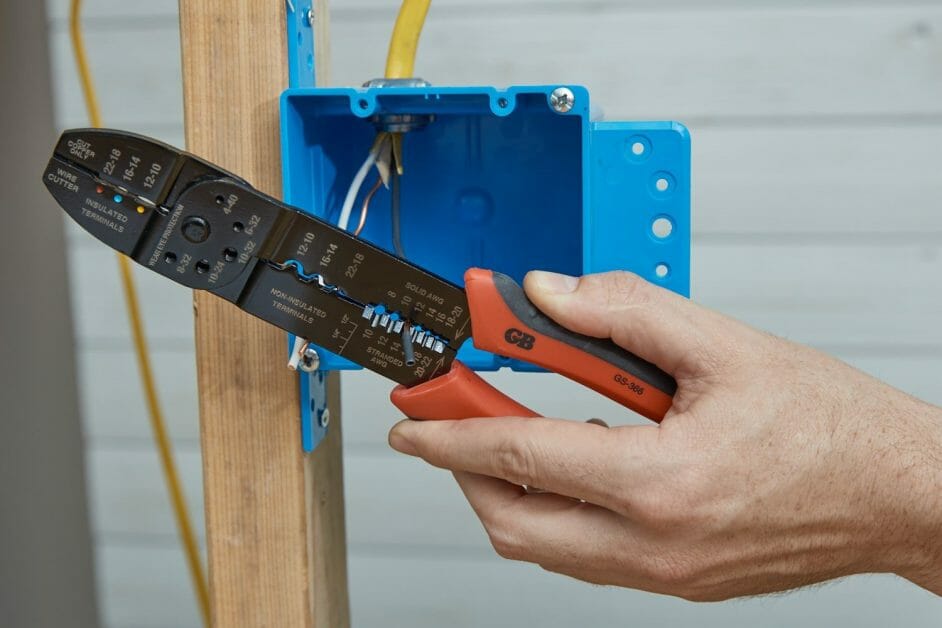
First things first, we need to prepare the wires. I always start by cutting the bare ends off with an electrical stripper.
You’re aiming for about a half-inch of straight, exposed wire. It’s all about precision here, so take your time.
Step 2: Placing the Wire Caps on the Wires
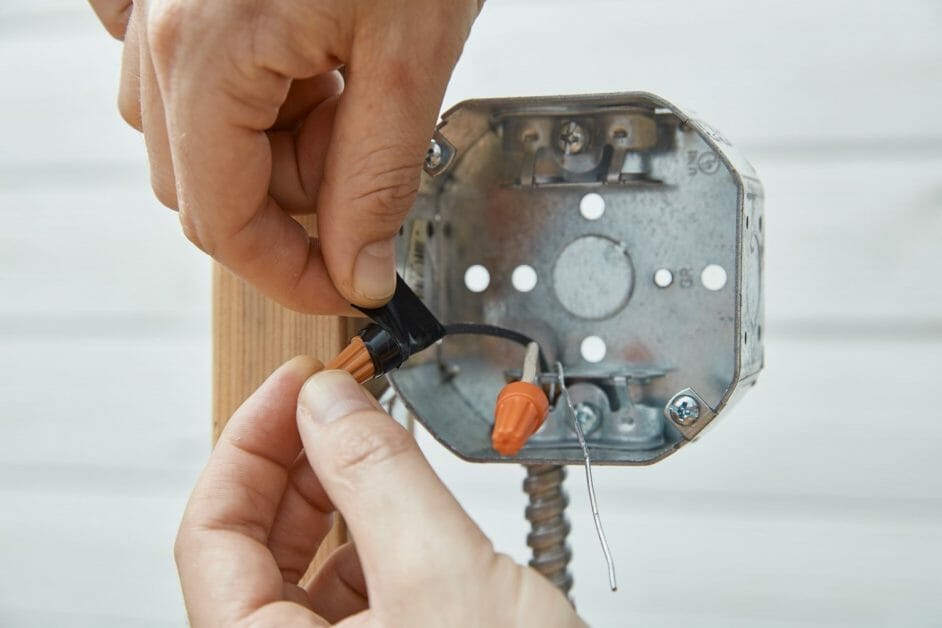
Next up, we will encapsulate those freshly stripped wire tips with wire caps, or as some like to call them, nuts.
Now, choosing the right size cap is crucial. Too big, and they’ll slip off, leaving your wires dangerously exposed. Too small, and well, you’re going to have the same problem. I always make sure to use the correct gauge to avoid any mishaps.
When you twist those plastic wire caps onto the wire strands, give them a nice, firm twist clockwise. It’s a simple move, but it makes all the difference. And remember, you don’t need to cap bare ground wires unless you want to for aesthetic reasons.
Step 3: Strengthening the Cap Grip with a Tape
Here’s a pro tip: I reinforce those caps with tape to ensure they stay put.
This is especially important because all objects, including wire caps, can gradually move or vibrate loose over time. A little tape goes a long way in keeping everything secure.
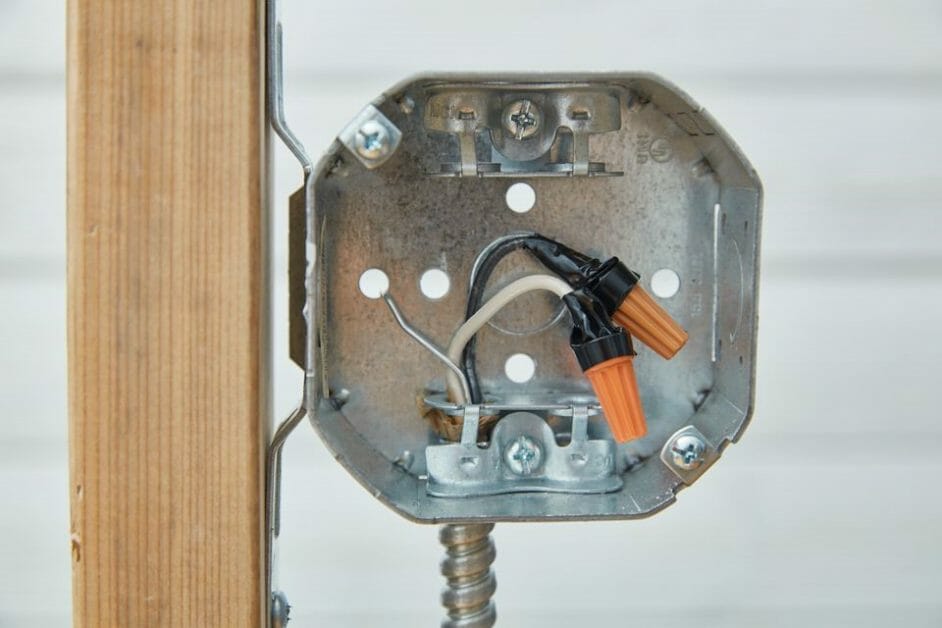
Step 4: Pushing the Capped Wires into the Box
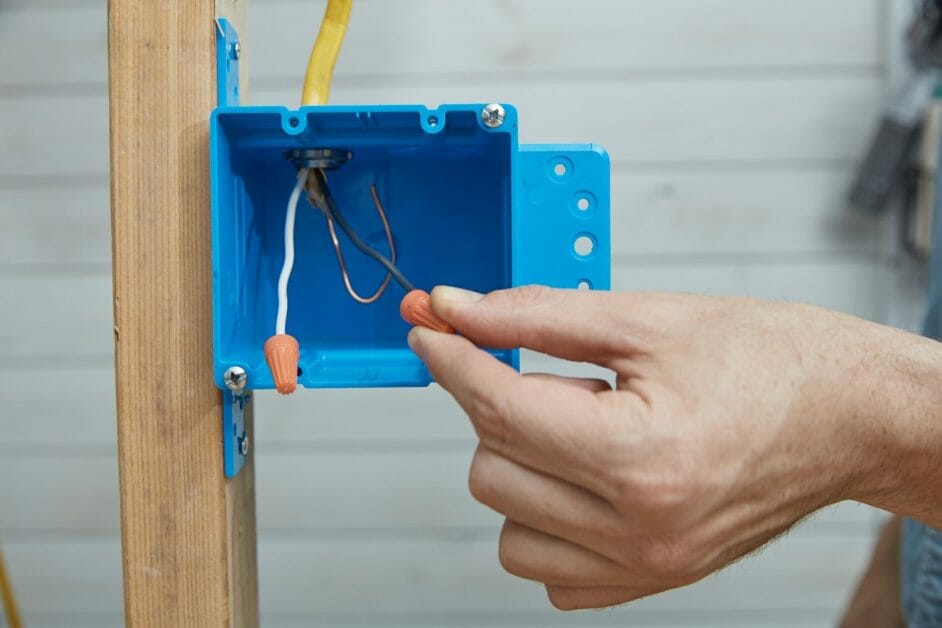
After all the wires are safely capped, I gently push them back into their box. This is also a good time to double-check the connections. You want to ensure those caps are snug and secure, with no loose wires.
Step 5: Add Your Blank Wall Plate Into the Box
The final step is adding a blank wall plate to your electrical box. This adds a clean, finished look and helps protect the wires. Screw it in place, and you’re good to go.
If the wires you’ve just worked on are part of an active circuit, now’s the time to restore power. Remember, capping off those wire tips is more than just a finishing touch; it’s a crucial safety measure for your home.
But if these wires aren’t part of your working circuit, there’s no need to turn the power back on.
And there you have it, folks! Capping off electrical wires, the Ty Pennington way. Stay safe and happy wiring!
When Should You Cap Off Your Wires?
Deciding when to cap off your wires is pretty important, and over the years, I’ve learned a couple of tricks on timing it just right. Here’s what I’ve found works best:

- Before Drywall Installation: Working with your electrical wires before the drywall goes up is much easier. You’ve got more room to move and can easily access the wires. I’ve been in situations where I had to work post-drywall; believe me; it’s a tight squeeze.
- Pull Back Wires to an Intermediate Point: Sometimes, you can pull the wires back to another electrical box or an intermediate point closer to your service panel. This trick has saved me from installing an extra box more times than I can count.
- Use an Up-line Electrical Box as a Termination Point: Extend your electrical wires to an up-line box. It’s a smart move that lets you use an existing box as your endpoint. This way, you’re not cluttering your space with unnecessary extra boxes.
- Strip Back to Original Starting Point for Major Remodels: In cases of a full house remodel, especially when the drywall’s down, you can strip the wires back to their original point at the circuit breaker. It’s like hitting the reset button – you can start fresh and plan your wiring layout more efficiently.
Each method has its own perks, and choosing the right one depends on your situation. Understanding your project’s layout and needs is crucial – and a bit of foresight can save you a lot of hassle down the line.
Common Mistakes to Avoid in Capping Off Electrical Wires
Over my years of working with electrical projects, I’ve repeatedly noticed a few common mistakes.
I’ll walk you through some of these common missteps and share my personal tips on how to steer clear of them. Let’s dive in and make sure you’re set up for success.
| Mistake | Why It’s a Problem | My Tip to Avoid It |
|---|---|---|
| Stripping Too Much Insulation | Exposing too much wire can lead to short circuits and is a safety hazard. | Use a wire stripper and carefully measure ½-inch from the tip. It’s easy to overdo it, so keep a steady hand. |
| Using the Wrong Size Wire Cap | Caps that are too large can slip off, and too small ones can’t hold the wires securely. | Always match the cap size to the wire gauge. I keep a variety of sizes in my toolkit for this reason. |
| Not Testing for Voltage | Working on live wires can lead to electric shocks or worse. | Never skip the voltage test. Even if you think the power is off, use a non-contact voltage tester to be sure. |
| Over-Twisting the Caps | Twisting caps too hard can damage the wires or the cap itself. | Firm but gentle is the way to go. Twist until snug, but don’t force it. |
| Ignoring Ground Wires | Ground wires are crucial for safety and shouldn’t be neglected. | Always cap ground wires, even if it’s just for aesthetic reasons. It’s a good practice to keep things consistent and safe. |
| Forgetting to Double-Check Connections | Loose connections can lead to electrical failures or hazards. | After capping, give each wire a gentle tug to ensure the cap is secure. It’s a simple step that can prevent a lot of problems. |
Remember, these are easy mistakes; I’ve seen them happen more times than I can count. But with attention and care, you can avoid these pitfalls and ensure a safe and successful electrical project.
Frequently Asked Questions
- Is It Okay to Reuse Old Wire Caps?
- I generally recommend against reusing old wire caps. Over time, the plastic can degrade, reducing their effectiveness. For safety’s sake, it’s best to use new caps to ensure a secure and reliable connection.
- Can I Cap Wires Without Turning Off the Power?
- Not. Always turn off the power at the circuit breaker before capping the wires. Working on live wires is extremely dangerous and can lead to serious injury or even death. Safety comes first, always.
- Do I Need to Tape Over Wire Caps?
- Taping over wire caps is a good practice, especially in areas with movement or vibrations. Electrical tape can provide an extra layer of security to keep the caps from loosening over time.
- Is It Safe to Leave Capped Wires Unattended in an Unused Box?
- Yes, properly leaving capped wires in an unused box is generally safe, provided the wires are not live, and the box is appropriately covered. However, ensure the wires are not part of an active circuit to avoid potential hazards.
- Can Wire Caps Be Used for All Types of Wires?
- Most wire caps are suitable for standard electrical wires used in homes. However, for specialized wiring, like aluminum wiring, ensure you use caps specifically designed for that purpose.
- How Often Should I Check My Electrical Connections?
- It’s a good idea to periodically check your electrical connections, especially in older homes or areas subject to vibration or temperature changes. Regular checks can help prevent electrical problems before they occur.
- Can I Leave Some Wires Uncapped If I Plan to Use Them Soon?
- Leaving wires uncapped, even temporarily, is not advisable. Uncapped wires are a safety hazard. If you’re not ready to connect them, cap them until you are. Safety should never be put on hold.
References
Organizations:
- National Fire Protection Association (NFPA). https://www.nfpa.org/en
- Occupational Safety and Health Administration (OSHA). https://www.osha.gov/
Books:
- “Wiring a House” by Rex Cauldwell. https://www.barnesandnoble.com/w/wiring-a-house-rex-cauldwell/1118175264
- “Electrical Wiring Residential” by Ray C. Mullin and Phil Simmons. https://www.barnesandnoble.com/w/electrical-wiring-residential-ray-c-mullin/1116778103
Website Resources:
- The Spruce (Electrical Repair Section). https://www.thespruce.com/electrical-problems-and-repairs-4127799
- Electrical Safety Foundation International (ESFI). https://www.esfi.org/