18 min read
How to Wire a Light Bulb Holder (Complete Guide With Photos)

Are you looking for help on how to wire a light bulb holder? I have been doing this for a long time, and I’m still surprised by the mistakes do-it-yourselfers make trying to do this. You might be planning to wire a metal cap & shell lamp socket or phenolic socket. Or you might be using the SPT-1 cord or SVT cord. Whatever the socket or cord type, you’ll get all the answers from our guide.
Follow these steps when wiring a metal cap & shell or phenolic socket.
- First, remove the socket cap and insert the wires into it.
- Then, connect the hot wire to the hot terminal of the socket.
- Next, connect the neutral wire to the neutral terminal.
- Finally, tighten the socket cap.
That’s it. Now, you can connect the light bulb.
Different Size Sockets
A device that holds electrical light bulbs is known as a holder. You can connect the circuit wire to these holders. Usually, we use several terms, such as lamp and bulb holders, to identify them. Either way, the basic principle remains the same. With that in mind, here are some sockets of different sizes for incandescent bulbs.
Candelabra (E-12) Base
Commonly used for vintage Christmas lights and chandelier bulbs.
Standard Edison or Medium (E-26) Base
The socket size for regular incandescent bulbs.
Intermediate (E-17) Base
You can spot these sockets in some interior lamps.
Mogul Base
These sockets are for huge bulbs which are used in vintage floor lamps. Not a common type these days.
**For this post, I will use the Standard Edison socket size.
**However, the wiring process is the same for all the other sizes.
In the Standard Edison socket size category, we will focus on the metal cap & shell and phenolic sockets.
Part 1 – Wiring a Metal Cap & Shell Lamp Sockets

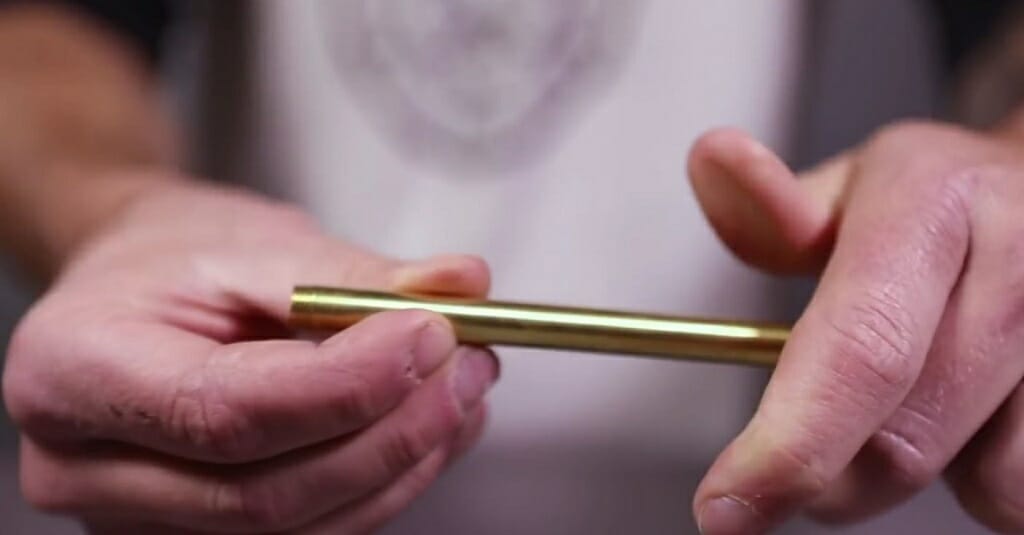
Usually, a metal cap & shell socket comes with four different parts: interior socket, shell, insulation, and cap. The Interior socket contains the screws that connect with the wires. It also has hot and neutral contacts for the bulb. Most often, insulation is made from cardboard. The shell and the cap are metal. The interior socket is a combination of metal and plastic.
Step 1 – Take Out the Interior Socket
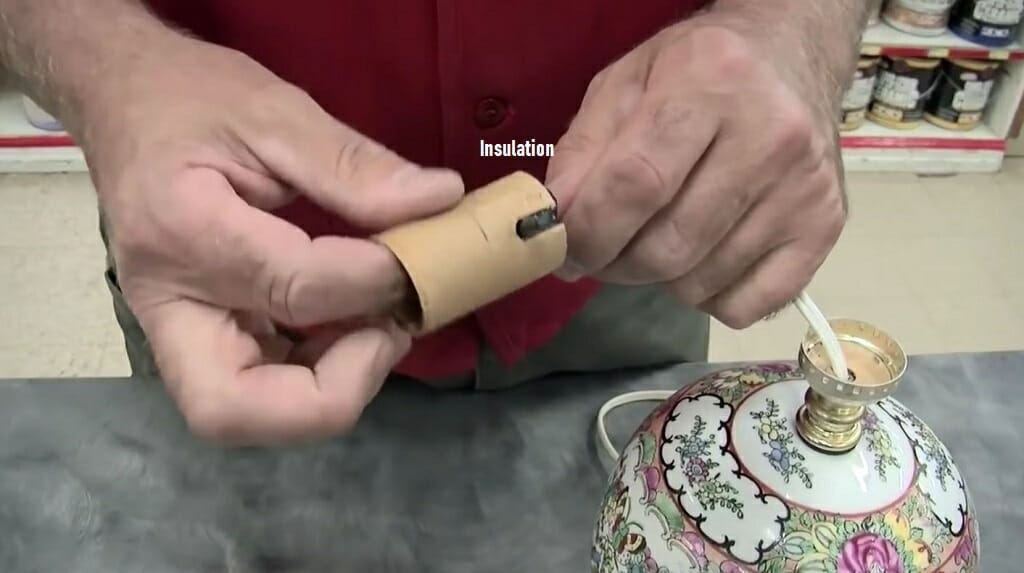
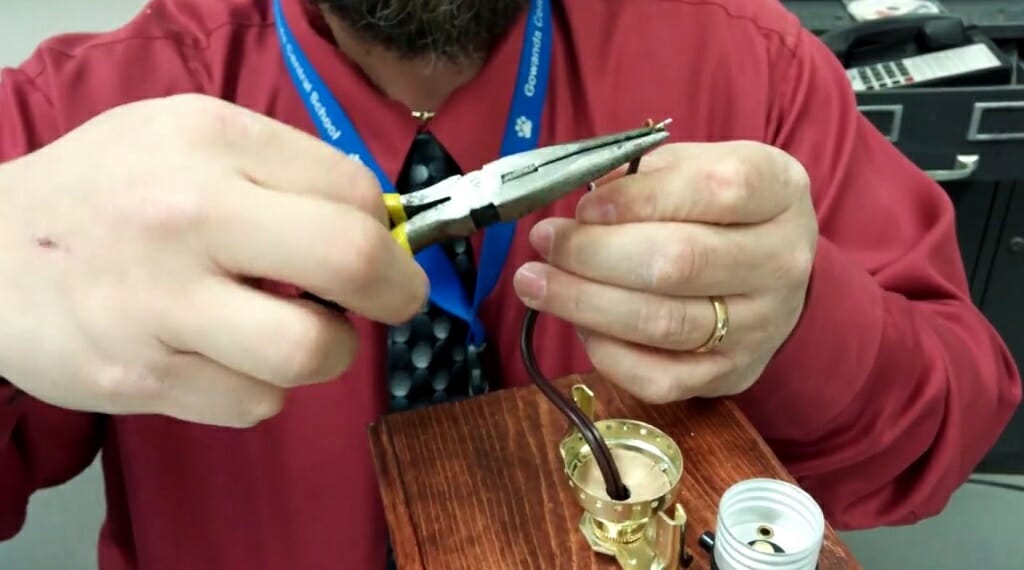
First, pull out the shell and insulation to separate the interior socket from the other parts.
Step 2 – Identify the Hot and Neutral Terminal
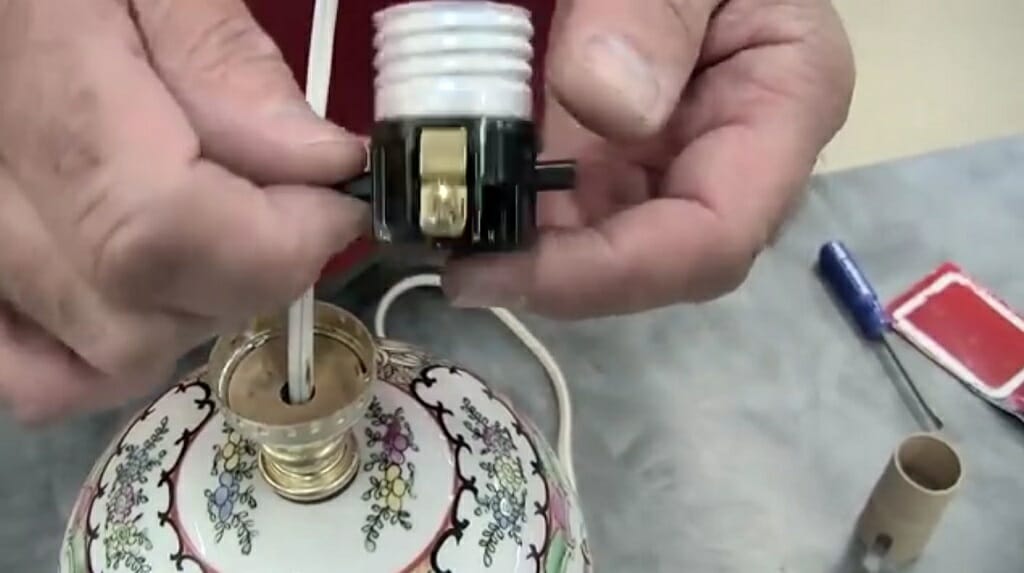
Then, try to identify the hot and neutral terminals. The gold color screw is the hot terminal, and the silver color screw is the neutral terminal.
Step 3 – Connect the Wires
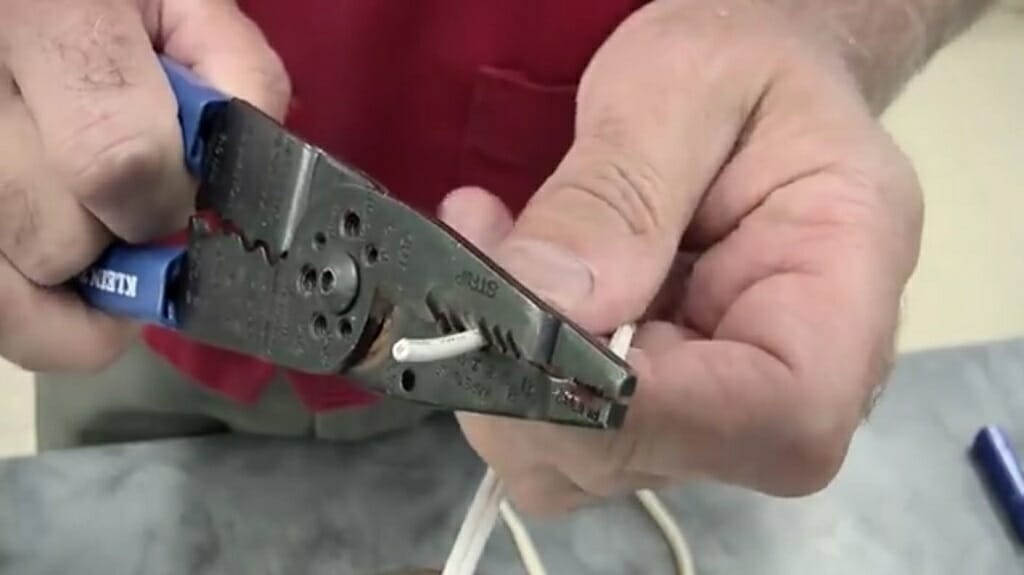
Now, strip the wires using a wire stripper.

Next, tighten the live wire to the gold screw and the neutral wire to the silver screw. Use a screwdriver for this.

Finally, put together all the parts of the bulb socket.
Tip: While connecting the wires, make a loop using the wires. Then, insert the loop-shaped wires into the screws.
Part 2 – Wiring a Phenolic Socket
Phenolic sockets are a little different from metal cap & shell sockets. For instance, they have a socket interior, ring, cap, and shoulder. All the parts of the phenolic socket are plastic except for the terminals and the contacts. Like in the metal cap & shell socket, these phenolic sockets have two terminals and two contacts.
Tip: Terminals connect wires, and the contacts are for the bulbs.
Step 1 – Take out the Interior Socket
First, separate the cap and shoulder and isolate the interior socket.
Step 2 – Run the Wires Through the Cap
Then, insert the wires into the hole on top of the cap.
Step 3 – Strip the Wires
You can locate two wires: a black wire and a white wire.
The white wire represents the neutral, and the black wire represents the hot. Use a wire stripper to strip the two wires.
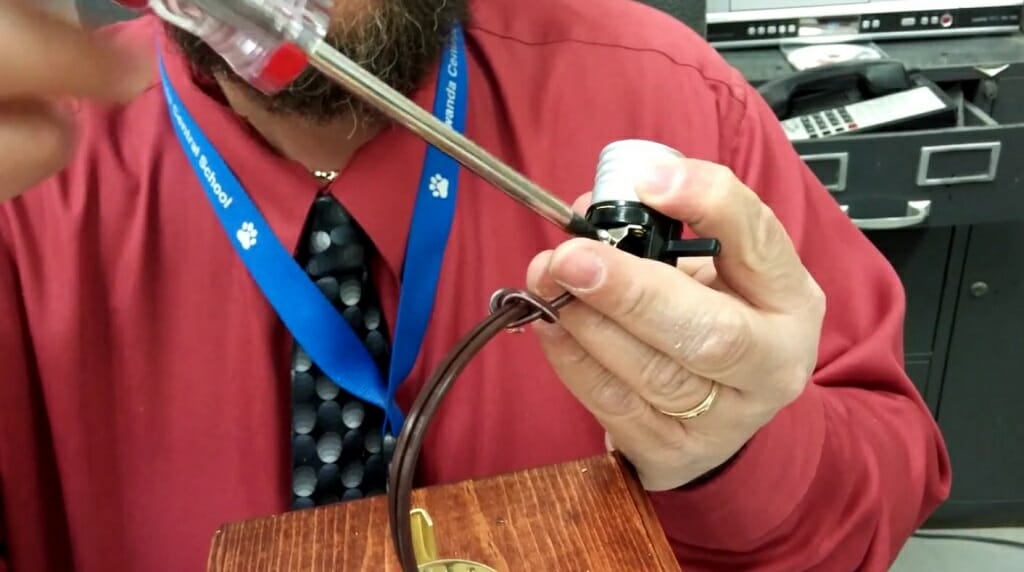
Step 4 – Connect the Wires
Before connecting the wire to the bulb holder, twist them tightly. Next, place the live wire on the gold screw and the neutral wire on the silver screw. Then, turn the screwdriver in a clockwise direction to tighten the screws.
Finally, connect the other parts of the holder.
Difference Between the SPT-1 Cord and SVT Cord
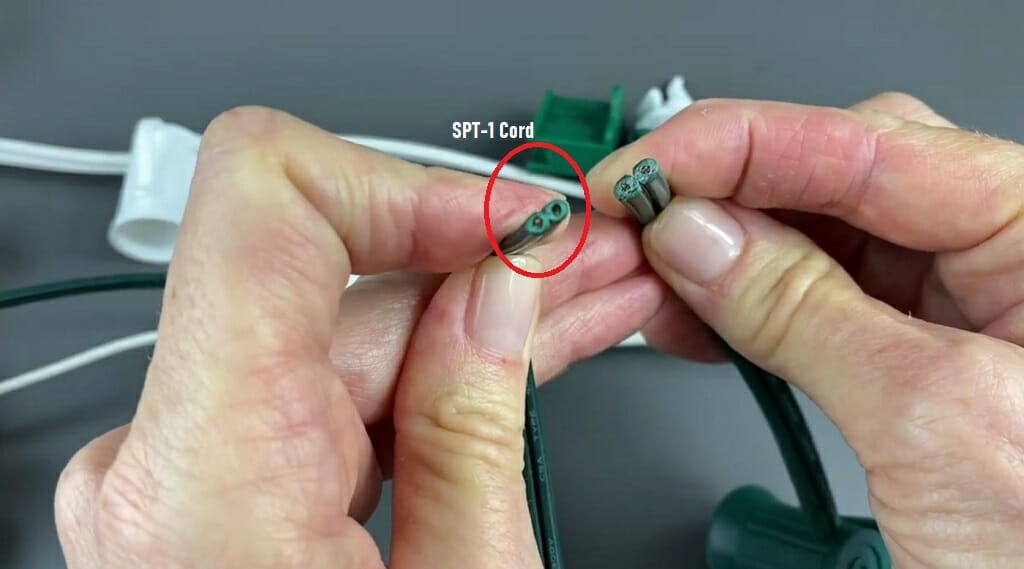
If you are unfamiliar with SPT-1 and SVT, they are electrical cords. But what is the difference?
SPT-1 comes with 0.03″ insulation and can withstand an amperage of 7 amps. These cords only have two wires.
On the other hand, SVT cords have three wires, including the hot wire, neutral wire, and ground wire.
In Parts 3 and 4, I hope to explain how to wire these two cords to a lamp holder.
Things You’ll Need
SPT-1 Cord Set Parts
- 2 feet SPT-1 lamp cord
- Medium metal cap & shell lamp socket
- Threaded 1/8 IP nipple
- Kwik easy lamp plug
SVT Cord Set Parts
- 2 Feet SVT cord
- Medium base phenolic socket
- Metal strain relief
Apart from that, gather the following tools.
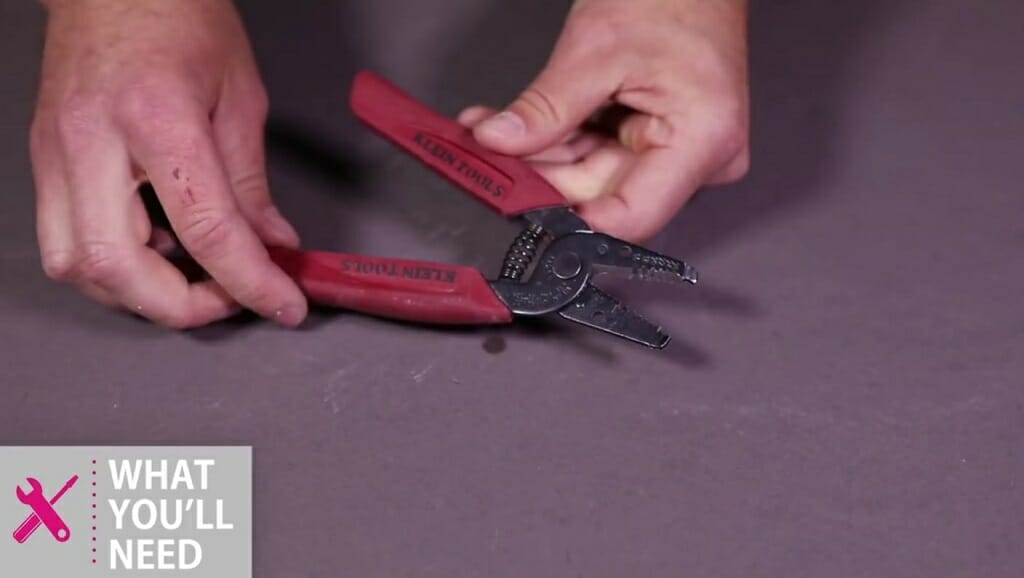
- Wire stripper
- Box cutter
- Wire cutter
- Ruler
- Philips head screwdriver
- Flathead screwdriver
- Needle-nose plier and Channellock plier
- Elmer’s glue
- Masking tape or electrical tape
Part 3 – Wiring Metal Cap & Shell Lamp Socket with SPT-1 Cord
By now, if you’ve been following along, you should be familiar with SPT-1 cords and metal cap & shell lamp sockets. We talk about how to wire a metal cap & shell lamp socket at the beginning. Here, I hope to talk about how to wire metal cap & shell lamp sockets with an SPT-1 cord.
Step 1 – Separate the Socket Parts
First, separate the shell and the socket cap. Then, take out the interior socket.
Step 2 – Connect the Threaded Nipple
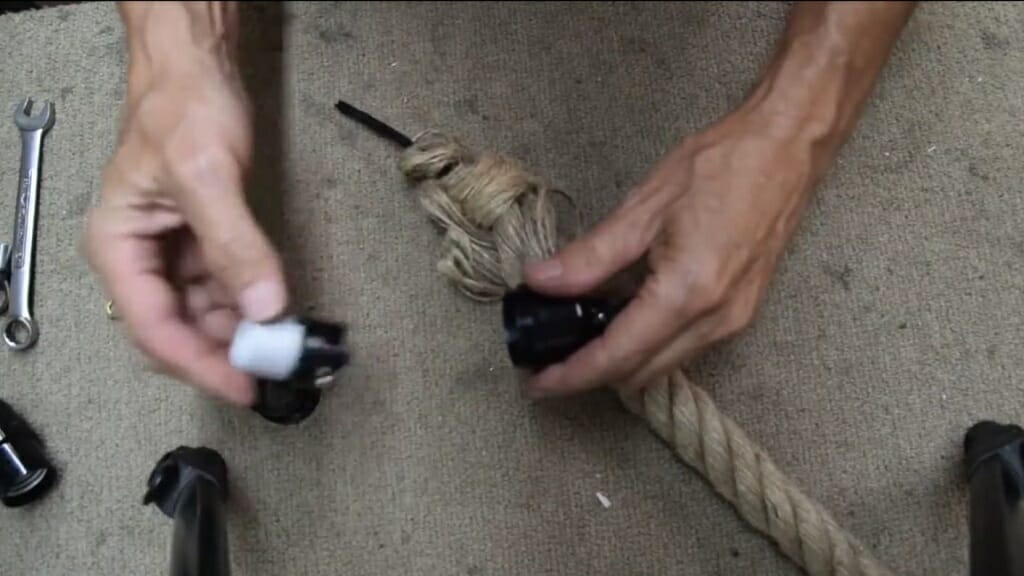
Next, connect the threaded nipple to the socket cap. We use the threaded nipple as a support item for the socket cap. You can remove it after this demonstration is completed. Insert the wire into the threaded nipple.
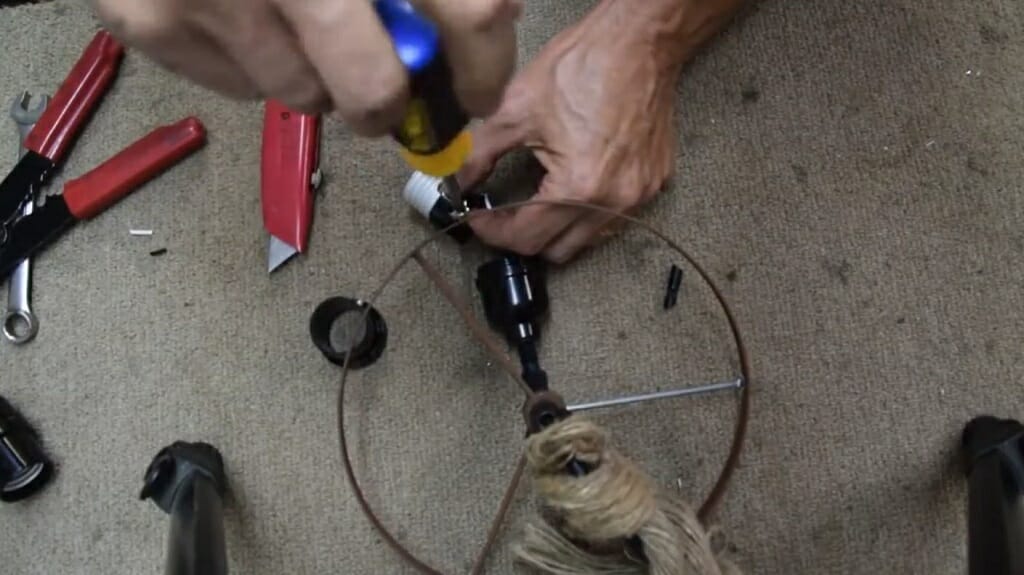
Step 3 – Arrange the Wires
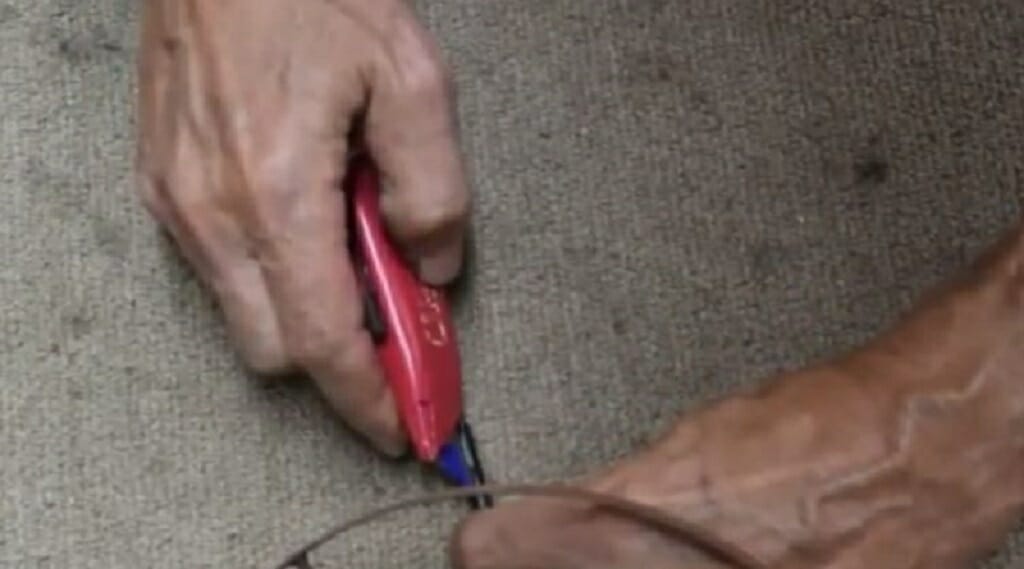
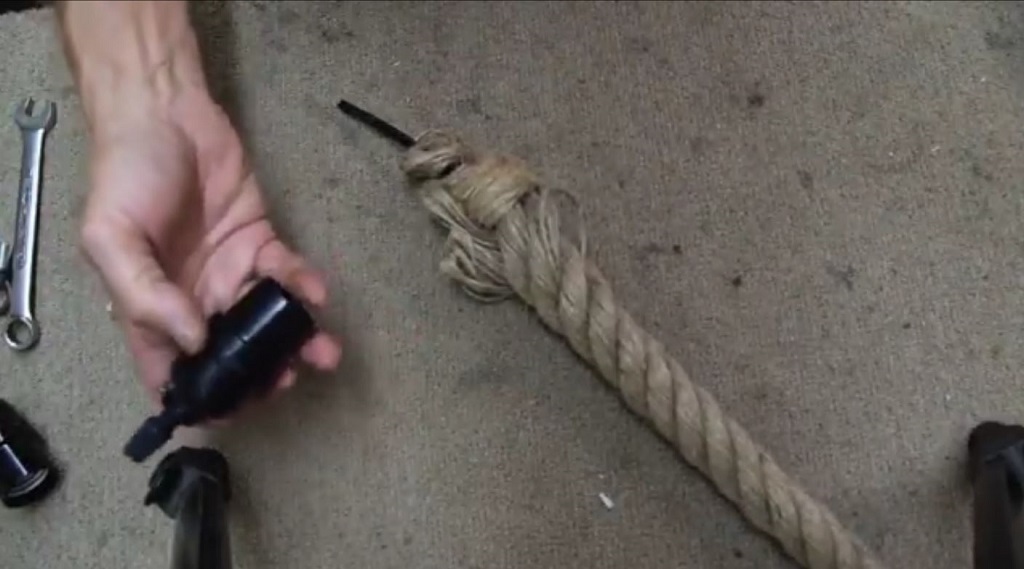
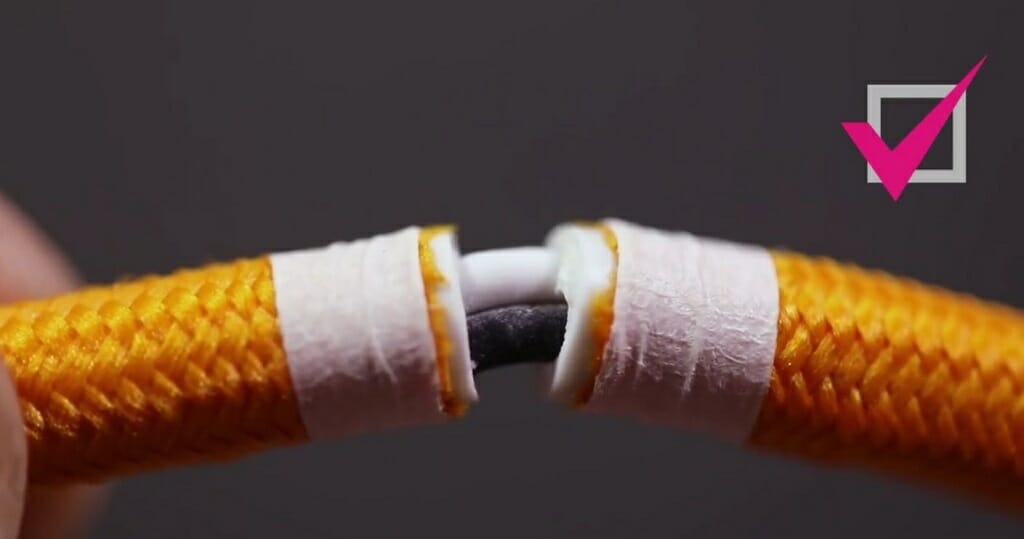
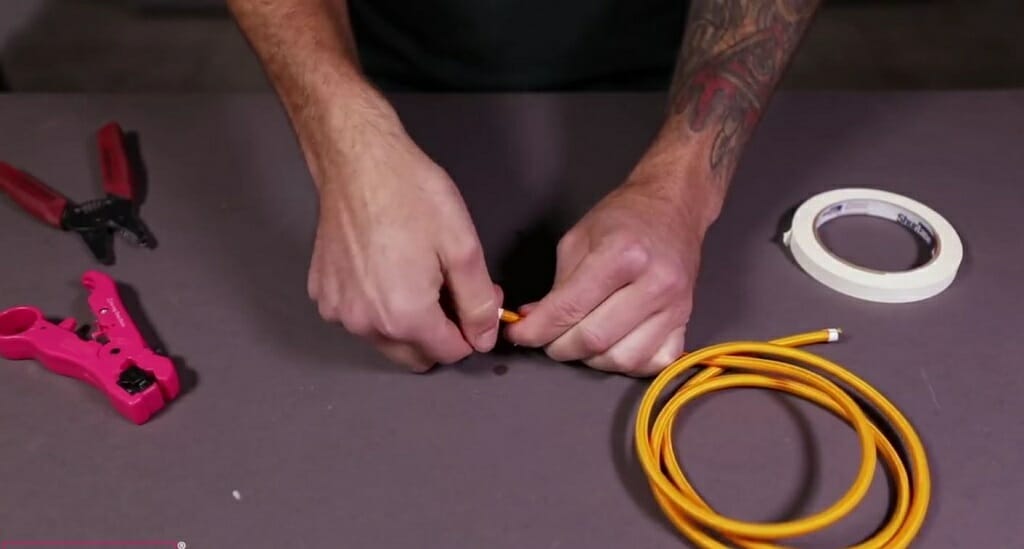
In this step, I’m going to arrange the wires. First, snip the SPT-1 cord into two wires using the wire cutter. Don’t damage the wires during this step. Then, pull apart the wires at least 3 inches.
Tie the wires according to the Underwriter’s Knot. You’ll get a better understanding of it with the image. While executing the Underwriter’s Knot, leave enough wire length for stripping (at least 2 inches).
Why We Use an Underwriter’s Knot?
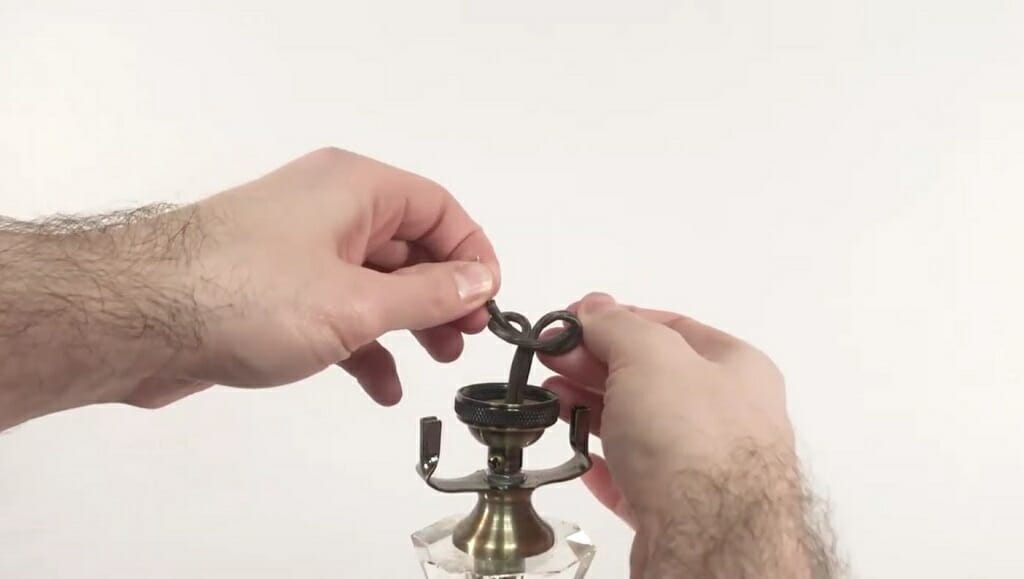
We use this knot to protect wires. After applying this Underwriter’s Knot, the wires won’t get pulled out of the socket.
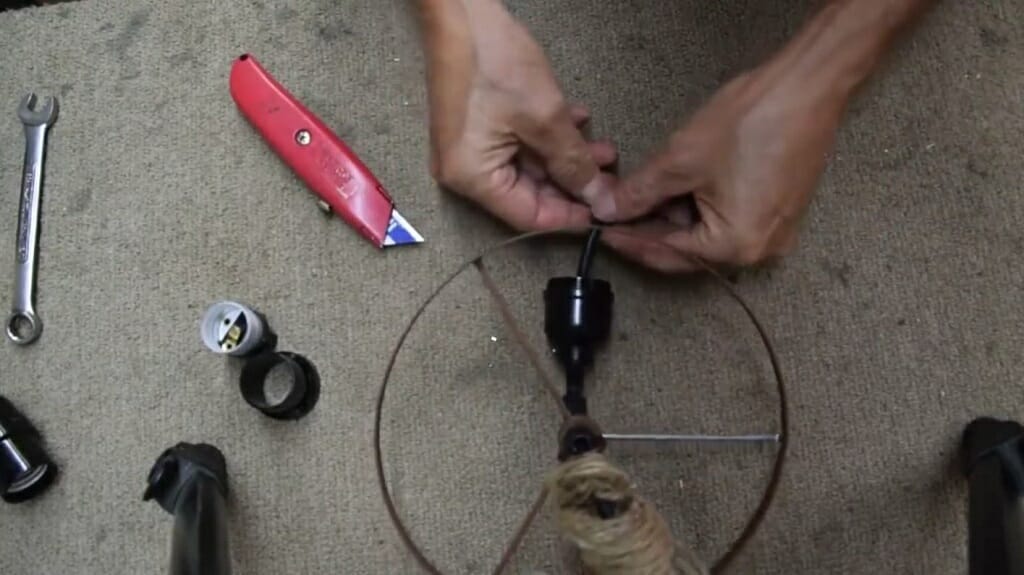
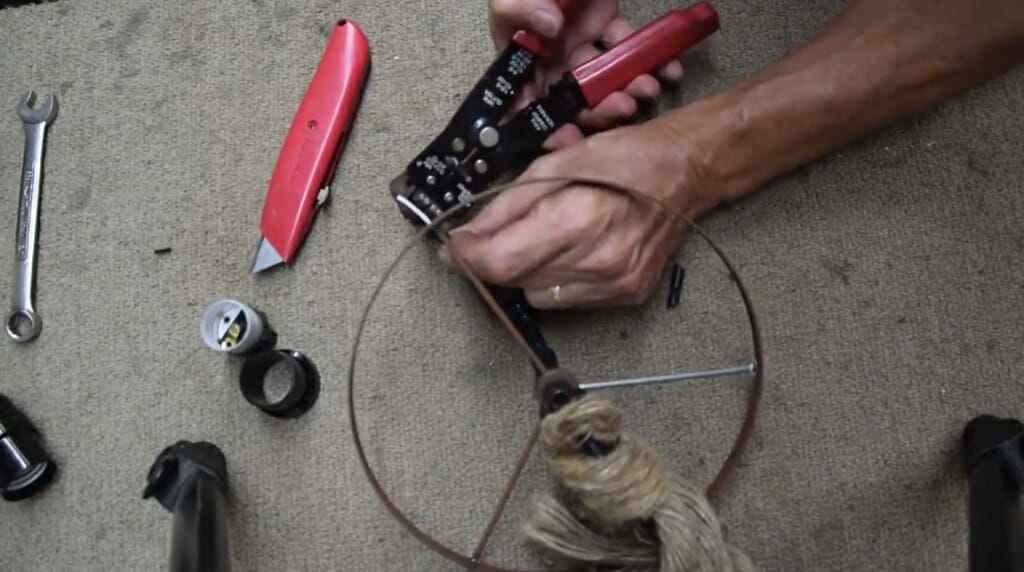
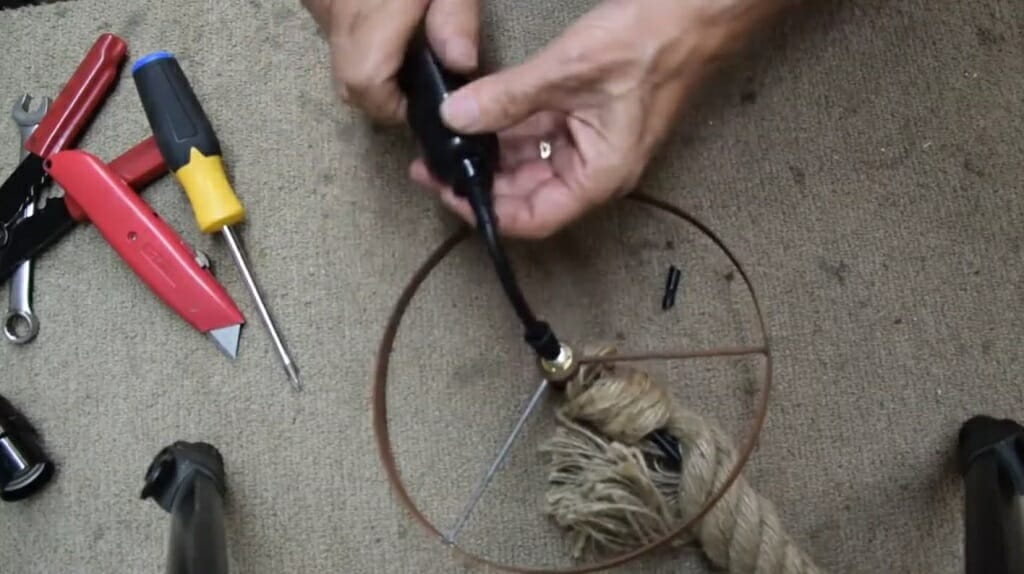
Step 4 – Strip the Wires
Take the wire stripper and strip 3/4 inch of insulation of each wire. Remember to use the correct gauge size while stripping the wires. For instance, if the wire is 16 gauge, put the wires in the 16 gauge hole on the wire stripper. After stripping, you can see the wire strands falling everywhere.
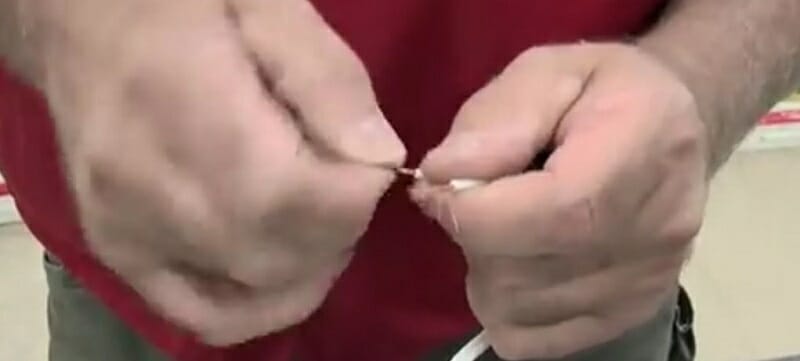
So, use your index finger and thumb to twist the strands together.
Then, form a hook shape for both wires. Now, the wires are ready to connect to the bulb socket.
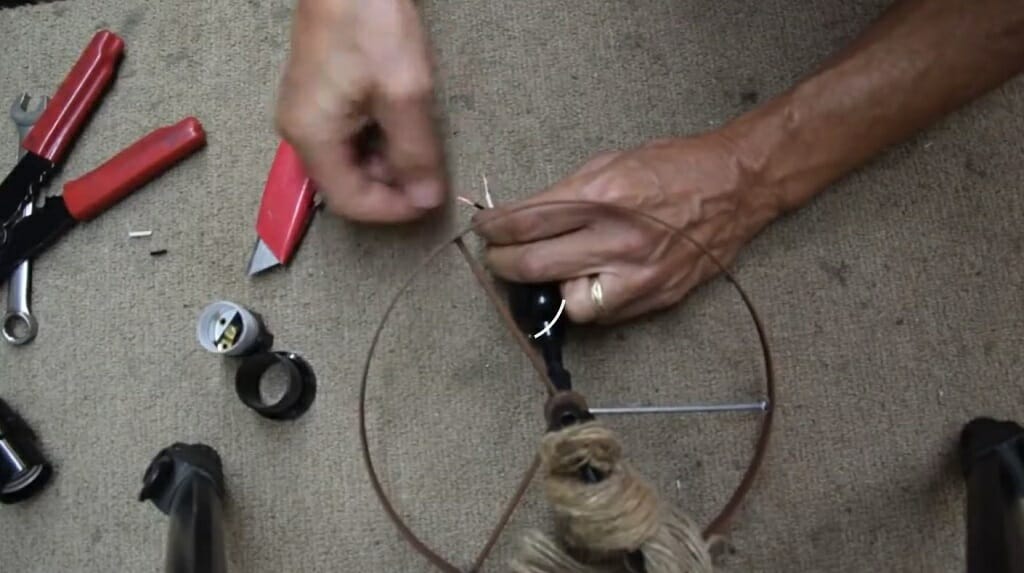
Step 5 – Connect the Wires to the Light Bulb Holder
Next, take the light bulb holder and loosen the socket terminals.

Here, we are using a metal cap & shell lamp socket, so there should be a gold screw and a silver screw.
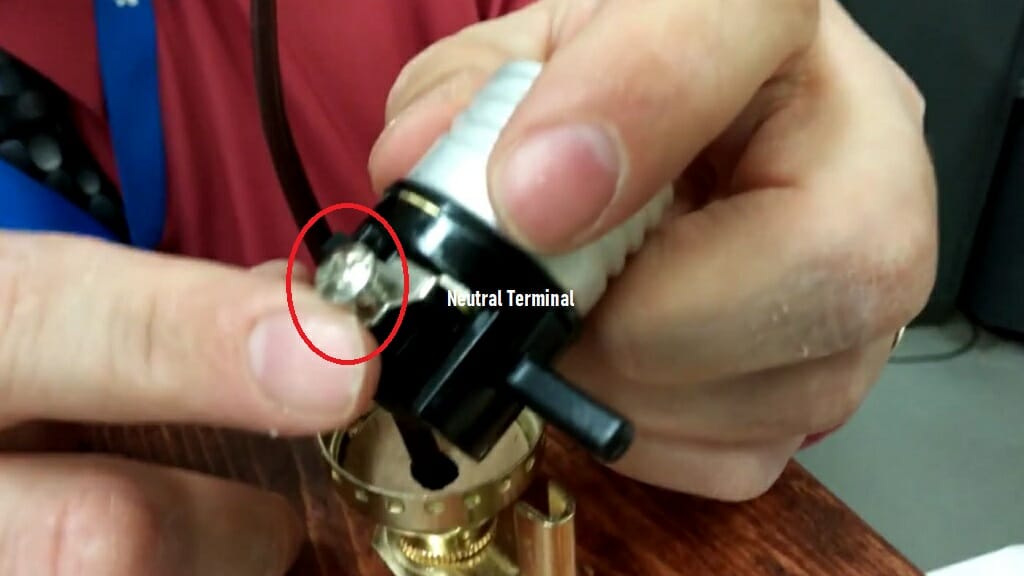
The live wire goes to the gold screw, and the neutral wire goes to the silver screw.
So, place the bent hot wire on the gold terminal. Then, tighten the screw. Remember not to leave any wire strands disconnected from the terminals; Tuck all the wire strands inside the terminals. Now, do the same for the neutral wire.
Step 6 – Rearrange the Socket’s Parts
Then, slide the socket cap close to the wire knot and connect the insulated shell. Press the shell until you hear or feel the click sound. Now unscrew the threaded rod and separate it from the socket cap.
Step 7 – Check the Lamp
Finally, connect the bulb and check the lamp.
Part 4 – Wiring Phenolic Socket with SVT Cord
Wiring a phenolic socket is not a big deal, but can you wire a phenolic socket with an SVT cord?
Don’t worry. I’m going to cover everything related to this topic. So, let’s get started.
Step 1 – Cut the Cloth Cover of the Cord
For this demonstration, we are going to use a cloth-covered SVT cord. First, mark 1.25 inches on the cord.
Then, take the masking tape and wrap it around the 1.25-inch mark. Use the box cutter to remove the marked cloth cover of the cord.
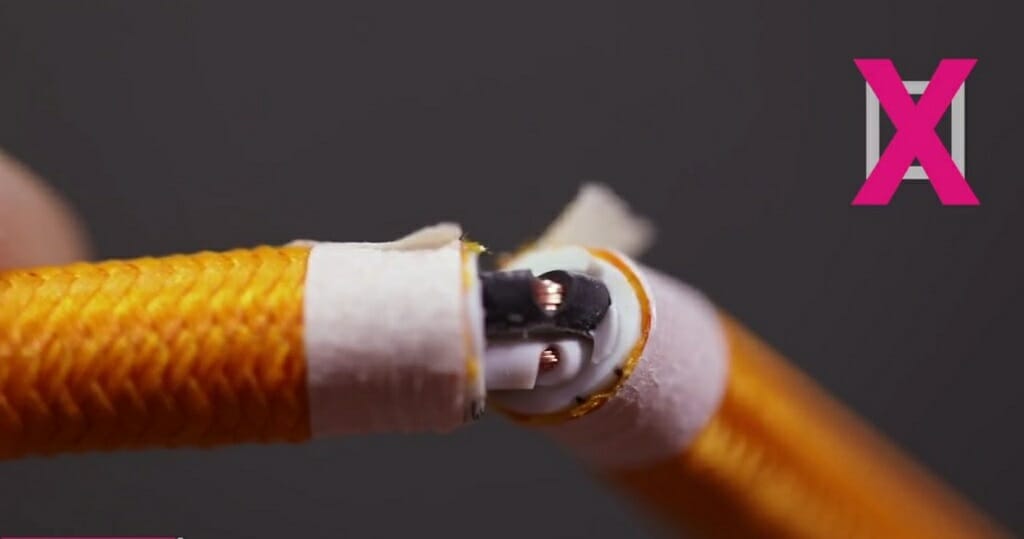
While cutting the cloth, remember to be careful. Box cutters can easily cut through the wire, and it can damage the wire strands.
Step 2 – Remove the Outer Insulation
After removing the cloth cover, you can spot the outer insulation. To remove the outer insulation, use the box cutter. For this, you’ll have to cut alongside the cord. Then, use your fingers to peel off the insulation.
As mentioned earlier, the SVT cord comes with three different wires. So, you’ll have to be extra careful while removing the outer insulation.
Step 3 – Strip the Wires

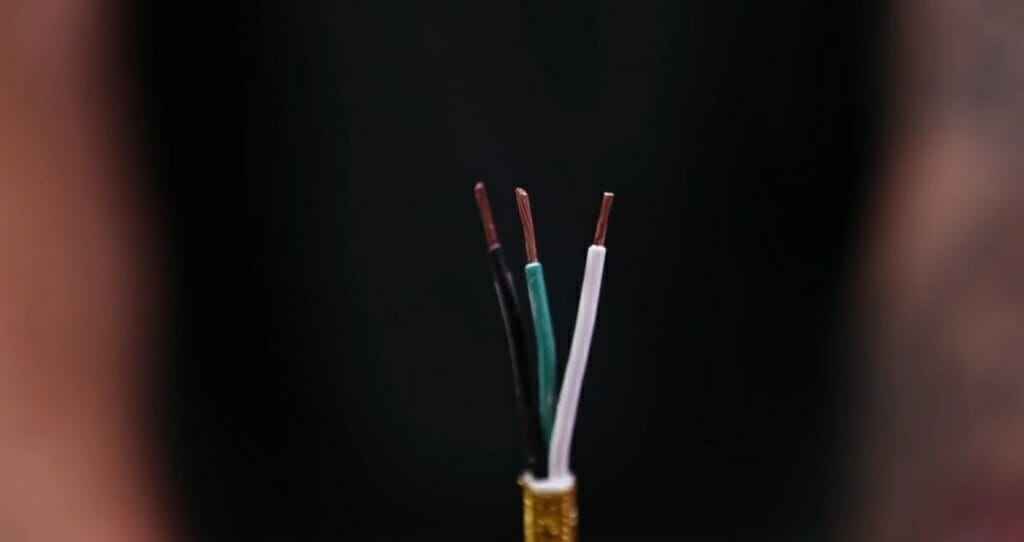
Usually, an SVT cord has three different wires: a hot wire, a neutral wire, and a ground wire. The black one is the hot wire, the white one is neutral, and the green one is the ground wire.
First, remove the green wire completely. Take the wire stripper and strip the insulation of the other two remaining wires. Strip at least 3/8 inches of insulation. While using the wire stripper, remember to use the correct hole according to the wire gauge.
Tip: We strip 3/4 inches of insulation for metal cap & shell sockets. However, phenolic sockets don’t need that much of an exposed wire conductor length. So, the 3/8-inch length is perfect.
After removing the insulation, twist the wire strand properly. Then, use the needle-nose plier or your fingers to fold the exposed wires in half.
Step 4 – Remove the Masking Tape
Now, remove the masking tape that you wrapped around the cloth cover in step 1. Then, apply Elmer’s glue to the outer insulation (especially on the cloth cover). Let the glue dry for a minimum of five minutes.
Even though this step seems like a simple step, it will give the cord a clean-cut look.
Step 5 – Connect the Wires to the Lamp Holder
Next, slide the socket cap into the stripped wires. Then, take the phenolic socket interior and start the wiring process. Tighten the live wire to the gold screw and the neutral wire to the silver screw. Turn the screwdriver in a clockwise direction to tighten the screws. If needed, bend the wires according to the locations of the hot and neutral terminals.
Step 6 – Crimp the Metal Strain Relief to the Cord
Set the Channellock plier to the appropriate size and position the strain relief on it. Then, take the SVT cord and place the metal strain relief on the edge of the cord’s insulation. Now squeeze the pliers and tighten the strain relief. Add a metal strain relief and protect the insulation and the wire as much as possible.
Step 7 – Connect the Other Parts of the Phenolic Socket
Slide the socket cap close to the socket interior. Rotate the socket to align the two parts correctly. Then, insert the shell and rotate it while holding the socket cap. Keep rotating until the connection gets strong. Check the strength of the wires and the holder connection one more time.
Step 8 – Test the Lamp
Finally, insert the light bulb into the phenolic socket and test the lamp.
Wrapping Up
Whether you use a metal cap & shell lamp or a phenolic socket, follow the above guidelines.
As you can imagine, the above process gets a little harder when we use SPT-1 or SVT cords. Additionally, it might take a little more time than usual. However, correctly wiring the lamp holder will benefit you in many ways. For instance, it will prevent the wires from melting, and you don’t need to worry about the safety of the lamp or bulb.
References
- Underwritert’s Knot. https://www.linkedin.com/learning/lean-deep-dive-job-instruction/how-to-tie-the-fire-underwriter-s-knot
- Insulation. https://www.energy.gov/energysaver/types-insulation
Wanamaker True Value Hardware
Lightcrafters, Inc.
Ryan Schwarzott
Shellie at Christmas Light Source
Royal Designs, Inc.
Color Cord Company