7 min read
How to Make a Hole in Resin Without a Drill (4 Methods)

If you want to make a hole in resin without a drill, you can use the methods I will lay out below.
Here are five methods you can try depending on your task. Apply either one of the first three before inserting the resin into the mold, or either one of the last two if you have already inserted the resin before it is hardened or cast.
You can Make a hole in resin using one of the following five methods:
- Method 1: Using Eyelet Screws and A Chiseling Knife
- Method 2: Using a Toothpick or Straw
- Method 3: Using a Metal Wire
- Method 4: Using wax tubing
- Method 5: Using a piece of wire
I will go into more detail below.
Before Hardening of the Resin
These methods apply if you have not yet inserted and hardened the resin.
Method 1: Using Eyelet Screws and A Chiseling Knife
A chiseling knife and eyelet screws are required for this method.
1A
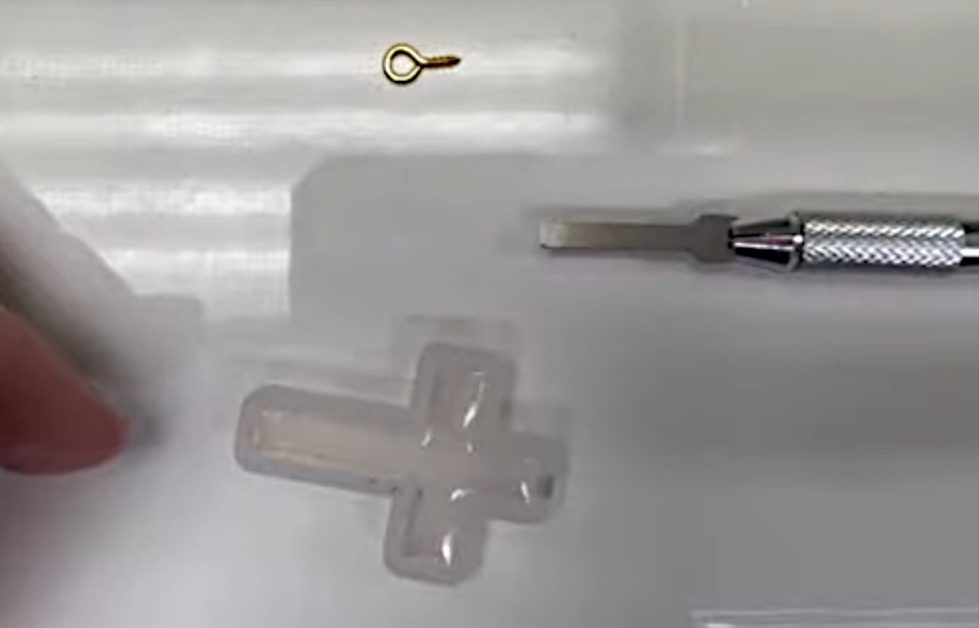
Resin mold, eyelet screws, and chiseling knife
1B

Inserting the chiseling knife into the mold
1C
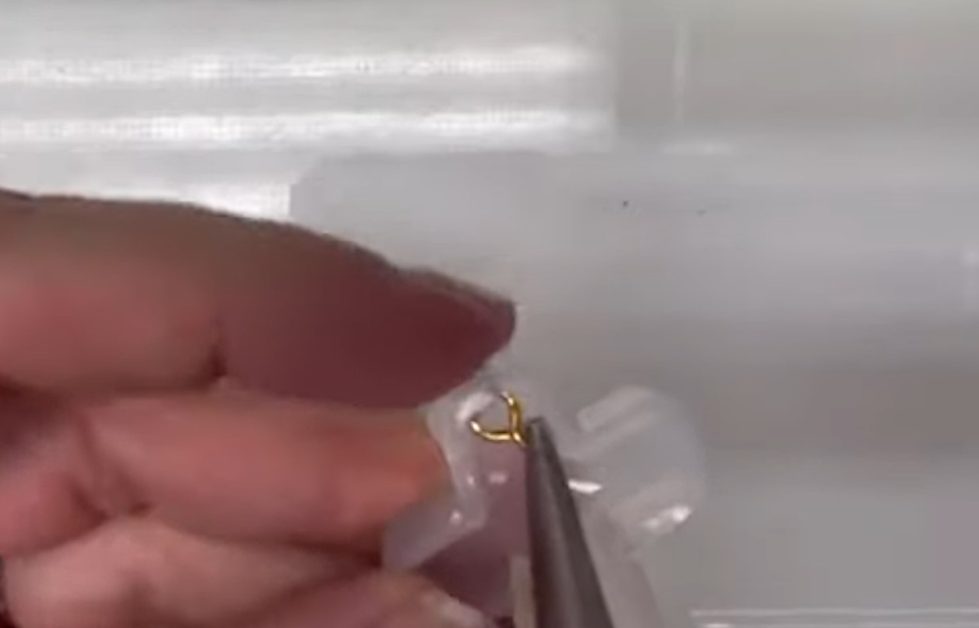
Pushing the eyelet screw through the hole
1D
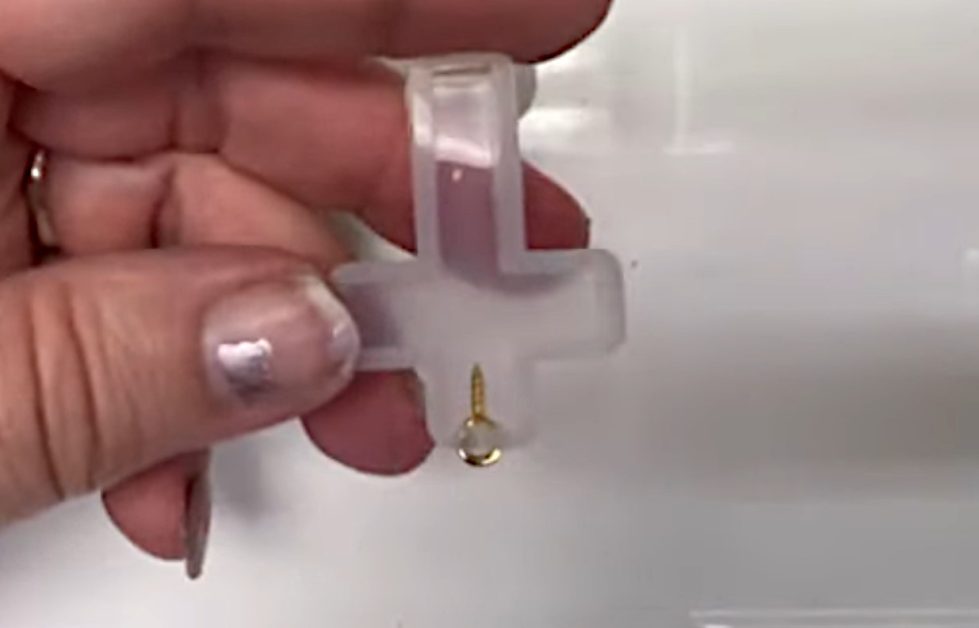
Position the eyelet screw inside the mold
1E
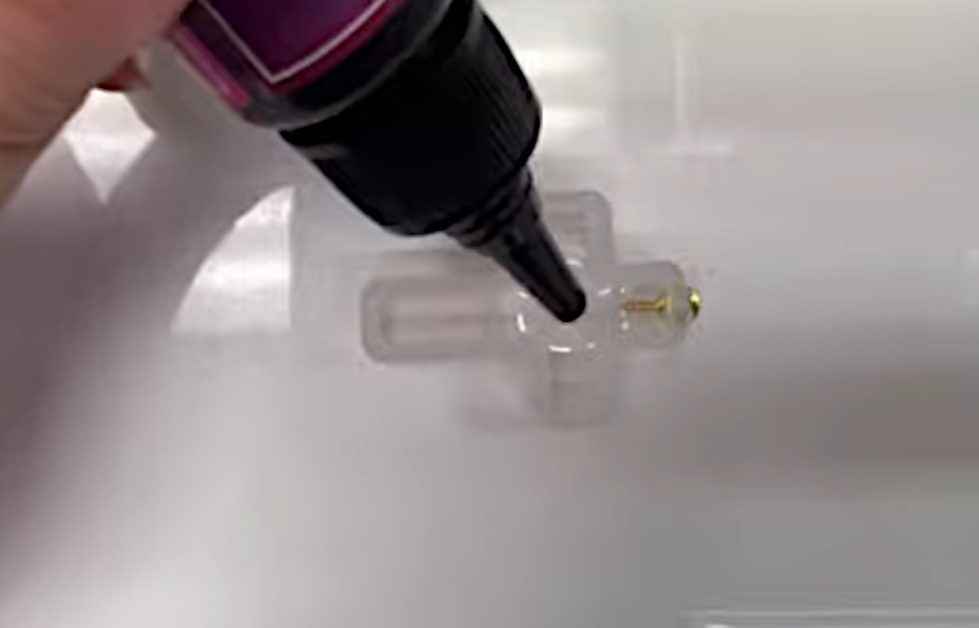
Filling the mold with resin
1F
Eyelet screw set in the mold
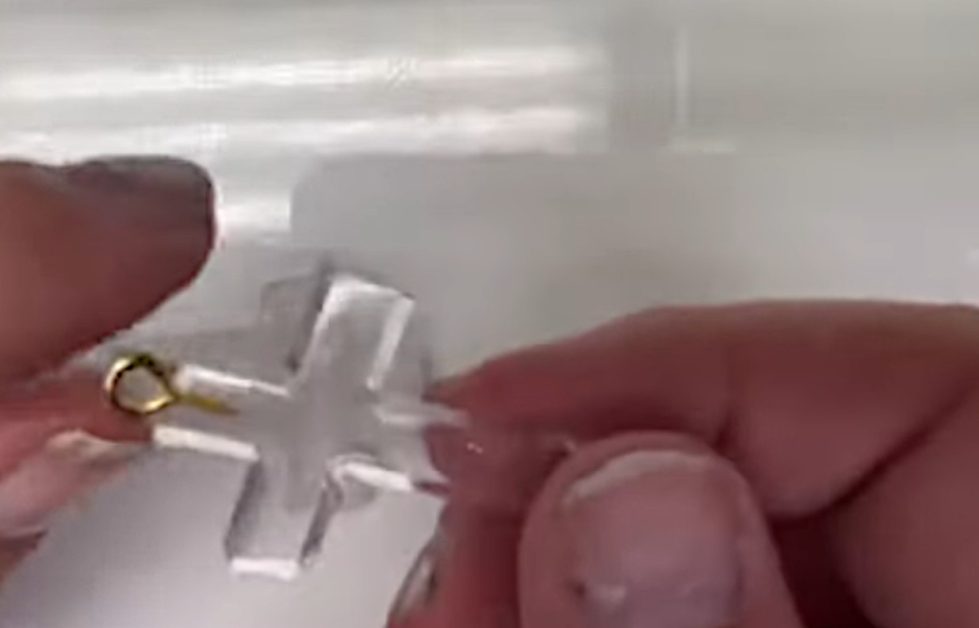
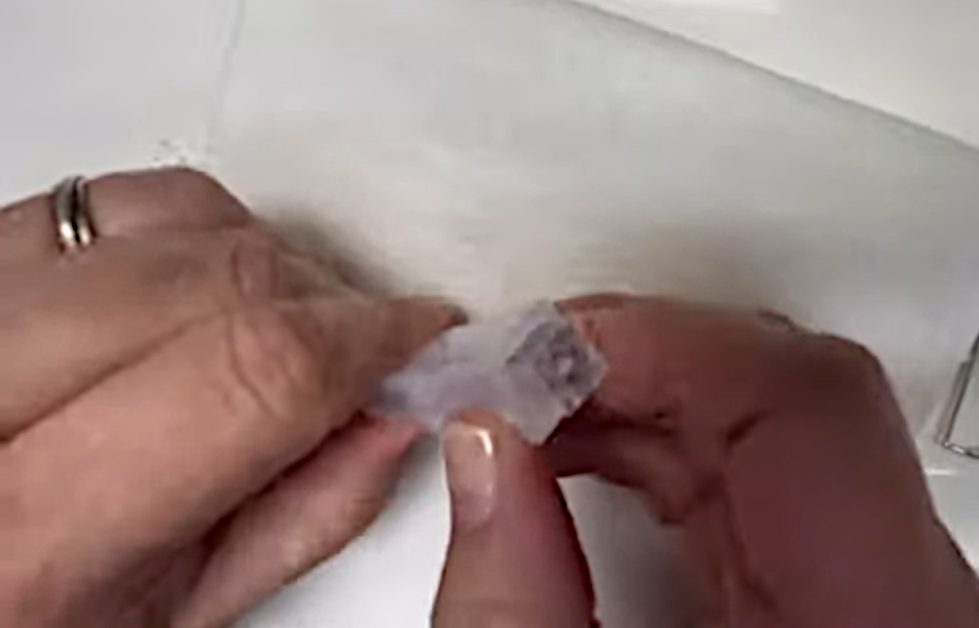
- Step 1: Mark the points to insert the eyelet using the chiseling knife or another pointed tool. (see image 1A)
- Step 2: Insert the chiseling knife into the open mold. (see image 1B)
- Step 3: Push the eyelet screw through the back side of the mold using tweezers or nose pliers. (see image 1C)
- Step 4: Position the eyelet screw inside the hole you created in the mold as far as is required. Make sure it is straight. (see image 1D)
- Step 5: Once the eyelet screw is set inside the hole in the mold, fill the mold with the resin. (see image 1E)
When the resin has hardened, the eyelet screw will be embedded inside the resin. (see image 1F)
Method 2: Using a Toothpick or Straw
A toothpick or straw is required for this method.
2A
Eyelet screw with a toothpick through it
2B
Hardened resin around the inserted eyelet screw
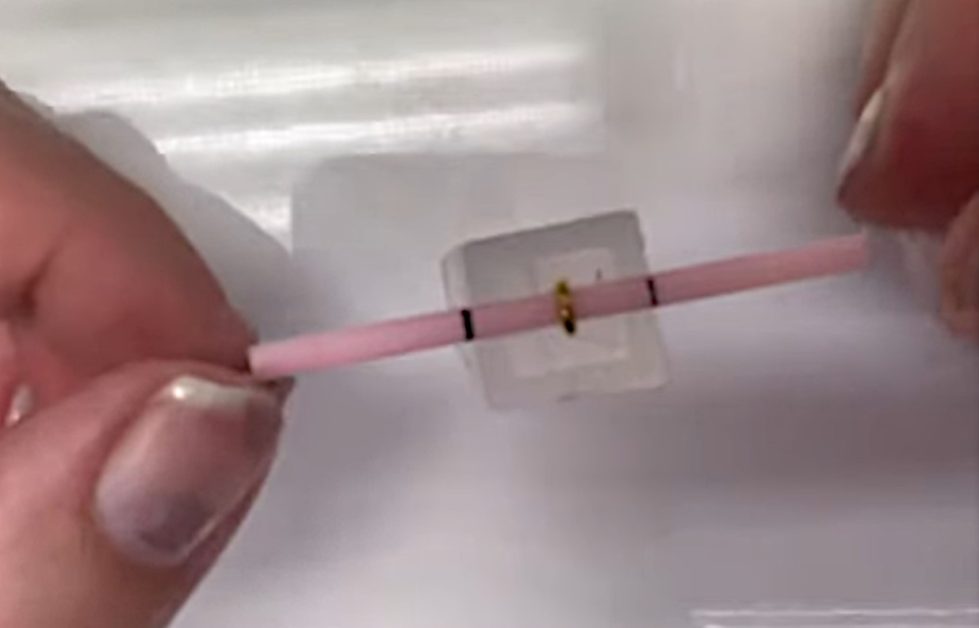
- Step 1: Pass an eyelet screw through a square toothpick or drinking straw, as shown. This is to hold the screw in position over the mold’s opening. Make sure the threaded part of the eyelet screw is facing straight down. (see image 2A)
- Step 2: Fill the mold with the resin.
Once the resin has hardened, the eyelet screw will be firmly inside. (see image 2B)
Method 3: Using a Metal Wire
This method requires a small piece of metal wire coated with either silicone or Teflon coating.
3A
Passing a wire through a mold
3B

Pushing the eyelet screw through the hole
3C
Removing the resin from the mold
3D
Passing the wire through the hardened resin
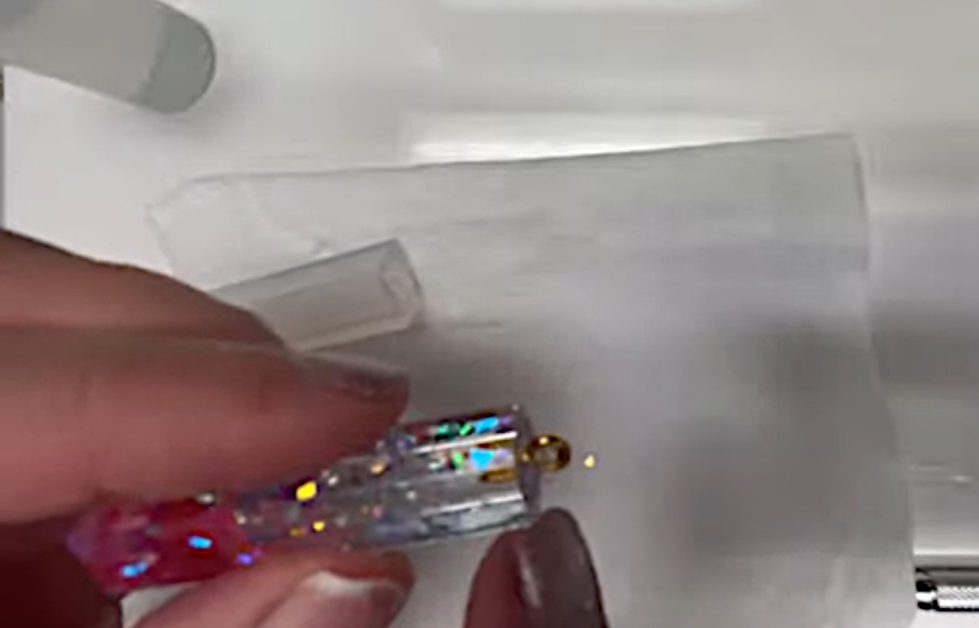
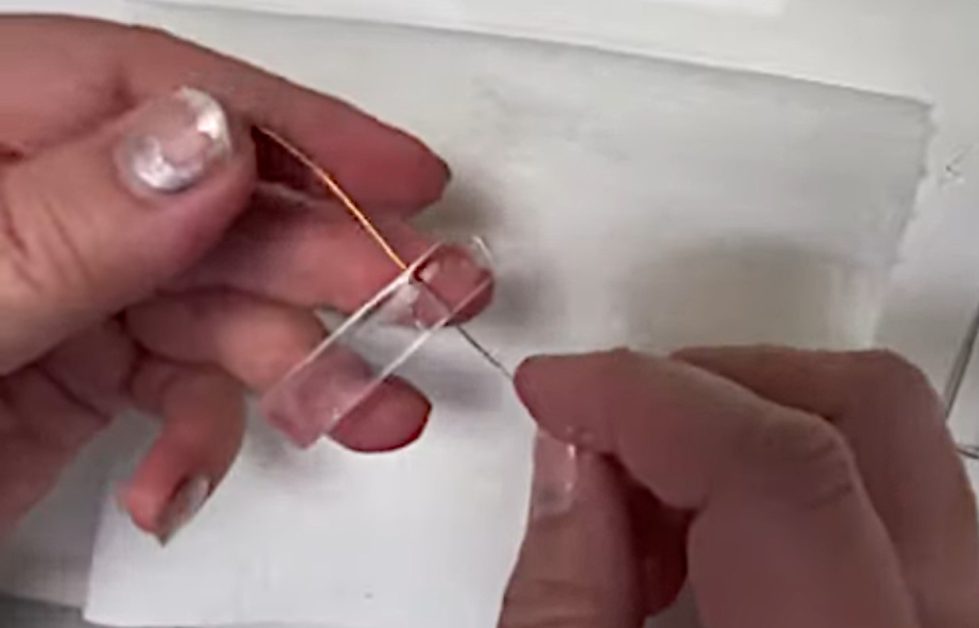
- Step 1: Pass a piece of metal wire coated with silicone or Teflon coating through the mold. (see image 3A) (1)
- Step 2: Fill the mold with the resin. (see image 3B)
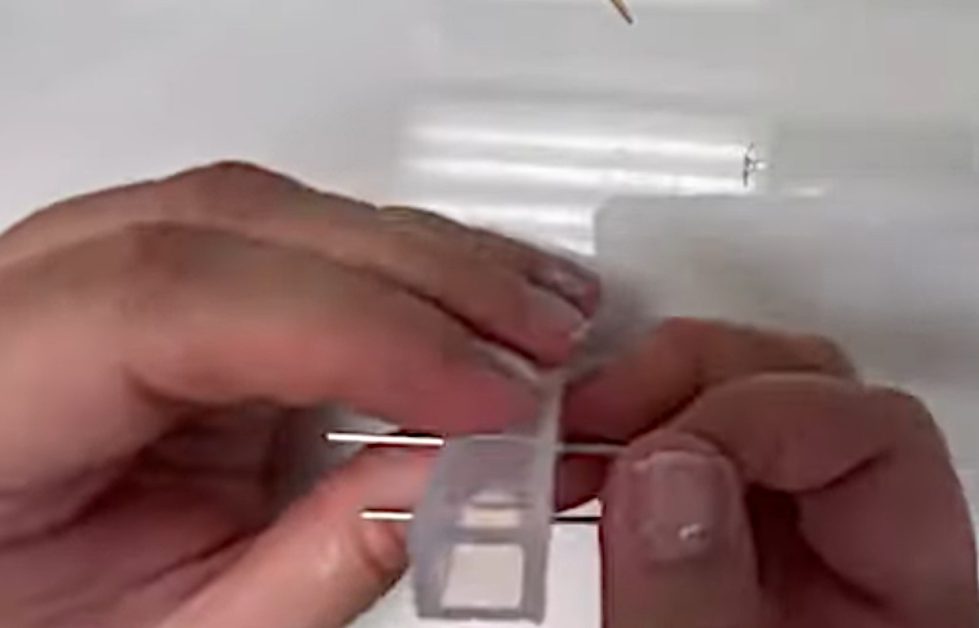
- Step 3: Remove the wire and resin from the mold once hardened.
- Step 4: Squeeze the hardened resin from the mold. (see image 3C)
- Step 5: You can now pass the wire through the hardened resin. (see image 3D)
RELATED Can You Drill Through Resin?
When the Resin Has Almost Hardened
These methods apply if the resin has almost hardened, i.e., before it is fully cast. The resin must not be too hard. Otherwise, it might be difficult to apply these methods.
Method 4: Using Wax Tubing
This method requires using wax tubing:
- Step 1: Obtain wax tubing and pass a suitable length of the tubing through those exact spots where you want to create the holes.
- Step 2: The tubes can be inserted without the resin sticking to the wax. If there is excess wax around the hole, you can use a tool (screwdriver, drill bit, toothpick, etc.) to push it away.
- Step 3: Remove the tubing once the resin has hardened.
Method 5: Using a Piece of Wire
This method requires using a small piece of wire:
- Step 1: Find a piece of metal wire with a gauge according to the size of the hole you want to create.
- Step 2: Heat the wire a little so it can slide easily through the resin. (2)
- Step 3: Insert the wire through the resin.
- Step 4: Remove the wire once the resin has been cast.
Take a look at some of our related articles below.
- How to cut chicken wire
- Does black wire go to gold or silver
- How to remove wire from push-in connector
References
(1) silicone – https://www.britannica.com/science/silicone
(2) resin – https://www.sciencedirect.com/topics/agricultural-and-biological-sciences/resin
Video Reference