10 min read
How to Cut Chicken Wire (3-Step Guide)
Let me take you on a journey into chicken wire cutting. It all started when my backyard chicken family began to grow. More chickens meant more space, and that’s where I dove headfirst into cutting more chicken wire.
And guess what? It turned out to be simpler than I expected. First up, roll out your chicken wire and decide where you will make your cuts. Trust me; it saves a lot of hassle down the line.
I’ll walk you through the process and even throw in some tips and tricks I’ve picked up. These little nuggets of wisdom have turned my chicken wire cutting from a chore into a craft.
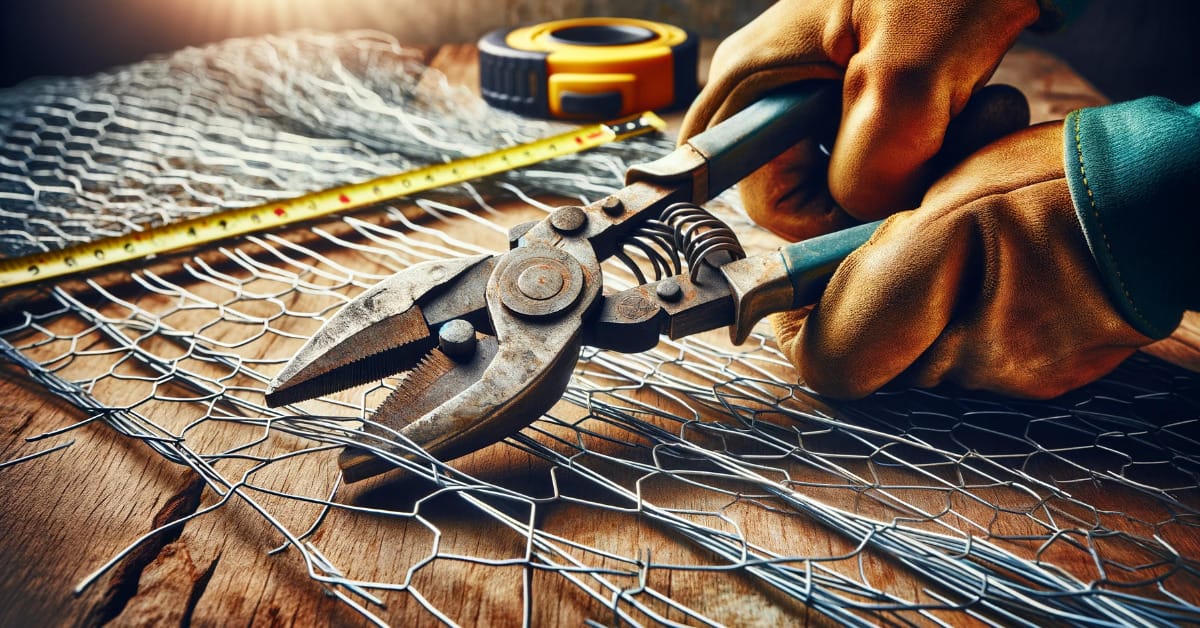
Gearing Up for Chicken Wire Cutting
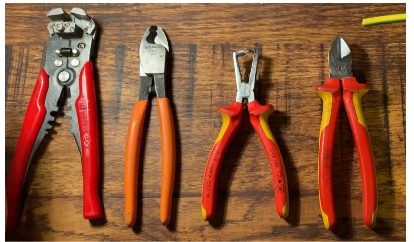
Alright, let’s talk tools. Over the years, I’ve cut enough chicken wire to fence a small farm and learned that using the right tool makes all the difference. So, here’s my rundown on what you’ll need:
Long-Nose Pliers for the Delicate Jobs
Long-nose pliers are your best friends when dealing with thin, finicky chicken wire. I remember working on a delicate garden enclosure. Those pliers were a lifesaver for the intricate cuts.
Tin Shears for the Medium Stuff
Grab those tin shears when you step up to medium-sized chicken wire. I used them once for a bigger chicken coop project.
Diagonal Cutting Pliers: The Jack-of-All-Trades
Diagonal cutting pliers are the MVPs of chicken wire cutting. Whether it’s thick or thin wire, they’ve got you covered. I’ve used these bad boys on countless projects, and they never let me down.
Safety Gear: Non-Negotiable
And hey, don’t forget about safety. Safety glasses are a must. I learned the hard way during a project when a wire piece flew right toward my eye. Close call!
And gloves? Essential. I’ve had my share of nicks and scratches, so trust me. Throw on some work jeans, too, to keep those legs scratch-free.
So, there you have it. With the right tools, you’re ready to tackle that chicken wire like a pro. Stay safe and enjoy your project!
Cutting Your Chicken Wire: A Step-by-Step Guide
Let’s get down to the nitty-gritty of cutting chicken wire. I’ve been through this process more times than I can count, and I have some tips and tricks to share. So, grab your wire cutters, and let’s get started!
Step 1. Lay Your Chicken Wire Down
First things first, let’s unroll that chicken wire. I remember this one time I tried to cut the wire without unrolling it properly – trust me, it didn’t end well.
Make sure to stretch out the chicken wire to the length you need. If you’ve got a buddy to help hold one end, great! If not, no worries. Secure one end to a stake or something similar to keep it from rolling back up.
Step 2. Mark Your Territory
Now that your wire’s laid out, decide where you will cut. I usually use a marker to draw a line along the wire.
This step reminds me of when I eyeballed it and ended up with a lopsided chicken run. Marking the line keeps your cuts straight and saves you from frustration.
Step 3. Precision Cutting
Here’s where things get interesting. It’s time to cut. But here’s a tip: if you plan to form a circle or connect the ends, cut one side slightly longer. I learned this hard when I first made a circular plant protector, and the ends wouldn’t stay put.
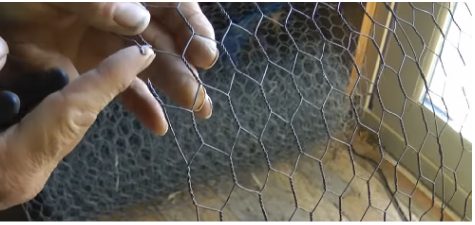
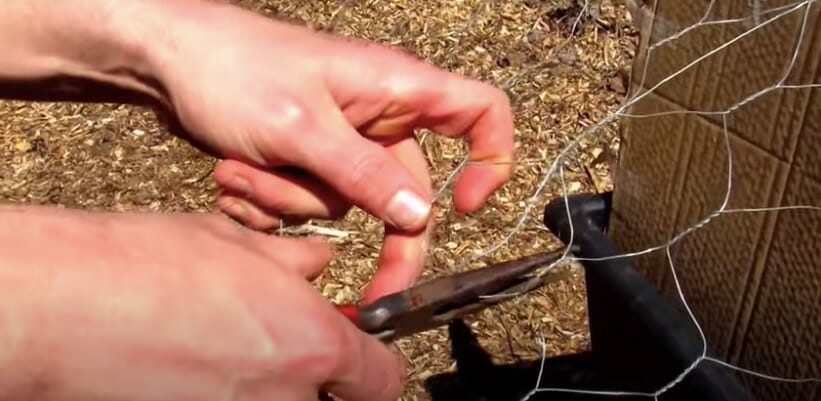
Step 3.1: Snip and Separate
Now, cut along your marked line. Do it strand by strand, carefully. I like to pull the cut part away to keep things clear. Precision is key!
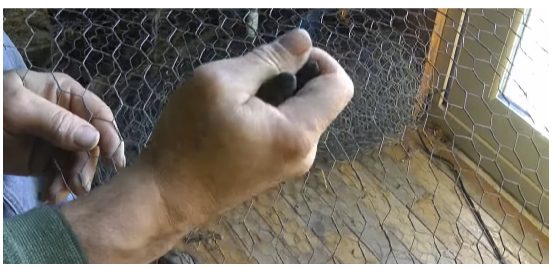
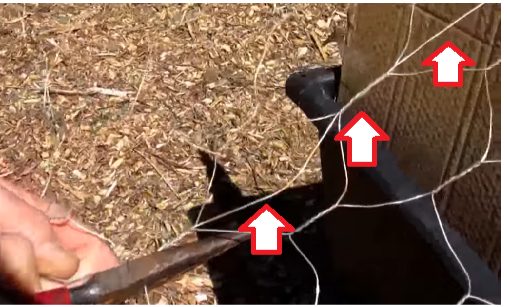
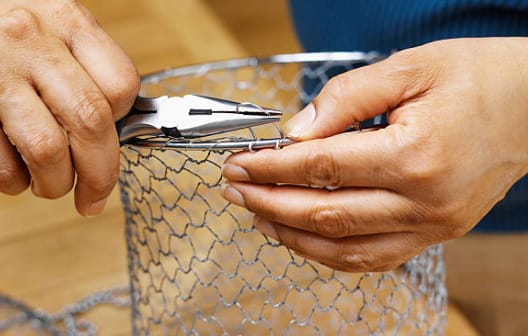
Step 3.2: Joining the Ends
It’s time to bring the ends together if you’re making a circle. Twist the wires around each other, ensuring the longer end wraps securely. This technique is a lifesaver. It keeps the circle intact and prevents those pesky wire ends from poking out.
And there you have it – chicken wire cutting made simple. Take your time, be precise, and most importantly, have fun with it. Happy cutting!
User-Friendly Tips for Cutting Chicken Wire

Working with chicken wire can be tricky but also rewarding. Here are some user-friendly tips and common mistakes to avoid, straight from my own experiences:
- Check for Wire Quality: I was all set to build a coop once, but my wire was rusted. Lesson learned – always inspect your chicken wire before you start cutting. Rusted or damaged wire makes cutting difficult and can be a safety hazard.
- Measure Twice, Cut Once: This old carpenter’s adage holds for chicken wire. When I first started, I’d often rush and end up with pieces that were too short. Take the time to measure your wire carefully before making any cuts. It saves time in the long run.
- Avoid Overstretching the Wire: I overstretched the wire in one of my projects, altering its shape and making it tough to work with. Do it gently when unrolling your chicken wire to maintain its original shape.
- Wear the Right Gear: I can’t stress this enough – always wear gloves! I learned the hard way after a few nicks and scratches. And don’t forget safety glasses. Those wire ends can be unpredictable when cutting.
- Keep Your Tools in Top Shape: A dull tool is bad. I once tried to make do with an old pair of wire cutters and ended up with a sore hand and a botched job. Keep your cutting tools sharp and well-oiled for a smooth experience.
- Be Mindful of Your Surroundings: Especially if you work in a shared space. I once accidentally scratched my car with a stray piece of wire. Secure your workspace and be aware of where your wire ends are at all times.
- Practice Makes Perfect: Don’t get discouraged if your first few attempts aren’t perfect. Like with any skill, practice is key. I remember my first chicken wire project – it was more of a learning experience than a success. But with each cut, I got better.
Remember, every project is a chance to learn and improve. Remember these tips, and you’ll be a chicken wire pro soon!
Advanced Techniques and Creative Uses for Chicken Wire
For all you seasoned DIYers out there looking to push the envelope with chicken wire, this section’s for you. I’ve dabbled in a few advanced projects myself, and let me tell you, there’s a whole world of possibilities beyond the humble chicken coop.
- Precision Cutting for Intricate Designs: When working on a decorative garden piece, I realized that precision is key for intricate designs. Use a fine-toothed hacksaw for detailed shapes. Patience is your friend here. Take your time, and you’ll be amazed at the delicate patterns you can create.
- Creating 3D Sculptures: This one’s a real game-changer. I made a life-sized scarecrow framework out of chicken wire for a community garden. Start with a simple frame and gradually add layers to build your sculpture. It’s like sculpting with wire – both challenging and incredibly rewarding.
- Layering Techniques for Strength: Layering is the way to go if you’re building something that needs extra strength. I discovered this while working on a robust garden structure. Overlap layers of chicken wire and secure them with wire ties for added durability.
- Artistic Weaving with Wire: This is where you can get creative. Weaving colored wires or ribbons through chicken wire can create stunning visual effects. I helped a friend weave LED lights into chicken wire for a dazzling light display. The result was nothing short of magical.
- Customized Shapes for Home Decor: Chicken wire isn’t just for outdoor use. I’ve used it to make unique lampshades and even picture frames. The key here is to mold and cut the wire to fit your desired shape – a pair of needle-nose pliers can be incredibly useful.
- Combining Materials for Mixed Media Projects: Don’t be afraid to mix materials. Combining chicken wire with wood, glass, or metal can yield fascinating results. I once made a mixed media wall hanging that combined chicken wire and reclaimed wood – it was a hit.
Remember, the only limit is your imagination. These advanced techniques can take your chicken wire projects to the next level. Have fun experimenting and creating something uniquely yours!
Frequently Asked Questions
- What Is the Best Way to Cut Different Wire Gauges?
- In my experience, the tool you choose is key. For thinner gauges, long-nose pliers work like a charm. They offer precision and ease. I’d recommend heavy-duty wire cutters or tin snips for thicker gauges. The thicker the wire, the more robust your tool needs to be.
- How Can I Cut Chicken Wire into Specific Shapes?
- Ah, you are shaping chicken wire! First, sketch your shape onto the wire using a marker. Then, use a combination of wire cutters and needle-nose pliers for the intricate parts.
- Is There a Trick to Cutting Chicken Wire Without Hurting Myself?
- Safety first, always! Wearing gloves is non-negotiable. I learned that the hard way. Also, keep your cuts at a comfortable distance from your body, and make sure your tools are sharp to avoid unnecessary force.
- How Do I Avoid the Chicken Wire Rolling Back Up?
- This one’s a classic. To prevent the chicken wire from rolling back, I usually lay it flat on the ground and weigh down the edges with something heavy. Slowly unrolling and securing as you go makes the process much more manageable.
- Can I Use Regular Scissors to Cut Chicken Wire?
- Regular scissors? I wouldn’t recommend it. They’re not designed for the job and can get damaged or cause an injury. Stick to wire cutters or tin snips – they’re made for this work.
- What’s the Best Way to Join Cut Pieces of Chicken Wire?
- Joining chicken wire is all about the twist! Use a pair of pliers to twist the ends together. For a cleaner look, try using small wire ties.
References
Organizations:
- American Poultry Association (APA). https://amerpoultryassn.com/
- National Chicken Council. https://www.nationalchickencouncil.org/
Books:
- “Building Chicken Coops For Dummies” by Todd Brock, David Zook, and Rob Ludlow. https://www.barnesandnoble.com/w/building-chicken-coops-for-dummies-todd-brock/1100295520
- “The Chicken Health Handbook” by Gail Damerow. https://www.barnesandnoble.com/w/the-chicken-health-handbook-2nd-edition-gail-damerow/1120743590
Website Resources:
- BackYard Chickens. http://backyardchickens.com/
- The Spruce. http://thespruce.com/
Video References:
Through Our Eyes
Rick Larson