18 min read
How to Make a Hole in Wood Without a Drill (Methods)
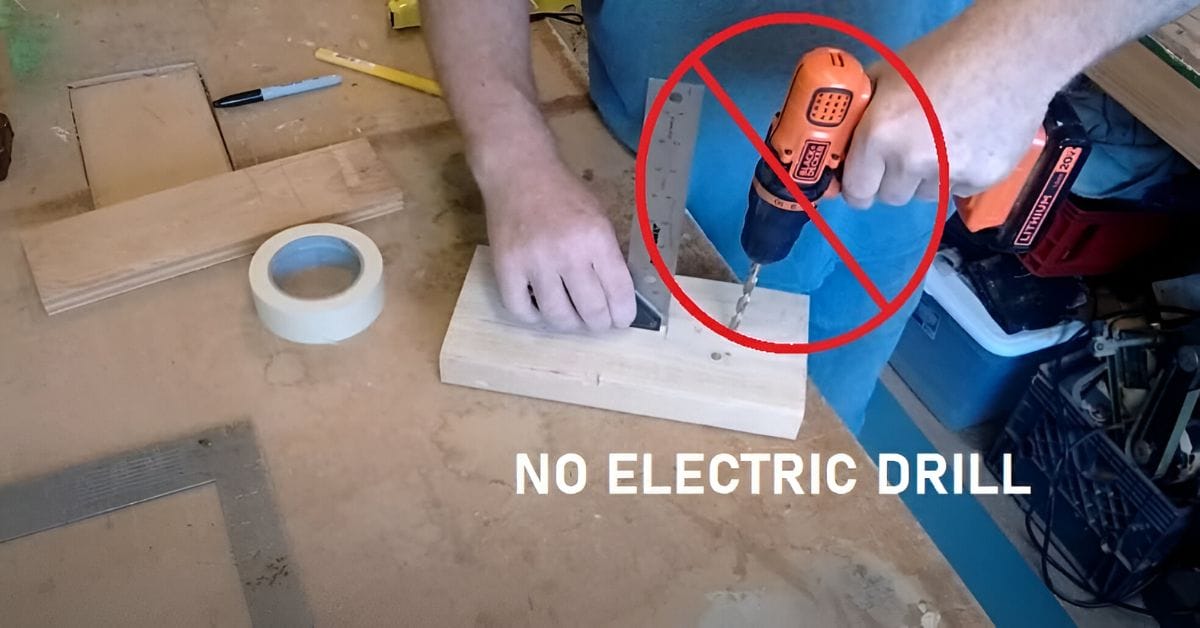
Hey there, DIY enthusiasts! I’m here to guide you through a handy skill that’s both useful and satisfying to master – making a hole in wood without using a drill.
Now, you might be wondering, “Is this possible?” Oh, you bet it is! Let me show you how to ace this task with classic yet effective methods.
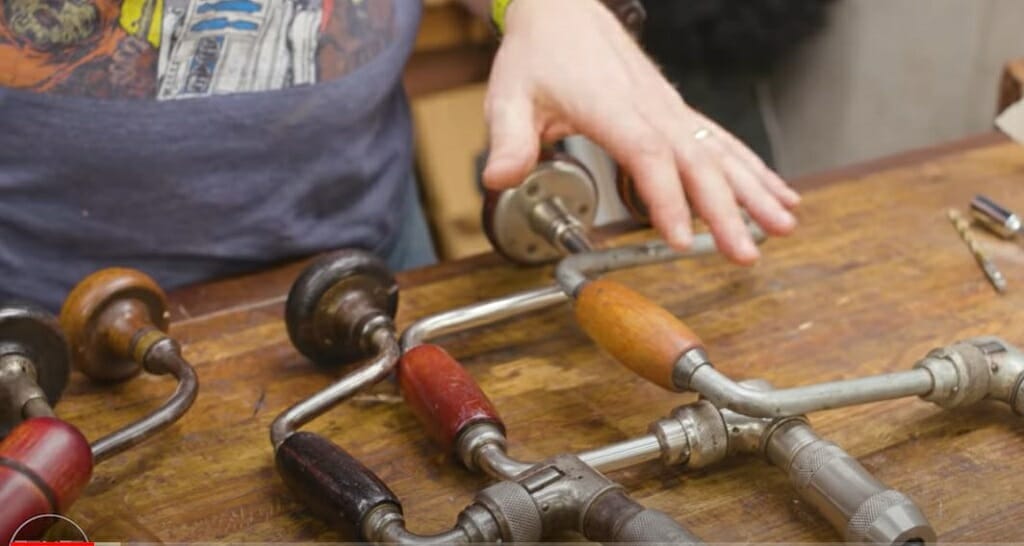
- Use a Bit & Brace Hand Drill
- Use an Egg-Beater Hand Drill
- Use a Simple Manual Hand Drill With Chuck
- Use Semi-Circular Chisel
- Use the Burning Method To Make A Hole In Wood
From the trusty bit & brace hand drill to some inventive methods you might not have thought of, I’m here to show you that where there’s a will, there’s a way.
Methods to Make a Hole in Wood without an Electric Drill
Let’s dive into making holes in wood without the modern convenience of an electric drill. I’ve got six fantastic methods to share with you, each using a unique tool that brings its own flair to the table.
Let’s get started with how you can master these traditional techniques.
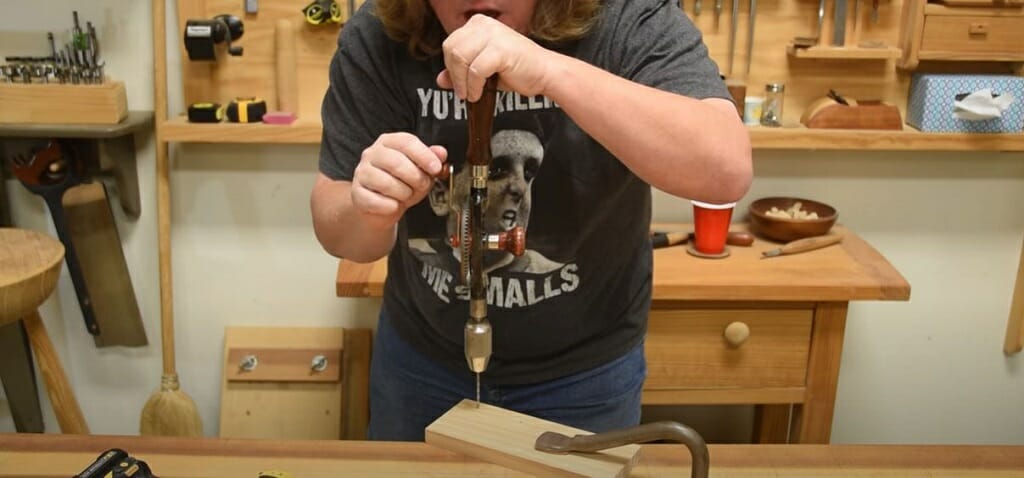
Method 1 – Use a Bit Brace Hand Drill
Let me introduce you to the Bit Brace Hand Drill. This tool is a classic, dating back to the 1400s! And believe me, it’s stood the test of time for a reason.
Step 1 – Mark Your Spot
First things first, you need to know where you’re drilling. So, take a pencil and mark the spot where you want that hole on your wood.
Step 2 – Choose Your Drill Bit
The Bit Brace is versatile – it can handle a variety of drill bits. For this job, let’s go with an Auger drill bit.
These bits are fantastic with their snail lead screw, guiding the drill in a perfectly straight line. Pick the right size for your project and attach it to the drill’s chuck.
Step 3 – Drill That Hole
Now, place your drill bit right on your mark. If you’re right-handed, keep your right hand on the circular head and your left on the rotating handle.
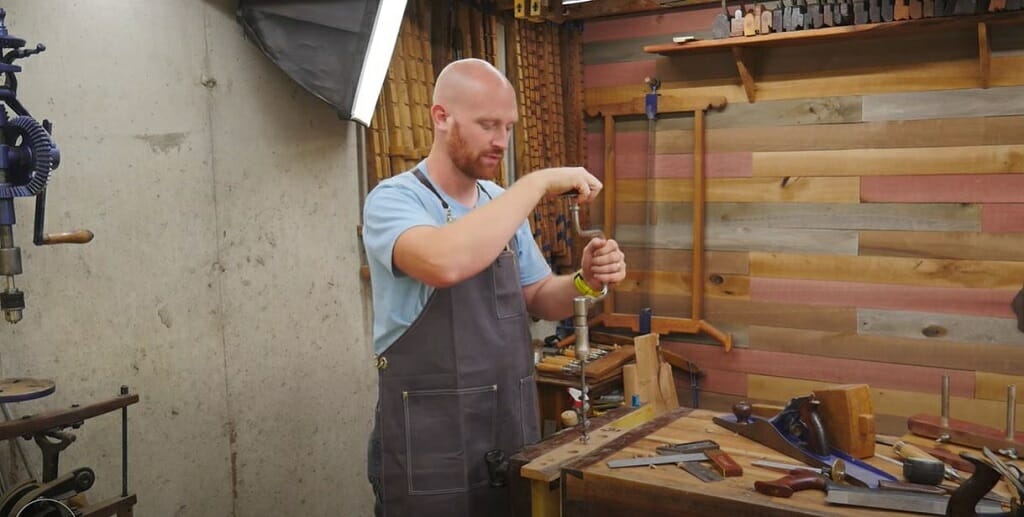
And if you’re a lefty, flip that around. Then, start rotating that handle clockwise. Keep the drill steady and keep on drilling until you’ve reached the desired depth.
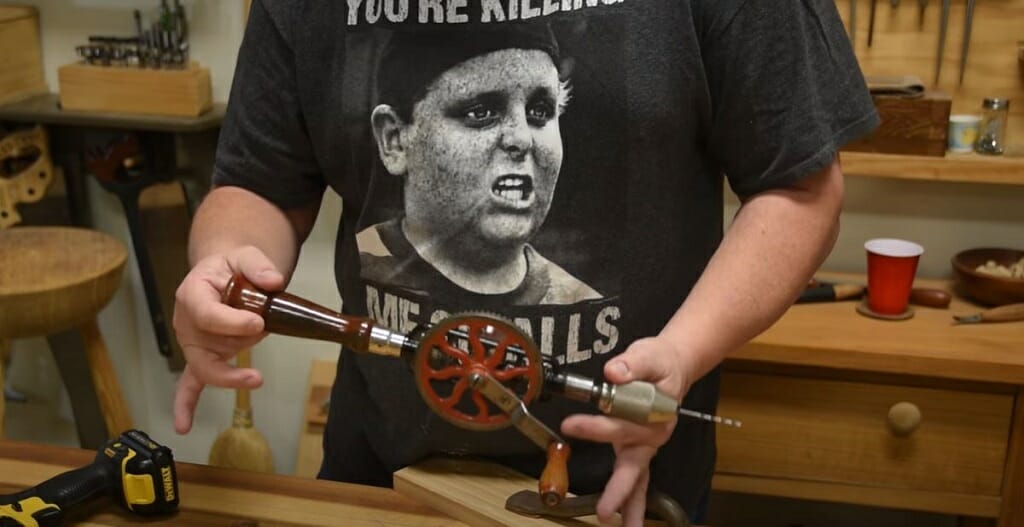
Method 2 – Use an Egg Beater Hand Drill
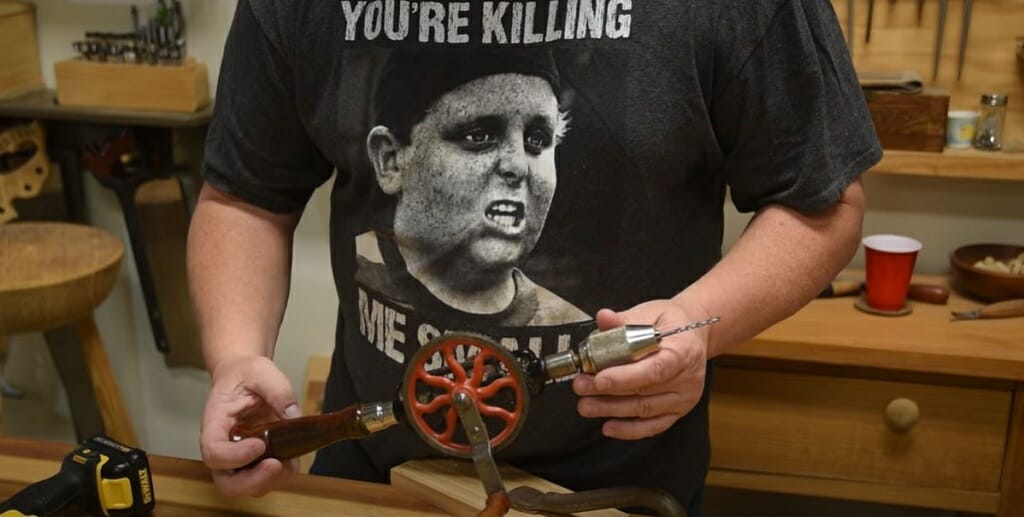
This tool is a classic, much like its cousin, the Bit & Brace Hand Drill. The key difference? It’s all in the way you spin it. With the Bit & Brace, you’re going horizontal, but with the Egg Beater, we’re talking vertical – a whole new spin on things!
These drills have been around for ages, and they come with three types of handles to make your work easier:
- The Main Handle
- The Side Handle
- The Turning Handle
Now, let me walk you through how to make a hole in wood with this vintage beauty.
Step 1 – Spot the Mark
First, grab your piece of wood and mark where you want that hole. Precision is key, so take your time.
Step 2 – Bit Connection
Next up, pick the right drill bit for your task and hook it up to the drill’s chuck. You’ll need the chuck key here – it’s like a puzzle piece, ensuring everything fits snugly.
Step 3 – Drill the Hole
Once your drill bit is all set:
- Position it right on that mark you made.
- Hold onto the main handle with one hand – steady now!
- With your other hand, start working the turning handle. This is where the magic happens.
And there you have it – start drilling and watch as the hole takes shape. It’s all about the rhythm and feeling the wood gives way under your tool. It’s not just about making a hole; it’s about connecting with every turn. Let’s get drilling!
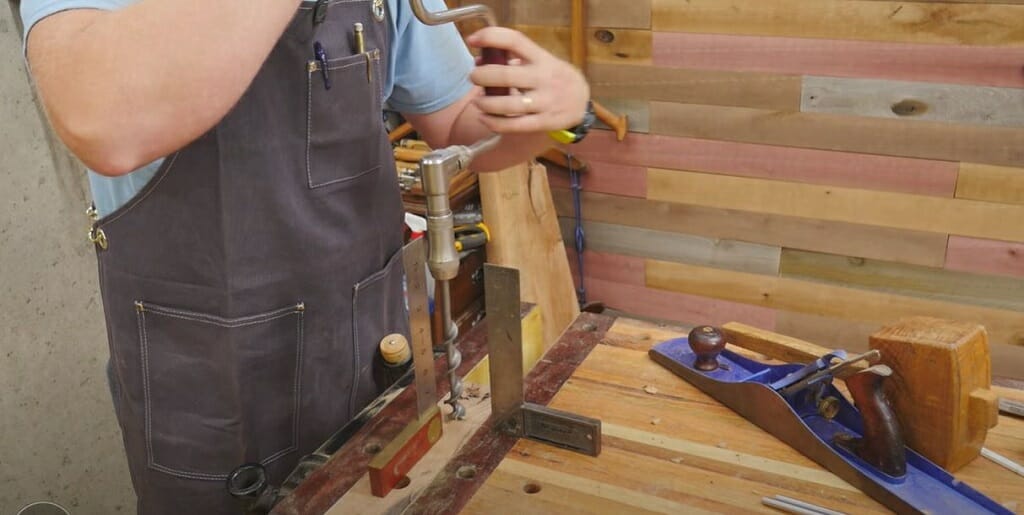
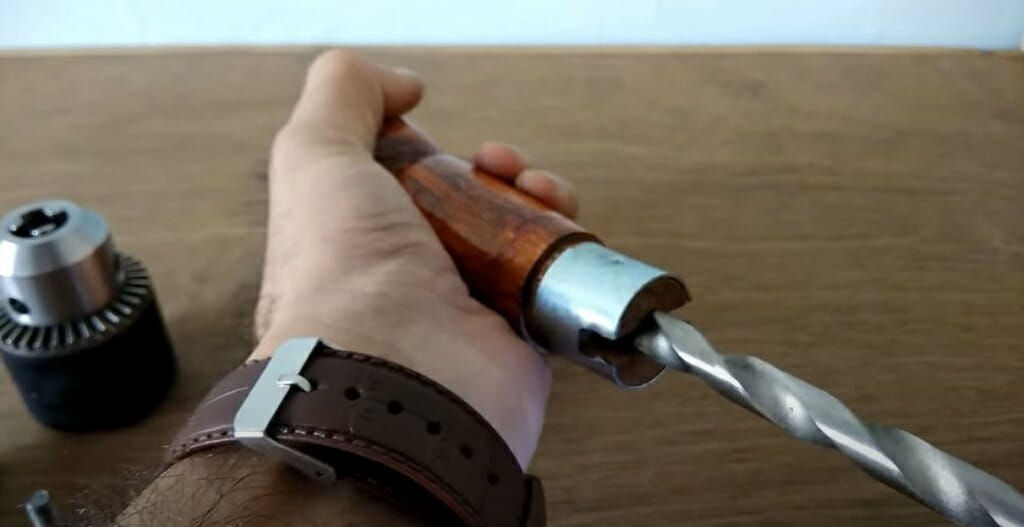
Method 3 – Use a Simple Manual Hand Drill w/ Chuck
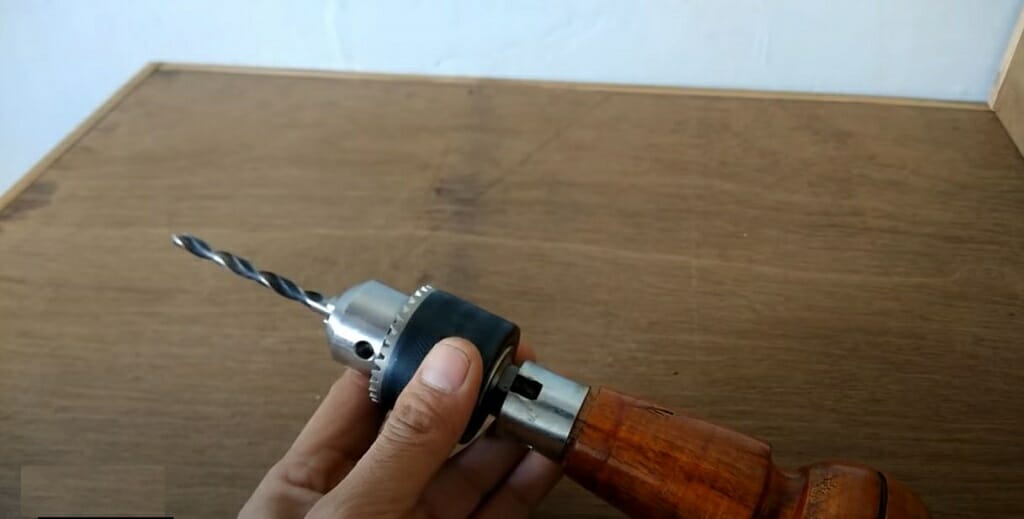
This one doesn’t have a rotating handle, unlike the bit & brace or the egg-beater drills. It’s all about your own touch and feel – pure craftsmanship at its best.
The beauty of this tool lies in its simplicity. You get to work directly with your hands, which means you have complete control over the drilling process.
Here’s how you get set up with this nifty tool. First, you want to select your drill bit based on what you’re planning to do. Loosen the drill chuck, pop in the bit, and tighten it back up. And voilà, your hand drill is ready to roll.
Let’s break down the steps, shall we?
Step 1 – Picking Your Spot
Grab your piece of wood and mark the spot where you want your hole. Precision is key here.
Step 2 – Choosing the Right Drill Bit
Check out your drill bits and pick the one that fits your task. Attach it to your drill chuck. You’re almost ready to drill!
Step 3 – Drilling the Hole
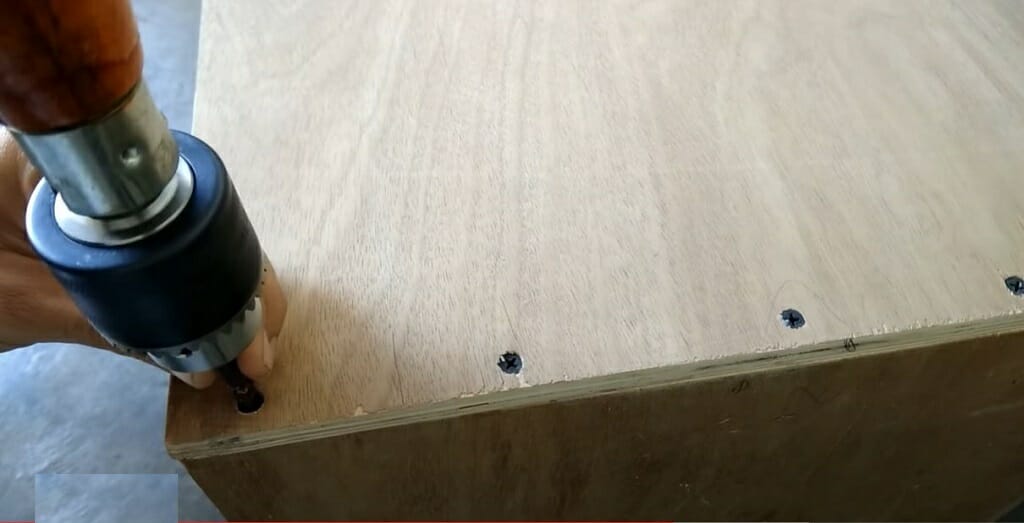
Now, hold the hand drill firmly in one hand. With your other hand, start rotating the drill. Keep your movements steady and consistent for the best results.
A heads-up: This method might take longer than using a bit & brace or an egg-beater drill. But hey, it’s all part of the experience.
Method 4 – Use a Semi-Circular Hand Chisel
Let’s tackle the Semi-Circular Hand Chisel, a real classic in the toolbox. This isn’t just your regular chisel; it’s got a circular blade, making it perfect for carving out holes.
Step 1 – Pick the Right Chisel
First things first, you’ve got to choose a chisel that fits the bill. Make sure the diameter matches what you need. Think of it like choosing the right paintbrush for a canvas.
Step 2 – Mark Your Spot
Next up, mark where you want this hole. I like to use a divider caliper wing for this – it’s all about precision, folks. It’s like drawing your bullseye before you throw the dart.
Step 3 – Outline the Circle
Now, place your chisel on that mark and give it a good hammer. You’re crafting the outline of your hole here, so it might take a few adjustments to get it right.
Step 4 – Carve It Out
Finally, it’s time to carve out that hole. This is where your skill shines. Remember, the deeper you go, the trickier it gets, so keep your focus.
A little tip from me: keep your patience as you go deeper with the chisel. It’s all part of the craft. And there you have it, a hole in wood without a drill, using some good old elbow grease and a trusty chisel.
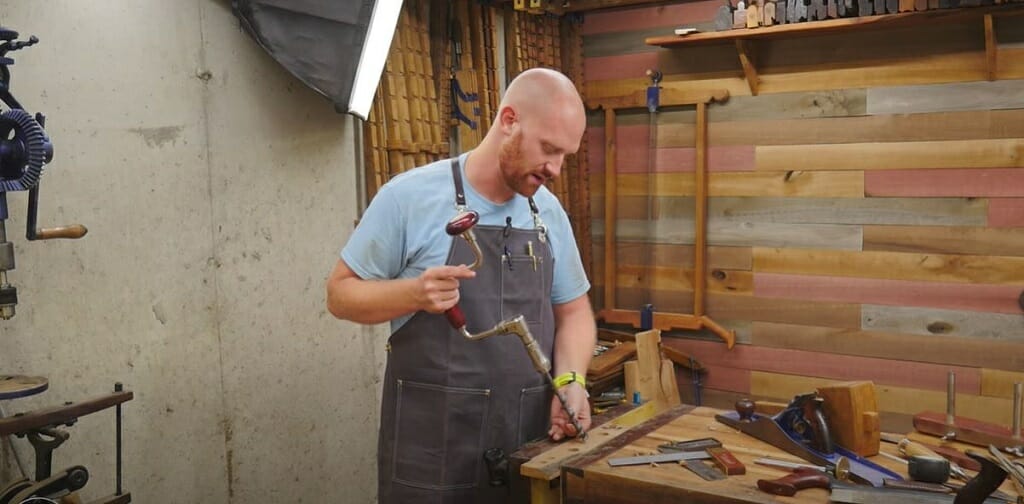
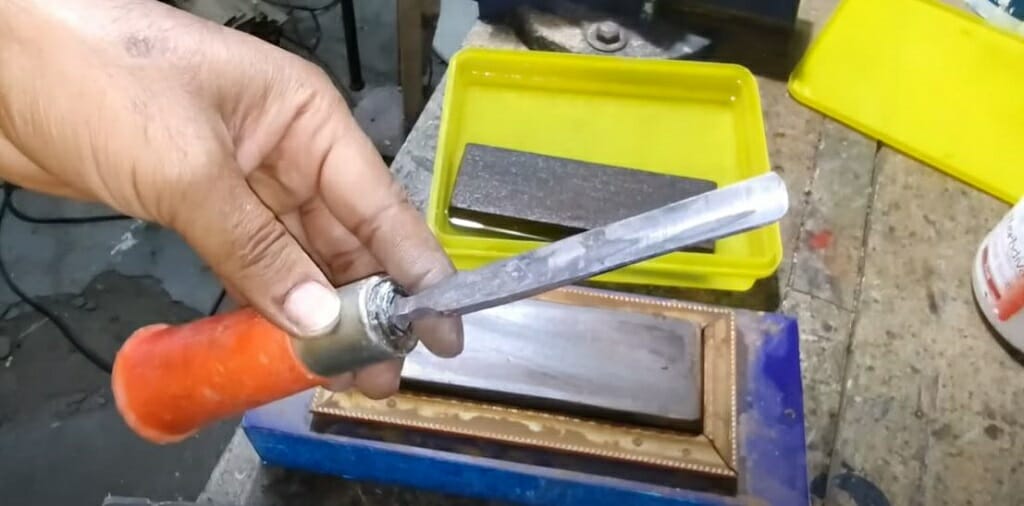
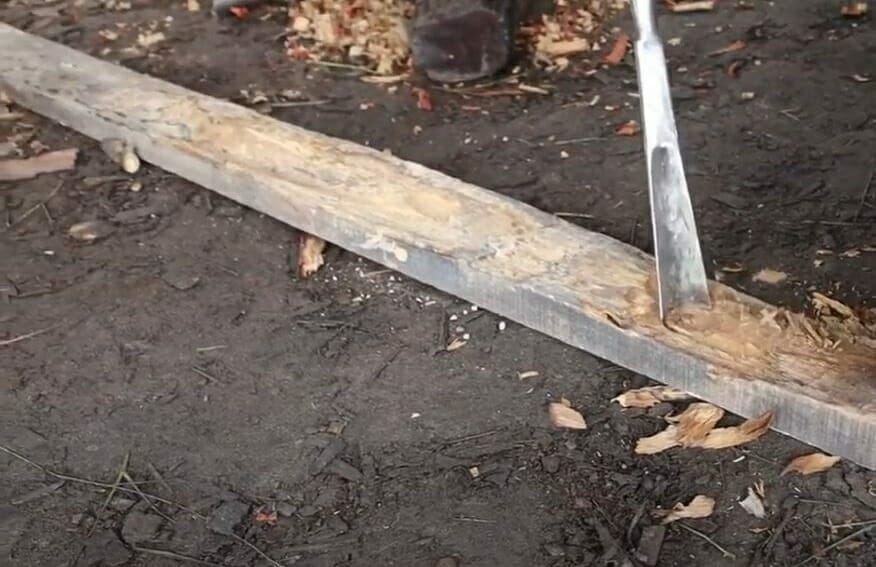
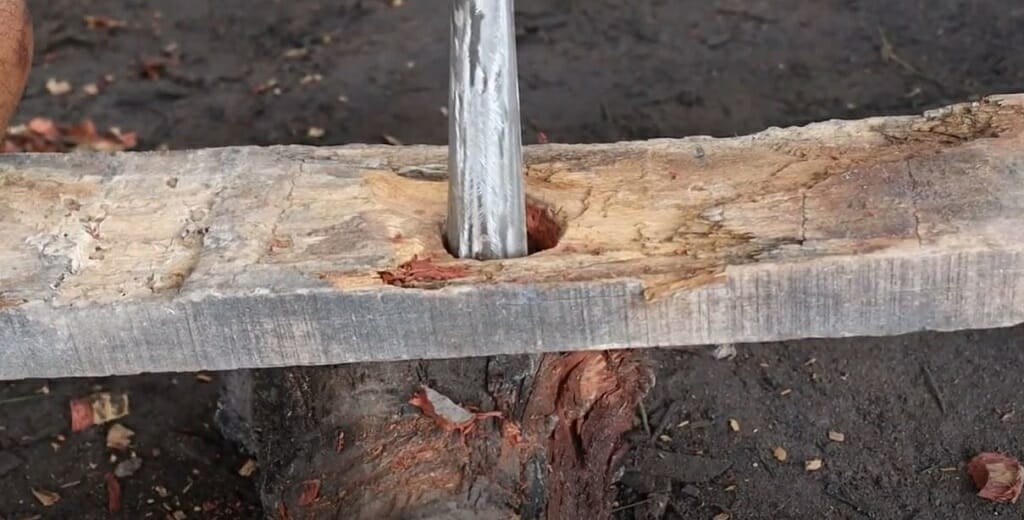
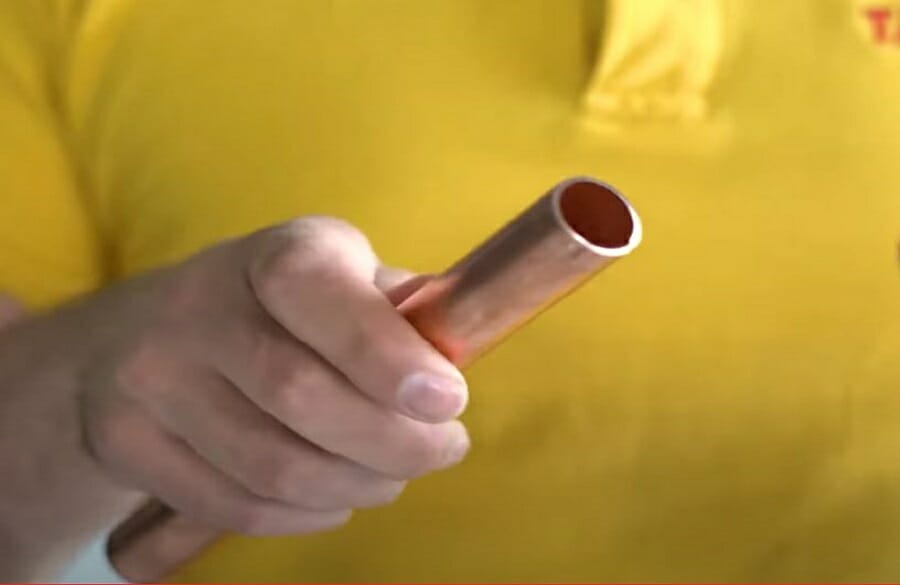
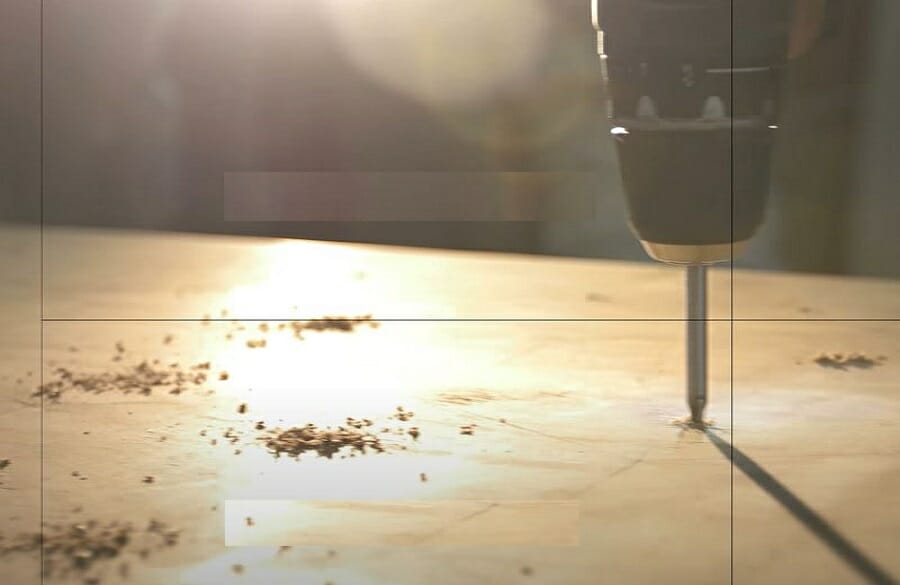
Method 5 – Make a Hole in the Wood by Burning
Let’s talk about a method that’s as old-school as it gets, and guess what? It doesn’t even require traditional tools. You’ll need a hot rod for this – and no, I’m not talking about cars.
This technique is something our ancestors were experts at. It’s a bit challenging, but the satisfaction you get from it is unbeatable. So, let’s say you’re out of options with other methods or want to try something rustic; this is your go-to.
Here’s how it’s done:
- Heat the Rod: Heat your rod until it’s piping hot. Ensure it’s uniformly heated for consistent results.
- Place Rod Against Wood: Carefully position the hot end of the rod right against the wood where you want your hole.
- Start Burning: Gently apply pressure as the heat from the rod begins to burn into the wood, creating a circular spot.
- Rotate the Rod: Slowly and steadily rotate the rod. This helps maintain the hole’s circular shape and ensures even burning.
- Drill Through: Continue the rotation and pressure until the rod burns through the wood, completing your hole.
Now, a quick heads up – this method is fantastic for fresh wood or planks. But be cautious with dry wood, as it’s more prone to catching fire. So, there you have it, a fiery way to make a hole in wood, no fancy tools required!
Other Methods You Can Try Out
Let me share a few more tricks for making holes in wood without an electric drill. I’ve used these tools on various projects, and they can be real lifesavers.
Handheld Screwdriver
You might not know that your everyday screwdriver can double as a manual drill. I’ve often carried a screwdriver in my tool belt, and it’s more versatile than you might think.
- Step 1: Create a pilot hole with a nail and hammer.
- Step 2: Then position the screwdriver on this pilot hole and twist.
- Step 3: Apply steady pressure and turn the screwdriver clockwise. It’s manual work, but seeing that hole form before your eyes is incredibly satisfying.
Try an Awl
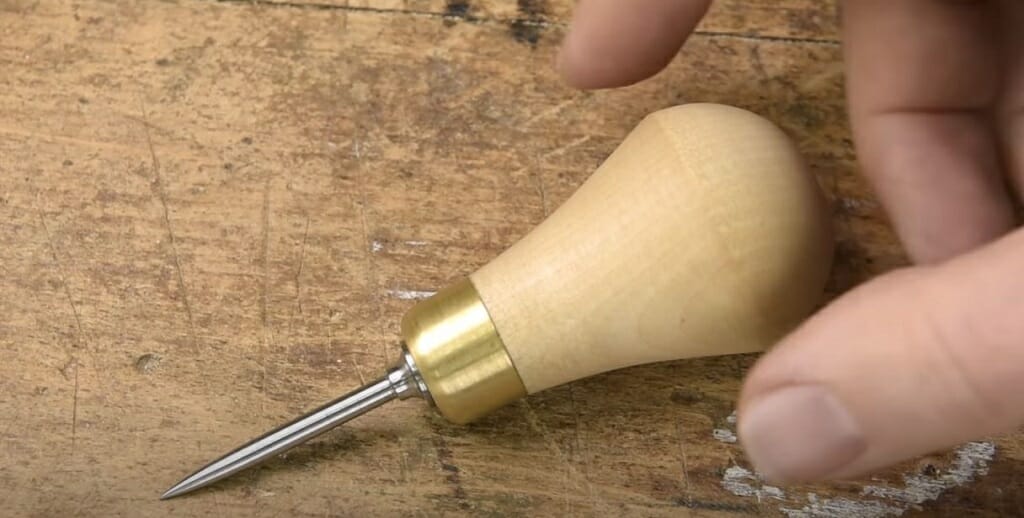
An awl might look simple, but it’s a powerful little tool. I’ve used it numerous times, especially for more delicate work. It’s a sharp stick with a flat end – perfect for precision.
Here are the steps to use it:
- Step 1: Mark where you want your hole
- Step 2: Create a starter pit with a hammer and nail.
- Step 3: Place the awl on this spot and push it into the wood with the hammer.
Remember, it’s great for smaller holes, ideal for when you need to fit in screws.
Self-Driving Screws
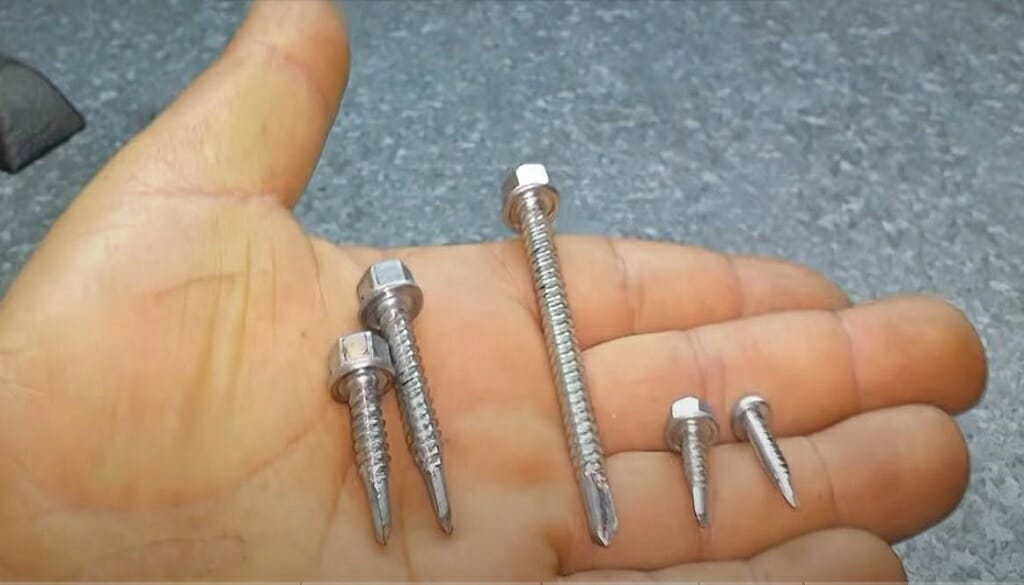
Now, self-driving screws are a game changer. You don’t even need to bother with a pilot hole.
Just place the screw where you need the hole and use a handheld screwdriver to drive it in. If you need a wider hole, start with the screw and widen it with the awl.
It’s quick and easy and gets the job done with minimal fuss.
Common Mistakes and Troubleshooting in Manual Wood Drilling
Let’s dive into some common mistakes and troubleshooting tips when making a hole in wood without a drill. Trust me, I’ve seen a few hiccups along the way, and I’m here to help you avoid them.
Mistake 1: Not Marking Your Spot Properly This is where it all starts. If you don’t mark your drilling spot accurately, you’re setting yourself up for a crooked or misplaced hole. Use a sharp pencil or marking tool and a ruler or tape measure for precision.
Troubleshooting: If you’ve started off a bit off-center, don’t panic. Stop as soon as you realize the error. If the hole is small enough, you can fill it with wood filler. It might be time to embrace that rustic, handmade look if it’s larger.
Mistake 2: Applying Too Much Pressure with Manual Drills Especially with tools like the egg-beater or bit & brace, you tend to put your back into it too much. Excessive pressure can lead to broken bits or uneven holes.
Troubleshooting: If you find the drill bit stuck or the wood splintering, ease up. Let the tool do the work. Remember, it’s about steady, consistent pressure and letting the tool’s mechanics do their magic.
Mistake 3: Choosing the Wrong Drill Bit Using a bit that’s too large or too small for your hand drill can be frustrating. It either won’t penetrate properly or will make a small hole.
Troubleshooting: Always double-check your bit size against the hole size you need. And keep various bits on hand – you never know when you’ll need to switch up.
Mistake 4: Inaccurate Angling with Chisels When using a semi-circular chisel, getting the angle wrong can result in an uneven hole or a lot of extra work.
Troubleshooting: Start with shallow angles and increase as you get deeper into the wood. Keep checking your progress and adjust as needed. It’s all about that finesse.
Mistake 5: Burning Through Too Quickly Ah, the burning method. It’s old-school but effective. However, rushing it can lead to charred wood or an uncontrollable burn.
Troubleshooting: Patience is key here. Rotate the rod slowly and keep a steady hand. If the wood starts to char too much, pause and let it cool down.
Remember, every method has its quirks, but with some practice and patience, you’ll get the hang of it. And hey, if you mess up, it’s just an opportunity to get a bit more creative, right? Keep at it; you’ll make perfect holes in no time – drill or drill.
Frequently Asked Questions
- What’s the Best Manual Drill for Beginners?
- I’d recommend starting with the egg-beater hand drill. It’s user-friendly and great for getting a feel for manual drilling. Plus, it’s pretty forgiving for those just starting out.
- How Do I Keep My Manual Drilling Tools in Top Shape?
- Maintenance is key! Keep your tools clean, rust-free, and sharp. Regularly check for any wear and tear, especially on the drill bits – a dull bit can make your job way harder than it needs to be.
- Is Manual Drilling More Time-Consuming Than Using an Electric Drill?
- It’s not a race, but manual drilling can take longer. However, it’s also more precise and gives you a sense of craftsmanship. Trust me, the extra time is worth it.
- Can These Techniques Be Used for Large-Scale Projects?
- They can, but it’s all about the right tool for the job. You might want to mix and match these techniques with power tools for larger projects to save time and energy.
- Are There Any Specific Safety Concerns With Manual Drilling?
- Safety first, always! Watch your fingers, and don’t apply too much pressure – let the tool do the work. And, if you’re using the burning method, be extra cautious with the heat.
- What If the Hole Isn’t Perfectly Round?
- If it’s slightly off, sand it down a bit. If it’s more than slightly off, that’s where your creativity comes into play. Sometimes, the imperfections add character!
RELATED Can You Drill into Wood Filler?
References
Organizations:
- The Woodworkers Guild of America (WWGOA). https://www.wwgoa.com/
- The International Federation of Building and Wood Workers (IFBWW). https://uia.org/s/or/en/1100056603
Books:
- “The Complete Manual of Woodworking” by Albert Jackson, David Day, and Simon Jennings. https://books.google.com/books/about/The_Complete_Manual_of_Woodworking.html?id=xtgxDiji5ZQC
- “Traditional Woodworking Handtools: A Manual for the Woodworker” by Graham Blackburn. https://valsec.barnesandnoble.com/w/traditional-woodworking-handtools-graham-blackburn/1112600487?ean=9781940611037
Website Resources:
- FineWoodworking.com. https://www.finewoodworking.com/
- WoodMagazine.com. http://woodmagazine.com/
- Instructables Woodworking. https://www.instructables.com/workshop/woodworking/projects/
Video References:
Sid’s woodworks
Wood By Wright How 2
Wood By Wright
wortheffort
Mistry MakeTool
Blacksmith SPR
Fet View Room
Torbjörn Åhman
Cruzdelasadas technical