7 min read
What Happens if You Drill into a Live Wire?
As an electrician, I have witnessed how frequently people get injured while drilling into walls and hitting live wires. Knowing the consequences of drilling into live wires behind walls and how to avert such incidents is important.
In general, when you drill into live wires behind walls, you’ll notice a spark, a pop, and possibly a power outage. Consequently, depending on the damage, you may suffer electrocution or damage to electrical appliances.
To prevent drilling into hot wires:
- Limit the depth of your drill.
- Pause drilling if you encounter significant resistance
- Anchor vertical wiring at the center of the studs
- Employ a wire or stud finder
I’ll cover the detailed explanations below.
What Happens When You Drill an Electrical Wire Behind a Wall?
You’ll notice a spark, a pop, and possibly a power outage. Consequently, depending on the damage, you may suffer fatal electrocution or damage to electrical appliances.
When you drill a wire behind your wall, you’ll almost certainly notice a spark, a pop, and possibly a power outage. If neither of those events happens, you may notice what appears to be a piece of wire lining the drill. But if you have any other reason to believe you’ve hit a wire, don’t ignore it for your safety.
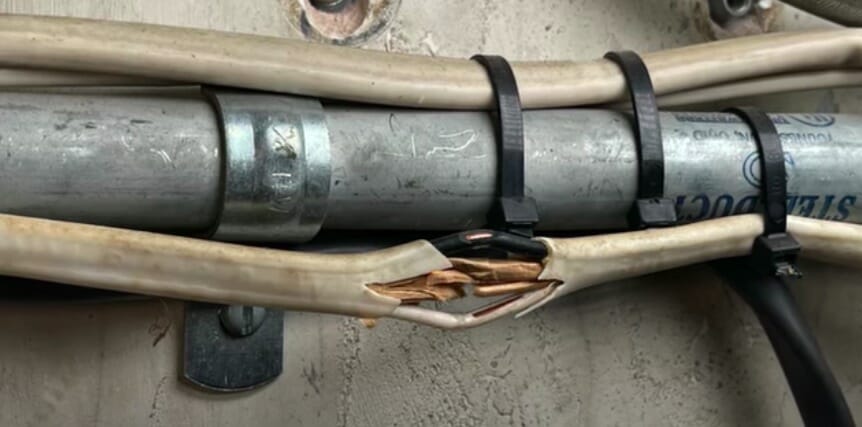
Even though the circuit is not turned off, a partially severed wire can cause a hot spot, ultimately leading to a fire. There’s also a chance you’ll hit the ground, neutral wire, or both.
Damage to Property
Drilling through a 12-2 15 amperes circuit without an insulated or properly grounded drill will trip the circuit breaker or blow a fuse. Eventually, your electrical appliances may suffer severe damage.
Personal Harm
In such cases, there could be no visible indication at the time. You may not notice that a nearby outlet or light switch has failed to work or can cause a shock if touched until it’s too late.
Categories of Domestic Wiring
Lighting wires typically come down from the attic, but power wires can come from above if there is a cement foundation or below if you’ve got a crawl space or basement. While each carries electricity, striking a heavier gauge electrical wire can have a dramatic, immediate effect and a more disastrous long-term effect if not properly fixed.
Take a look. Are there any nearby switches or outlets? Are you close to any large electrical appliances? Responding to these questions will give you an idea of what kind of wiring will likely run through the wall. A hand-held meter or voltage tester is also ideal for checking whether the switch or outlet is getting power.
How to Prevent Drilling Through Wires
I am very cautious when it comes to drilling a wall. Here are a few things you can do to avoid drilling wires behind drywall as you go about your to-do list:
1. Limit the Depth of your Drill
Once you’ve drilled through, wrap a piece of tape around the bit at about 1/2-3/4″.
2. Please Don’t Force it
Wires passing through holes drilled in 2 by-4 studs are common in the United States. To prevent drilling through wires, codes require a shielding metal plate to cover the side of the stud. Pause drilling if you encounter significant resistance.
3. Anchor Vertical Wiring at the Center of the Studs
Vertical wiring should be routed to the center of the studs if the wall you are drilling into was properly installed. You reduce the chances of hitting internal electrical wiring by keeping your nail or screw length to 1 1/2″ or less.
4. Employ a Wire or Stud Finder
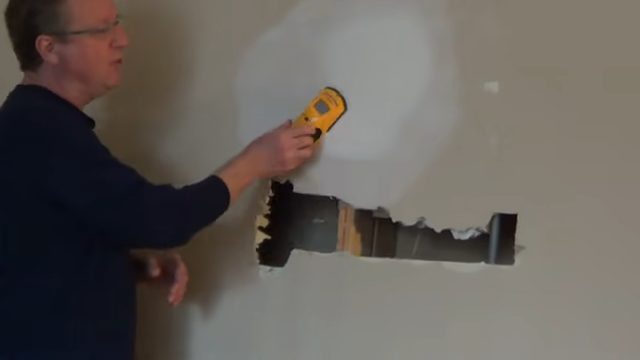
A wired sensor will detect the path of electricity or power sources in the walls. This is particularly important in older or heavily renovated areas.
What Should You Do if You Drill Through a Wire in a Wall?
1. Turn Off the Electricity
When a breaker trips, the simplest thing is re-energizing it to see if it works. That could be a bad idea. If there were sparks and noises when you hit the wire, you should turn off the breaker until you assess the damage.
When you begin your repair work, trip or disconnect the affected cables from the circuit breaker. Never try fixing an electrical wire while still receiving power for your safety.
2. Examine the Damage
If you are unfamiliar with electric work, contact a certified electrician. Don’t risk yourself or others by attempting to repair risky electrical wires without first learning how electrical circuits work. You’ll also need to beware of the current codes that must be followed to protect wiring from future damage.
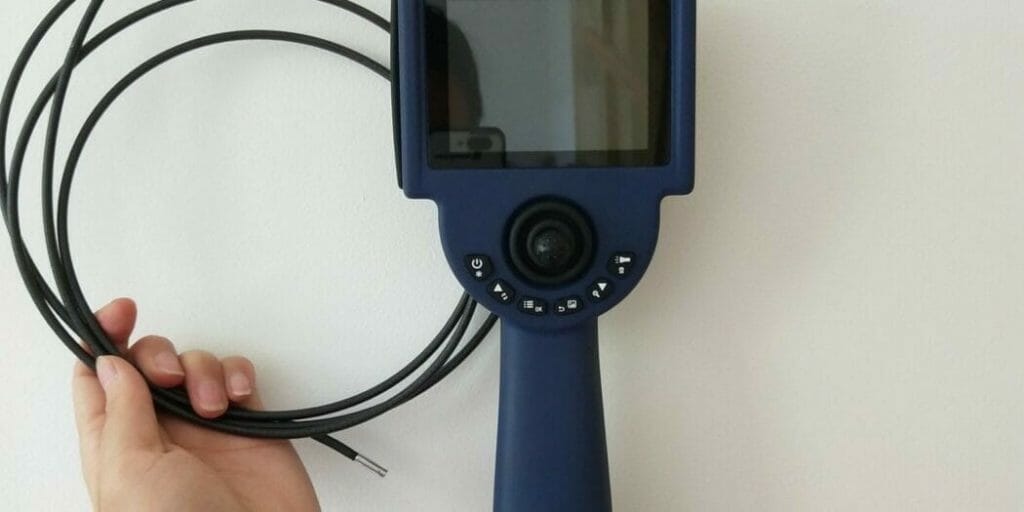
To inspect the damage, a borescope may be useful. This tool costs between $100 and $250 and has numerous applications around the house. However, if you don’t have it and don’t want to wait, you’ll have to open the wall to check the area visually.
Use a drywall saw to cut large holes to facilitate wiring inspection:
Set the saw at an angle so the piece could be fitted back in without falling through or requiring bracing after renovations. If you don’t have the tool, use shallow-cutting equipment to make a hole without causing further damage.
3. Repair the Damage
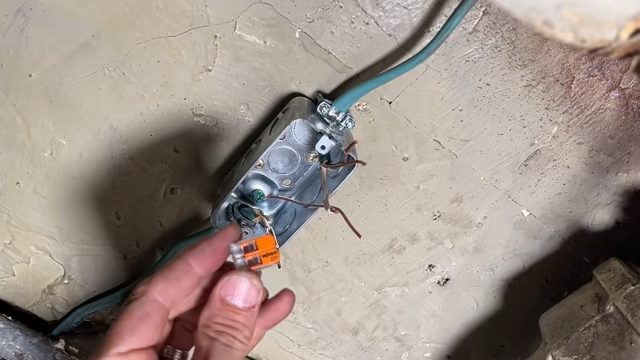
Once you see the extent of the damage, check to see if any nearby electrical junction boxes can help properly repair the wire.
If you only pinched the insulation and can free the cable via a close junction or switch box, you can return the insulation by sliding shrink-wrap over the affected section.
All bare wires that are exposed and damaged must be fixed. Don’t attempt to repair an electrical wire outside a junction box by merely wrapping it in tape or screwing on a wire nut. Such repairs don’t meet codes and create new hazards if exposed to wetness or other foreign objects.
You can make corrections if there is enough wire to pull the damaged wire into a neighboring junction box.
When there are no boxes or if pulling the damaged wire into a neighboring box will not work, do the following:
Insulated Crimp Splice
Insulated Crimp Splice: These splices ensure that no bare wires are revealed to the elements.
Repair Kit for Cables
A repair kit like Hellermann Tyton’s LVRK-L Cable Repair Set could be a good option for heavier gauge repair work. To avoid hot spots, double-check the voltage capacity of any repair materials you utilize.
Take a look at some of our related articles below.
Video References
Everyday Home Repairs
FIX IT Home Improvement Channel