12 min read
How to Drill Hole in Granite Countertop (6 Steps)
Hey everyone! If you want to add custom touches to your kitchen or bathroom, drilling a hole in a granite countertop is a great way to start.
It might sound like a task for the pros, but I’m here to tell you that you can tackle this on your own with the right approach. Here’s a quick guide to drilling holes in granite countertops:
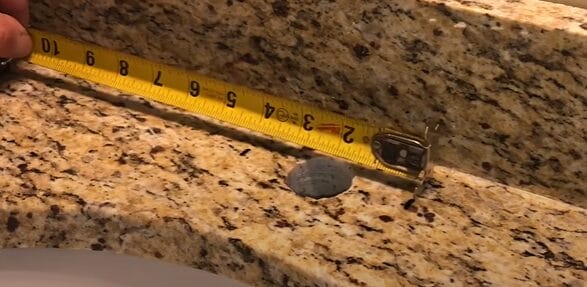
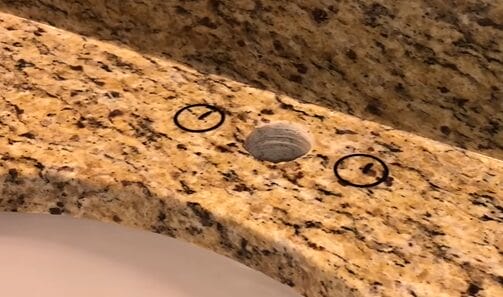
- Step 1: I measured for three holes, four inches apart in the center, using the faucet itself for perfect alignment – precision is key here.
- Step 2: Next, I marked the spots on the granite where I needed to drill, double-checking measurements for accuracy – no room for error!
- Step 3: I grabbed my trusty diamond-tipped hole saw, one for a grinder and another for a drill – both are winners in my book.
- Step 4: I used the dry method for the first hole with the hole saw on a grinder, starting at an angle and then going perpendicularly. Remember, let the tool do its magic.
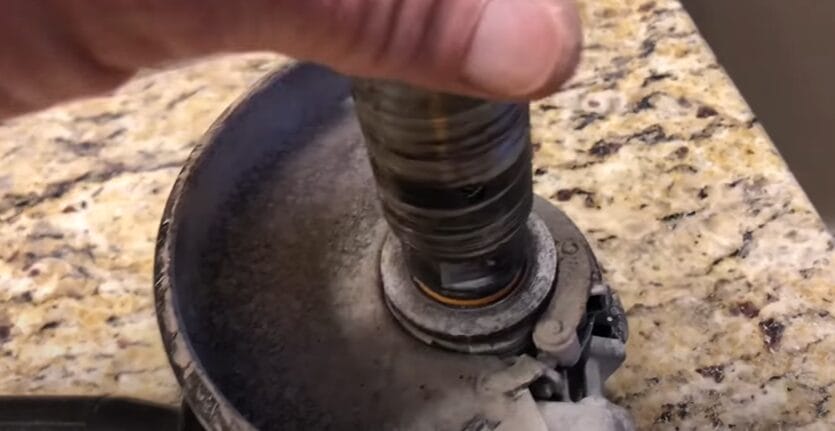
- Step 5: I switched gears for the second hole, using a wet method hole saw with a water dam for cooling – a bit messier but just as effective.
So, let’s gear up, focus on precision, and turn that intimidating piece of granite into a perfectly customized part of your home. Let’s dive into how to make those clean, precise holes in your granite countertop.
Tools and Materials Needed for Drilling Granite Countertops
Let’s discuss the tools and materials you’ll need to drill those holes in your granite countertop. Having the right equipment is half the battle won. I’ve rounded up a list of essentials based on my experience, which should keep you well-equipped for this project.
Tools:
- Measuring Tape: Precision is key. I always keep my trusty measuring tape handy for accurate spacing of the holes.
- Marker: Use a marker that’s visible on granite. Marking correctly is crucial, and I’ve found that a bright or contrasting color does the job.
- Diamond-Tipped Hole Saw: These are your best friends when drilling granite. I’ve used two types: one for a standard grinder and one for a standard drill. Both are effective, so it comes down to what you’re comfortable with.
- Standard Grinder (For the Dry Method): If you choose the dry method like I did for the first hole, you’ll need a grinder to attach the hole saw. It’s powerful and gets the job done fast.
- Standard Drill (For the Wet Method): You’ll need a standard drill for the wet method. This is for the hole saw that requires water.
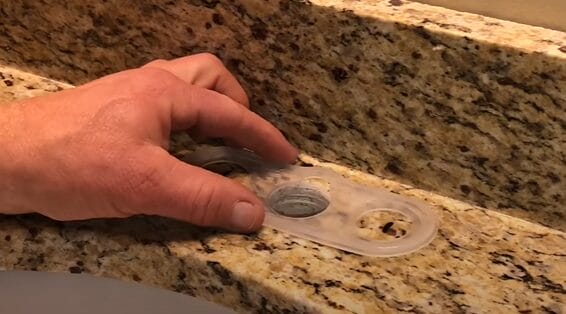
- Water Dam Kit (For the Wet Method): This includes a sticky pad and a water-holding well. It’s essential for keeping the drill bit cool and minimizing dust.
- Vacuum (For the Dry Method): You’ll need this to manage the granite dust. It makes clean-up a lot easier.
- Safety Gear: Never forget your safety glasses and a dust mask. Granite dust is no joke; you want to protect those eyes and lungs.
Materials:
- Granite Countertop: This is your canvas.
- Water (For the Wet Method): Simple yet crucial. It cools the drill bit and reduces dust.
- Towel or Bucket (For Wet Method Cleanup): To catch the water and slurry from under the countertop. Better safe than sorry, saving you a lot of clean-up time.
Remember, it’s all about having the right tools for the job. Each item plays a key role in ensuring a smooth drilling process. From personal experience, being well-prepared not only makes the job easier but also a lot safer.
Drilling Holes in Granite Countertops: A Step-By-Step Guide
I’m here to walk you through drilling holes in granite countertops. It’s a task that might seem daunting at first, but it’s doable with the right tools and techniques. I’ve done this many times and am excited to share these steps.
Step 1: Measuring for Faucet Holes
- First things first, you have to measure where your holes are going to be. In my case, I needed three holes at four inches in the center.
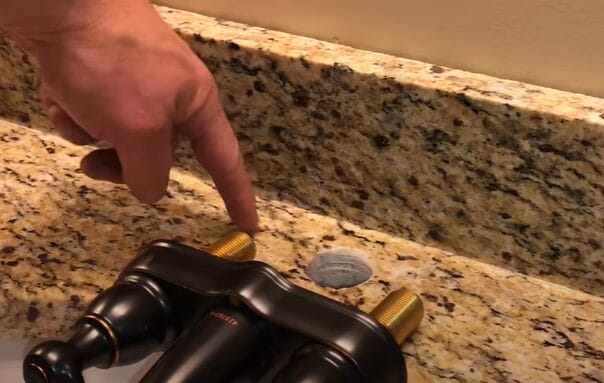
- I took my faucet, placed it on the countertop, and marked the spots for the new holes, ensuring they were evenly spaced from the center hole.
- Pro tip: Use the faucet’s base plate as a guide for perfect alignment.
Step 2: Marking the Spots
- Once you’ve got your measurements right, mark those spots on the granite. This is where you’ll be drilling, so accuracy is key.
- I like to double-check my measurements because, trust me, there’s no going back once you drill.
Step 3: Choosing Your Tools
- Now, for the fun part. You’ll need a diamond-tipped hole saw for this job.
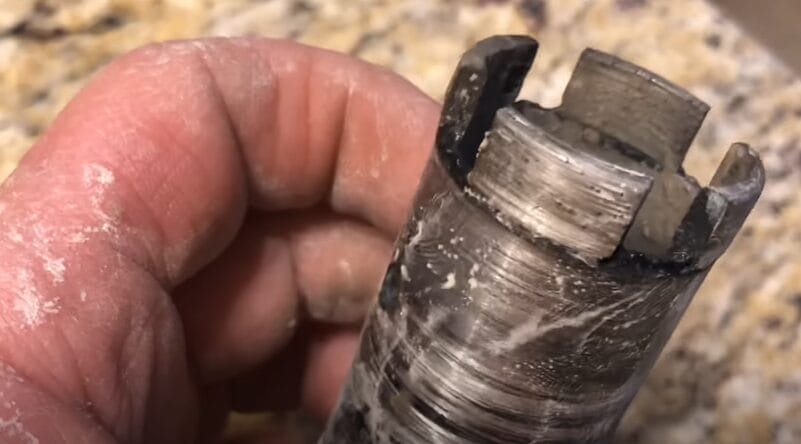
- These come in two types: one that attaches to a standard grinder and another that fits into a standard drill. I’ve used both, and they work great.
Step 4: Cutting the First Hole (Dry Method)
- I used the dry method for the first hole, using the hole saw attached to a grinder. Start at an angle to get the hole started, then bring it up to a perpendicular position.
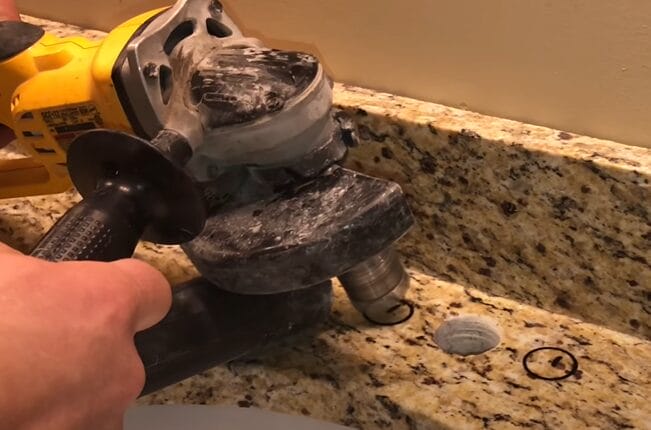
- Remember, let the tool do the work. Pressing too hard can overheat the bit. And yes, keep that vacuum handy to manage the dust.
Step 5: Cutting the Second Hole (Wet Method)
- I switched it up for the second hole and used a different hole saw with a water dam (a sticky pad and a well that holds water).
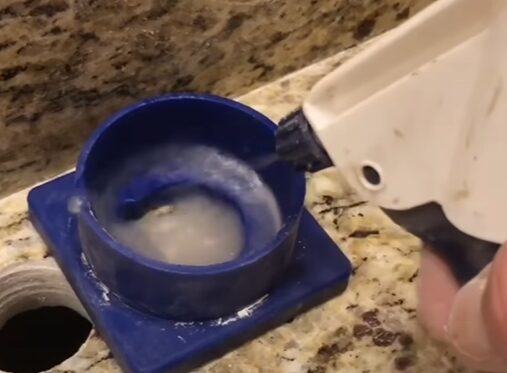
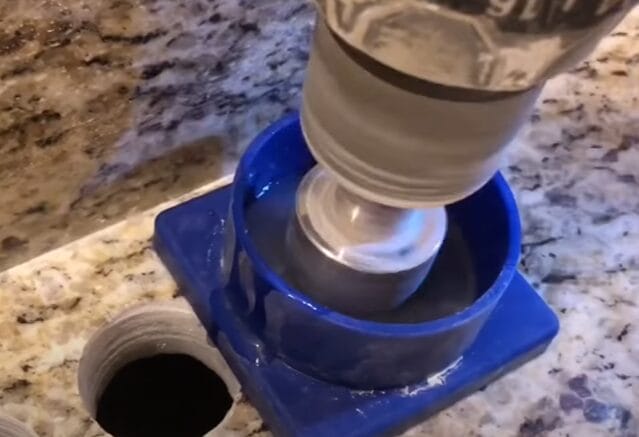
- This bit fits into a standard drill and requires water to keep it cool. Fill the well with water and start drilling, and you’ll have a clean hole with less dust but a bit more mess underneath the countertop.
Remember to put a towel or bucket underneath when using the wet method. And as always, safety first – wear your protective gear and take your time. Happy drilling!
Troubleshooting Guide: Drilling Holes in Granite Countertops
Drilling into granite countertops can be a bit of an adventure. It’s a task that requires precision, patience, and the right approach.
But let’s face it, even with the best preparations, things can go sideways. That’s why I’ve put together this troubleshooting guide. Let’s dive in and tackle these challenges together!
Problem 1: Drill Bit Slipping
- Experience: In my early days, I remember the drill bit often slipping off the mark, especially on that smooth granite surface. It’s like trying to balance on ice!
- Solution: Create a small guide with tape or a wooden template. This prevents the drill bit from wandering. Also, starting with a smaller pilot hole can help maintain accuracy.
Problem 2: Overheating of the Drill Bit
- Experience: Once, I almost ruined a good diamond bit due to overheating. It felt like watching money burn!
- Solution: Regularly apply water for cooling during wet coring. In dry coring, periodically withdraw the drill bit and allow it to cool. Remember, patience is key here.
Problem 3: Cracking or Chipping the Granite
- Experience: Cracking granite is a heartbreaker, especially after all that effort. I’ve had my share of mishaps, especially when rushing the job.
- Solution: Ensure steady, gentle pressure, and don’t rush. Let the drill do the work. It’s like nurturing a plant, not forcing it to grow!
Problem 4: Inconsistent Hole Depth
- Experience: I once drilled a hole too shallow, leading to a faucet installation nightmare.
- Solution: Use a drill stop or mark the desired depth on the drill bit with tape. Consistency is crucial for a professional finish.
Problem 5: Dust Management
- Experience: Early in my career, I underestimated the mess. Granite dust went everywhere, turning my workspace into a mini dust storm!
- Solution: Use a vacuum to collect dust as you drill for dry coring. If wet coring, be prepared with cloths and a mop for clean-up.
Problem 6: Inaccurate Hole Sizing
- Experience: Misjudging hole size is easy. I recall a job where the hole was slightly too large, making the fixture loose.
- Solution: Double-check the fixture size and choose the corresponding drill bit size accurately. Always measure twice drill once!
Remember, every mistake is a learning opportunity; you’ll gain more confidence and skill with each project. Keep drilling, and stay safe!
Maintaining Your Granite Countertop Post-Drilling
It’s not just about admiring your handiwork after successfully drilling that perfect hole in your granite countertop. Maintaining the integrity and appearance of the granite around your new hole is key.
Over the years, I’ve learned a few things about keeping that granite looking as good as new, and I’m here to pass on that wisdom.
| Maintenance Task | Description | Frequency |
|---|---|---|
| Seal the Drilled Area | Apply a high-quality granite sealer to the newly drilled area to protect against stains and moisture. | Immediately after drilling, then annually |
| Routine Cleaning | Use mild detergent or granite-specific cleaner to prevent buildup and maintain appearance. | Daily or as needed |
| Inspect for Chips and Cracks | Check the drilled area for any small chips or cracks, and fill them out if necessary. | Monthly |
| Avoid Excess Weight | Do not place heavy items near the drilled hole to prevent stress on the granite. | Ongoing vigilance |
| Regular Inspections | Regularly inspect the area for any changes like discoloration or hairline cracks. | Biannually |
| Gentle Use of Drilled Area | Treat the area gently to maintain its integrity. Avoid using the hole as a tool holder or for heavy items. | Ongoing vigilance |
This schedule is a guideline to ensure your granite countertop’s long-term care and maintenance, especially around areas where drilling has occurred. Adhering to this schedule will help maintain the beauty and durability of your granite surfaces.
Frequently Asked Questions
- Can I Drill Into Granite Countertops Myself?
- Absolutely! You can drill into granite countertops with the right tools and patience. Ensure you’re equipped with a diamond-tipped drill bit and follow safety guidelines. I’ve done it many times, and it’s quite a rewarding DIY project.
- What Kind of Drill Bit Do I Need for Granite?
- You’ll need a diamond-tipped hole saw or drill bit. Granite is tough, and regular drill bits just won’t cut it (literally!). I always recommend investing in a good quality diamond-tipped bit for the best results.
- How Do I Prevent the Drill Bit from Slipping?
- A common challenge, but there’s a simple trick. Use a piece of tape or a wooden template to stabilize the drill bit at the start. It acts like a guide and prevents slipping. Trust me, it’s a game-changer.
- Dry Coring Vs. Wet Coring: Which Is Better?
- Both have their pros and cons. Dry coring is faster and doesn’t create a wet mess, but it generates a lot of dust. Wet coring keeps the dust down and is a bit gentler on the granite, but it’s slower and messier. I often lean towards wet coring for indoor projects.
- How Deep Can I Drill Into the Granite?
- This depends on your project’s requirements. Generally, it would be best if you did not drill more than ⅓ of the thickness of the granite to maintain its integrity. For standard countertops, this usually means not going beyond an inch.
- Is It Necessary to Seal Granite After Drilling?
- Yes, it’s a crucial step. Sealing the area around the drilled hole prevents water and stain penetration. This helps maintain the granite’s durability and appearance. I always seal after drilling – better safe than sorry!
- Can Cracked Granite Be Repaired After Drilling?
- Minor cracks can often be repaired with color-matched epoxy or resin. However, major cracks might require professional intervention. Always drill carefully to minimize the risk of cracking.
References
Organizations:
- National Kitchen & Bath Association (NKBA). https://nkba.org/
- The Marble Institute of America. https://www.naturalstoneinstitute.org/about/news/press-releases/2014/082014/
Books:
- “The Complete Guide to Home Masonry: Step-by-Step Projects & Repairs Using Concrete, Brick, Block & Stone” by Editors of Creative Publishing. https://www.abebooks.com/9780865735927/Complete-Guide-Home-Masonry-Step-by-Step-0865735921/plp
- “Stone Conservation: An Overview of Current Research” by Eric Doehne and Clifford A. Price. https://www.abebooks.com/9781606060469/Stone-Conservation-Overview-Current-Research-1606060465/plp
Website Resources:
- ThisOldHouse.com. https://thisoldhouse.com/
- FineHomebuilding.com. http://finehomebuilding.com/
Video References:
funbro1