9 min read
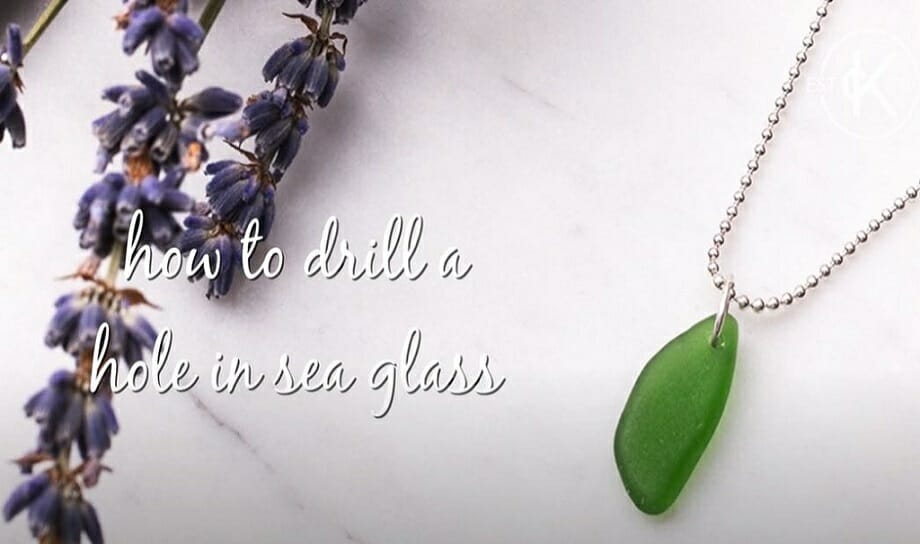
How to Drill a Hole in Sea Glass (6-Step Guide)
Drilling sea glass without proper training and the right tools is a total waste of your time. The only thing you get from this is broken sea glass.
Luckily, over the years, I have had some great experiences doing this, and I hope to teach you every trick in the book regarding drilling holes in sea glass. In general, to drill a hole in sea glass:
- Step 1: Adjust the drill so the bit hovers just above the bottom of your water cup to avoid drilling too deep and cracking the glass.
- Step 2: Fill a cup with enough water to submerge the sea glass fully.
- Step 3: Place the sea glass in the water and drill straight down at your marked hole location.
- Step 4: Regularly ease off the drill to check your progress and avoid going too deep too quickly.
- Step 5: After an initial indent, flip the sea glass over and continue drilling from the other side for an even hole.
- Step 6: Keep drilling until you achieve a clean breakthrough on the other side.
By the end of this article, you’ll be drilling sea glass like a pro. So, let’s roll up our sleeves and get started. It’s time to turn those beautiful seaglass pieces into something even more amazing!
Getting Ready to Drill Sea Glass
Let’s gear up for some sea glass drilling. Trust me, having the right tools and setting things up correctly makes all the difference. Here’s how I get everything prepped and ready to go:
Tools and Materials You’ll Need:
- Dremel Drill: This is your main player. A reliable Dremel drill is a must-have for precision work.
- Diamond Drill Bit: Don’t skimp on this. A diamond bit is essential for smoothly drilling through tough sea glass.
- A Cup or Small Container: You’ll need this to hold water and the sea glass while drilling.
- Protective Eyewear: Safety first! Always protect your eyes when working with glass.
- Water: Plain old H2O to cool your drill bit and prevent glass from overheating.
- Sea Glass: Of course, have your pieces of sea glass ready.
Preparation Steps:
- Workspace Setup: Choose a spot where you can work comfortably and where a little mess won’t be an issue. I usually cover the surface with an old towel or newspaper.
- Gather Your Tools: Lay out your Dremel drill, diamond drill bit, cup, water, and sea glass. Having everything within arm’s reach makes the process smoother.
- Safety Gear On: Don those protective eyeglasses. You might not think it’s necessary, but you don’t want tiny glass shards in your eyes.
- Sea Glass Selection: Pick out the piece of sea glass you want to work on. I like to choose pieces with a flat surface for easier drilling.
Once you’ve got everything set up and feel ready, it’s time to get down to the actual drilling. Remember, slow and steady wins the race here. Let’s drill some sea glass!
How to Drill a Hole in Sea Glass
Drilling sea glass is an art; like any good craft, it needs precision and patience. Here’s how you can drill a hole in sea glass in just seven steps:
Step 1: Set the Drill Depth
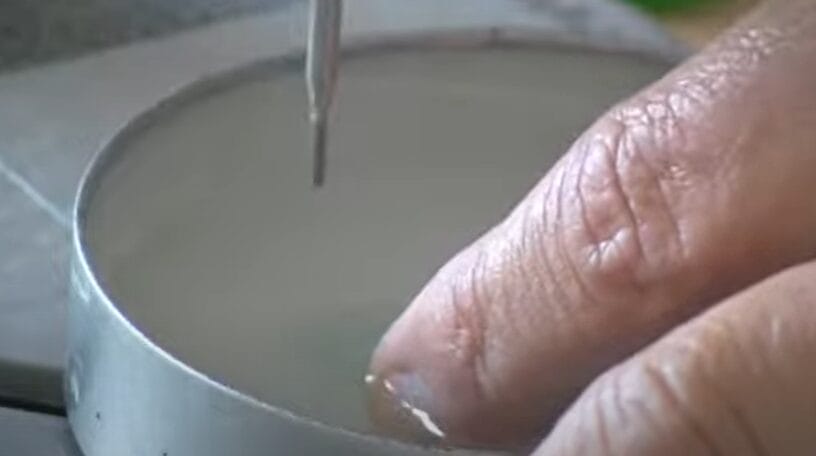
- Adjust your drill so the bit is slightly above the bottom of your water cup. This ensures you don’t drill too deep and risk cracking the glass.
Step 2: Water Cup Setup
- Fill a cup with water so the sea glass can fully submerge with about 1/16 to 1/8 inch of water. The water is crucial as it acts as a coolant.
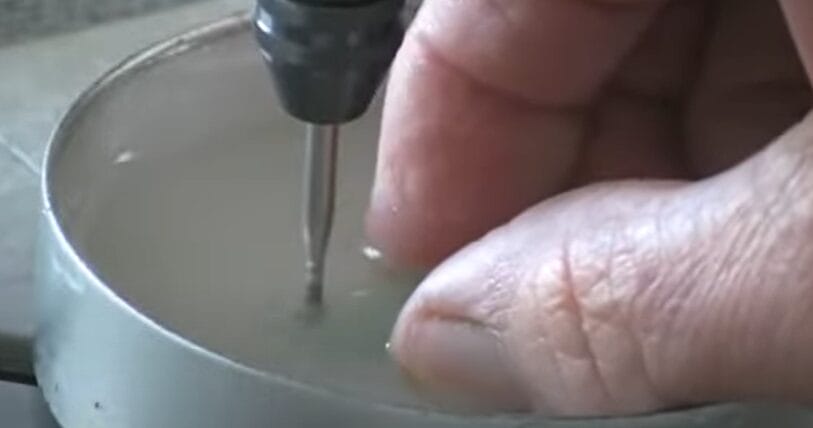
Step 3: Begin Drilling
- Place your sea glass in the water and start drilling at the desired hole location. Keep the process slow and steady.
Step 4: Ease Off and Check
- Periodically ease off the drill to check your progress. Go slow, ease off occasionally, and then back down. Patience is key here.
Step 5: Flip and Continue
- After a bit of drilling, pause to check your progress. Then, flip the sea glass over and start drilling from the other side. This helps create a clean hole without cracking the glass.
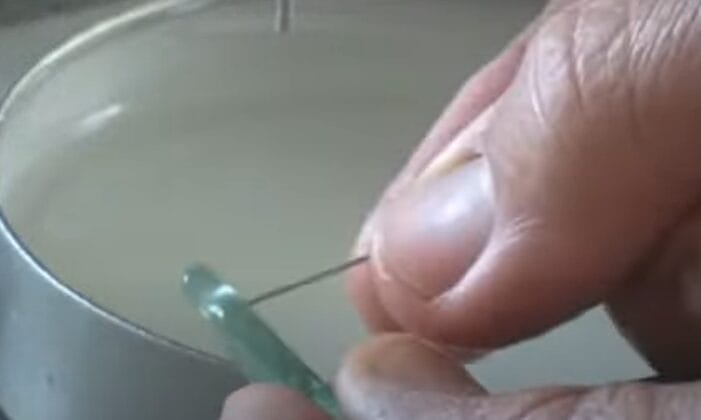
Step 6: Final Breakthrough
- Continue drilling until you break through to the other side.

- The final push-through should be done carefully to ensure a smooth finish.
Remember, the key to success here is patience and precision. Rushing can lead to cracks or uneven holes. Take your time, and you’ll get a perfect hole every time. Happy drilling!
Exploring Alternative Methods for Drilling Sea Glass
The rotary tool and diamond drill bit method are my go-to when making holes in sea glass. But, hey, it’s always good to know your options, right?
Over the years, I’ve dabbled in several methods, each with quirks. Let’s break them down:
| Method | Pros | Cons | My Take |
|---|---|---|---|
| Rotary Tool with Diamond Drill Bit (Our Main Method) | Precise and clean holes; suitable for various sizes. | Requires specific tools; learning curve for beginners. | The best for control and precision, especially for delicate work. |
| Manual Glass Drill (Hand Drill) | No need for electricity; more control in pressure application. | Time-consuming; requires a lot of manual effort. | Great for when you’re off the grid, but it can be a real workout! |
| High-Speed Steel (HSS) Drill Bits | Readily available; cheaper than diamond bits. | Wears out quickly with sea glass; higher risk of cracking. | Handy in a pinch, but they don’t hold a candle to diamond drill bits. |
| Laser Drilling | Extremely precise; no physical contact with glass. | Expensive equipment; not practical for casual crafters. | Super cool technology, but more for the pros in specialized settings. |
Remember, each method has its place, and it often comes down to what you have on hand and the specific project you’re working on. The rotary tool method might be the gold standard for me, but don’t be afraid to experiment with these alternatives. Who knows? You might find a new favorite way to work with sea glass. Keep those creative juices flowing!
Troubleshooting Your Sea Glass Drilling

Let me tell you, even with the best techniques and tools, you might run into a few hiccups along the way. But fear not!
Whether it’s a crack in your precious sea glass or a hole that’s wandered off course, I’ve got some tried-and-true solutions for you.
When Your Sea Glass Cracks
Let’s talk about a common hiccup – cracking. Cracking can happen even to the best of us. While working on a particularly stubborn piece, I once heard that dreaded ‘click’ and knew I had a crack. It happens, but don’t sweat it! Here’s what you can do:
- Slow Down: Most cracks happen because of too much pressure or speed. Keep your drill speed low and apply gentle pressure.
- Stabilize Your Glass: Make sure your sea glass is firmly placed on the wood in the water tray. Any movement can cause cracks.
- Pre-Drill Marks: Use a small grinding bit to create a tiny indent where you will drill. This reduces the risk of the drill bit slipping and cracking the glass.
Fixing a Misplaced Hole
We’ve all been there – you start drilling and realize, “Oops, that’s not where I wanted the hole!” In my early days, I messed up more than I could admit. But here’s a trick to turn that mistake around:
- Convert to a Design Feature: Think of the misplaced hole as a creative opportunity. Can it become part of a pattern or design?
- Patch It Up: You can fill the hole with clear resin for smaller mistakes. Once it sets, you can re-drill at the correct spot.
- Re-purpose the Glass: Sometimes, a mistake can lead to a whole new project idea. Maybe that piece with the misplaced hole becomes part of a mosaic instead.
General Tips for Smooth Sailing
- Keep Your Tools Sharp: A dull drill bit is more likely to cause problems. Keep your bits sharp and replace them when necessary.
- Regular Breaks: Occasionally, lift the drill bit out of the water to clear any glass debris. This helps maintain a clear drilling path and reduces strain on the bit.
- Listen to the Glass: It sounds mystical, but you’ll learn to ‘hear’ when the glass gets stressed. A change in sound can often precede a crack.
Remember, practice makes perfect. Each piece of sea glass is unique, and each drilling session teaches you something new. Stay patient, stay safe, and most importantly, have fun!
References
Organizations:
- North American Sea Glass Association (NASGA). https://seaglassassociation.org/author/seaglassassociation/
- The Corning Museum of Glass. https://home.cmog.org/
Books:
- “Sea Glass Crafts” by C.S. Lambert. https://www.barnesandnoble.com/w/sea-glass-crafts-c-s-lambert/1110792431
- “The Ultimate Guide to Sea Glass” by Mary Beth Beuke. https://www.barnesandnoble.com/w/the-ultimate-guide-to-sea-glass-mary-beth-beuke/1122378517
Website Resources:
- Crafts Institute. http://craftsinstitute.com/
- Instructables.com. http://instructables.com/
- dremel.com. http://dremel.com/
Video References:
rickndianacom