12 min read
Multimeter Continuity Symbol (Guide)

Hey there, DIYers and electrical wizards! Let’s dive into the essentials of using a multimeter, specifically focusing on that crucial continuity function.
Quick Summary in 7 Steps:
🔍 Step 1: Set the multimeter to continuity setting.
🔌 Step 2: Touch probes to test the multimeter.
🔋 Step 3: Turn off and unplug the device.
🔗 Step 4: The test circuit ends with probes.
📈 Step 5: Wait for the multimeter reading.
🚨 Step 6: Look for zero reading for continuity.
📊 Step 7: Check resistance levels if above zero.
Let’s break this down into detail below.
Understanding the Multimeter Continuity Symbol
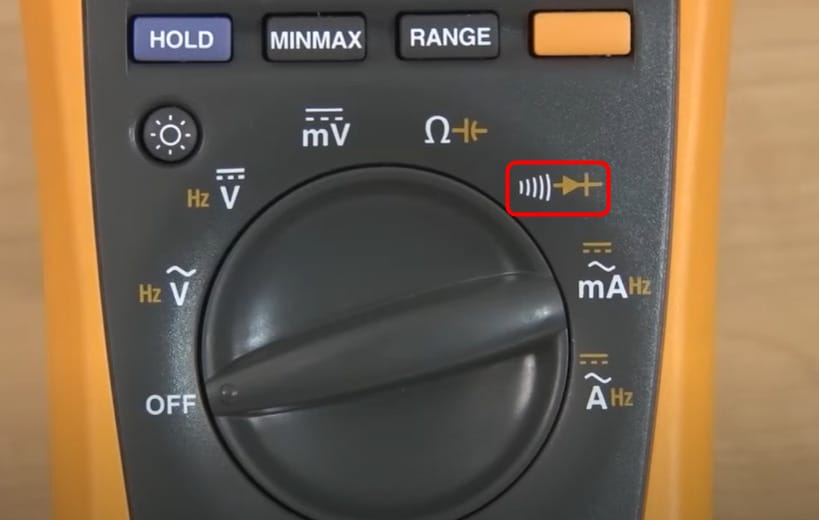
Most multimeters have a diode symbol, like a triangle with a line and soundwave symbol. It’s your go-to for testing continuity.
When I first got my hands on a multimeter, I was puzzled by the symbols. But once I connected the dots – triangle and soundwave – it clicked!
How to Use the Continuity Mode
Here, we will discuss how the continuity test works.
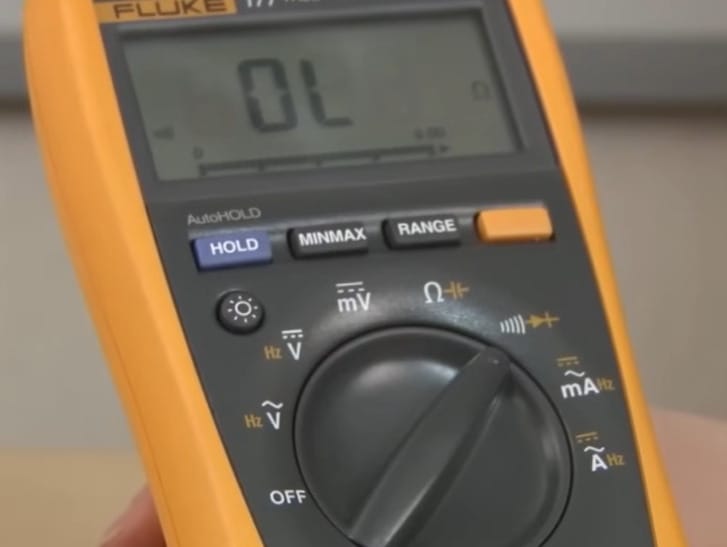
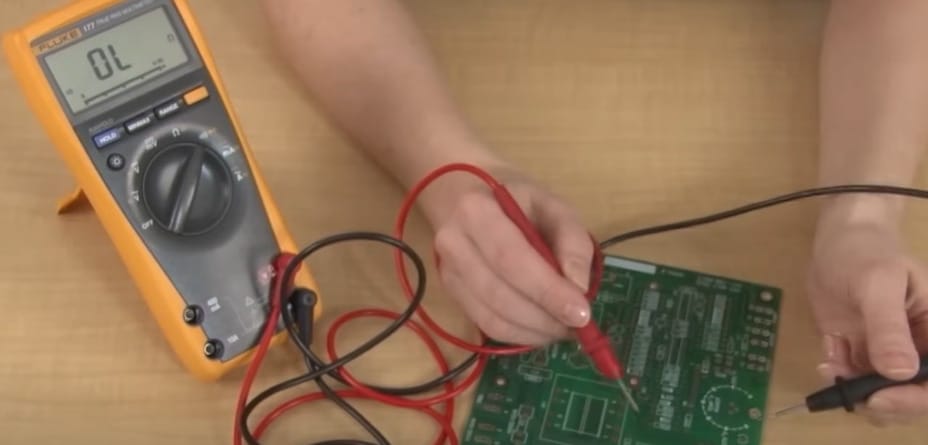
Step 1: Set the multimeter dial to the continuity setting. Now, you can measure continuity.
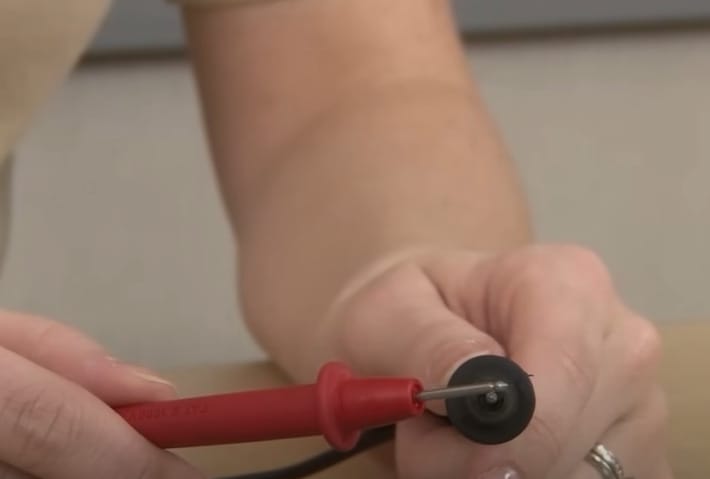
Step 2: Touch the black and red probes to ensure the multimeter works.
Step 3: Switch off and unplug the device or circuit you want to test.
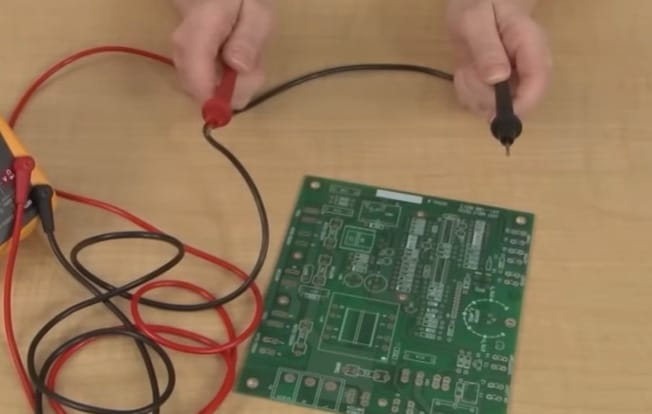
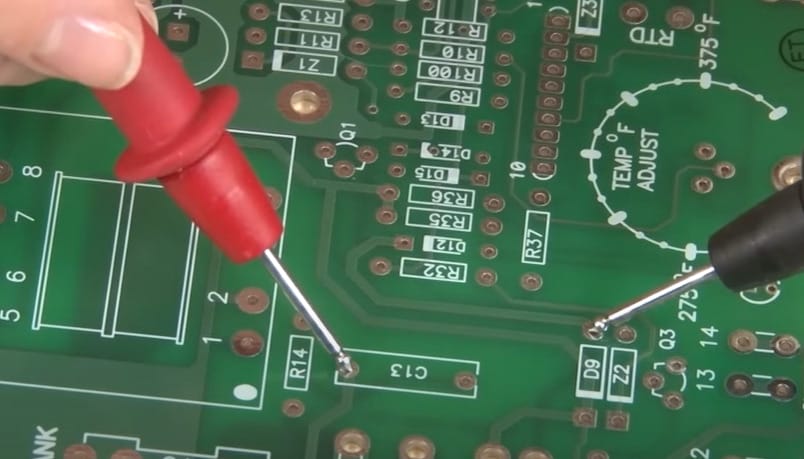
Step 4: Touch one end of the circuit with the black probe. Then, touch the other end with the red probe.
Step 5: Wait until the multimeter gives a proper reading.
Step 6: If the reading is zero, that means perfect continuity. The multimeter will beep continuously. However, the continuity does not need to be zero every time to be safe.
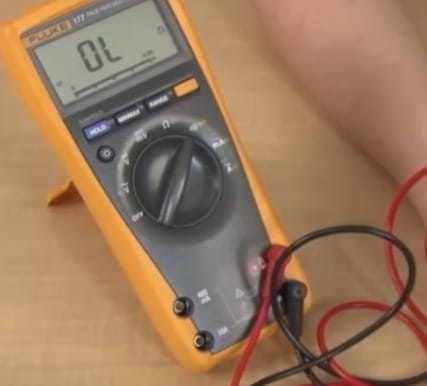
Step 7: If the reading is 1 to 10, check the device manual to clarify the resistance levels. If it is above 10, the circuit has poor continuity.

You now should know how to find a continuity symbol in a multimeter. So, make sure to apply the things that were discussed above for your next DIY project.
Troubleshooting Tips for Multimeter Continuity Testing
Sometimes, things get tricky, and your trusty tool might throw you a curveball. But don’t sweat it – I’ve got you covered with some pro tips on sorting out those head-scratchers.
Whether it’s a finicky wire or a multimeter acting up, these tips will help you navigate the road’s common bumps. Keep these in your back pocket, and you’ll soon be diagnosed like a pro!
| Problem | Cause | Solution |
|---|---|---|
| No Beep on a Supposedly Closed Circuit | Poor connection or a break in the circuit | Check the connections for any loose wires or broken components. Tighten or resold connections if necessary. |
| Intermittent Beeping | Loose or intermittent connections | Wiggle the wires or connectors to identify the loose part. Secure or replace the problematic component. |
| False Continuity Reading | Residual current in the circuit or multimeter error | Ensure the circuit is fully powered down and disconnected from any power source. Reset the multimeter and try again. |
| Continuous Beep in an Open Circuit | Short circuits or crossed wires | Inspect the circuit for any signs of wires touching that shouldn’t be. Isolate and repair the short circuit. |
| Inconsistent Readings | Faulty multimeter probes or battery | Check the condition of the multimeter probes for damage. Replace the probes or the multimeter’s battery if they appear worn out. |
| Multimeter Fails to Register Anything | Incorrect multimeter setting or a blown fuse in the multimeter | Double-check that the multimeter is set to the correct continuity mode. Check the multimeter’s fuse and replace it if necessary. |
| Beep with High Resistance Value | Partially broken wire or component | Look for any partially broken or damaged wires or components and replace or repair them as needed. |
Remember, diagnosing electrical issues involves attention to detail and understanding your tools. Remember these tips, and you’ll confidently tackle any continuity test!
Comparative Analysis of Multimeter Continuity Symbols and Functions

Alright, gearheads and gadget lovers, let’s roll up our sleeves and dive into the world of multimeters, specifically focusing on the continuity symbol and function.
Let’s compare how different multimeters represent this key function and shed some light on what to expect when you switch between models.
- Fluke Multimeters
- Symbol: Usually a diode with a sound wave.
- Functionality: These guys are top-notch for precision. Expect a clear beep on continuity tests. They’re sensitive, so even a tiny connection will set off that beep.
- Klein Tools Multimeters
- Symbol: Similar to Fluke, with a diode and sound wave, the design might have its own twist.
- Functionality: The beep is reliable but might not be as sensitive as Fluke. They are great for everyday tasks and can take a bit of rough handling.
- Tektronix Multimeters
- Symbol: Could have a unique twist, combining a diode with other elements.
- Functionality: These are the big guns – professional-grade and super precise. The continuity tests are accurate with quick response times.
- Budget or Generic Multimeters
- Symbol: Often a simple sound wave or basic diode symbol.
- Functionality: Does the job for basic tasks. The beep is not as sensitive or clear as the pricier models. Perfect for non-critical jobs.
- Advanced Digital Multimeters
- Symbol: In touchscreen models, you’ll see an on-screen symbol, typically a diode and sound wave.
- Functionality: These are the high-tech options with advanced continuity testing. They offer adjustable thresholds and alerts, ideal for complex systems.
Each brand or model has its own way of showing it, but at the end of the day, they’re all trying to tell you the same thing.
RELATED Klein vs. Fluke Multimeter
Maintenance Tips for Your Multimeter: Keeping It Accurate and Reliable
Let’s get down to business with keeping your multimeter, especially that nifty continuity function, in tip-top shape. Here’s how you can keep yours running smoothly:
- Probe Care: Those probes are like the hands of your multimeter. Keep them clean and sharp. Wipe them down after each use to prevent buildup, and check for any signs of damage. Frayed or bent probes? That’s a signal for replacement.
- Regular Calibration: Think of calibration as a regular health check-up for your multimeter. Even the best tools drift over time. A yearly calibration is a good rule of thumb, depending on how often you use it. More frequent checks might be needed if you use it professionally.
- Battery Maintenance: Low batteries can lead to inaccurate readings. It’s like trying to run a marathon on an empty stomach. Regularly check your multimeter’s battery level and replace batteries as needed.
- Storage Smarts: When not using your multimeter, store it in a clean, dry place. A protective case is a great investment. It’s like giving your multimeter its little home, safe from dust and accidental drops.
- Handle with Care: Multimeters can be sensitive instruments. Rough handling can mess up their internal components. Treat it with respect – no dropping, throwing, or jolting.
- Check for Firmware Updates: If using a digital multimeter, watch for updates. These updates can improve functionality and accuracy, like updating the software on your phone or computer.
- Avoid Extreme Conditions: Extreme temperatures and humidity aren’t friends with your multimeter. Avoid leaving it in direct sunlight, high humidity, or freezing conditions.
- Understanding Limits: Know the specifications of your multimeter. Pushing it beyond its designed limits can cause damage and affect accuracy.
- Connector Check: Ensure the connectors and jacks on your multimeter are clean and tight. Loose connections can lead to inaccurate readings and potentially damage the multimeter.
- Use the Right Settings: Misusing settings can strain the multimeter. Ensure you use the right setting for the job, especially when checking continuity.
Remember, a well-maintained multimeter is a reliable multimeter. These simple steps can help extend its life and ensure you get accurate readings every time you use it. Keep it maintained, and it’ll be one of the trustiest tools in your toolbox!
Safety Tips for Continuity Testing: Staying Safe While Getting the Job Done
Hey, DIYers and electrical wizards! Let’s talk safety when it comes to continuity testing. It’s not just about getting accurate readings; it’s also about ensuring you don’t get a shocking surprise. Here are some essential safety tips to keep in mind:
- Power Down: Before testing, ensure everything’s powered down. Working on live circuits is a no-go. It’s like trying to fix a car engine while running – not a wise move.
- Use the Right Tools: Ensure your multimeter and test leads are in top shape. Damaged or frayed leads? That’s an invitation to trouble. A good, reliable tool is your best friend here.
- Know Your Equipment: Familiarize yourself with your multimeter’s functions and settings. It’s like knowing every nook and cranny of your workshop. The more you know, the safer you’ll be.
- Check the Surroundings: Your workspace should be dry and clear of clutter. Water and electricity are dangerous; you don’t want to trip over something while testing.
- Wear Protective Gear: Insulated gloves and safety goggles are your armor. They might not be fashionable, but they protect you from unexpected sparks or shocks.
- Handle Components Gently: When dealing with sensitive components, be gentle. A heavy hand can cause damage, leading to faulty readings or worse.
- Stay Grounded: Grounding is key when working with high-power circuits or sensitive electronics. It’s like putting your feet firmly on the ground – it keeps you safe.
- Double-Check Connections: Before testing for continuity, double-check your connections. A wrong connection can give false readings and may even damage the circuit.
- Mind the Multimeter Settings: Always ensure your multimeter is set correctly for continuity testing. Using the wrong setting is like using a hammer when you need a screwdriver – it just won’t work right.
- Understand the Limits: Know the limitations of your multimeter. Pushing it beyond its capacity is like asking a compact car to tow a trailer – it won’t end well.
Remember, safety in continuity testing isn’t just about following rules; it’s about making smart choices and understanding your tools and the task at hand. Stay safe, and happy testing!
Frequently Asked Questions
- Why Is Continuity Testing Important?
- Continuity testing checks if two points are electrically connected. It’s like testing if a bridge between two points is solid. It is super important for ensuring circuits are correctly completed.
- Can Continuity Testing Be Done on Live Circuits?
- Nope, safety first! Always turn off the power before testing. It’s like checking the brakes on a car – you don’t do it while it’s moving.
- Is It Safe to Test Continuity on All Electrical Devices?
- Mostly, yes, but be cautious with sensitive electronics. Some circuits don’t like being tested and might throw a tantrum (or get damaged).
- How Often Should I Calibrate My Multimeter for Accurate Continuity Testing?
- Regular calibration is key. Think of it as a yearly check-up more often if you’re a heavy user.
- Can Continuity Testing Help Identify All Types of Electrical Faults?
- It’s great for finding basic faults, but not all. Sometimes, you need more detective work to uncover deeper issues. It’s a great starting point, though!
References
Organizations:
- InterNational Electrical Testing Association (NETA). https://www.netaworld.org/
Books:
- “The Art of Electronics” by Paul Horowitz and Winfield Hill. https://artofelectronics.net/
- “Electrical Engineering 101” by Darren Ashby. https://www.goodreads.com/en/book/show/6043651
Website Resources:
- Fluke Corporation Website. https://www.fluke.com/
- Klein Tools Website. https://www.kleintools.com/
- Tektronix Website: https://www.tek.com/en
Video Resources:
GalcoTV
Gary Davies