13 min read
How to Wire a Potentiometer (5 Easy Steps)

Have you ever considered adding the perfect volume control to your DIY speaker project? What if I told you that wiring a potentiometer is the key to achieving that?
Potentometers, or “pots” as tech aficionados fondly call them, are incredibly handy devices.
Quick Summary of Steps:
- Step 1: Gather your tools.
- Step 2: Pinpoint your potentiometer’s terminals.
- Step 3: Carefully strip your wires. This ensures a clean and secure connection.
- Step 4: Connect your wires. With precision and patience, solder each wire to the designated pins on your potentiometer.
- Step 5: Test your potentiometer.
In this article, we’ll dissect the process step by step, turning what might seem like an electronic maze into a straightforward walk in the park.
Now, let’s roll up our sleeves and get started.
What is a Potentiometer? (Review)
Let’s dive right in, shall we? A potentiometer, often called a “pot,” is an electronic component that adjusts voltage dividers. You see, the main function of a potentiometer is to measure electric potential (voltage).
The cool part? The name gives away its purpose – ‘Potentio’ means power, and ‘meter’ means measurement. So, it’s a power measurer!
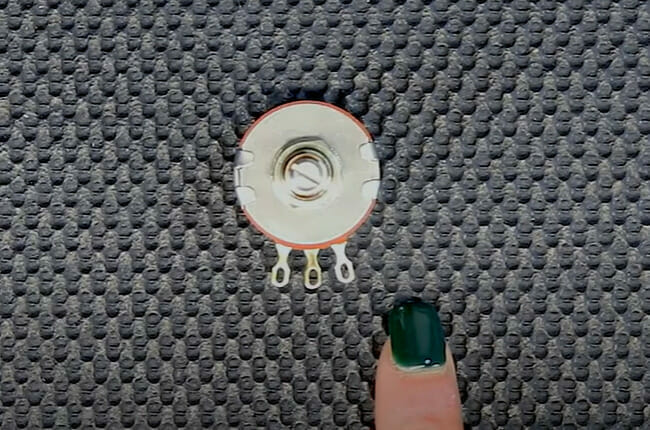
Potentiometers are blessed with three terminals. A solid understanding of these little guys is crucial for anyone looking to wire one up successfully.
| Terminal | Description |
| Terminal 1 | Voltage in |
| Terminal 2 | Voltage out (adjustable) |
| Terminal 3 | Ground or common connection |
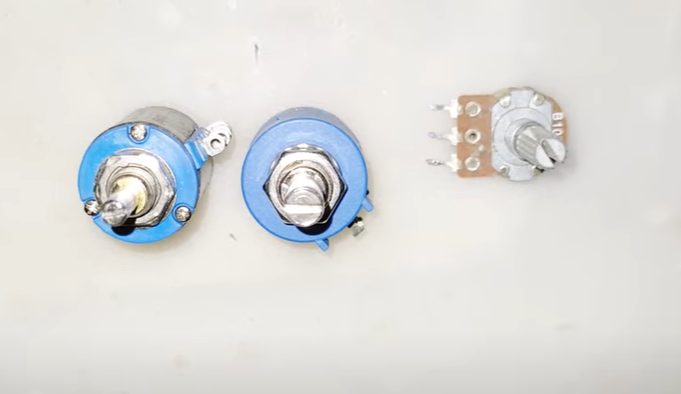
Types of Potentiometers and Their Uses
Potentiometers in the electronics world allow us to adjust and refine with precision.
| Type | Description | Common Uses & Analogies |
|---|---|---|
| Rotary Potentiometer | This is the most common type, where the resistance changes as you turn a knob. | Adjusting the volume on a stereo system. Imagine tweaking the aesthetics of a living room for the perfect vibe, much like a certain home improvement expert. |
| Slide Potentiometer | As the name suggests, the wiper moves straight like a sliding door. | Used in mixing desks for audio work. Think of it as sliding the door to unveil a renovated patio. |
| Linear Potentiometer | The resistance change is directly proportional to the wiper’s position. | Various electronic applications where linear adjustments are needed. Like making straight-lined modifications to a house’s exterior. |
| Logarithmic (or Audio) Potentiometer | Resistance changes in a logarithmic manner. Ideal for applications sensitive to perception, like human hearing. | Volume controls in audio equipment. Picture fine-tuning the acoustics of a room for that perfect listening experience, reminiscent of a certain TV host’s attention to detail. |
Tools and Materials Needed
Let’s do a quick inventory check.
| Item | Description |
|---|---|
| Potentiometer | It’s your star player in this project. They come in different variations like linear or logarithmic, but a 10K linear potentiometer should suffice for basic projects. |
| Wire | I recommend picking up some solid-core wire; it’s easy to shape and robust enough for most simple electronics projects. If you want my advice, 22 gauge is usually ideal. |
| Soldering Iron | This will be used to join your wires with the potentiometer terminals. For safety purposes, don’t forget about soldering iron stands – they’ll keep your workspace (and fingers) safe from unintentional burns! |
| Solder | To create those crucial connections. |
| Breadboard | This can be really useful if you’re prototyping before making permanent connections. |
| Wire Cutters | This can be useful if you’re prototyping before making permanent connections. |
Safety Precautions
Before you dive into the nitty-gritty of wiring a potentiometer, let’s roll up our sleeves and talk safety.
- Disconnect Power: Don’t forget to disconnect when working with electrical equipment. We’re talking about any power source – a battery or an outlet. This isn’t just unplugging stuff; switch off the mains if necessary.
- Use Insulated Tools: Regular tools might be tough, but they can conduct electricity like nobody’s business. Insulated tools have a protective coating that keeps electricity from reaching you.
- Wear Protective Gear: Rubber gloves and safety glasses are your best friends here. They’ll help protect against accidental shocks and keep your eyes safe from flying sparks or metal shards.
- Maintain a Clear Workspace: Keep your workspace clean and organized. Loose wires can create unexpected circuits or get caught in your tools – we don’t want surprises!
- Stay Grounded: Just like we anchor furniture for safety, ensure your equipment is grounded to avoid electrical surges.
- Know Your Limits: Stop if you’re uncomfortable doing something or it seems too complex. There’s no shame in calling in a professional electrician for help.
Steps to Wire a Potentiometer
So you’ve decided to take the plunge and wire your own potentiometer. Good for you! I will walk you through it, ensuring we cover all the bases.
Step 1: Gather your tools.

- Let’s round up our toolkit before we break ground on this project!
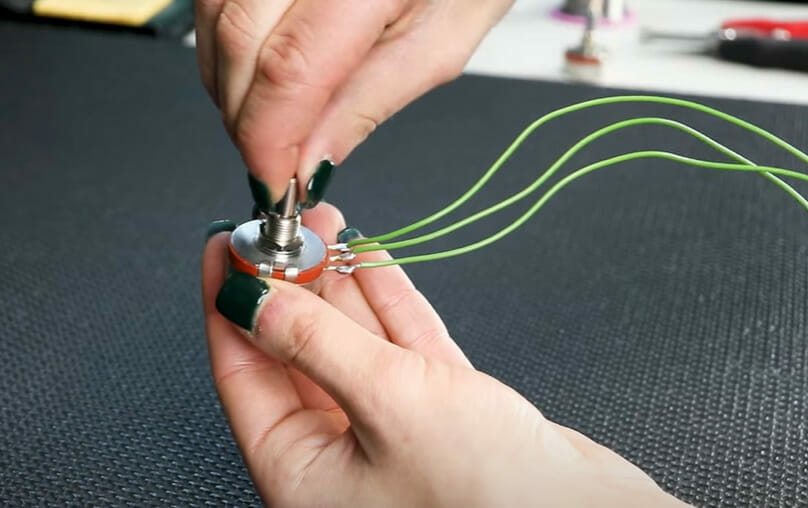
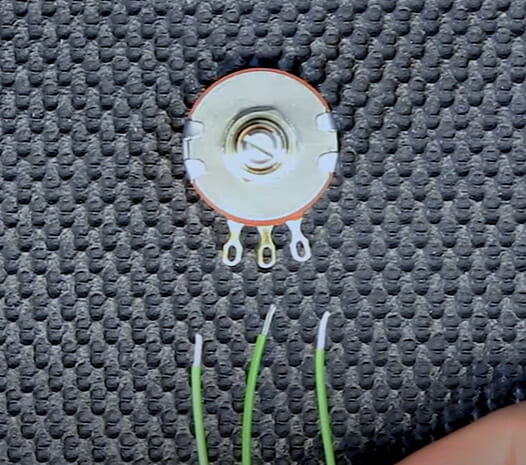
Step 2: Identify Your Potentiometer Pins
- Almost every potentiometer has three pins – two on one side (your ‘outside pins’) and one on the other (your ‘middle pin’). If in doubt, check the manufacturer’s datasheet.
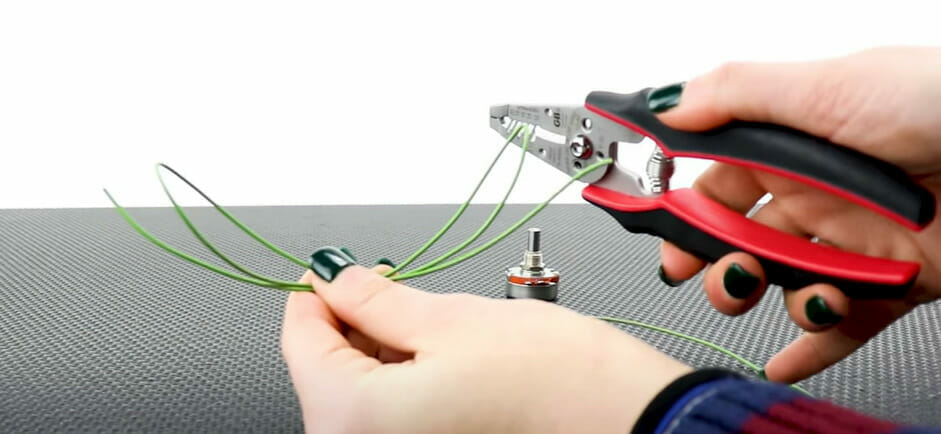
Step 3: Strip Your Wires
- Grab those wire strippers and strip about half an inch off each end of your wires. Don’t cut into the wire – we want that insulation gone!
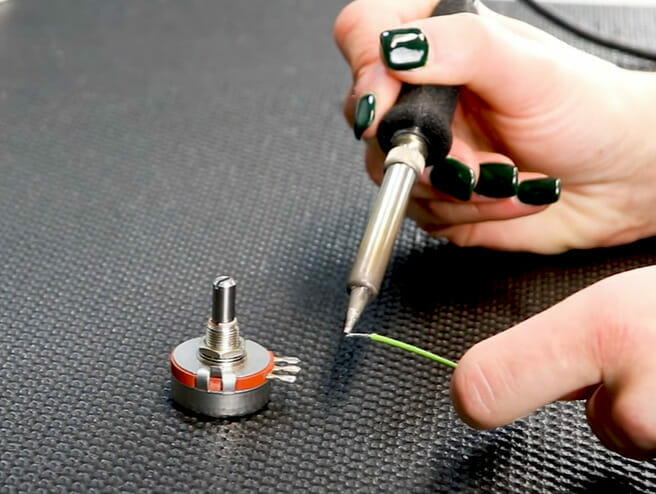
Step 4: Connect Your Wires
- Now comes the really fun part! One by one, connect each wire to a pin on your potentiometer using your soldering iron.
Remember these rules:
- The outside pins connect to the source voltage and ground.
- The middle pin connects to whatever device you control with the potentiometer (like an amplifier).
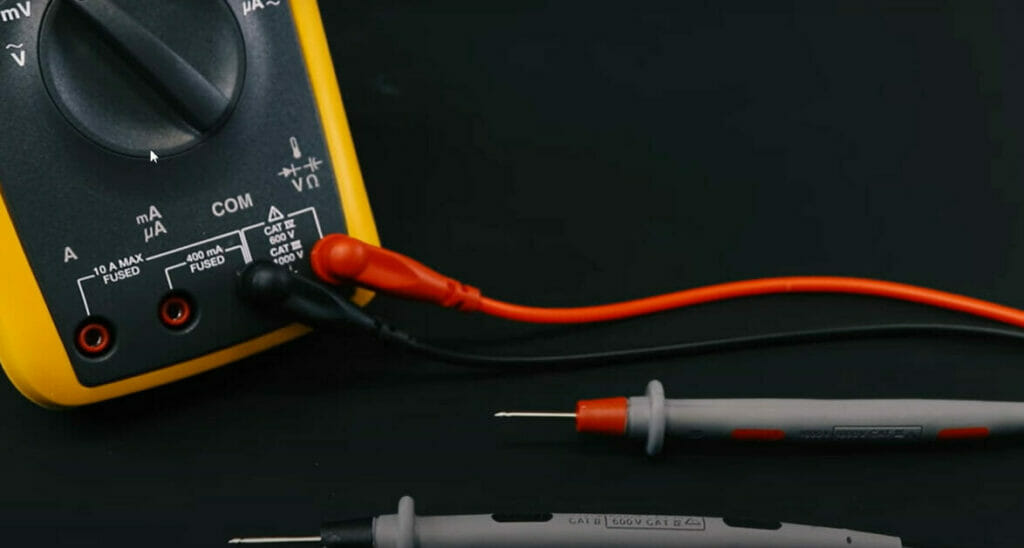
Step 5: Test It Out
- Finally, use your handy multimeter to ensure everything is wired correctly before connecting it to further equipment.
Potentiometer Wiring Tips & Tricks
Navigating the world of electronics, especially when it comes to wiring components like potentiometers, can be both thrilling and a tad overwhelming.
But with a few inside tips and a sprinkle of know-how, you can master the art and have a blast while at it.
- Steady Does It!: Soldering can be tricky, especially for newcomers. Try resting your hand or pinky on the table to get that perfect connection while you solder. It’ll give you a steadier hand, ensuring a clean solder joint.
- Quality Matters: Like picking the right materials for that dream renovation, high-quality solder can make a difference. It flows better and creates stronger connections. Don’t skimp on this one!
- Keep It Clean: Remember how we always prep a space before diving into a big project? The same applies here. Always clean the terminals of your potentiometer before soldering. A bit of rubbing alcohol on a cloth or swab works wonders.
- Heat, Not Force: Let the heat do the work when soldering. Apply enough heat to the wire and the terminal for the solder to flow smoothly. No need to force it! Think of it like marinating – it’s all about letting things meld together naturally.
- Check Twice, Solder Once: Always double-check your wiring before making any permanent connections. It’s like measuring twice before cutting that wood plank. This little precaution can save a lot of backtracking later on.
- Stay Organized: A clear workspace isn’t just for aesthetics (though who doesn’t love a clean workshop?). By organizing your tools and materials, you’ll streamline the process and reduce the chances of any mistakes.
- The Art of Twisting: When connecting your wires to the potentiometer pins, twist them together before soldering. This tiny twist can make soldering easier and ensure a more robust connection. Think of it as intertwining threads for a stronger fabric.
- Practice on Scraps: If you’re new to this, practice your soldering technique on some scrap wires or old electronics. It’s like doing a dry run before the big reveal. You’ll get a feel for the process without risking your main project.
Troubleshooting Common Issues
I’d bet you’ve been there before. You’ve followed every step to wire your potentiometer, but something’s off. Don’t worry – I’m here to help! Let’s walk through some common issues and their solutions.
| Issues | Possible Causes & Solutions |
|---|---|
| Potentiometer not responding | It could be a faulty connection. Check your wiring and soldering points. They need to be secure for the current to flow correctly. |
| No change in output voltage | If there’s no variation in output voltage when you adjust it, confirm that it’s wired as a rheostat (two-terminal device) instead of a potentiometer (three-terminal device). |
| Inconsistent or erratic behavior | Internal wear or damage. This often signifies that the potentiometer needs replacing. |
| Knob wobble | Physical damage or improper mounting. Ensure that the potentiometer is securely fixed to avoid wobbling. |
| Crackling noise in audio applications | Internal wear or damage. Often signifies that the potentiometer needs replacing. |
| Unexpected readings even when everything seems alright | Your multimeter might be misleading you. These devices aren’t perfect and can sometimes provide inaccurate measurements due to low battery or internal damage. |
Frequently Asked Questions
- Can I use any potentiometer for my project?
Not necessarily. You need to choose a potentiometer based on your specific needs, like the required resistance and the type of application (audio, linear adjustments, etc.). Always consider the specifications of your project before choosing a pot. - Is soldering the only way to connect wires to a potentiometer?
While soldering provides a robust and durable connection, you can use breadboards for prototyping or temporary connections. However, for a long-term fix, soldering is recommended. - How do I determine the resistance value of my potentiometer?
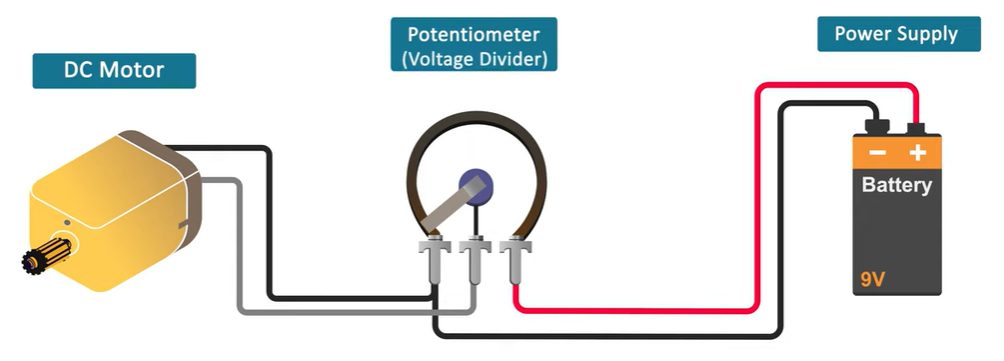
The resistance value is typically printed on the potentiometer. If not, you can use a multimeter to measure it. - Can I use a potentiometer to control the speed of a motor?
Yes, you can! Adjusting the resistance allows you to vary the voltage delivered to the motor, thereby controlling its speed. However, ensure the potentiometer can handle the current required by the motor. - What’s the difference between a potentiometer and a rheostat?
While both can adjust current and resistance, a potentiometer typically has three terminals and divides voltage. In contrast, a rheostat has two terminals and is specifically designed to vary resistance. - Can I replace any potentiometer with a digital potentiometer?
Digital potentiometers are nifty little devices that digitally adjust resistance. While they can replace many traditional pots, ensure it suit your application, as there can be differences in performance and response. - Are there potentiometers that can handle high-power applications?
Yes! There are high-wattage potentiometers designed specifically for high-power applications. Always check the pot’s power rating before using it in such scenarios. - Why does the potentiometer get hot when I use it?
A warm potentiometer typically indicates it’s dissipating power as heat. It might be handling more current than it’s rated for. Always ensure your pot’s power rating aligns with your application. - Can I use a potentiometer with a microcontroller like an Arduino?
Absolutely! Potentiometers are often used with microcontrollers as input devices, like volume controls or dimmers. Just ensure it’s compatible with your microcontroller’s voltage and current specifications.
References
Website Resources:
- IEEE Xplore – https://ieeexplore.ieee.org/Xplore/home.jsp
- All About Circuits – https://www.allaboutcircuits.com/
- Electronics Tutorials – https://www.electronics-tutorials.ws/
Video Resources:
Creative For You
Loadout_shop
Automatedo
Galco TV
Thanks