11 min read
How to Solder Wire (Ultimate 9-Step Guide & FAQ)
If you haven’t soldered a wire before, I’ll show you how to do it like a professional.
It’s not difficult, but you must take some safety precautions. All you need is a soldering iron and some solder wire. So after reading this article, you will be ready to get started.
Quick Summary: To solder two wires together, bind and twist the conductors inside the insulating cover, apply some flux, heat the joint, and apply the solder until it spreads throughout the joint. Then, optionally, apply some silicon paste, cover the joint with a thin tube, and shrink-wrap it using a heat gun. If you’re soldering a wire to something else, I suggest applying the soldering iron with a wetted tip to the required part, allowing the solder to flow and melt to form a strong bond.
Below ill go through the solder iron and solder, a few general soldering tips related to wires, and discuss how to avoid a few common soldering defects.
Solder
The solder used with soldering irons is typically an alloy of two or more metals.
I recommend you only use lead-free solder if you come across one containing lead, despite it being easier to work with for beginners.
Lead-free formulations are usually an alloy of either tin and copper (Sn-Cu) or tin, silver, and copper (Sn-Ag-Cu).
| Type of Solder | Composition | Pros | Cons |
|---|---|---|---|
| Lead-Based Solder (Sn-Pb) | 60% Tin, 40% Lead | Low melting point, easy to work with | Health risks due to lead |
| Lead-Free Solder | Tin-Copper (Sn-Cu) or Tin-Silver-Copper (Sn-Ag-Cu) | Safer for health and the environment | Higher melting point, less smooth flow |
| Rosin-Core Solder | Contains a core of rosin flux | Helps clean metal surfaces during soldering, ensuring a secure, conductive connection | Depends on whether it’s lead-based or lead-free; lead-based has the associated health risks |
Now, let’s get soldering.
Soldering a Wire
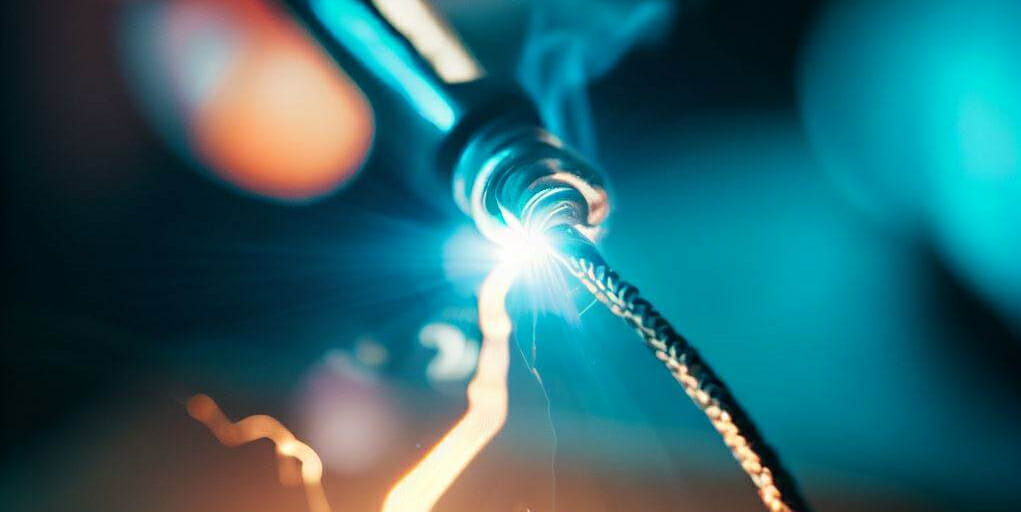
Soldering a wire is essentially a brazing technique at low temperatures.
The aim is to get the parts soldered hot enough so that the solder melts and flows across and between them.
Once heated and left to cool, the solder bonds with the metallic parts and hardens.
Ideal Method of Soldering
The ideal soldering method is to heat and apply a soldering iron with a wetted tip to where it touches the soldered parts.
This will allow the solder to flow and melt at the right temperature.
Some people heat the soldered pieces first, i.e., before applying the solder. But soldering with a “wetted” tip generally works better at forming a good thermal connection. Without it, the process could take longer, and the heat applied to the pieces without solder might transfer to parts that could damage them.
9 Steps to Solder a Wire
In this example, I’ll show one good way how to solder two wires together.
Below, an electrician uses a soldering gun, soldering wire, silicone paste, and a heat gun to demonstrate it.
Only the first two items are essential to finish the job (steps 1 to 6), but if you want a good finish, you can optionally use the last two (steps 7 to 9).
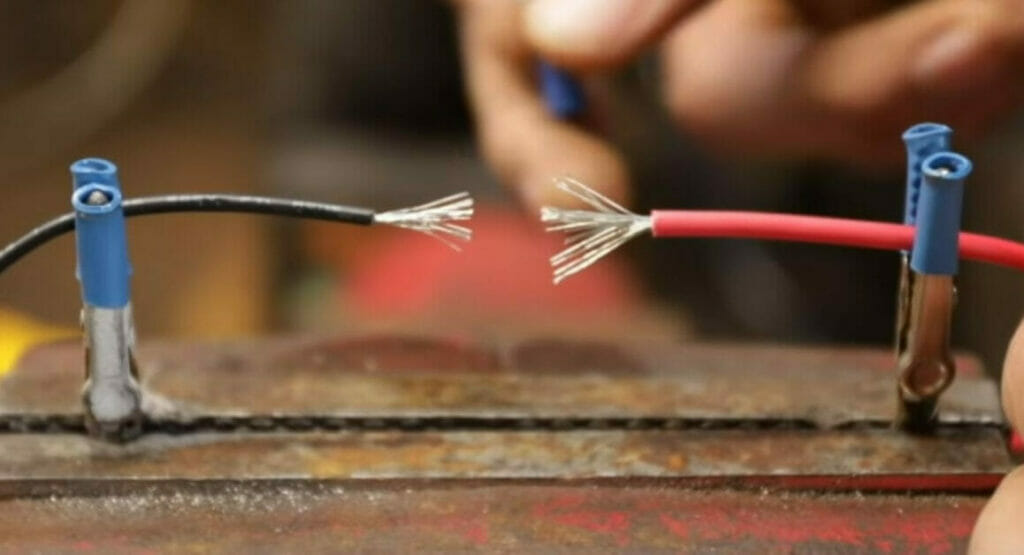
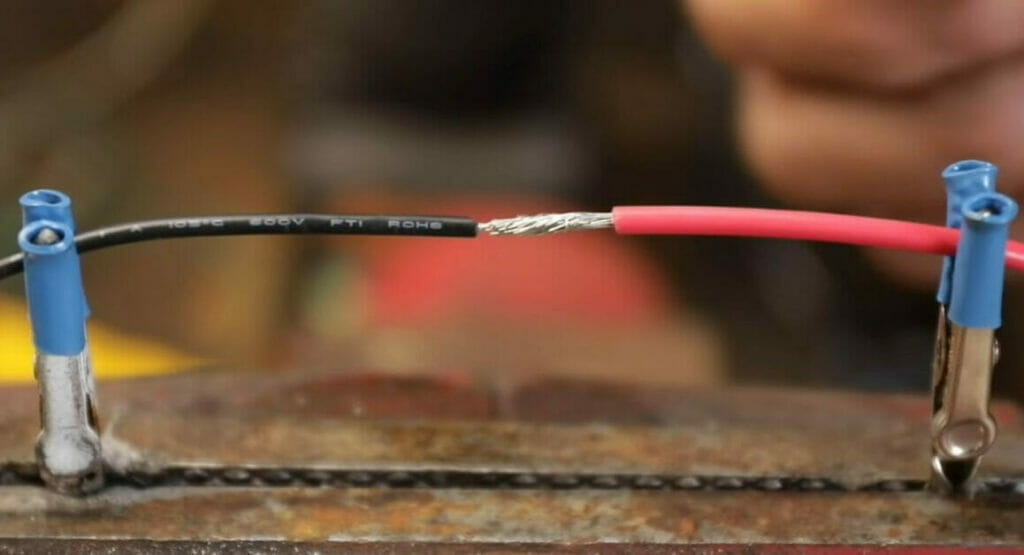
Step 1: Hold the Two Wires Close Together
Hold the two wires close to each other using a small clamp or alligator clip for each one, as shown below.
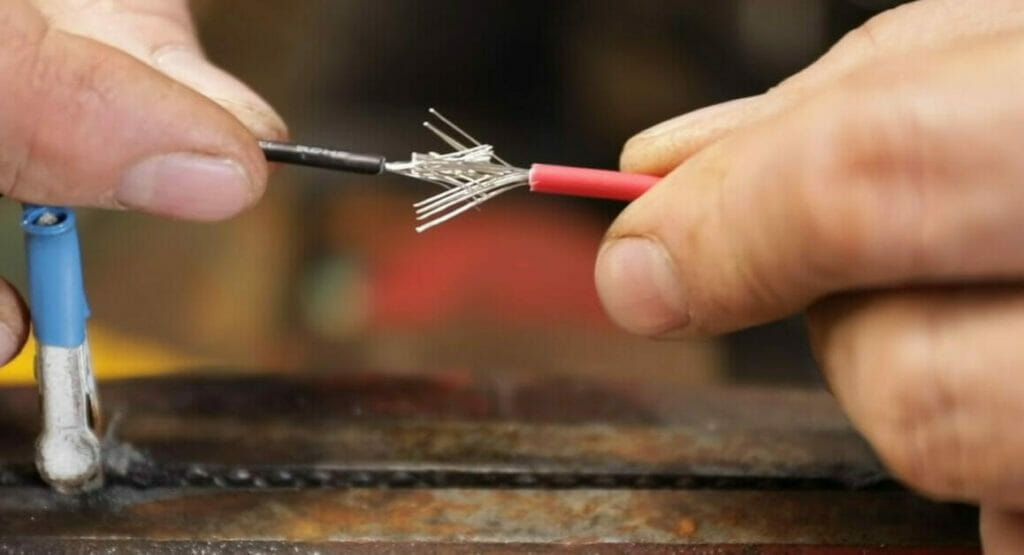
Step 2: Join the Conductors
Join the conductors by merging them, as shown below.
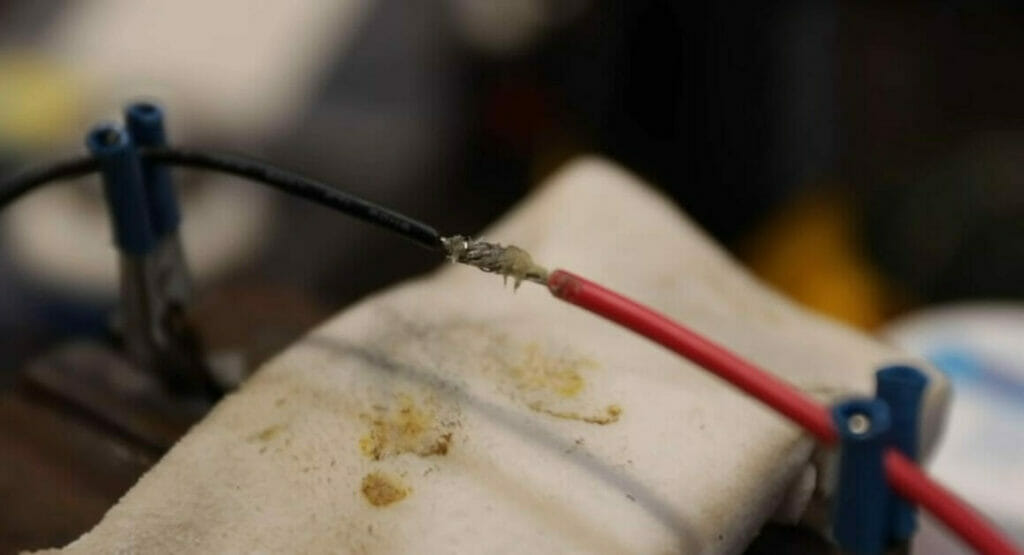
Step 3: Press and Twist the Conductors
Press on the two sets of conductors so none sticks out. Then twist in one direction to make a clean joint before soldering and clamping both wires again.
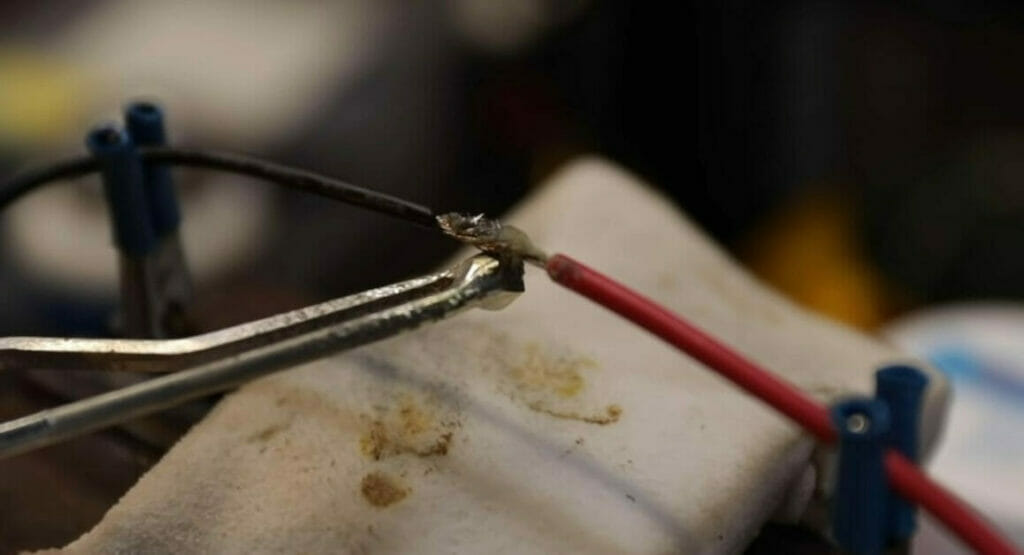
Step 4: Apply Some Flux
Optionally, place a sponge underneath before starting to solder the wires. Then, apply some flux onto the joint.
Step 5: Heat the Joint
Start heating the joint to melt the flux so that it gets inside the gaps.
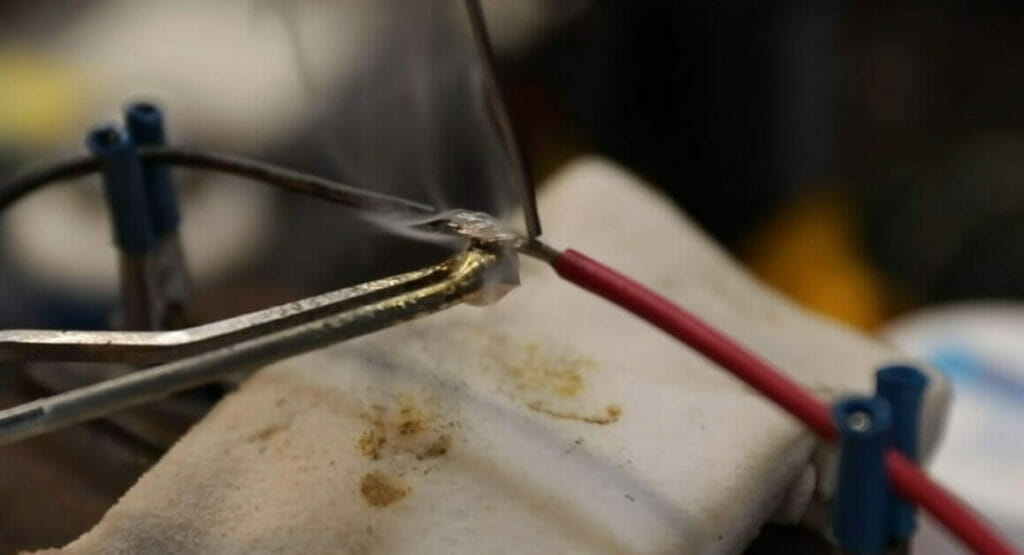
Step 6: Apply the Solder
Apply the solder by putting its end onto the joint while the soldering iron is still in contact.
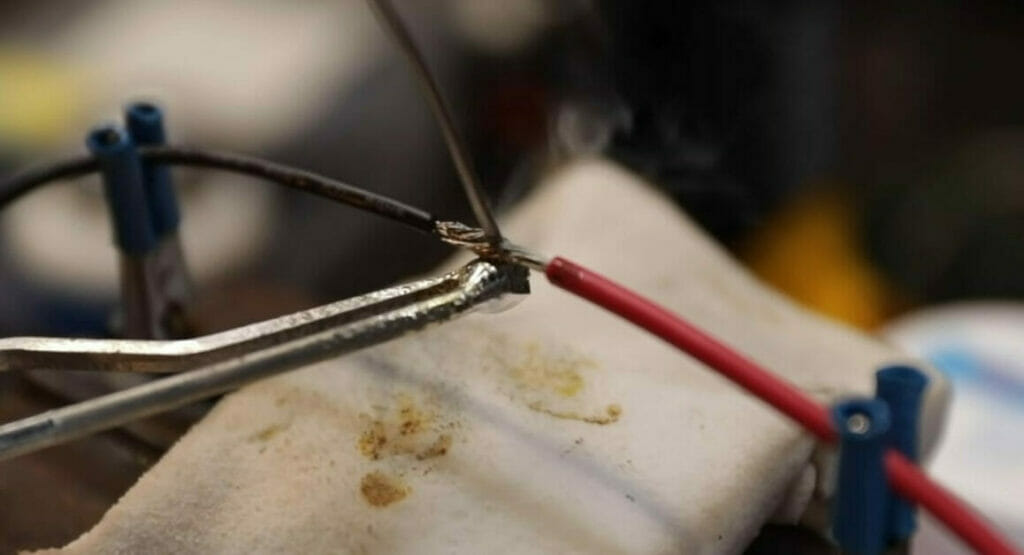
Let the solder flow throughout the joint, but don’t put too much so it drips off easily.
Step 7: Apply the Silicone Paste
Although the connection is now solid – see the picture below…
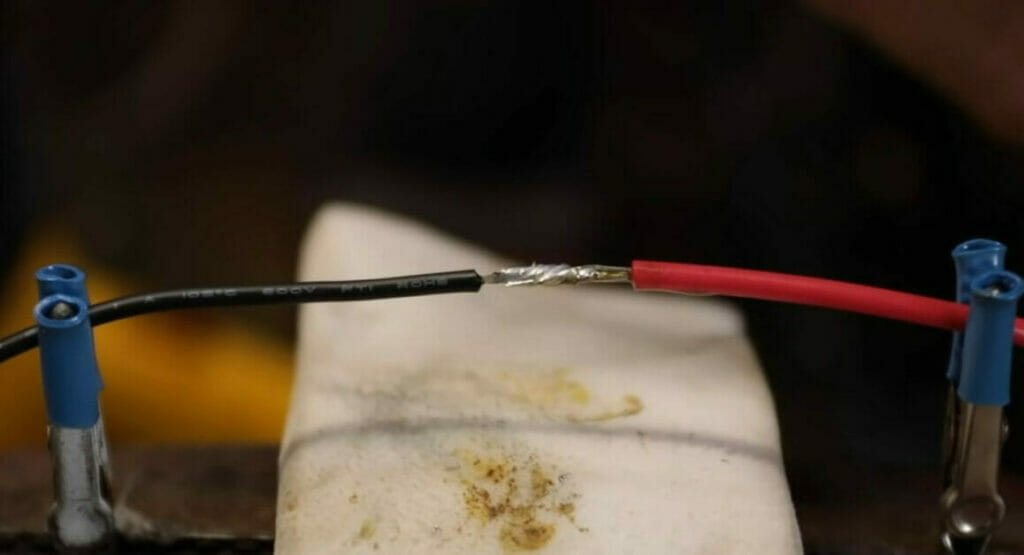
…I suggest you apply silicone paste onto the joint.
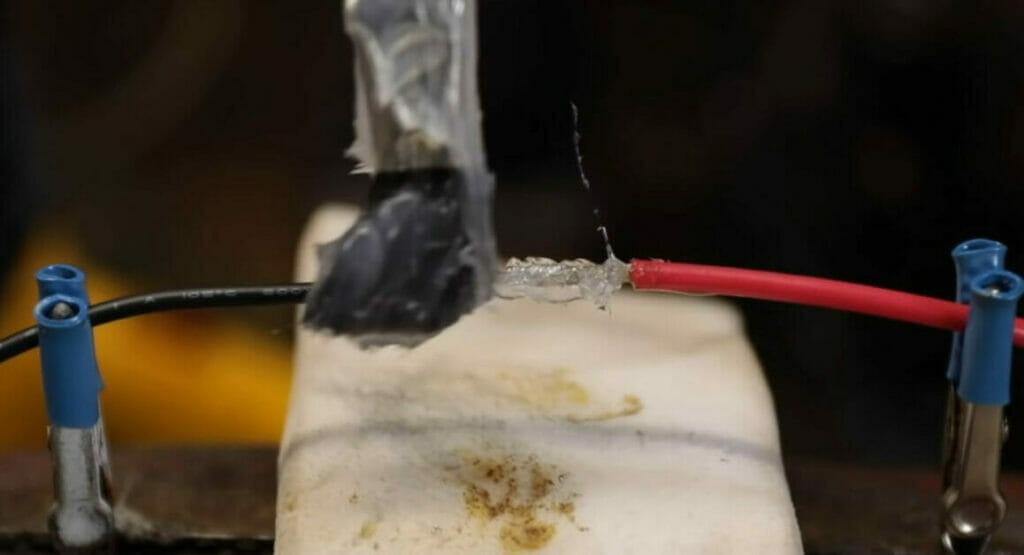
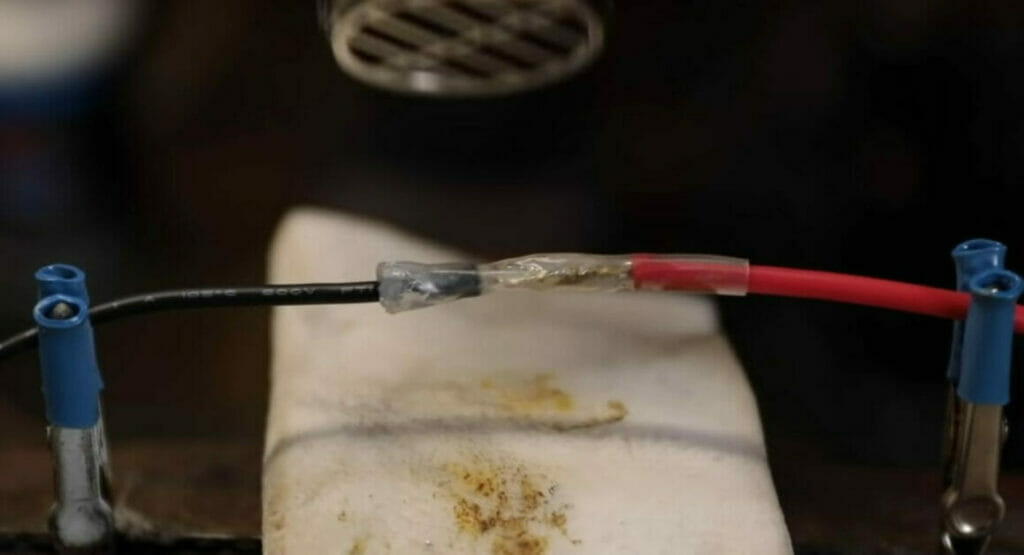
Step 8: Cover the Joint with a Tube
Again, optionally, cover the joint with a piece of tubing just a little wider in diameter than the wires. Be careful not to remove the silicone paste.
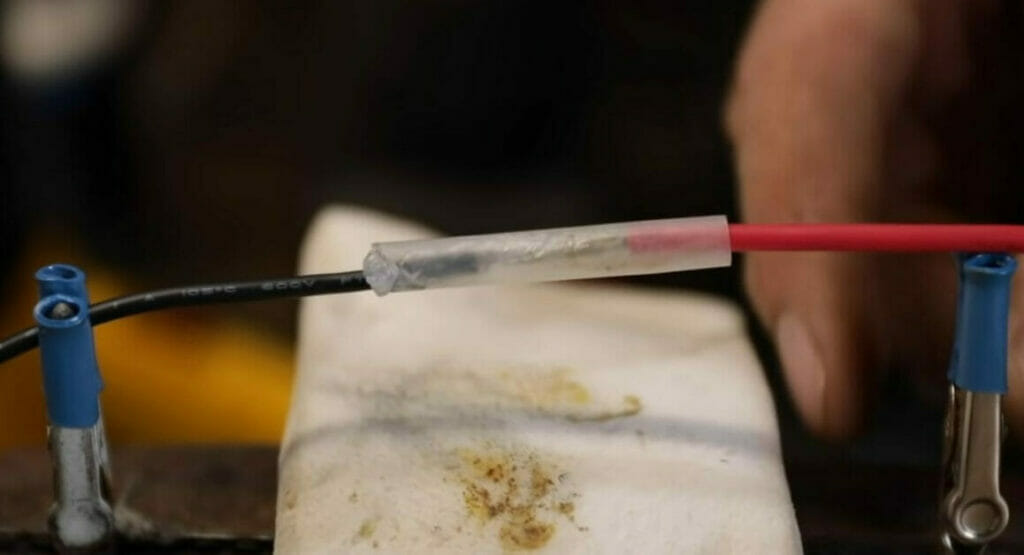
Step 9: Shrink the Tube
Use a heat gun to shrink the tube. Start from the middle and work your way to each edge. The tube should shrink to better wrap around the joint, conductors, and wires. Some silicone paste will ooze out, but the remaining paste inside the tube will help to form a waterproof bond.
Soldering Tips
Solder Wire or Paste?
The ordinary soldering wire is sufficient for soldering wires.
Solder paste is an alternative but more suitable for working with surface-mounted components. It is ground solder with flux and binding agent, which you apply to component mounting locations.
Using a Heat Sink
Using a heat sink is an additional but sometimes necessary step while soldering.
It helps protect the connections and anything from accidentally coming into contact with the soldered parts. Also, it is essential around temperature-sensitive components to prevent heat from spreading.
However, it is less likely to be an issue when the soldering wire, as it is when soldering components on a PCB unless you’re soldering wire onto a PCB component.
Soldering Defects
Here, I give some additional tips to help prevent common soldering defects.
A Rough Connection
Avoid disturbing the solder while it is molten because it could disrupt its internal structure. Otherwise, you are more likely to have a rough connection or joint.
A Cold Solder Joint
Avoid what’s called a “cold solder joint.”
Heating the soldering iron to the right temperature required for a good joint is important; otherwise, the solder will not flow properly, resulting in a weak and unreliable joint.
You will know when the solder is hot enough when it flows, leaving behind a smooth and shiny joint.
A Broken Solder Joint
A cold solder joint often leads to a broken one.
To avoid or minimize thermal damage to components, apply the solder quickly while the iron is still hot enough.
A dull solder color indicates the soldering iron was not hot enough, or the solder may not have cooled quickly enough. The joint is at risk of breaking.
Fixing a Cold or Broken Solder Joint
To fix a cold or broken solder joint, apply some paste or liquid flux before applying additional solder while reheating the joint.
Desoldering
If you need to desolder a wire, there are proper ways to do it.
Those two ways are wicking and suction:
- Wicking involves using a solder wick, which is a copper braid. Ensure the joint is clean before using the soldering iron to remelt the connection.
- Sucking involves using a tool to pull the molten solder while using a vacuum. A desoldering pump is usually used for this purpose. A soldering station usually has a built-in vacuum pump.
Safety Precautions
Addressing safety precautions is crucial in any procedure involving tools and potentially harmful materials. Here’s a more detailed guide on safety precautions for soldering:
- Well-Ventilated Area: Soldering can release fumes that are harmful when inhaled. Always work in a well-ventilated area to ensure these fumes are properly dispersed. Using a fume extractor can also significantly reduce the risk.
- Protective Wear: Wear safety glasses to protect your eyes from molten solder or flux splashes. Non-flammable or heat-resistant clothing can also prevent burns.
- Avoid Direct Contact: Never touch the tip of the soldering iron while it’s heated. It can reach temperatures over 400°C (750°F), which can cause severe burns. Always hold the soldering iron by its handle, and ensure it’s placed on a stand when unused.
- Proper Storage: After use, always allow the soldering iron to cool completely before storing it. Keep it and any related supplies out of reach of children.
- Avoid Food and Drink: Keep food and drink away from the soldering area to prevent accidental ingestion of lead or other potentially harmful substances from the solder or flux.
- Wash Hands: Always wash your hands thoroughly after soldering, especially before eating or drinking, to prevent accidental ingestion of harmful materials.
- Fire Safety: Be aware of the fire risk. Have a fire extinguisher suitable for electrical fires nearby, and don’t leave a hot soldering iron unattended.
Troubleshooting Common Soldering Problems
Problem 1: The Solder Won’t Melt
Here’s what you can do:
- Not Enough Heat: Is your soldering iron getting hot enough? If it’s lukewarm, turn it up a notch. Remember, we need the right temperature to make the magic happen.
- Check Your Solder: Maybe it’s the solder, not you. Some types require more heat than others. Make sure you’ve got the right kind for your project.
- Clean Your Tip: If your tip’s covered in residue, it won’t transfer heat properly. So get in there and clean it up!
Problem 2: The Solder Won’t Stick
Here’s what to do:
- Oxidized Metal: If your metal is oxidized, it’s like trying to stick gum to a dusty floor. Give that metal a good clean before you try again.
- Temperature Tweaking: If your iron’s too hot or not hot enough, the solder won’t stick.
Problem 3: The Soldering Iron Tip Won’t Tin
Trying to tin a tip that won’t cooperate? :
- Dirty Tip: A dirty tip won’t tin. Give it a good clean first.
- Right Temperature: If it’s too hot, it’ll burn the flux before it can clean the tip. Make sure you’ve got the heat right for tinning.
- Quality Solder: Not all solder is created equal. If you’re having trouble, try switching to a higher-quality solder with a good amount of flux.
There you go! With these tricks, you’ll be a soldering superstar in no time. Now get out there and make me proud!
References
3-way switch. https://www.homedepot.ca/product/leviton-3-way-lighted-toggle-switch/
J. M. Hughes. Practical electronics: Components and techniques. O’Reilly. 2015
Video Reference
Wranglerstar