7 min read
How to Fix a Chewed Wire (3 Techniques)
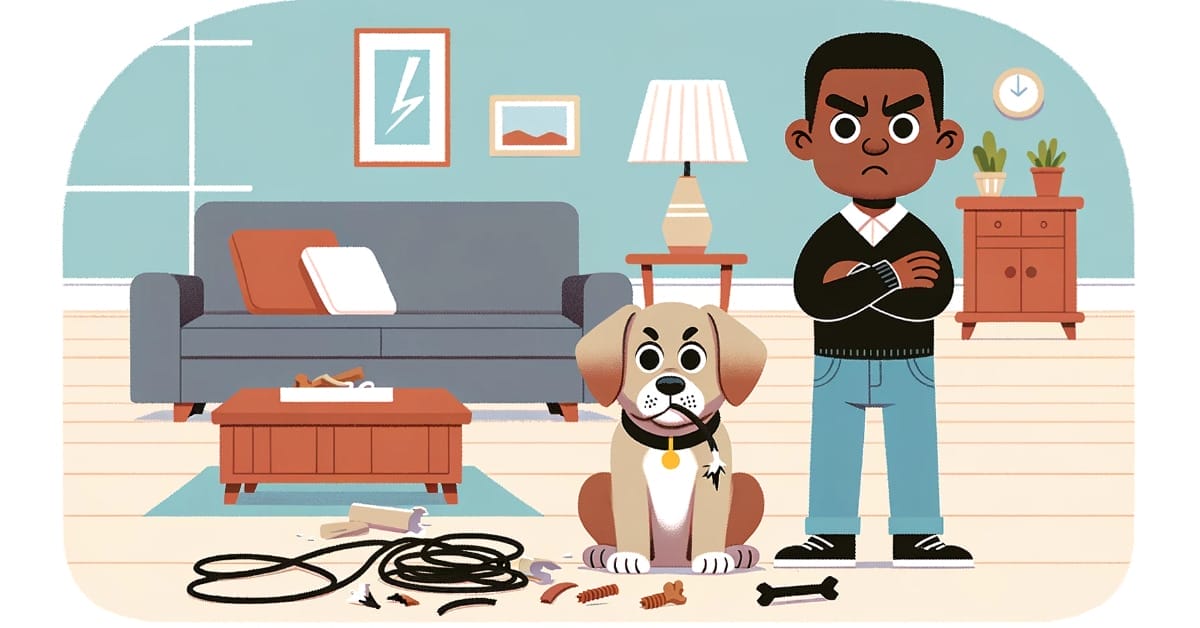
Whether your pet chewed an electrical wire or tore some other way, there are several ways to fix it.
Quick Summary: Ways to fix a chewed wire include using electrical tape; cutting out the chewed portion and joining the two ends by splicing, soldering, or sealing with a heat shrink tube, or a combination of these methods; or fixing the problem by replacing the plug instead.
After you’ve inspected the damage, I’ll show you how to apply each of my listed 3 solutions.
Inspection
Before applying a solution, I suggest you inspect the whole wire, including the chewed portion, if possible.
- Only attempt to fix a chewed wire if it’s a minor tear and the conductor inside is undamaged. If the wire is chewed in multiple places, has many cracks and tear marks, or is brittle or old, I suggest you replace the whole wire.
- If the wire is chewed near the appliance, you might need to open that appliance to repair or replace the wire.
- If the wire is chewed in the middle or near the plug end, you can probably repair it, if necessary, by cutting out the chewed portion and rejoining it.
- If the wire is chewed very close to the plug end, you should probably cut that plug off and install a new one instead.
I will guide you through 3 methods, where Method 2 has three options.
Requirements
You will need some or all of the following tools and materials, depending on the method you will apply::
| Tools | Materials |
| Screwdriver Wire cutter Wire stripper Heat gun | Heat shrinkable tube Solder wire connectors Replacement plug Electrical insulation tape |
Method 1: Fix a Wire with Chewed Insulation
If the wire was chewed a little as far as the insulation layer, you could wrap electrical insulation tape around that portion to cover it.
Method 2: Cutting Out a Chewed Portion
Follow these steps if cutting out the chewed portion and rejoining the wires is better.
Step 1: Cut Out the Chewed Portion
Cut out the chewed portion at both ends using a wire cutter.
Step 2: Strip the Wire Ends
Strip both wire ends about one inch.
Step 3: Join the Wire Ends
Join the two wire ends together by twisting them around one another.
If the cable has multiple wires, ensure you ONLY join two matching wires. Mixing them can be dangerous. Ensure the connection is tight.
Step 4: Strengthen the Joint
There are several ways to strengthen the joint.
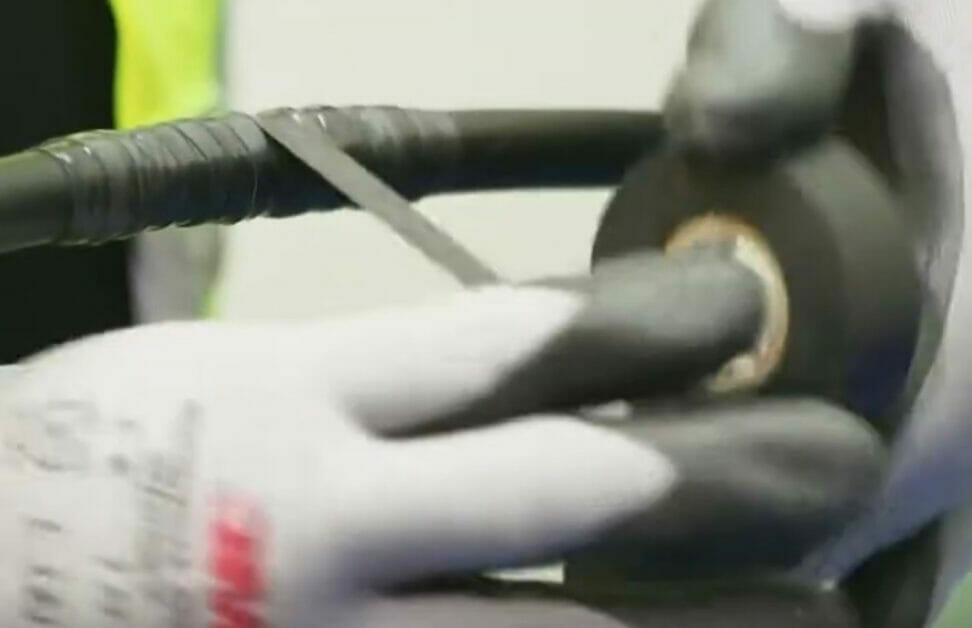
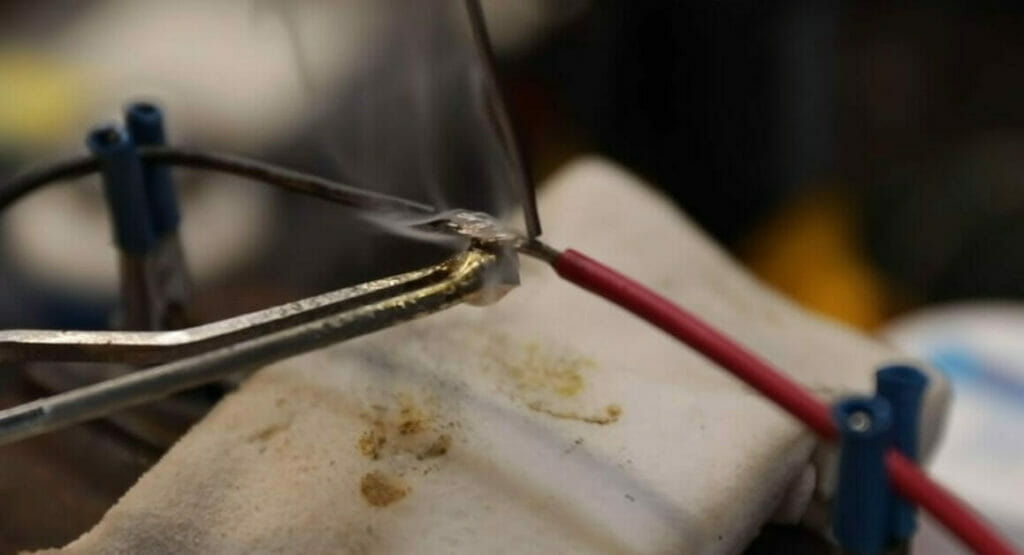
You can use electrical tape over it if it’s a thin wire, but I will show how to solder the wires together and splice the wires professionally as two further options. So, you will need a solder wire connector, a heat shrink tube, a soldering iron, or a heat gun.
Step 4a:
Solder the wires together using solder and a soldering iron.
Use electrical tape to cover the joint.
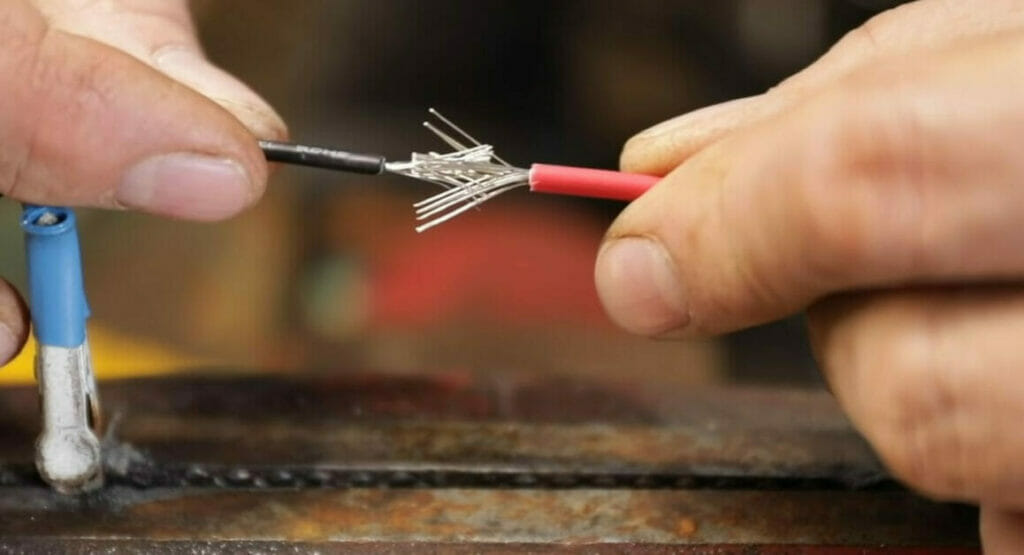
Step 4b: Splicing the Wires
Splice the wires according to the type of conductors inside, whether solid or stranded.
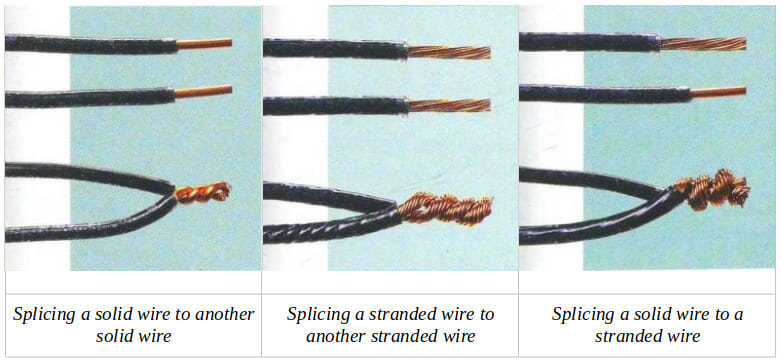
Use electrical tape to cover the joint.
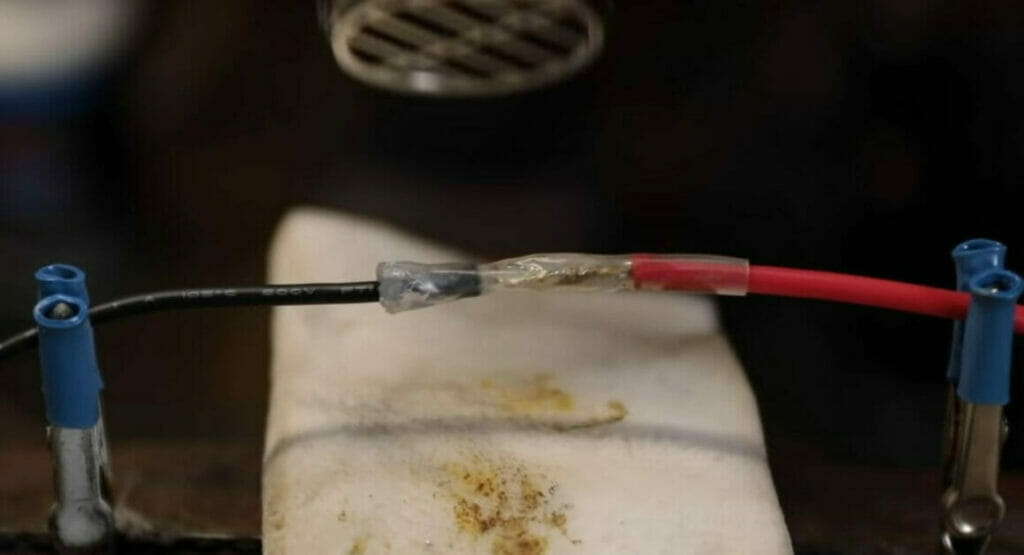
Step 4c: Sealing with a Heat Shrink Tube
Sealing with a heat shrink tube is a solid solution, especially suitable for a thick wire or important appliance.
Start by splicing, but splice them facing each other instead after inserting a heat shrink tube over either of the two.
Solder the wires.
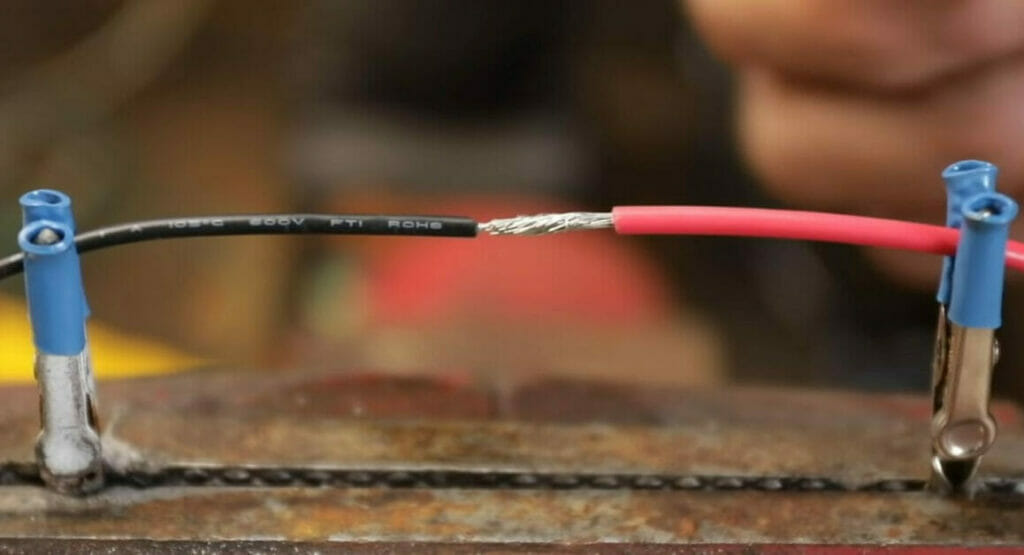
Cover the joint with a heat shrink tube and shrink it by applying heat from a heat gun.
Method 3: Change the Plug
If the wiring is very close to the end of the plug, it’s better to change that instead of trying to fix the wire unless it becomes too short.
Cut the wire and discard the chewed portion of the wire. If the plug cannot be opened, discard it and get a new one to attach. Proceed with the instructions below to add a new plug.
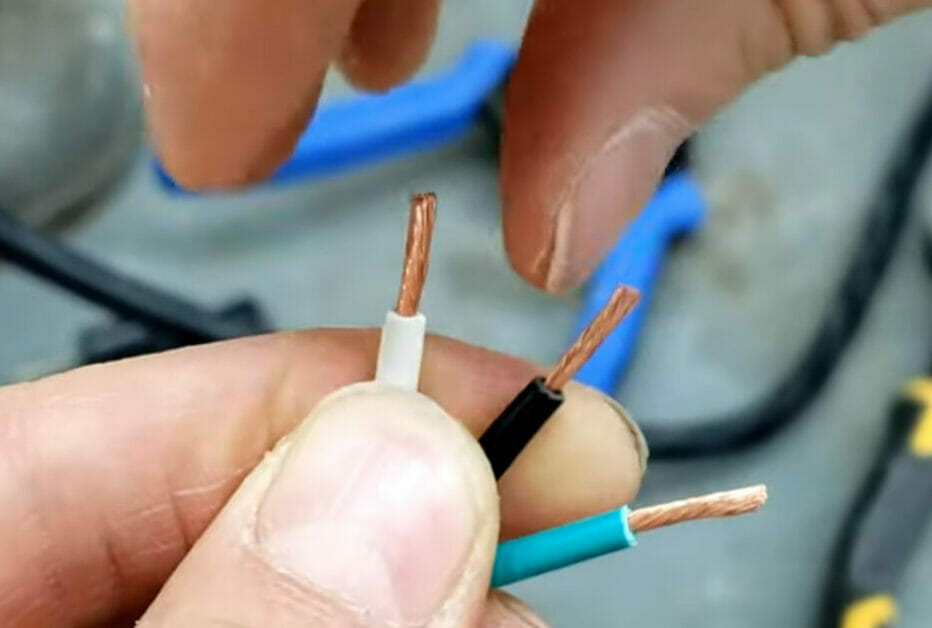
Step 1: Cut and Strip the Wires
Cut the cord, remove some sheathing, and strip the wires to expose the conductors inside. Twist the conductors if it’s stranded wire.
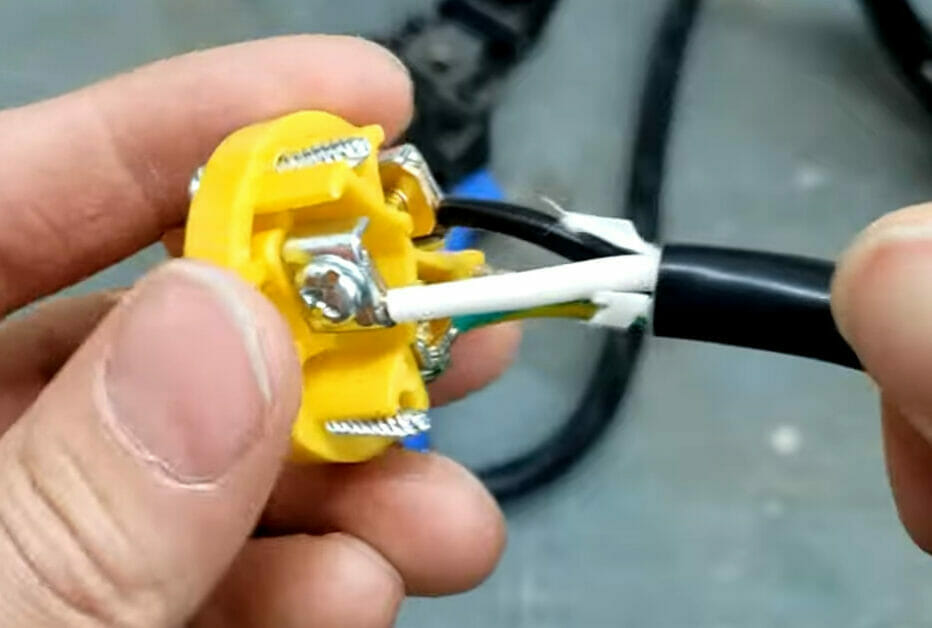
Step 2: Open the Plug
Open the plug with a screwdriver and loosen the screws on its prongs or terminals (or buy a new one).
Step 2: Connect the Wires
Connect the wires as follows:
- Connect the cable’s ground wire to the plug’s ground terminal. It is usually black, red, or blue.
- Connect the neutral wire from the cable to the neutral terminal on the plug. It is usually white.
- Connect the hot wire from the cable to the hot terminal on the plug. It is usually green or yellow.
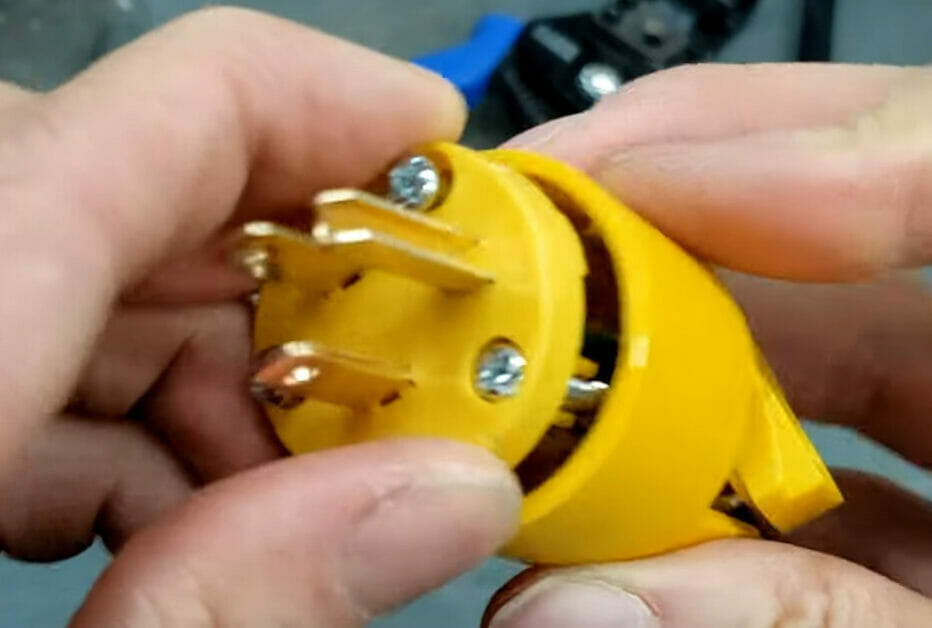
Step 5: Close the Plug
Ensure all the screws are tight, close the plug, and screw it tightly.
References
Creative Homeowner. The ultimate guide to wiring: complete home projects. 6th edition. Creative Homeowner. 2007
Video References:
3M Australia & New Zealand
Dan’s Guide to Everything
Wranglerstar