7 min read
How to Solder Wires to a Circuit Board (5 Steps)
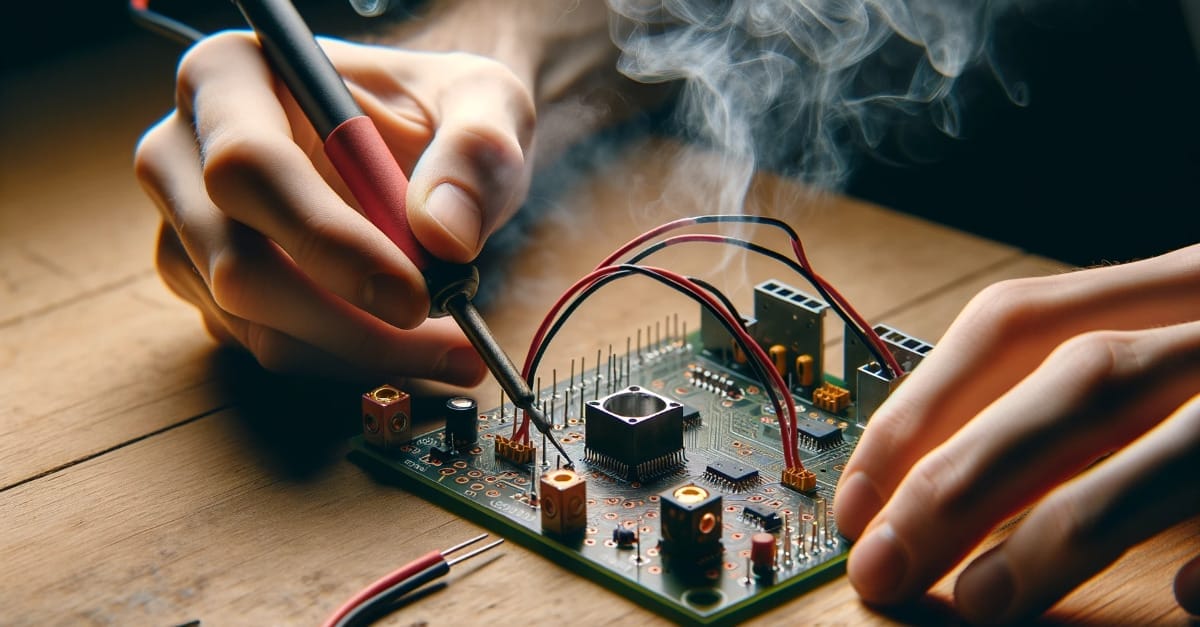
Soldering wires to a circuit board can be tricky if you’ve never done it before.
Beginners usually face issues such as the wire not sticking in place, not having enough solder on the spot, the solder not solidifying over the conductor, and so on. We’re here to make it easy for you by showing you how to solder wires to a circuit board.
Here’s a summary of the steps to solder wires to a circuit board:
- Check the spot.
- Strip the wire.
- Apply solder on the wire’s end.
- Apply solder on the circuit board spot.
- Solder the wire.
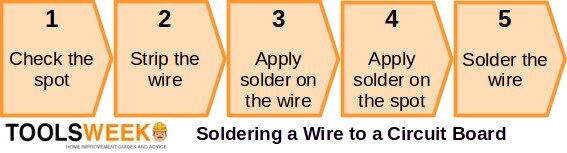
Step-by-step instructions are given below with illustrations.
Getting Started
Considerations
When soldering anything to a circuit board, bear in mind [Hughes, 2015]:
- A circuit board can be heat sensitive depending on what components it has on it, so you should try to minimize the exposure and avoid damaging it.
- A clean circuit board is easier to work with than an unclean one, so wipe it with isopropyl alcohol (90%) to remove any residue or potential contaminants before soldering.
- Applying some flux or soldering paste to the area before soldering can help, but you may need to clean it off afterward. Apply it using a wooden toothpick, matchstick, or wood shaft swabs.
- After soldering, clean the area using a cleaning solution or isopropyl alcohol (90%). This is especially important when applying flux because leftover flux can attract moisture and dirt.
Requirements
You will need the following to solder wires to a circuit board:
- Wire stripper
- Soldering iron
- Solder
Soldering a Wire to a Circuit Board
Step 1: Check the Spot
Check the spot on the circuit board to which you will connect the wire to ensure it behaves as expected when connected.
You don’t want to connect the wire only to find out later you wired it wrongly, the wire is broken, or it’s on the wrong spot. You don’t want to connect the wire only to find out later you wired it wrongly or the wire is broken.
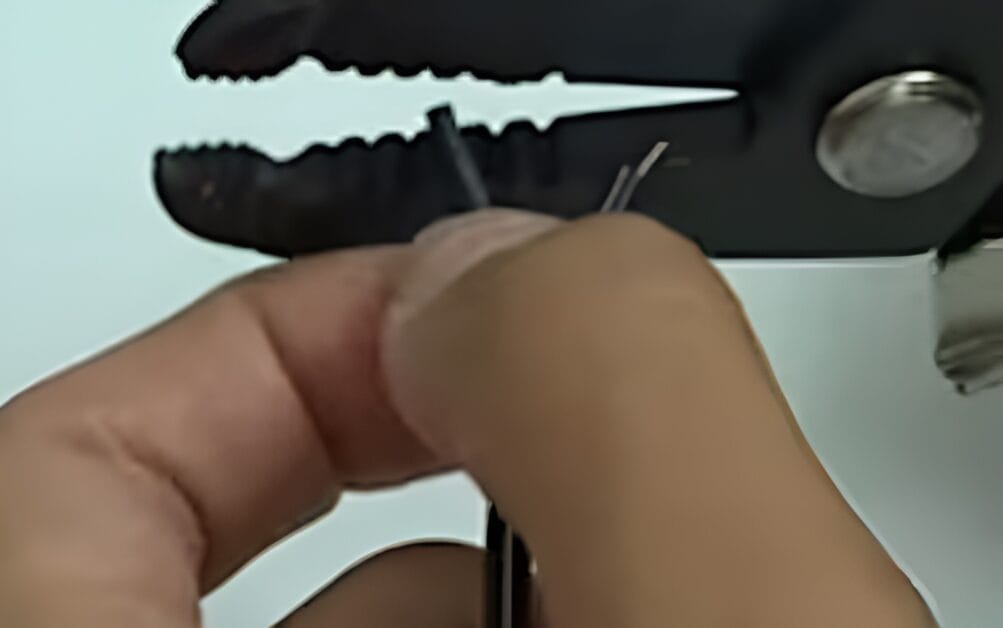
Step 2: Strip the Wire
Strip about ¼” (quarter of an inch) of insulation off the end of the wire using a wire stripper. Repeat for any additional wires.
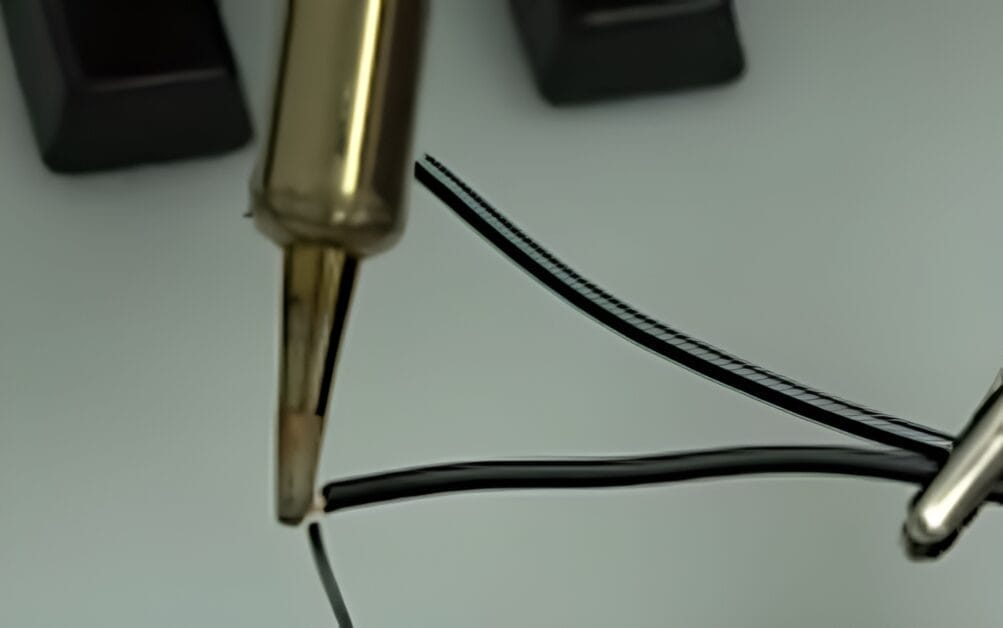
Step 3: Apply Solder on the Wire
Heat the soldering iron and apply some solder to the end of the exposed wire. Repeat for any additional wires.
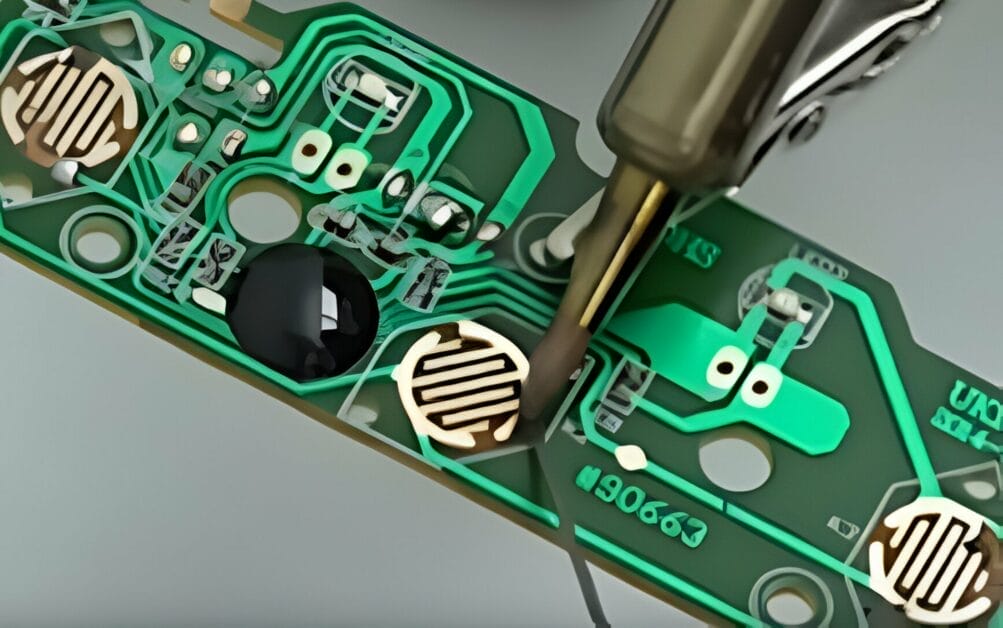
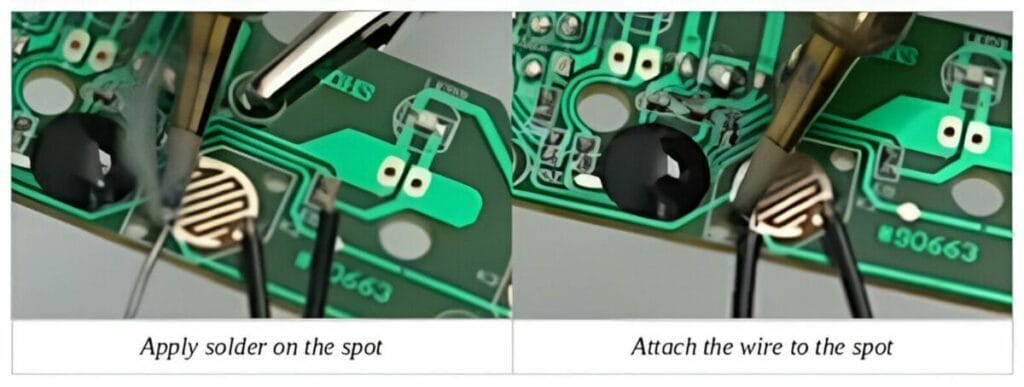
Step 4: Apply Solder on the Spot
Apply some solder onto the spot identified in the first step.
Place the soldering wire on the spot and bring the soldering iron’s tip into contact so that a drop melts.
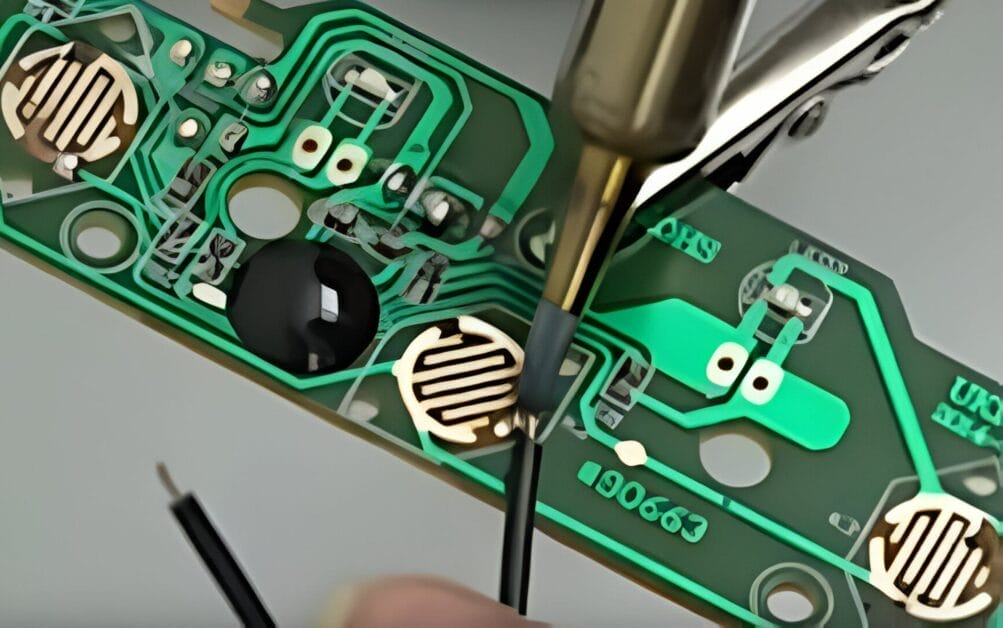
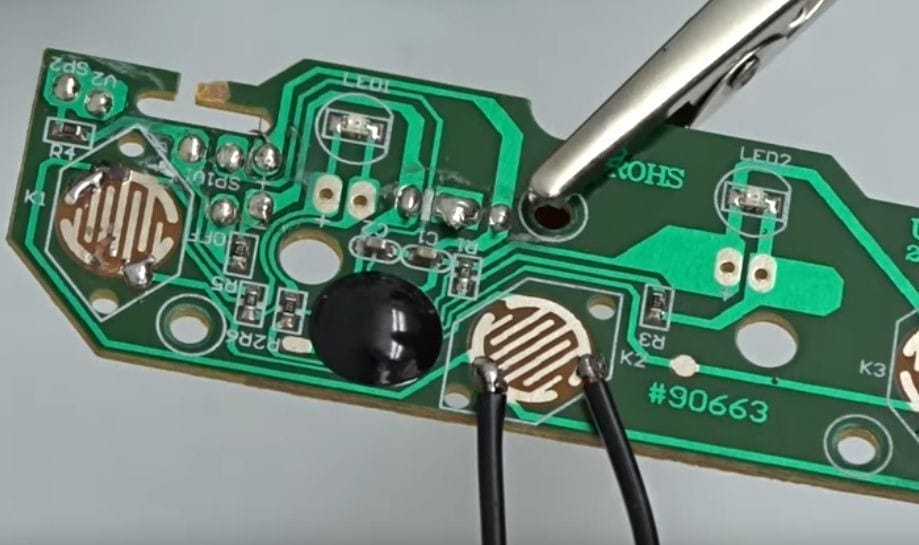
Step 5: Solder the Wire
You now have a bit of solder on the circuit board’s spot where the wire will be connected and on the wire’s end.
Attach the wire on the spot and bring the soldering iron’s tip to heat and secure the joint. Submerge the wire onto the molten solder until its end is firmly in place.
If you mess up, you can always reheat the solder or apply more to start again. Repeat the above process to connect any additional wires to the circuit board.
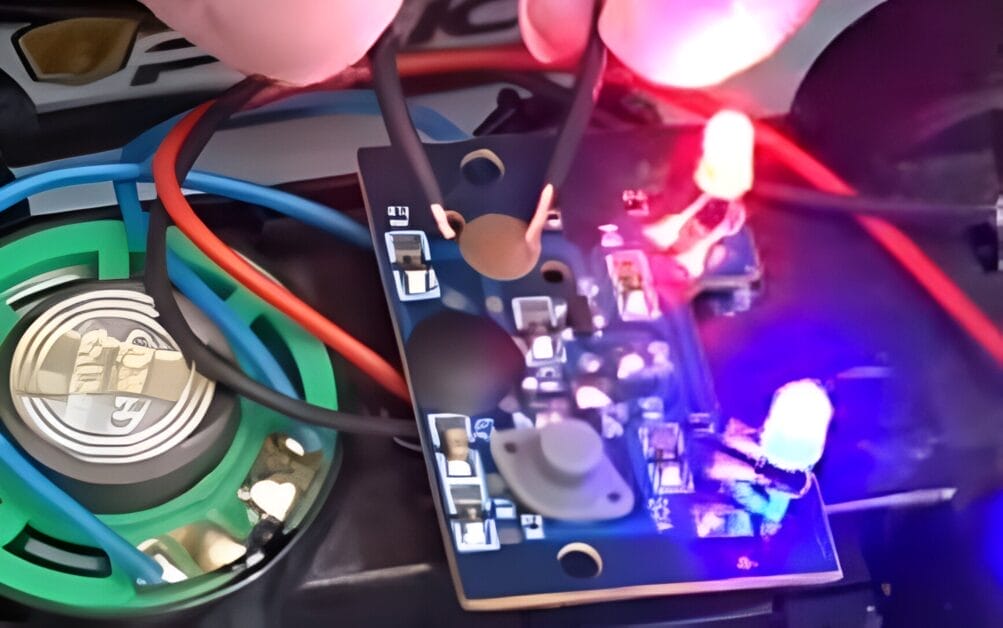
The wires are now soldered to the circuit board, and the board is ready to use.
FAQ: Getting the Perfect Solder Every Time!
Why is my solder not sticking to the Circuit Board?
The solder might not adhere properly due to surface contaminants or oxidation. Ensure the board is clean by wiping it with isopropyl alcohol (90%) before soldering. Also, using a bit of flux can help improve adhesion.
How long should I heat the soldering joint?
Heating the joint just enough to melt the solder and create a smooth connection is essential. Overheating might damage the circuit board or the components. A few seconds should suffice, but it can vary based on the soldering iron’s temperature.
What type of solder should I use?
For electronics, it’s recommended to use rosin-core solder. It melts easily and flows smoothly, making it perfect for circuit boards.
I’ve burnt my Circuit Board; what now?
It happens to the best of us! If you’ve accidentally burnt or damaged a section of your board, assess if the damage is superficial or if it has affected the board’s traces. You might need a jumper wire to bypass the damaged trace if it’s the latter.
Do I always need to use flux?
While not always necessary, flux can greatly assist in the soldering process. It helps the solder flow and adhere better. However, clean off any residual flux after soldering to prevent potential issues.
How can I avoid cold solder joints?
Cold solder joints occur when the solder doesn’t melt completely. They can be brittle and might not conduct electricity well. Ensure the soldering iron is at the right temperature and that the wire and the board are adequately heated before applying the solder.
Can I solder wires of different gauges together?
Yes, you can. However, it might require more skill as thicker wires take longer to heat up. Ensure both wires are heated evenly for a secure joint.
How do I know when my soldering iron is ready?
Most soldering irons take a few minutes to heat up. Touch the solder to the tip; it’s ready to go if it melts instantly!
I made a mistake. How do I desolder?
No worries! You can remove the unwanted solder with a solder sucker or desoldering braid. Heat the joint and use the tool to remove the molten solder.
References
Books:
- J. M. Hughes. Practical electronics: Components and techniques. O’Reilly. 2015. https://www.oreilly.com/library/view/practical-electronics-components/9781449373221/
Video References:
Toy Adaptation Program