12 min read
How to Wire Two Outlets in One Box (6 Easy Steps)
Have you ever wondered how to wire two outlets in one box? Well, you’re in luck! I’m here to break it all down for you.
Quick Summary: Ready to tackle wiring two outlets in one box? It’s easier than you think! We’ve got it all laid out in 6 simple steps:
🔒 Step 1: Safety Precautions and Power Shutdown
📦 Step 2: Prepare the Outlet Box
🔌 Step 3: Stripping Wires Like a Pro
🔗 Step 4: Connect the Wires
🛠️ Step 5: Outlet Installation Time
✅ Step 6: The Final Check-Up and Test
In this article, we’re rolling our sleeves and diving into the nitty-gritty of wiring two outlets in one box. Plus, I have many tips to keep your wiring efficient and safe.
So, grab your tool belt, and let’s turn that confusion into a can-do attitude.
Essential Tools and Materials for Wiring Two Outlets
I keep several materials and tools on hand when wiring two outlets in one box.
- 12-gauge wire is a staple in my toolbox, although you could use 14-gauge if it suits you better. I always make sure to have some 12/2 Romex lying around because it’s handy for many jobs, not just wiring outlets.
- Romex wire is about 8 inches long each. These wire sets consist of a white neutral wire, a black hot wire, and a bare copper wire for grounding. Wire stripping is a crucial part of this process, stripping down about ⅝ inch of the outer covering.
- Screwdriver and Needle-nose pliers are essential for loosening screws and straightening hooks on wires.
- Wire strippers come in handy for removing the sheathing from wires, exposing approximately ⅝ inch of bare wire.
Step by Step in How to Wire Two Outlets in One Box
Alright, DIY enthusiasts! Wiring two outlets in one box might sound like a challenge, but it’s doable and enjoyable with the right approach.
Let’s dive into the step-by-step process to ensure you get this right the first time, safely and efficiently.
Step 1: Safety Precautions and Power Shutdown
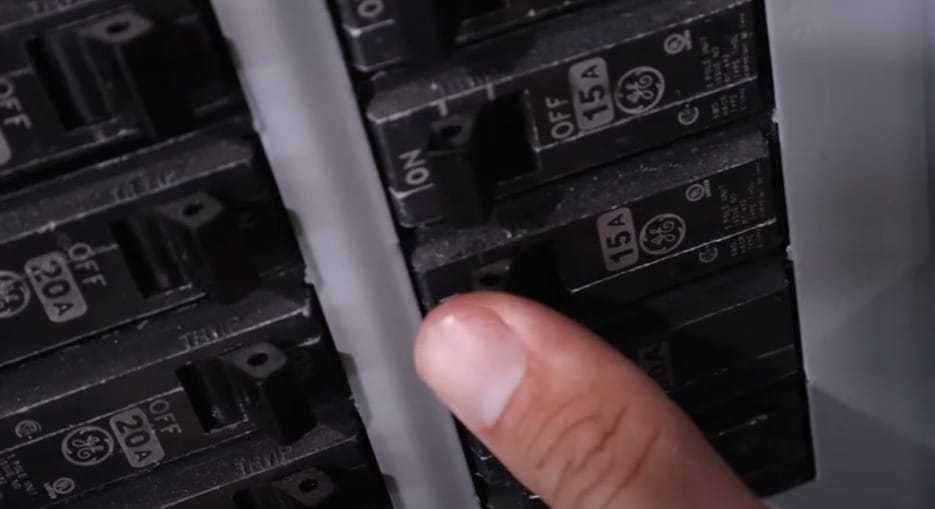
No project is worth risking your safety for. Before starting this electrical job, ensure the power is turned off to your working outlet. You can utilize a voltage tester to double-check for power at the outlet.
Afterward, visit the electrical panel to turn off the corresponding breaker. If you’re uncertain about the right breaker, shutting off the main breaker for the entire house is safer.
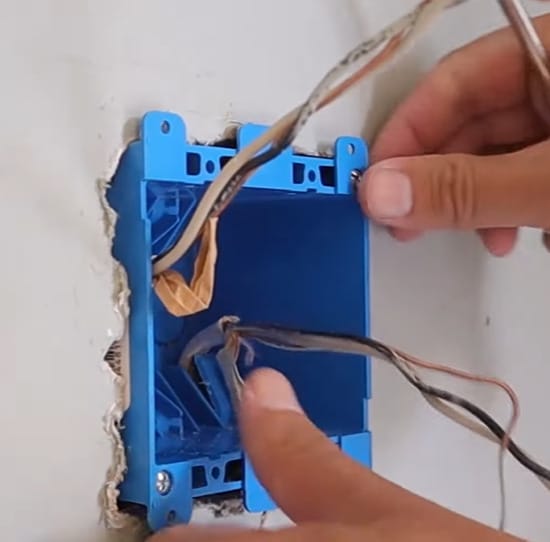
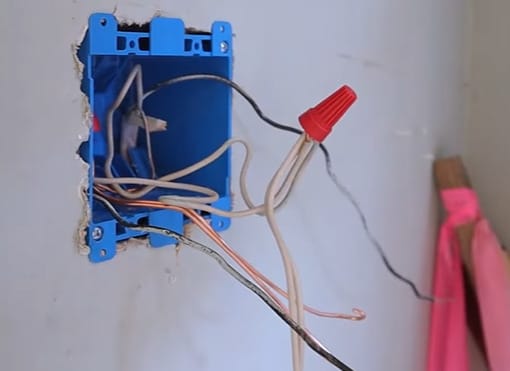
Step 2: Prepare the Outlet Box
- Remove the old outlets if you’re working with an existing outlet box.

- If it’s a new installation, ensure the box is securely mounted and the appropriate wires (usually one black, one white, and one ground wire) are pulled through.
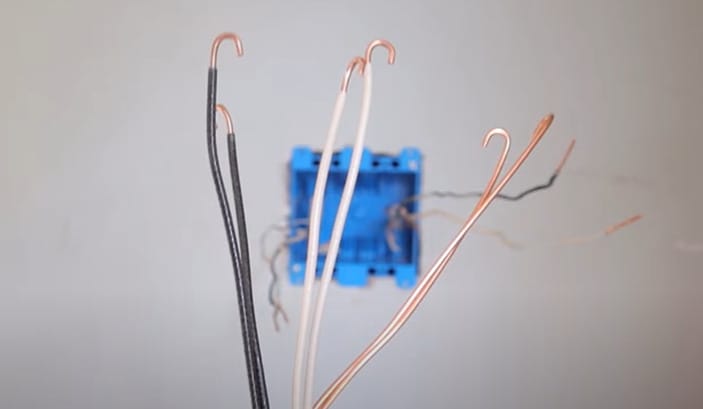
Step 3: Strip the Wires
Let’s talk about wire stripping.
- Step 1: To get them ready for connection, you’ll have to strip the sheathing from the wires, exposing about 3/4 inch of the bare wire. You can do this using a wire stripper.
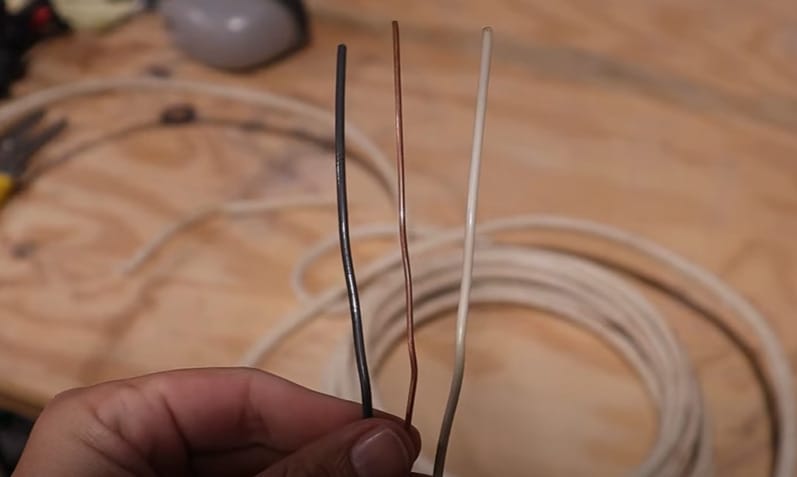
- Step 2: Also, you’ll need to prepare the wires into hooks for connection. Don’t forget to use your needle-nose pliers to bend these wires into hooks.
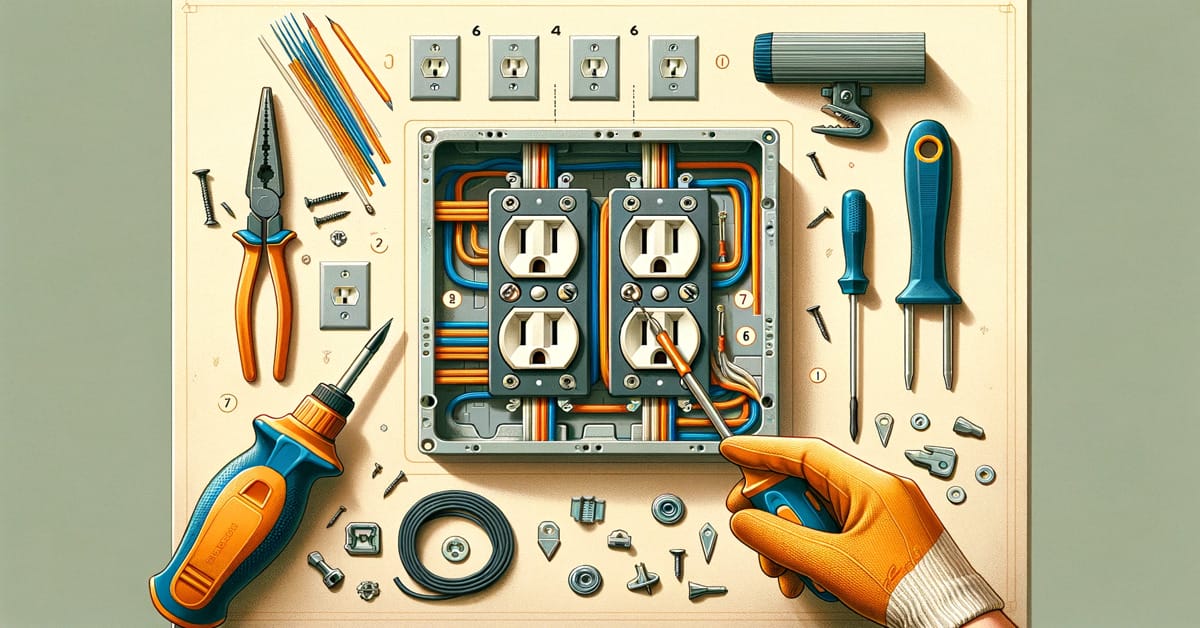
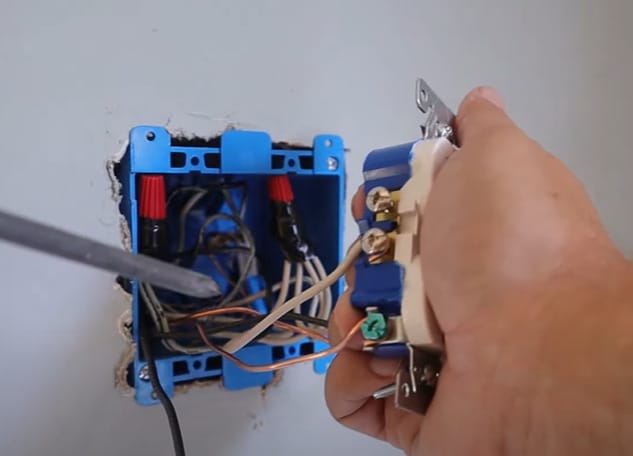
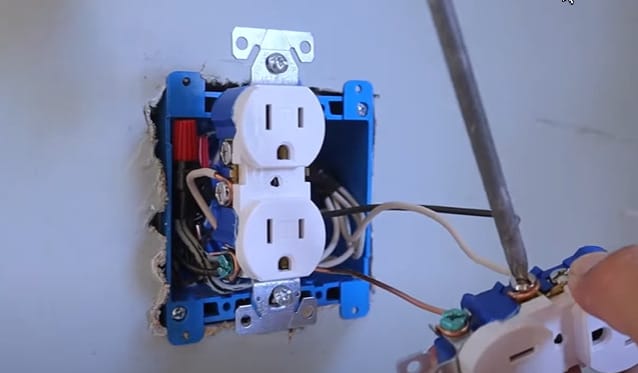
Step 4: Connect the Wires
We’ll make the crucial electrical connections, ensuring each wire is securely attached to its corresponding outlet terminal.
- Step 1: Gather all black wires; those are your hot wires full of energy. Twist them together with a wire nut like they’re old friends at a reunion.
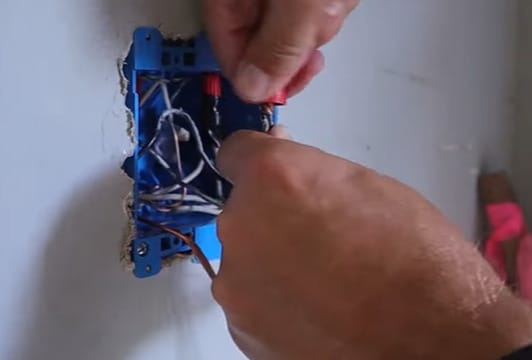
- Step 2: Attach a pigtail to that group and hook it up to the brass screw on each outlet, making a solid connection to power up your life!
- Step 3: Next up, the white and neutral wires keep the current in check. Wire nut these peacekeepers together, smooth and sleek.
- Step 4: Send out a pigtail from that bunch to the silver screw on each outlet – this is where the balance happens.
- Step 5: Finally, your ground wires; don’t let them feel left out. They’re the safety net, so get them all together with a wire nut for a group hug.
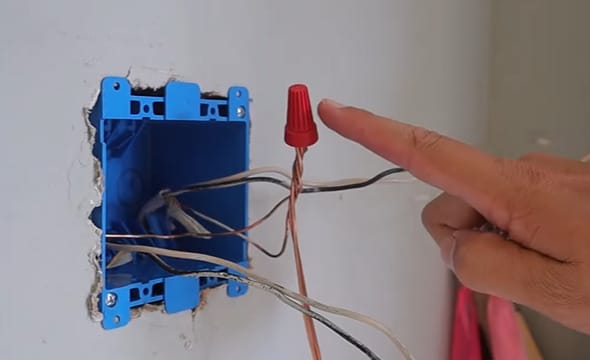
- Step 6: Lead a pigtail out to the green screw on each outlet, creating a safe path for any stray currents.
- Step 7: Do the same steps above for the second outlet.
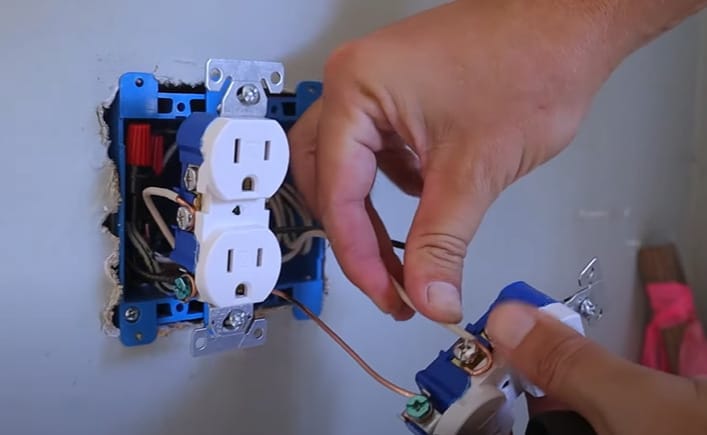
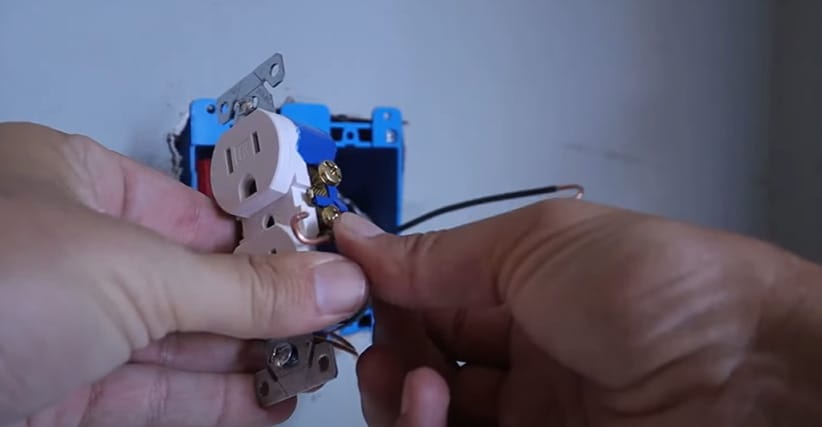
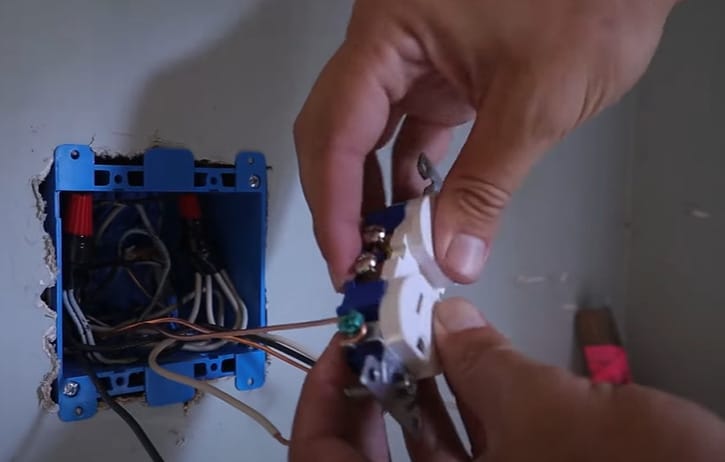
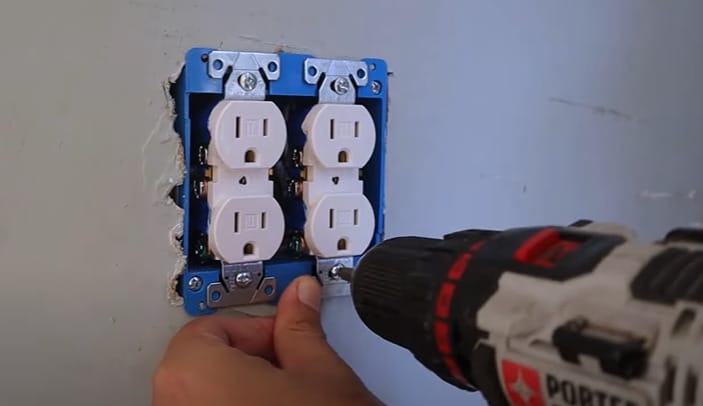
Step 5: Install the Outlets
With your outlets wired, they need to be secured in the electrical box. This task calls for a fair amount of precision.
- Step 1: Bend the wires to allow them to fold neatly into the box.
- Step 2: Panel screws should be tightened until the outlet is steady and snug.
Step 6: Final Wiring Check and Testing
Last but not least is the final wiring check and testing.
- Step 1: After everything is set up and secure, turn the power back on from the breaker and test your new double-outlet work.

- Step 2: Turn off the power again, attach the cover plate to the outlets, then turn the power back on for a final test.
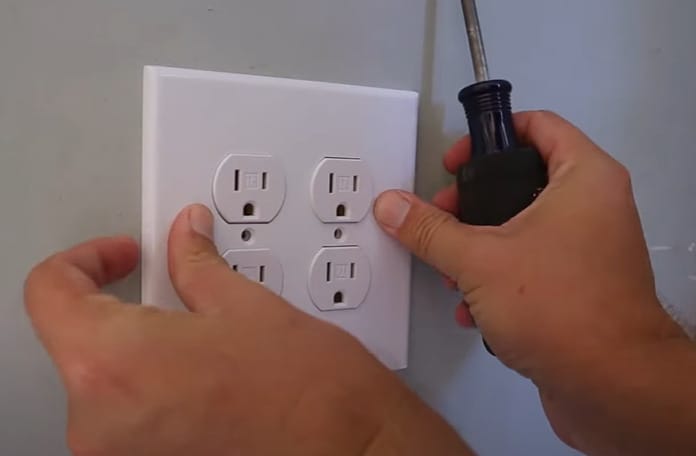
Remember, safety is always the number one priority!
Troubleshooting Tips
Are you having trouble with your outlet wiring? Don’t sweat it! Here’s how to tackle some common hiccups you might encounter:
- Wire Doesn’t Fit: If your wire isn’t fitting properly into the terminals, it’s likely due to improper stripping or bending. Check that you’ve stripped about ⅝ inch of the insulation off. If it’s still a tight fit, ensure the wire isn’t out of shape. A straight, neatly stripped wire makes all the difference.
- No Ground Wire: Came across a box without a ground wire? This can happen, especially in older homes. In this case, you should install a ground fault circuit interrupter (GFCI) outlet for safety. This outlet will protect against electrical shock even without a ground wire.
- Loose Connections: Do you feel like your wires are a bit wobbly? Loose connections can lead to serious problems. Tighten those screws snugly, ensuring the wire hooks are well secured under the screw heads. A stable connection is key to a safe outlet.
- Breaker Keeps Tripping: If your breaker trips when you turn the power back on, it’s a sign something’s not right. Double-check your connections. Ensure the hot (black) and neutral (white) wires aren’t touching or incorrectly connected. Precision here is crucial.
- Outlet Not Working: If your outlet isn’t functioning after all your hard work, it’s time to backtrack. Use a voltage tester to ensure power is reaching the outlet. If it is, re-examine your connections. Sometimes, a simple re-tightening of the screws does the trick.
Remember, patience and attention to detail are your best tools here. Remember these tips, and you’ll have those outlets up and running safely soon.
Tips for Efficient and Safe Wiring Practices
Experience has told me there’s nothing more important than safety regarding electrical wiring. Habits boosting safety are always worth adopting.
Here’s a rundown of tips that’ll keep your project on track and hazard-free:
- Grounding Comes First: Always connect the ground wire first. This little step is a big deal in preventing electric shock. It’s about creating a safe path for any fault current.
- Wire Order Matters: When connecting, it’s ground first, then neutral, and hot last. And when disconnecting, reverse the order. This sequence minimizes the risk during both installation and any future maintenance.
- Circuit Load Knowledge: Be mindful of how much your circuit can handle. Overloading is a common mistake, and it can be costly and dangerous.
- Test Before Touch: Always test for live current before working, even if you think the power is off. A simple test can save you from a world of trouble.
- Neatness Counts: Keep your wires organized and neatly arranged in the box. Crowded or disorganized wiring can lead to shorts and is a potential fire hazard.
- Secure Connections: Double-check that all connections are secure. A loose wire can lead to arcing and overheating.
- Stay Informed: Keep up with the National Electrical Code and local regulations. They’re updated for a reason – for your safety.
- When in Doubt, Professional Shout: If you’re unsure, there’s no harm in calling a professional. Sometimes, the smartest DIY move is knowing when to involve an expert.
Remember, efficient wiring is safe wiring. Take your time, follow these tips, and you’ll have a job that’s well done, up to code, and safe for the long haul.
FAQ Section: Your Wiring Questions Answered
- What’s the Difference Between 12-gauge and 14-gauge Wires?
- 12-Gauge: This is thicker and can handle more current, making it ideal for outlets that power larger appliances or multiple devices.
- 14-Gauge: Slightly thinner, this wire is typically used for lighting circuits or outlets with less load. Remember, using the right gauge is crucial for safety and efficiency.
- How Do I Identify Which Breaker Corresponds to My Outlet?
- To find the right breaker, plug a lamp or radio into the outlet and turn it on. Then, head to your breaker panel and start flipping breakers off individually. When the light or radio turns off, you’ve found your breaker. It’s a simple trick, but it works like a charm.
- Can I Use a 14-gauge Wire on a 20-amp Circuit?
- It’s a no-go. A 14-gauge wire isn’t designed to handle the load of a 20-amp circuit. Stick to 12 gauge for these circuits to avoid any risk of overheating or worse.
- Is It Safe to Wire Two Outlets in One Box?
- Absolutely, as long as you follow proper wiring techniques and adhere to safety guidelines. It’s a common practice and completely up to code.
- What If My Outlet Box Seems Crowded?
- If things are tight in the box, ensure you’re folding the wires neatly and not forcing them in. There should be enough room for both outlets without overcrowding. Safety and neatness go hand in hand.
References
Organizations:
- International Association of Electrical Inspectors (IAEI). https://www.iaei.org/
- National Electrical Manufacturers Association (NEMA). https://www.nema.org/
Books:
- “Wiring a House” by Rex Cauldwell. https://www.barnesandnoble.com/w/wiring-a-house-rex-cauldwell/1118175264
- Black & Decker The Complete Guide to Wiring. https://www.barnesandnoble.com/w/black-decker-the-complete-guide-to-wiring-updated-8th-edition-cool-springs-press/1141325337
Website Resources:
- The Spruce – Electrical Repair Tutorials. https://www.thespruce.com/electrical-4127800
- DoItYourself.com – Electrical Section. https://www.doityourself.com/scat/electricandelectron
Video References:
How To Home