15 min read
How to Make a Wire Stripper (18 Steps)
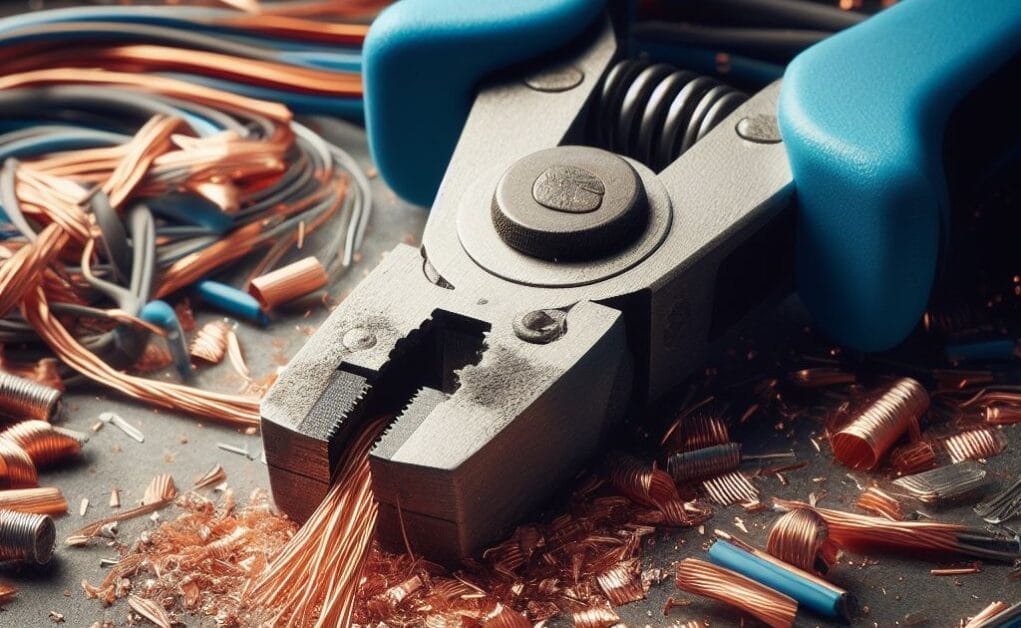
A wire stripper is a dedicated tool for stripping the insulation layer off the ends of wires, but how do you strip wires or make a wire stripper if you don’t have one?
You can use alternatives, which I’ve mentioned at the end. The type of wire stripper I will show you how to make is a special one normally used for stripping the entire insulation off, i.e., a full wire stripper.
To make a full wire stripper, you will need metallic pieces, bolts, nuts, washers, spur gears, threaded rods, and a handle. The procedure involves cutting and drilling holes and takes 18 steps.
I will guide you step-by-step on how to make a full-wire stripper to strip wires easily.
Making a Full Wire Stripper
The type I will show how to make is a full-wire stripper.
So, if you want to make a full wire stripper to completely remove the outer sheathing of a cable to separate the wires inside or to extract copper, this method is for you. See the end for simpler types of wire strippers.
Obtain the items below and follow the steps to make your own full wire stripper. [DIY FixMan]
Requirements
| Materials | Tools |
| Square metal tiles (2 pieces, about 6-8”) Long bolts Threaded rod Nuts Washers Spur gears (angled, one pair) A small rectangular piece of metal Handle | Vernier caliper Hole punch Drill machine Marker Grinder Vice grip Clamp |
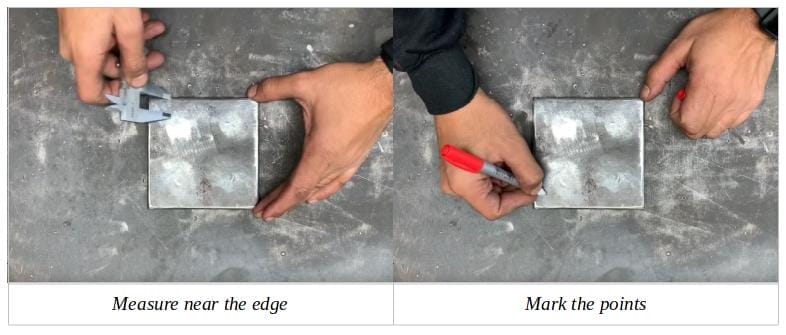
Step 1: Mark Corner Holes
Get a metal tile, about 12” square, and mark 4 equidistant points close to the corners, about 1-2” from each edge.
Use a ruler or vernier caliper for greater precision. Mark the points using a marker.
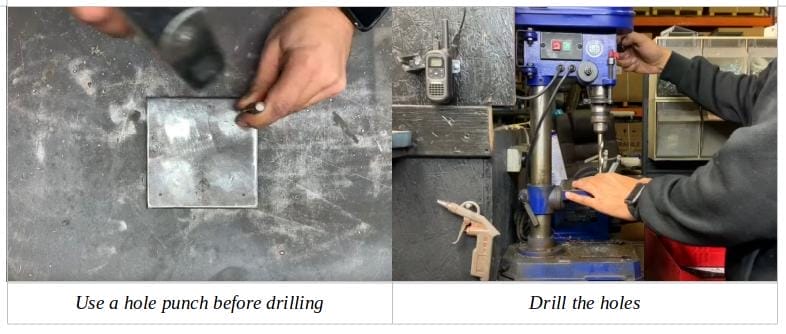
Step 2: Drill Holes
Gently use a hole punch on the marked spots to make drilling easier.
Drill holes on the marked spots using a drill machine.
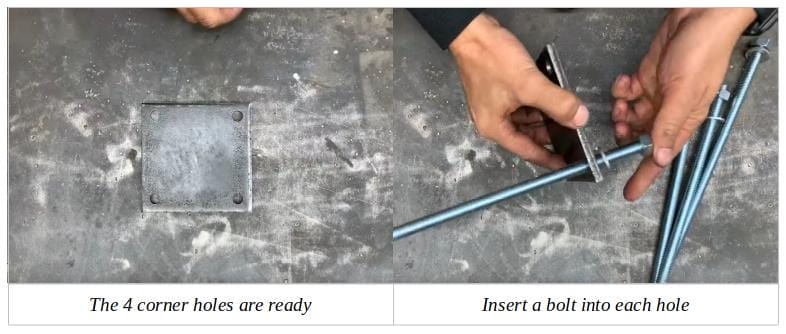
Step 3: Insert the Bolts
Insert 4 bolts into the 4 corner holes you created.
Choose a length according to how high you want the wire stripper to be. Make it around 10-12” if unsure. Use washers at the base, as shown.
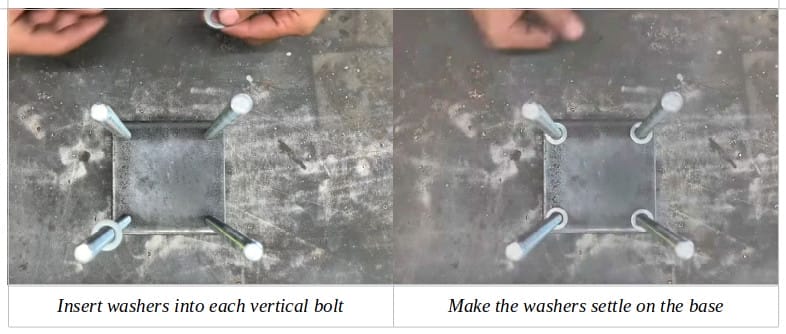
Step 4: Insert Washers
Insert a washer on each bolt from the top after inserting the 4 bolts. So, there should be a washer on both sides of each bolt.
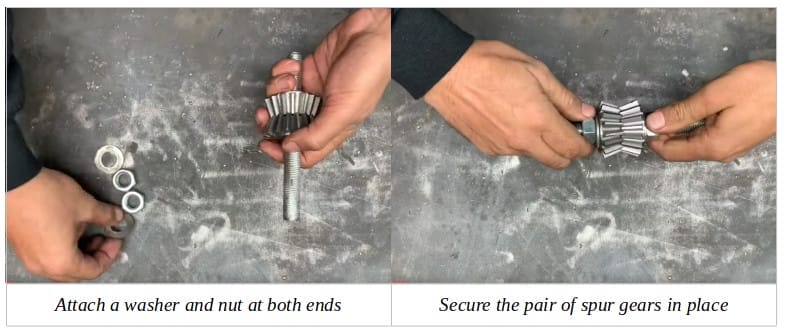
Step 5: Prepare the Spur Gears
Put a couple of angled spur gears in the center of a bolt, as shown below, and fix it in place using a pair of washers and nuts at each end.
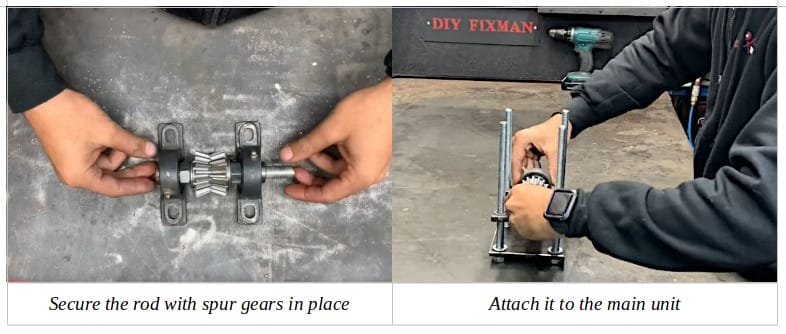
Hold the gears in place further using 2 brackets, as shown below. The brackets should have holes at each end equal in distance to the holes you marked in Step 1. Then, please insert it into the main unit.
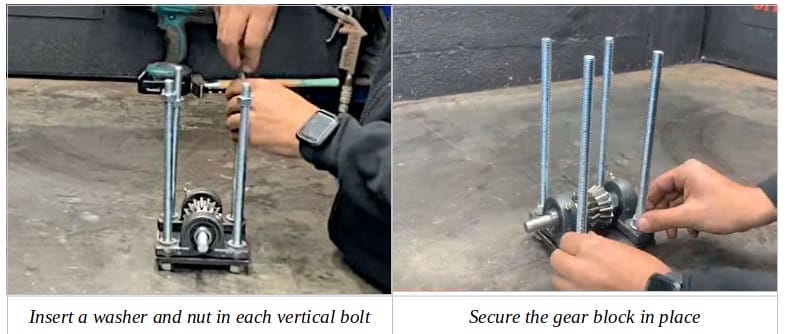
Step 6: Secure the Gear Block
Insert an extra set of washers and nuts to secure the gear block.
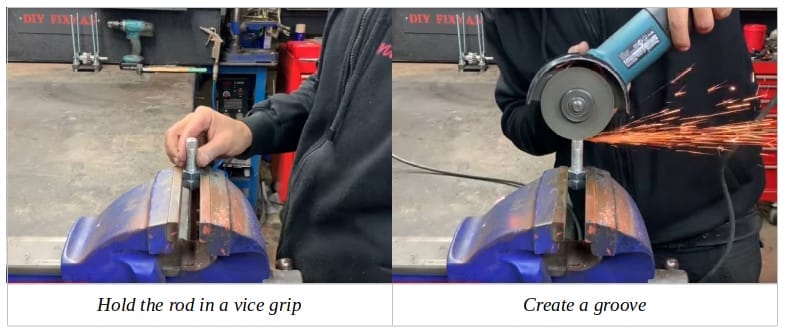
Step 7: Cut Grooves
Get a piece of threaded stud or rod (headless bolt), attach two nuts on one end, and cut a groove at the other end, about half an inch deep through the center.
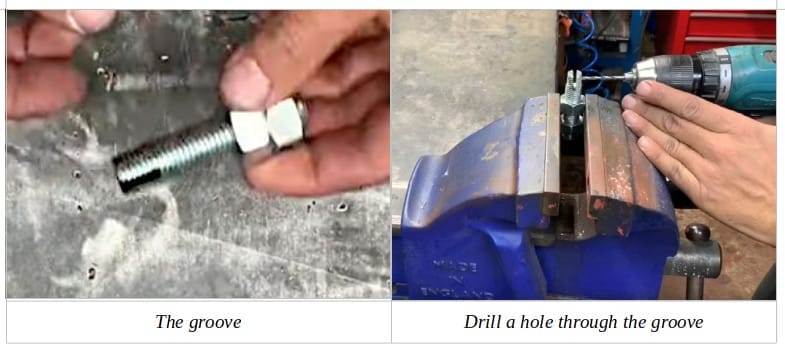
Step 8: Drill a Hole
Drill a hole through the groove you created above. This is for a washer you will insert inside the groove created in Step 7. The washer will strip the insulation off wires, so choose one with a sharp edge.
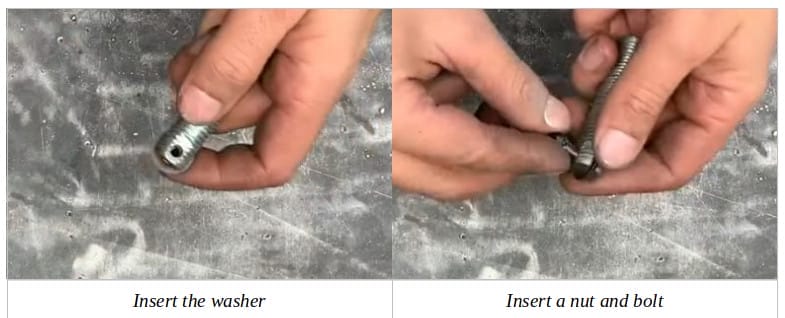
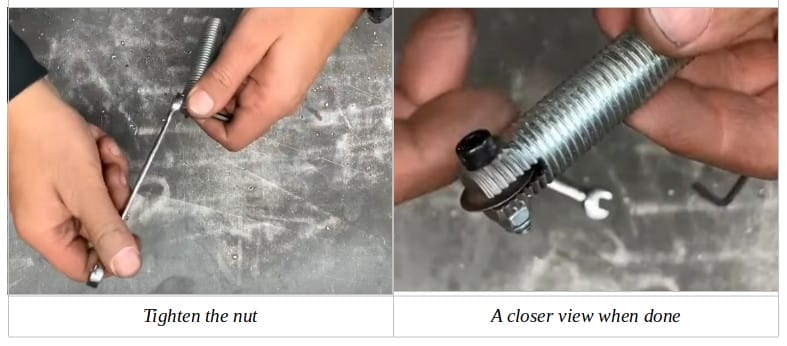
Step 9: Secure the Washer
Secure the washer in place using a nut and bolt through the hole you created in Step 8. Tighten the nut. You have now created a cutter or stripper.
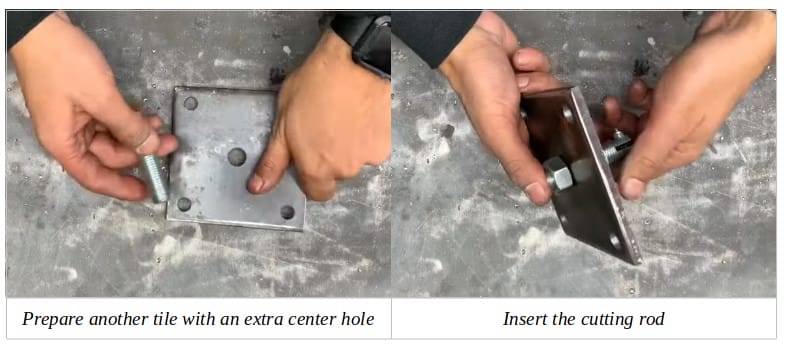
Step 10: Prepare Another Tile
Prepare another tile, as you did in Step 1. But create an additional hold in the center for the cutter you made in the previous step. Insert the cutter rod in this center hole and secure it with a nut.
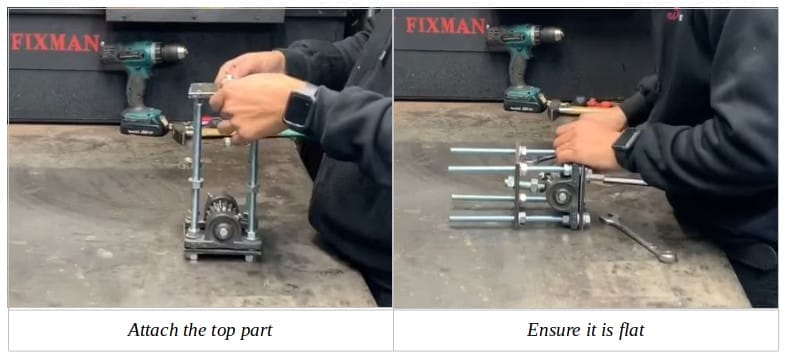
Step 11: Attach the Top
Attach the part you made in Step 10 to the main unit’s top.
Set it on top of the middle nuts on each long vertical bolt so that it is flat, i.e., balanced with equal height. In the second picture below, the whole unit was placed on its side temporarily to ensure equal spacing using a vernier caliper.
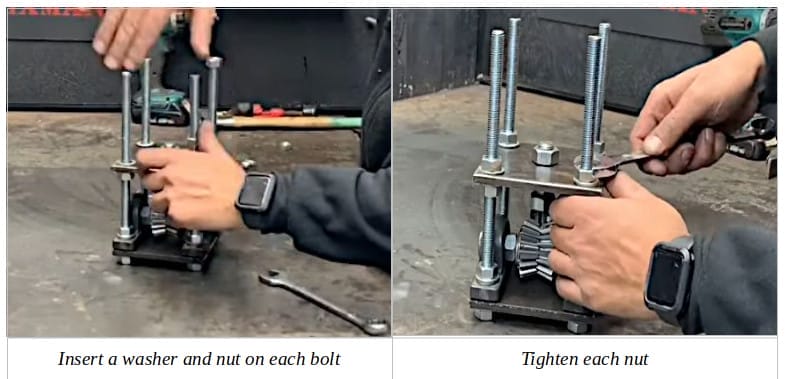
Step 12: Secure the Top
Secure the top of the unit with more washers and nuts.
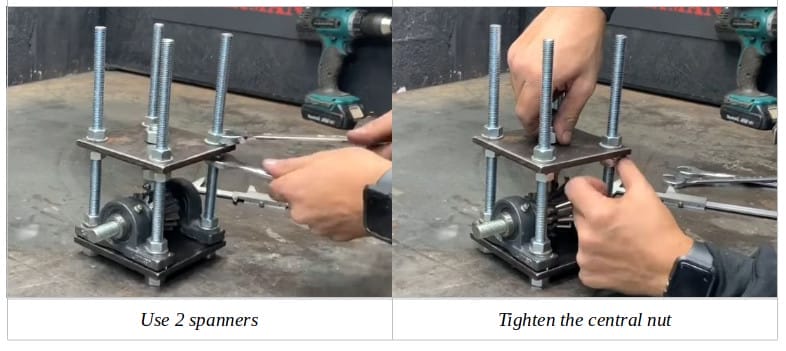
Tighten the nuts. You may need a pair of spanners or one spanner, a wrench to hold the bottom nut so it doesn’t rotate, and one to tighten the top nut. Tighten the center nut as well.
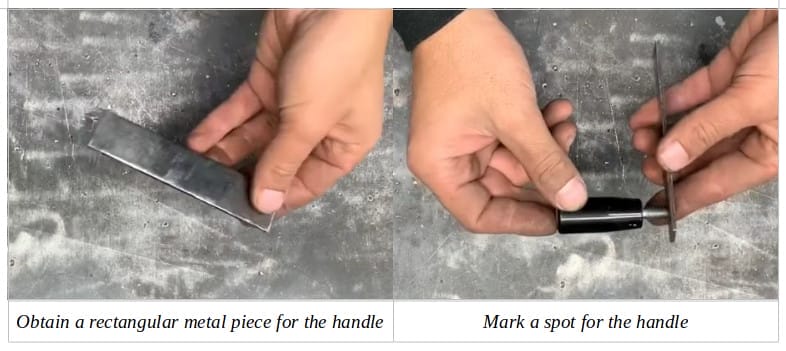
Step 13: Prepare a Handle
We will need to make a handle using a rectangular piece of metal.
We will drill a hole for the handle’s rod to pass through at one end and the threaded rod at the other. Mark the spot for the handle’s rod.
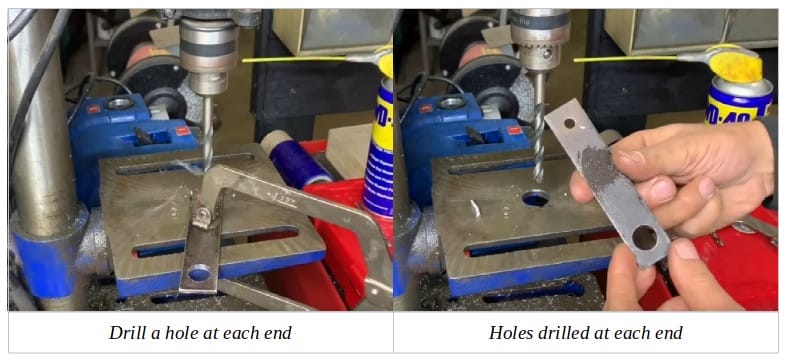
Step 14: Drill Holes
Drill holes in the rectangular piece.
The hole sizes may differ. One should be large enough for the handle and the other for the threaded rod.
Step 15: Set the Handle
Put the handle on the rectangular piece from the previous step and secure it with a washer and nut at the bottom.
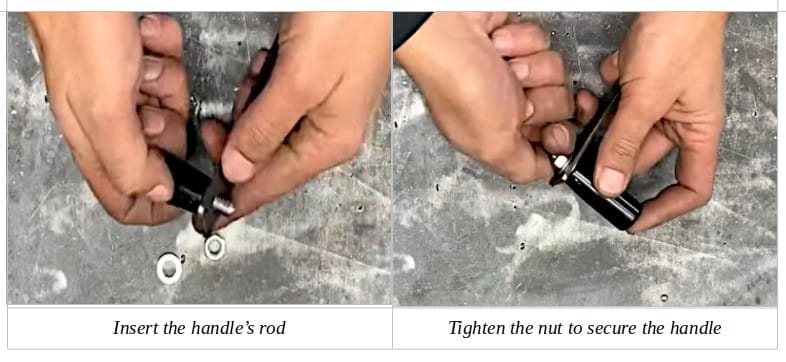
Step 16: Attach the Handle
We will attach the handle you created in Step 15 to the threaded rod with a pair of spur gears in the center.
First, attach a nut and washer before attaching the handle. Then, attach the handle and secure it with another pair of washer and nut at the outer end. The 2 washers must be in contact with the handle’s rectangular piece.
Don’t tighten the nuts too much. It should be tight enough to hold the handle in place but a little loose to allow the handle to rotate.

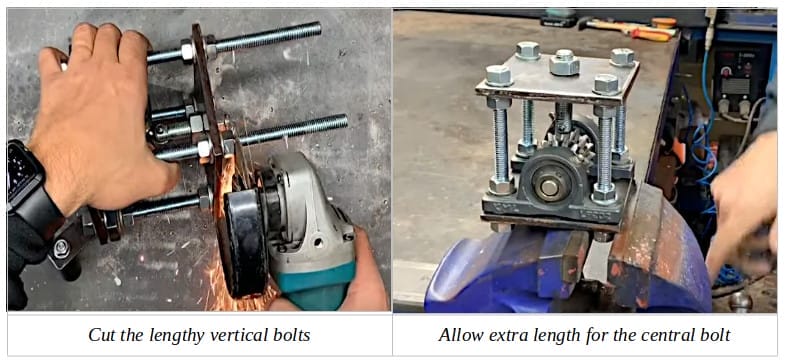
Step 17: Cut the Vertical Bolts
If the vertical bolts are too long and stick out too much, cut them to the required length.
They should be a little higher than the top nuts, but allow extra height for the central bolt, as you will need to adjust the height of the cutting rod according to different cable sizes.
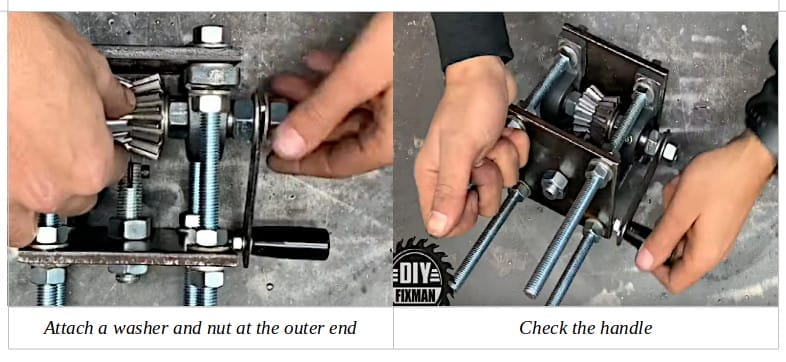
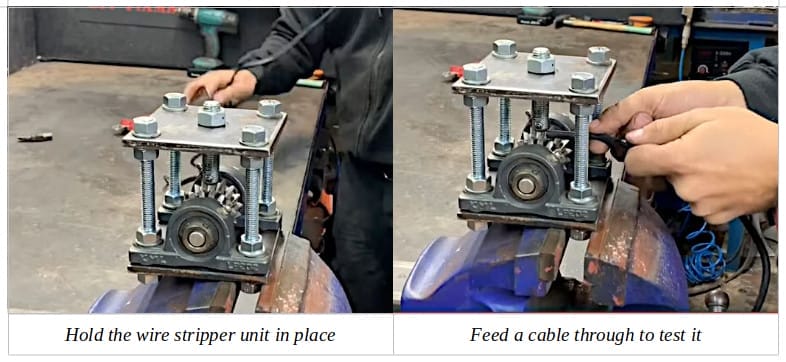
Step 18: Final Adjustments and Testing
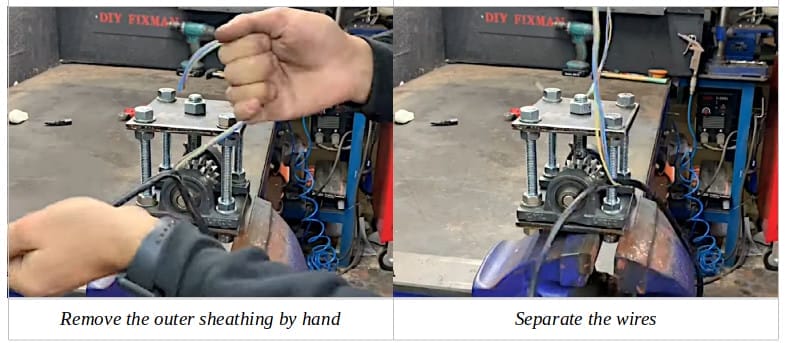
Hold the wire stripper unit in a vice grip and run a cable through to test it.
You may need to adjust the height of the central cutting rod for each cable.
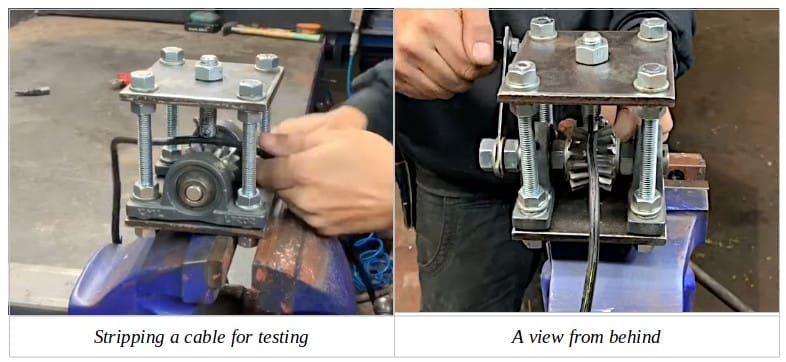
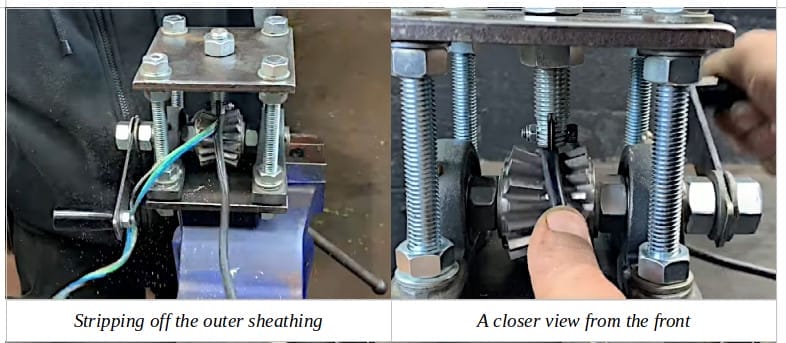
The wire stripper will strip the cable, but you may need to pull the outer sheathing off by hand to separate it from the wires inside.
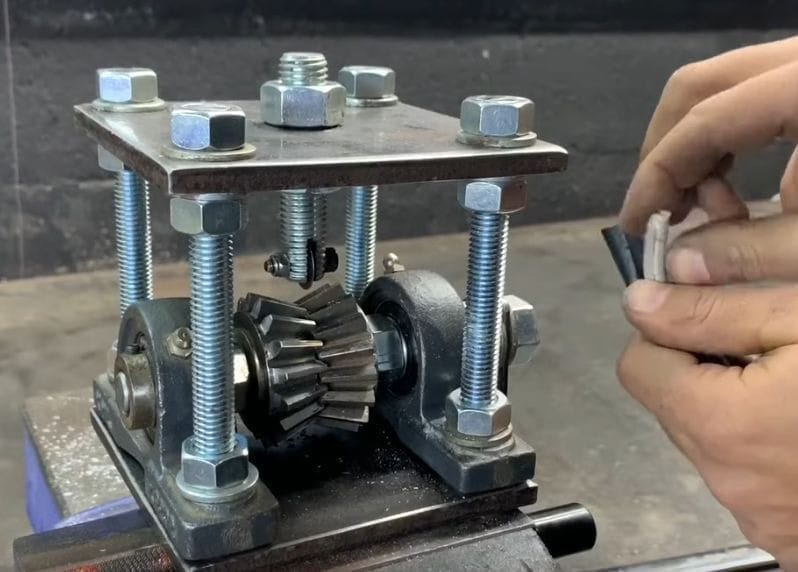
Final Form
After following the above steps, the final form of your new wire stripper should look something like this:
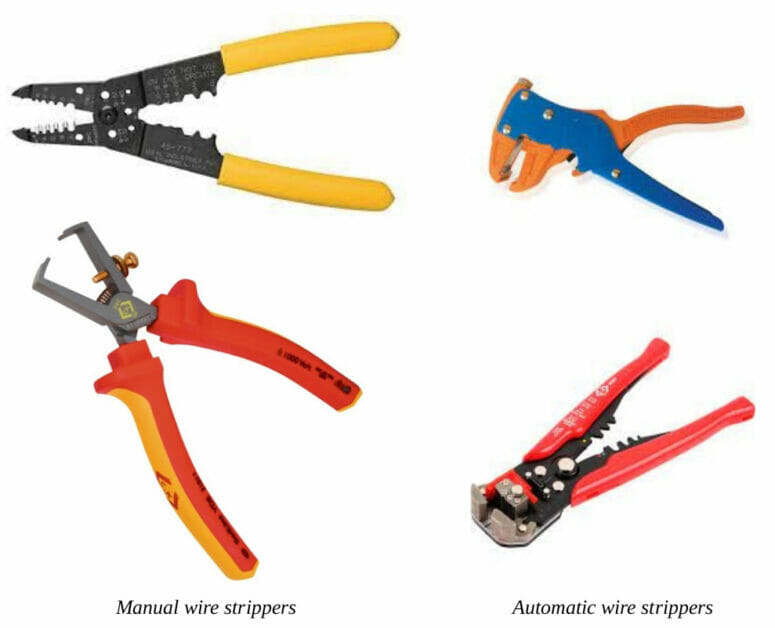
Alternative Tools
Wire Strippers
A wire stripper is a tool for stripping wires, i.e., removing the insulation from their ends.
They fall into three general categories: manual, automatic, and full. The first two types are shown in the sample below.
You don’t normally need to make one of the above wire strippers because you can use alternatives. Suitable alternatives for stripping wires are:
- A multipurpose tool
- Pliers
- Utility knife
However, unlike a proper wire stripper, they’re not specifically designed for wire stripping, so you must take extra care.
For instance, if using a utility knife, be careful not to nick the wire. Also, don’t strip a wire by circling the insulation and cutting it with pliers. It might pull off the insulation but also cut the conductor inside, which can break off at some point.
A wire stripper is a dedicated tool for this specific task, and some can also be used for cutting wires and forming hooks. Wire strippers have precision blades and depth-of-cut gauges for stripping an exact amount of insulation from a wire of a given size without cutting into it.
FAQ Section: All About Wire Strippers
What is a wire stripper?
A wire stripper is an essential tool designed to remove the insulation layer from the ends of wires, revealing the metal conductor inside. They’re perfect for electrical tasks where wires need to be connected.
Why would I need to make my own wire stripper?
While readily available in stores, sometimes you might be in a pinch and need a wire stripper immediately. Making your own can also be a fun DIY project, especially if you’re a hands-on person who loves tinkering with tools!
What’s the difference between a full-wire stripper and other types?
A full-wire stripper is designed to strip the entire insulation off a wire instead of just the ends. It’s particularly useful to separate the wires inside a cable or extract copper.
I don’t have all the materials listed. Can I substitute?
Absolutely! While the materials listed provide a robust and efficient stripper, you can get creative with what you have. Just ensure that the substitutes are durable and can withstand the stripping process.
Are there risks involved in making my own wire stripper?
As with any DIY project, there’s always a risk if not done correctly. It’s crucial to follow the steps carefully and always prioritize safety. Wear protective gear, and if you’re unsure about a step, seek expert advice.
What if I don’t want to make a full wire stripper?
No worries! The article also mentions simpler types of wire strippers and even alternative tools for wire stripping. These might be quicker to make or find around your workshop.
Are there any safety tips when using a wire stripper?
Yes! Always ensure your hands are dry and free from oil or grease. Wear safety gloves to protect against any sharp edges. When stripping a wire, ensure you’re pulling away from your body. And always be cautious not to nick or damage the wire itself.
Can I use this wire stripper for all types of wires?
The DIY full-wire stripper is versatile but may not be suitable for very thin or very thick wires. Adjustments may be needed based on the wire’s size. Always test on a small section of wire first.
How do I maintain my DIY wire stripper?
Keep the metal parts clean and rust-free. After use, wipe down to remove any debris. If there are moving parts, consider lubricating them occasionally for smooth operation.
Where can I find more DIY projects like this?
There are numerous resources online, from DIY blogs to video tutorials. The article references DIY FixMan, which is a great place to start for hands-on projects!
References
Website Resources:
- Automatic wire strippers
- Manual wire strippers
Video References:
DIY FixMan