14 min read
How to Ground an Outlet without a Ground Wire (Steps)
If you need to use a grounded outlet but find no ground, I’ll show you how to ground it.
Properly grounding your entire electrical system requires installing a grounding rod in your home, a ground bus in your breaker panel, and adding ground wires throughout. Another option is to replace the outlets with GFCI ones.
To ground an outlet, you must arrange for a ground wire and an outlet that supports it. If your home has older 2-prong outlets with no ground, I recommend replacing the first in each circuit with GFCI outlets. Connect one end to the ground terminal on the outlet with a green screw and attach the other to a metallic part of the outlet’s box.
Continue reading for more detailed information. I’ve also mentioned the relevant NEC code, what option you have if you have the older non-grounded outlets in your home, and given reasons to convince you to ground your outlets.
The NEC Code and Your Options
The NEC Code
The NEC (National Electric Code) requires all 15- and above-amp outlets to be grounded.
Article 406.3C states that you must ground their grounding terminals to a “low-impedance fault current path”, which is a “branch circuit equipment grounding conductor” (NEC 250.146D).
If your home wiring predates this code and doesn’t have grounded outlets, you don’t have to replace them, but it’s better if you do. The outlets might be ungrounded if the wiring was done before the mid-20th century (1960s).
How to Check
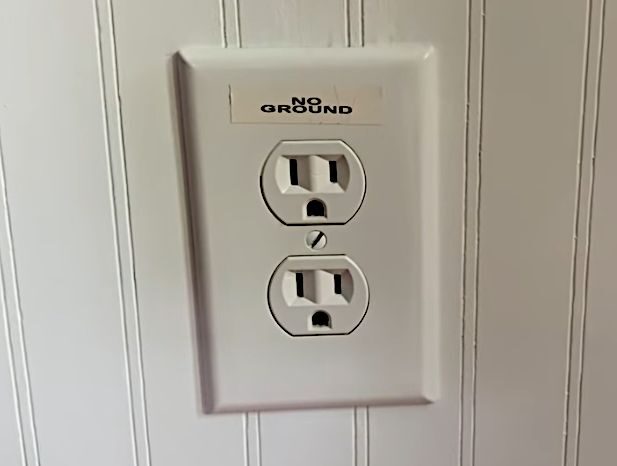
If you’re unsure, you will see holes for only 2 prongs outwardly in ungrounded outlets and 3-prongs in (possibly) grounded outlets, which may or may not be grounded. Either type may or may not have a (detached) ground wire behind it.
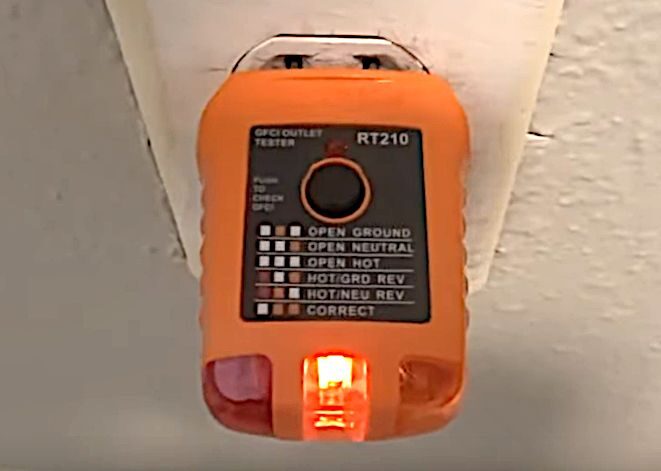
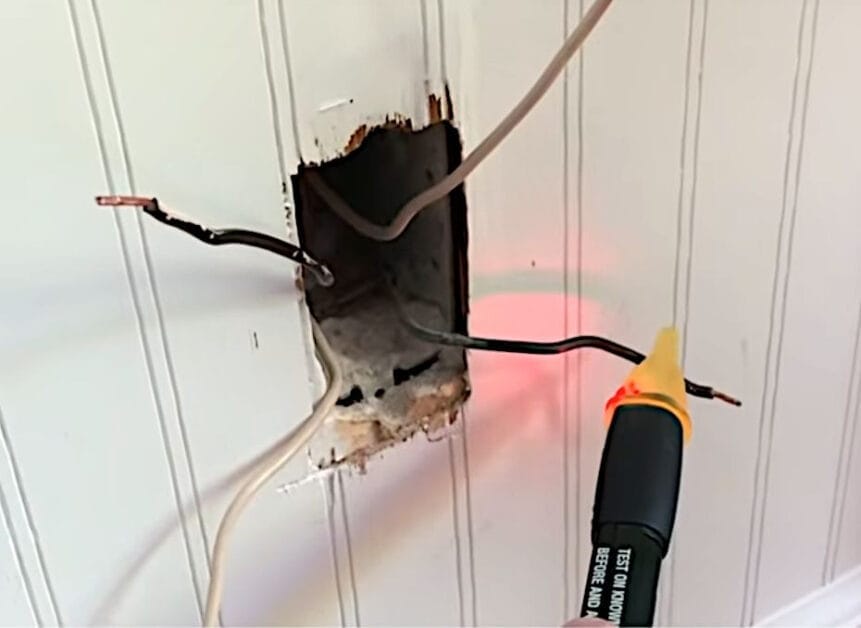
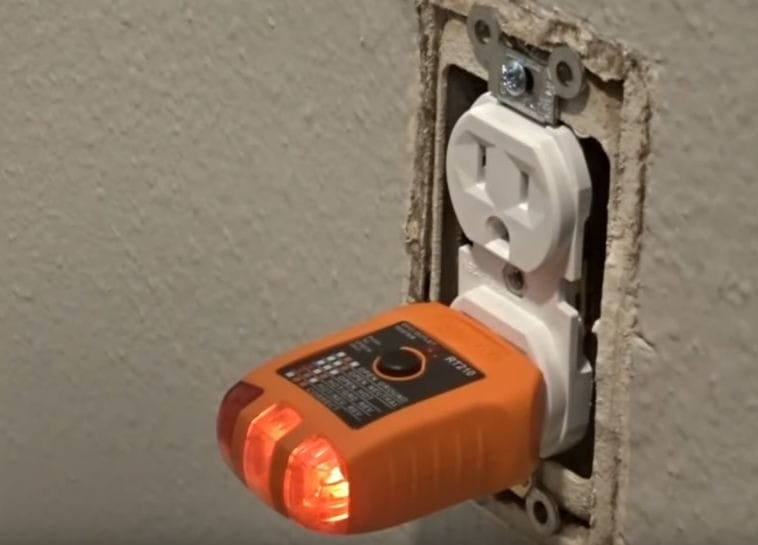
Another way to check externally is using an outlet tester, as shown below. If only the middle light lights up, there’s an open ground, most likely because there is no ground, or if there is, it’s not connected, or else the ground wire is loose.
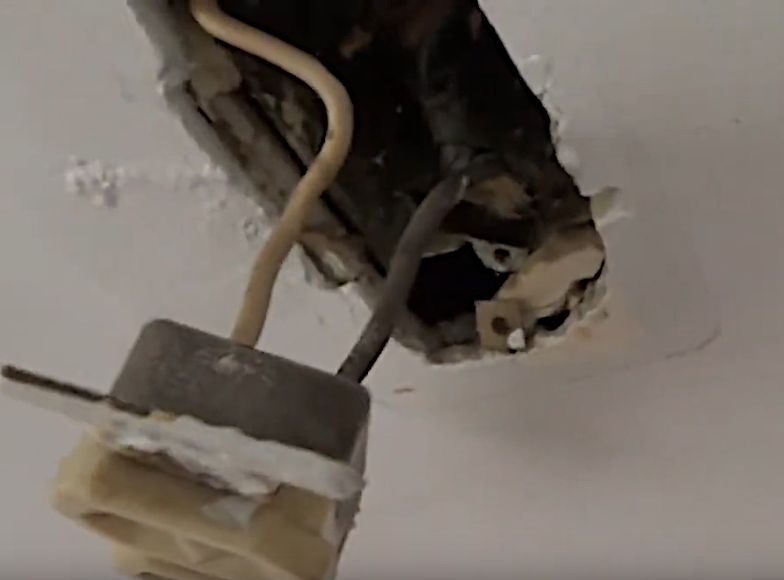
The sure way to know is to open the outlet and see the wires inside.
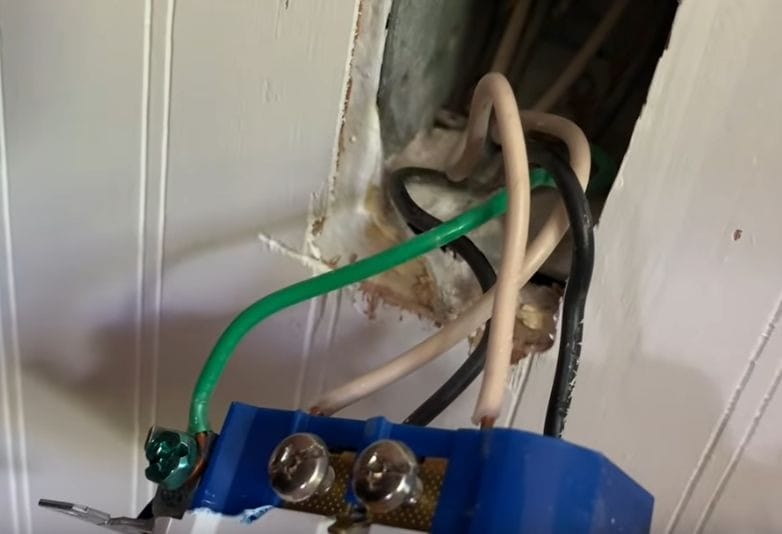
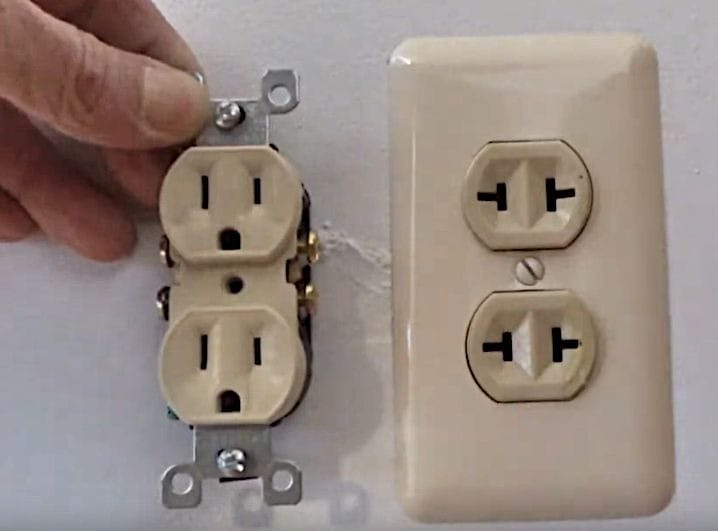
The outlets are ungrounded if you see only 2 wires inside them, i.e., hot (black) and neutral (white) wires, but no ground (bare copper, yellow, or green) wire, or if there is one, it’s not connected. So, you have a 2-wire system if you have only 2 wires or a 3-wire one if you see 3 wires that include the ground wire, whether connected to the outlet or not.
The extra terminal at the back of the outlet, i.e., the ground terminal, if there is one, normally has a green screw on it.
However, just because you see a 3rd ground wire doesn’t necessarily mean you have a grounded system, even if it’s attached to the outlet. The grounding must run to the grounding rod attached to the earth via the grounding bus in the panel.
Your Options
Without a ground wire, you could continue using non-grounded outlets.
But alternatively, you could (and should) upgrade the main breaker panel. It will be costly but worth it for the extra safety. Otherwise, you could use individual GFCI (Ground Fault Current Interrupting) outlets instead for protection from electric shocks, though not current surges.
So, your options are:
- Continue using non-grounded outlets (if already installed before the code came into effect);
- Upgrade the main panel to include a ground bus and ground connections and rewire all outlets to include ground wires;
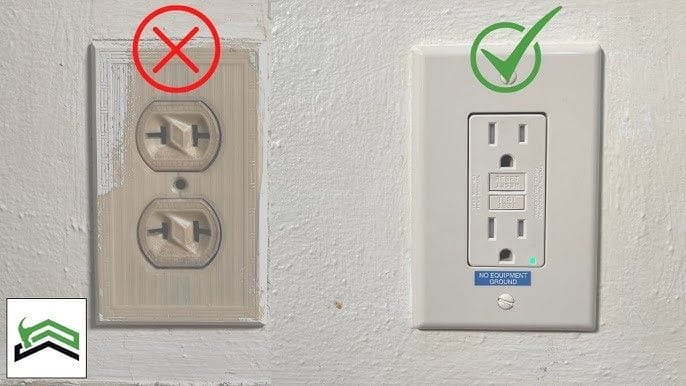
- Use a GFCI-protected outlet, marked “GFCI protected” or “No equipment ground,” as per NEC 210.8 and 406.4(D). This is particularly important in a damp or wet location.
Note that if you have 2-wire circuits in your home and do a branch-circuit extension, i.e., you install a new outlet on an existing circuit, it must be grounded, as per NEC 250.130(C).
Either way, you must ground your outlets. Let’s see why.
The Importance of Grounded Outlets
A 3-wire system is safer than a 2-wire system, as the ground connection helps to prevent electric shocks.
A loose connection, worn insulation, or a broken part inside the outlet may cause shocks. If touching an outlet in such a condition, current would flow through the body to the ground. The situation could also cause overheating and ignite a fire.
The NEC code requiring grounding was introduced to prevent the above. The extra 3rd (ground) wire protects against getting an electric shock by safely redirecting the electric current during a ground fault.
You cannot plug an appliance with a 3-prong (grounded) plug into a 2-prong (ungrounded) outlet. The only solution is replacing it with a grounded outlet, so let’s go through how to do that.
What Grounding Involves
Electrical grounding involves connecting the electrical system to the ground to provide a safe path for current to flow in an emergency.
Article 100 of the NEC defines the ground as “the earth”. Section 250.4(A1) states that grounded electrical systems “shall be connected to earth in a manner that will limit the voltage imposed by lightning, line surges, or unintentional contact with higher-voltage lines and that will stabilize the voltage to earth during normal operation.”
You provide a proper grounding connection to the home circuit by including a ground bus in the panel and connecting it directly to the earth using a metallic ground rod. Nowadays, it is common to have a 3rd ground wire in outlets connected to the ground bus via the ground terminals on outlets and appliances.
If you choose to install a GFCI outlet instead, it will monitor the current and provide shock protection by tripping to stop the flow of electricity if there’s a ground fault. It will provide a significant safety advantage, but only at the point of installation.
Requirements
The typical requirements for replacing a non-grounded outlet are:
- Screwdriver
- Wire cutter and stripper
- Pliers
- Voltage or outlet tester
Replacing a Non-Grounded Outlet with a Grounded One
This method will work if the outlet has a metal box and conduit.
You may have to buy a new outlet if the old one only has 2 prongs or doesn’t have a connection for the ground wire.
Suppose there’s no ground bus in the panel, i.e., the home’s ungrounded electrical system. In that case, I suggest replacing the first outlet in each circuit or running with a GFCI one and powering subsequent (downstream) outlets from it to extend the same ground-fault protection to them.
You can recognize the first outlet in a run because it will have 4 wires instead of 2, and 2 of them (a hot and neutral pair) will be from the power supply and will have power when live. Temporarily restore power and use a non-contact voltage tester to confirm. Turn the power back off after confirming.
Step 1: Turn the Power Off
Turn the power off to the circuit on which the outlet will be replaced. Use a voltage tester to ensure there is no power.
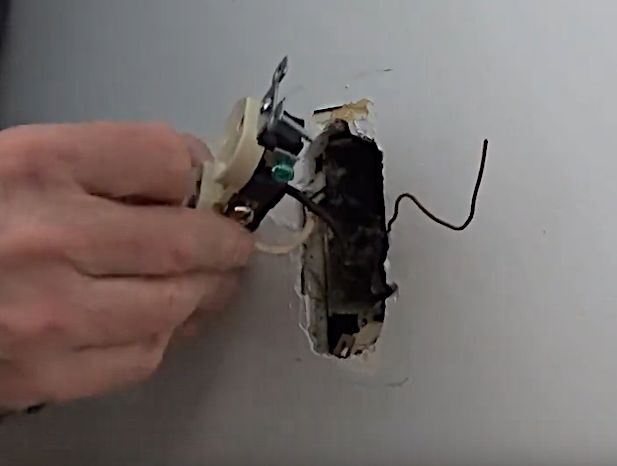
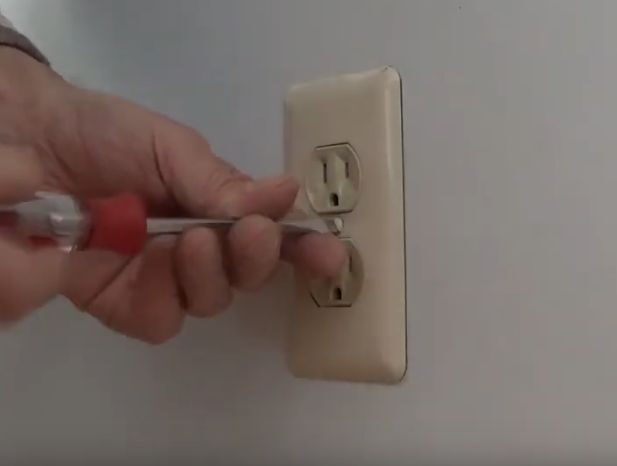
Step 2: Remove the Non-Grounded Outlet
Remove the faceplate and screws on the non-grounded outlet to completely remove it.
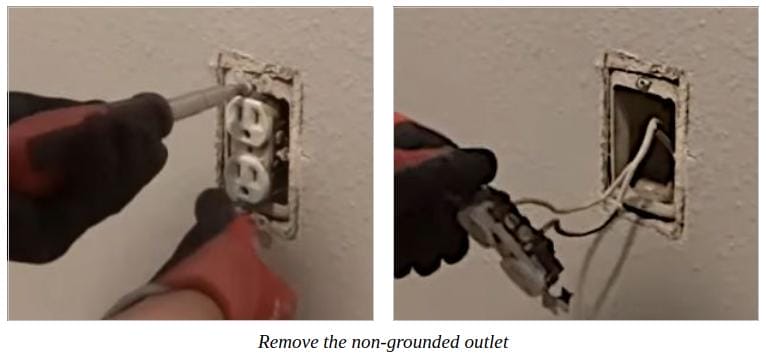
Step 3: Disconnect the Wires
Disconnect the two (hot and neutral) wires from the existing outlet.
Step 4: Connect the Wires
Reconnect the main 2 wires you removed from the old outlet to the new one as follows:
- Connect the hot (black) wire to the brass terminal.
- Connect the neutral (white) wire to the silver terminal.
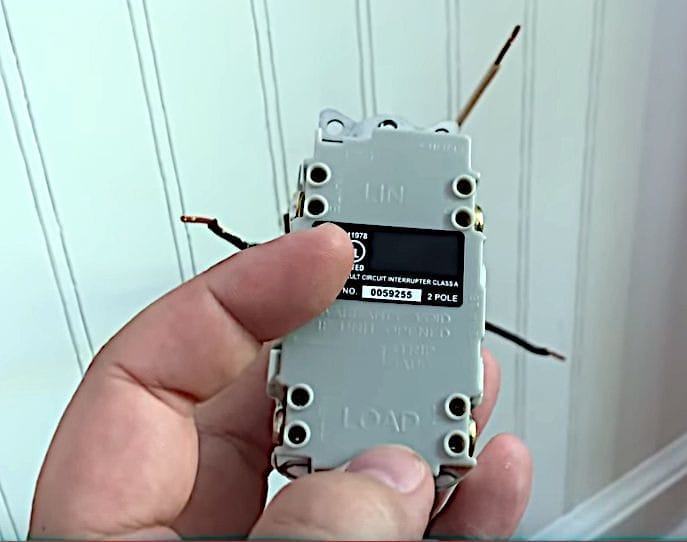
If it’s a GFCI outlet, connect the above 2 wires to the LINE row, not the LOAD one.
If you have 4 wires extending the GFCI protection to downstream outlets, the above 2 wires must be the line wires from the power supply. Connect the other 2 wires to the LOAD row as they run to the next outlet.
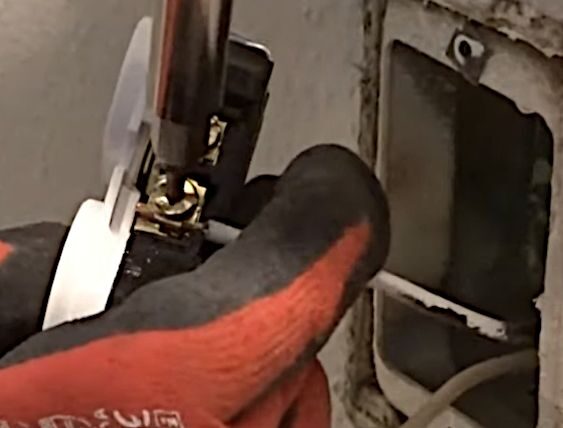
Step 5: Connect the Ground Wire
Some GFCI outlets come with a grounding pigtail. You can attach the clip end to a metallic part of the outlet’s box if you have this type.
Otherwise, connect a small piece of wire to the ground terminal (with a green screw) on the new outlet and the other end to a metallic part of the outlet’s box, which must be grounded.
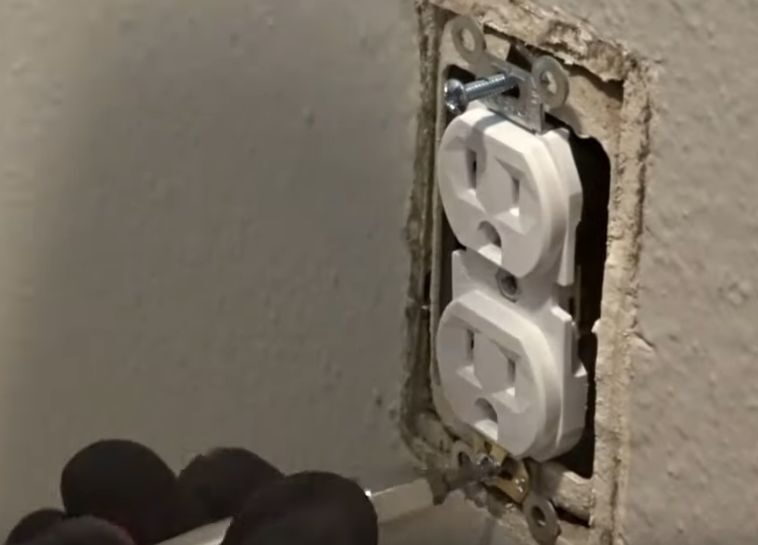
Step 6: Attach the Outlet
Attach the outlet to its box by inserting and tightening the screws.

Step 7: Restore Power and Test
Restore power to the outlet’s circuit and test using an outlet tester again.
The middle and right lights should be on this time, indicating that the outlet is correctly wired and grounded.
Step 8: Replace the Faceplate
Replace the outlet’s faceplate.
Replacing a 2-Prong Outlet with a 3-Prong One
This method is for replacing older-style 2-prong outlets.
It will work if the outlet has a metal box and conduit. You will have to buy a new outlet.
Steps 1-3: Remove the Outlet
The first 3 steps are the same as in the above method:
- Turn the power off to the circuit and check to ensure no power.
- Remove the faceplate and screws holding the outlet to the wall.
- Disconnect the wires attached to the back of the outlet (hot and neutral wires).
Step 4: Arrange the Ground Connection
Take a good look behind the outlet, as you may find an unused or detached ground wire.
You must arrange a ground connection in your home if you don’t. An electrician can do that for you. We will assume you’ve done that now.
Step 5: Connect the Wires
Reconnect the main 2 wires you removed from the old outlet to the new one as follows:
- Connect the hot (black) wire to the brass terminal.
- Connect the neutral (white) wire to the silver terminal.
If it’s a GFCI outlet, connect the above 2 wires to the LINE row.
Step 6: Connect the Ground Wire
Connect the ground wire to the new terminal with a green screw. The other end should be attached to a metallic part of the outlet’s box.
Steps 7-9: Attach the Outlet
Follows steps 6 to 8 in the first method:
- Attach the outlet to its box by inserting and tightening the screws.
- Restore power to the outlet’s circuit and test using an outlet tester to confirm.
- Replace the outlet’s faceplate.
FAQ Section
Why is grounding important for my outlets?
Grounding provides an extra safety measure by offering a safe path for electrical currents during emergencies. It helps prevent electric shocks from loose connections, worn-out insulation, or a broken part inside the outlet.
What is the NEC Code regarding grounding?
The NEC (National Electric Code) mandates that all 15- and above-amp outlets be grounded. If your home’s wiring was done before the 1960s, it might not comply with this requirement. However, it’s beneficial to update to grounded outlets for safety reasons.
How can I tell if my outlet is grounded?
You can visually inspect the outlet. Ungrounded outlets typically have two prong holes, while potentially grounded ones have three. However, the presence of a third prong doesn’t guarantee grounding. An outlet tester can provide a more definitive answer. For full certainty, you’d need to open the outlet and inspect the wires inside.
What if I find my outlets aren’t grounded?
You have a few options. You can continue using non-grounded outlets if installed before the grounding code took effect. Alternatively, you can upgrade the main breaker panel or use individual GFCI outlets for shock protection.
Is it possible to ground an outlet myself?
Yes, you can ground an outlet with the proper tools and knowledge. However, hiring a professional is recommended if you’re not confident in your skills. Ensuring proper grounding is crucial for safety.
What tools will I need to ground my outlet?
Typical tools include a screwdriver, wire cutter and stripper, pliers, and a voltage or outlet tester. Always ensure the power is turned off before working on any electrical system.
Can I plug a 3-prong appliance into a 2-prong outlet?
No, you shouldn’t plug a 3-prong appliance into a 2-prong outlet. This mismatch can be hazardous. The safest solution is to replace the 2-prong outlet with a grounded one.
How do GFCI Outlets provide safety?
GFCI outlets monitor the electrical current and offer protection from electric shocks. The trip to stop the flow of electricity if there’s a ground fault. They’re particularly essential in damp or wet locations.
Remember, always prioritize safety when working with electrical systems. If in doubt, consult a professional electrician.
References
Video References:
Aaron Fixes Stuff
Richmond’s Place Homestead
Top Homeowner