11 min read
How to Wire a 3-Prong Dryer Outlet (9 Steps)
A 4-prong dryer outlet is common, but older 3-prong ones are still in use, so you should know how to wire one when you come across them.
To wire a 3-prong dryer outlet (for a 240-volt dryer):
- Connect the black (primary hot) wire to the brass terminal. It might be labeled ‘Hot,’ H, or X.
- Connect the red (secondary hot) wire to the second brass terminal. It might also be labeled ‘Hot,’ H, or X.
- Connect the white (neutral) wire to the silver terminal. It might be labeled ‘Neutral’ or N.
- Bridge the N and G terminals with a small piece of wire if not bridged already.
Please read the requirements and instructions below carefully because they differ for a 110-volt dryer. I’ve also included some background information to know why there are 3 variations (regular, 3-prong, and 4-prong outlet).
Requirements
You will need some or all of the following, as per your requirements:
- Main items: 3-prong dryer outlet, dryer outlet box, 30-amp double-pole circuit breaker
- Tools: screwdriver, wire cutter, wire stripper, voltage tester
- Materials: wire cuts, cable connectors, electrical tape, 10/2 wire (see below for more details)
- Circuit breaker: 30-amp, double-pole breaker
Outlet and Wires
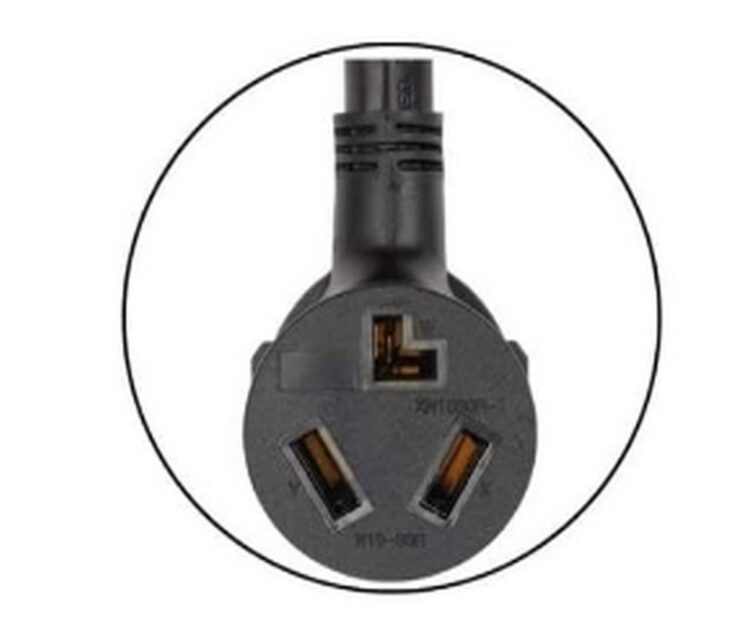
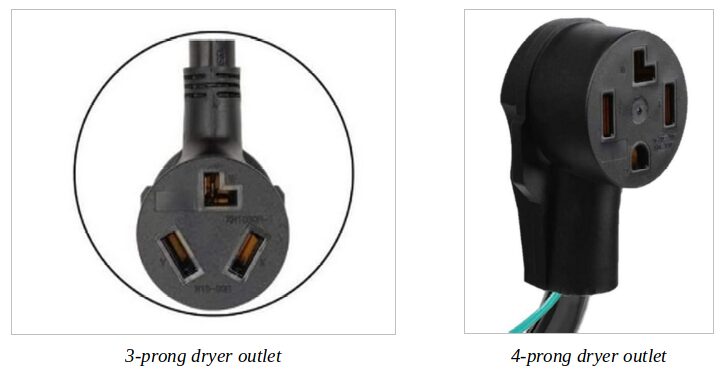
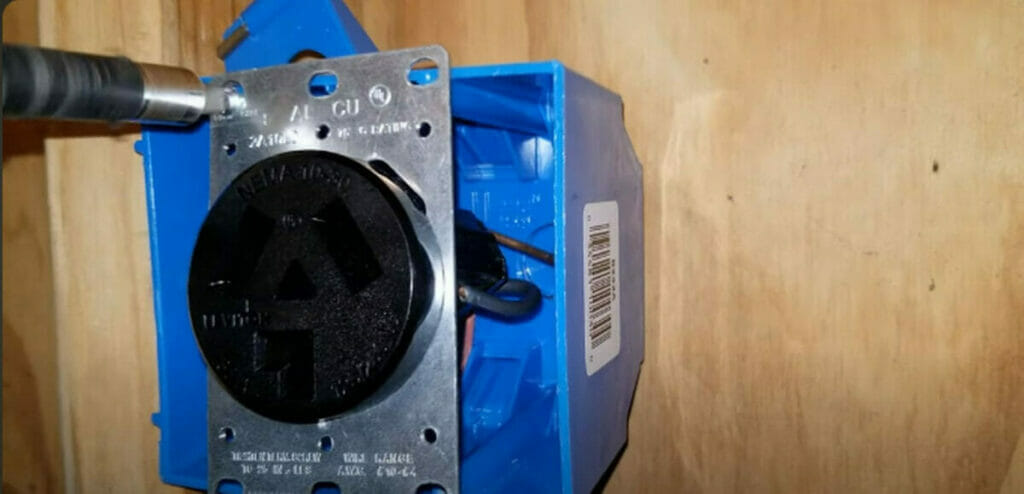
A 3-prong outlet has 3 slots and is designed to be used with a 3-prong plug.
So, it differs from a 4-prong outlet (see the pictures below). Internally, a 4-prong one differs by having separate neutral and ground wires to provide a safer return path for the current than a 3-prong outlet.
A typical 3-prong outlet uses the ground connection for this return path instead. Such 3-prong outlets have terminals for 2 hot wires to provide the required 240 volts, and the white neutral wire is used for a ground connection.
However, small or compact dryers that operate on 110-120 volts don’t need the extra hot wire. You can use regular 10/2 wire for them, containing one hot (black), one white (neutral), and a bare or green wire (ground) wire. In this case, it will require a regular outlet for dryers, not those shown below.
Cable and Wiring
The wire used for a dryer is typically a 10-gauge one, so you will need a 10/2 cable with a ground wire included if it operates on 110 volts or the combination of 2 hot and 1 neutral if on 220 volts.
If you’re installing a completely new circuit, which runs from the dryer to the panel, I strongly recommend cabling for and installing a 4-prong outlet.
But if that’s not practical or feasible, continue reading to learn how to wire a 3-prong dryer outlet. See the final section on ‘Background Information’ below.
Wiring a 3-Prong Dryer Outlet
Note: These instructions are for wiring a permanent 3-prong dryer outlet to the wall for a dryer that operates on 220-240 volts, thus requiring 2 hot wires. But some pictures show a regular 10/2 cable containing a single hot wire for a regular 110-volt outlet.
Step 1: Turn the Power Off
Turn the power off at the panel before starting any electrical work on the dryer circuit. Do this by switching off the circuit breaker that controls the power to the dryer’s circuit.
Step 2: Choose a Suitable Location
Choose a suitable location to attach the dryer outlet. Usually, it’s positioned within a few feet of the dryer and about 4 feet off the floor.
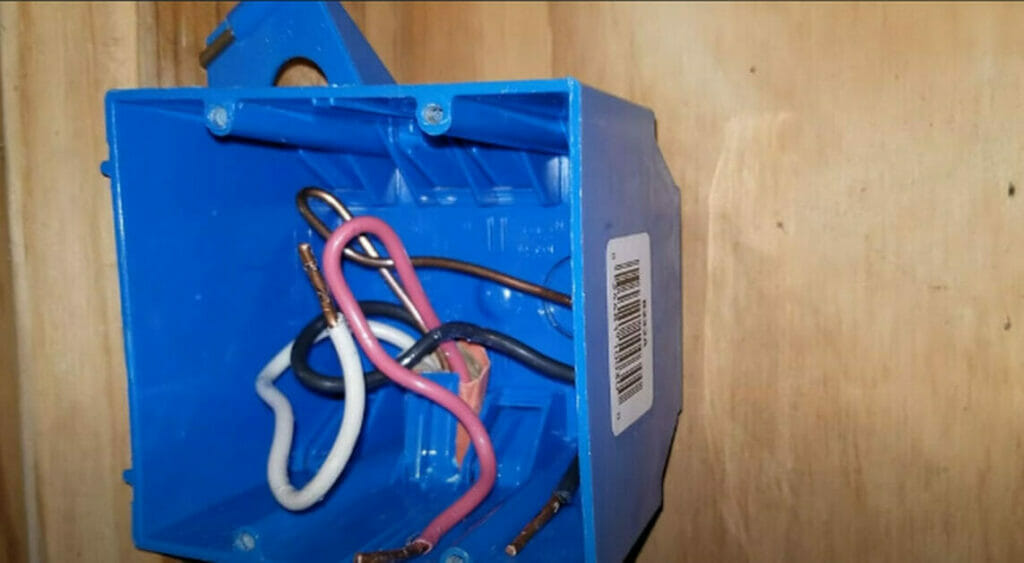
Step 3: Install the Outlet’s Box
Mark the spot for the dryer outlet.
Cut a hole around the spot for the dryer outlet’s box to fit snugly. Install the box using screws and ensure it is securely attached to the wall.
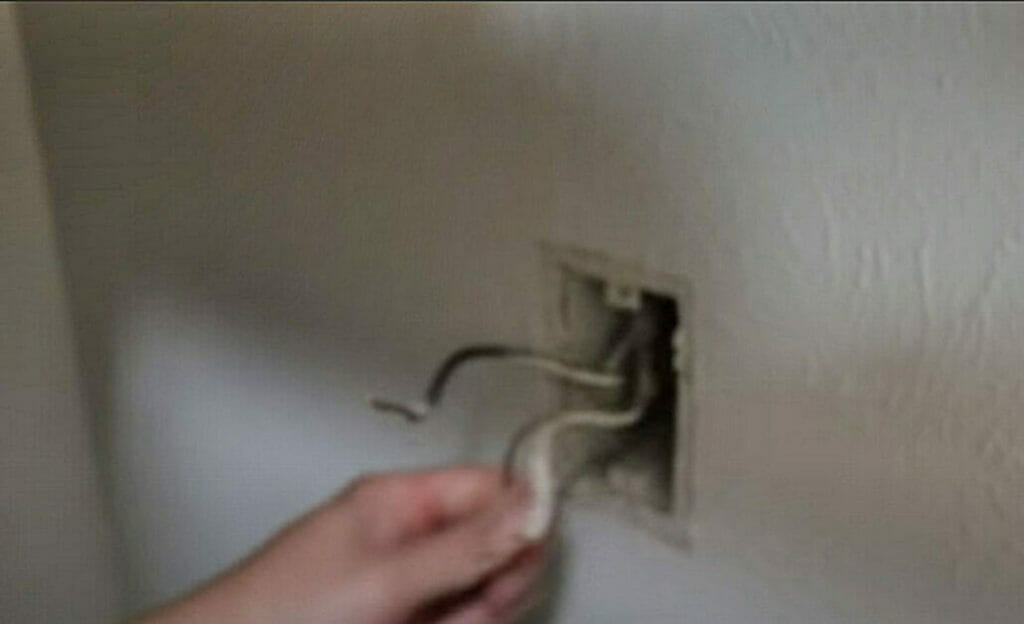
Step 4: Prepare the Wires
Prepare the wires by stripping about 8 inches of the cable’s outer sheathing and about 5/8” insulation off the ends of all 3 wires.
Step 5: Connect the Wires
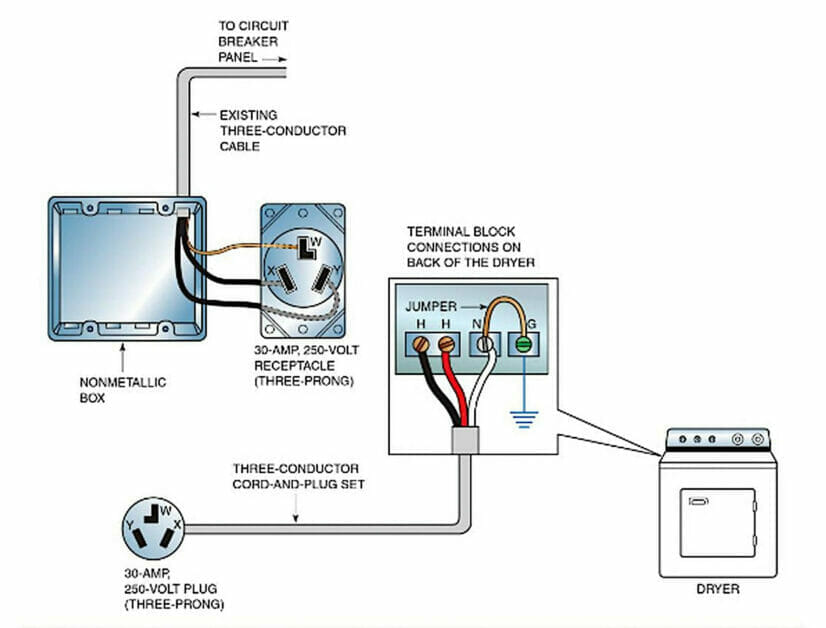
Connect the wires to the outlet as follows (for a 240-volt dryer):
- Connect the black (primary hot) wire to the brass terminal. It might be labeled ‘Hot,’ H, or X.
- Connect the red (secondary hot) wire to the second brass terminal. It might also be labeled ‘Hot,’ H, or X.
- Connect the white (neutral) wire to the silver terminal. It might be labeled ‘Neutral’ or N.
As explained earlier, you might see a short piece of bridging wire connecting the N and G terminals because the neutral is used for the local ground. See the wiring diagram at the end of this article. If not, you must create this bridge by connecting the two terminals.
If it’s a 110-volt dryer, connect the wires as follows:
- Connect the black (hot) wire to the brass terminal. It might be labeled ‘Hot,’ H, or X.
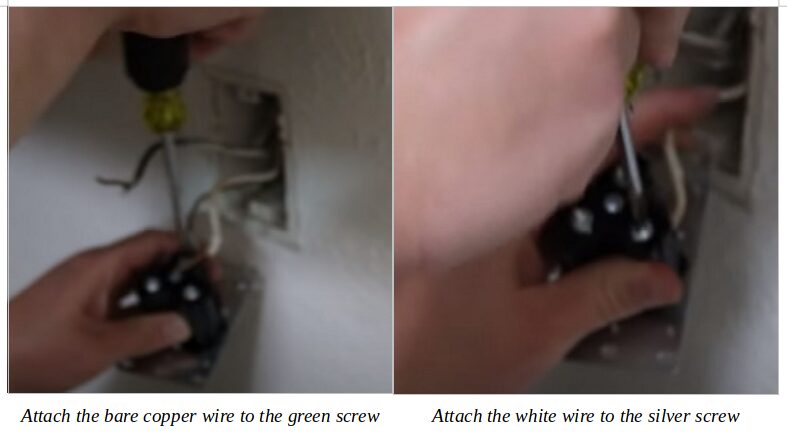
- Connect the white (neutral) wire to the silver terminal. It might be labeled ‘Neutral’ or N.
- Connect the bare copper or green (ground) wire to the green terminal. It might be labeled ‘Ground’ or G.
Ensure the screws on all 3 terminals are tight.
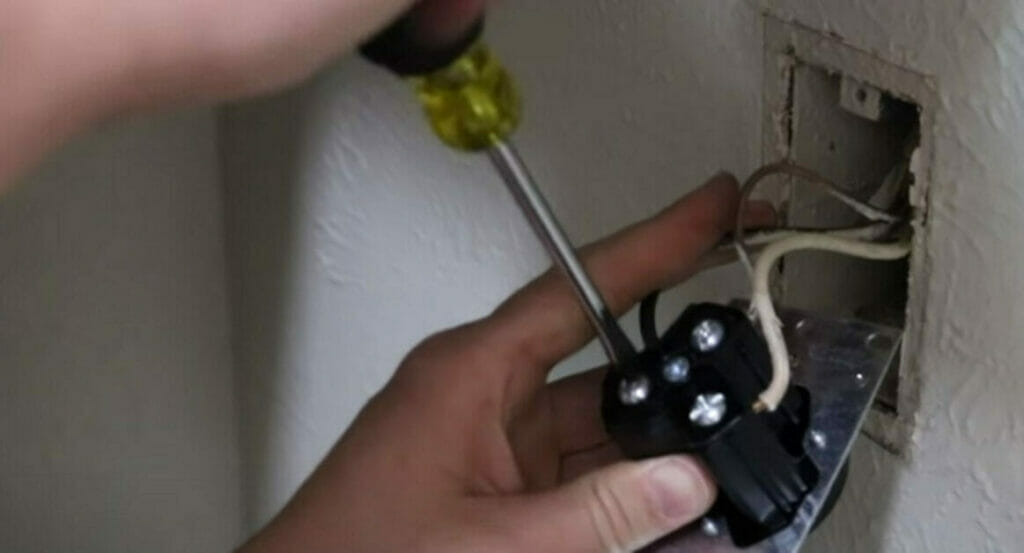
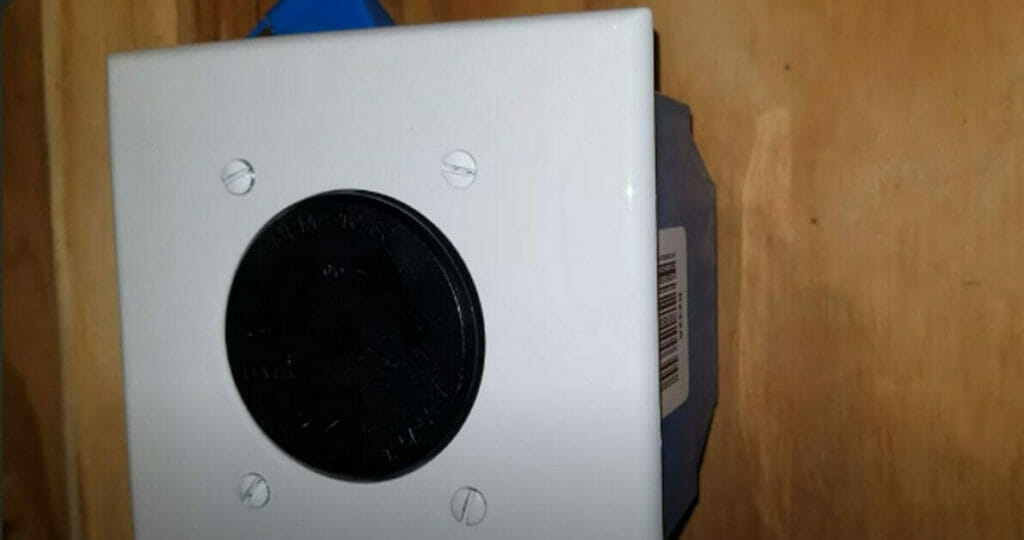
Step 6: Attach the Outlet
You will attach the outlet to its box in this step because the wiring is done.
Tuck the wires inside and attach the outlet to its box using the screws provided with the outlet.
Tighten all the screws and wire connections inside the outlet’s box. Use wire nuts to cap the ends of any unused wires. Optionally, wrap the terminal connections with electrical tape for added safety. You can attach the cover plate or after testing in the final step.
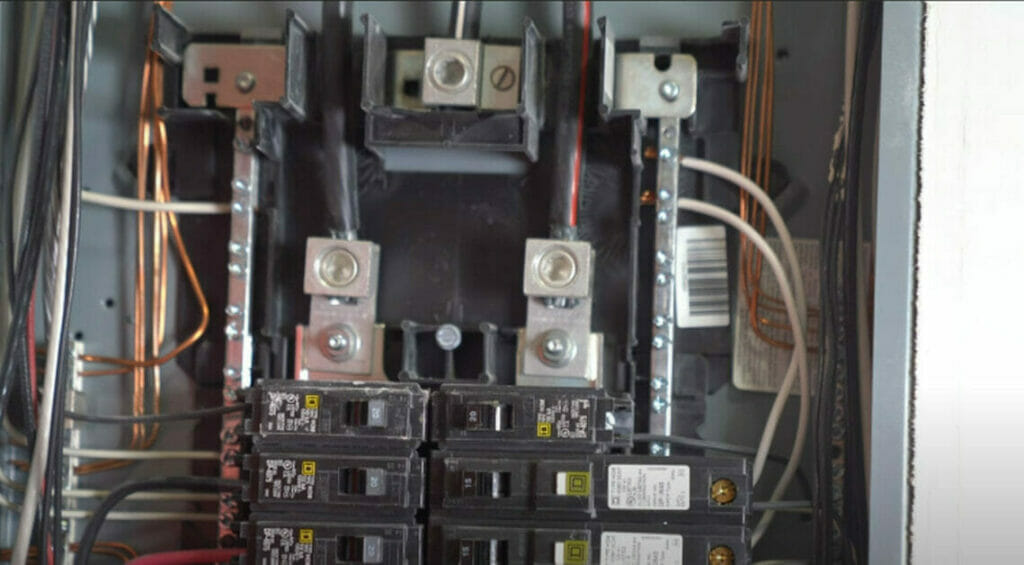
Step 7: Install the Circuit Breaker
Run the cable from the outlet to the main panel and install the 30-amp double-pole circuit breaker for the dryer circuit.
Then, connect the wires as follows:
- Connect the black wire to the hot terminal on the circuit breaker.
- Connect the white wire to the neutral bus bar in the panel.
- Connect the bare copper (or green) wire to the grounding bus bar.
Step 8: Grounding
Ensure the grounding conductor is connected securely to your home’s grounding system, especially as it’s a 3-prong outlet with the neutral connected to the ground terminal.
Step 9: Testing
Restore the main power by switching the circuit breaker back on. Use a voltage tester to confirm power at the outlet if necessary.

Background Information
You might wonder why 3-prong dryer outlets still exist when 4-prong ones are more common on newer dryers.
3-prong dryer outlets conform to an older NEC standard in which the neutral and ground terminals are wired together. It involved the risk of electric shock due to current flowing through the ground connection and energizing the dryer’s metal frame.
The rules on wiring clothes dryers changed in 1996 when the standard 3-prong outlets were updated to 4-prong ones.
However, replacing existing outlets is not feasible, as too many are installed, especially in older homes. It would involve replacing the outlet, cable, and plug. Hidden cabling makes the task even more difficult and expensive. So, the NEC allows 3-prong dryer outlets as long as they remain code-compliant.
Alright, Folks! Let’s Dive Right into Frequently Asked Questions About Wiring Your Dryer Outlets!
FAQs
- What’s the Difference Between 3-Prong and 4-Prong Dryer Outlets? 3-prong outlets have terminals for 2 hot wires and use the neutral wire for a ground connection. The 4-prong outlets separate the neutral and ground wires, making them safer.
- Why Do Some Dryers Operate on 110 Volts and Others on 240 Volts? Compact or small dryers typically operate on 110-120 volts and don’t need the extra hot wire. Standard dryers often operate on 220-240 volts, thus requiring 2 hot wires.
- Can I Use a Regular Outlet for My Compact Dryer? Yes! If your dryer operates on 110-120 volts, you can use a regular outlet with a regular 10/2 wire, which contains one hot (black), one white (neutral), and a bare or green wire (ground).
- Why Is the Neutral Connected to the Ground Terminal in a 3-Prong Outlet? 3-prong dryer outlets conform to an older NEC standard in which the neutral and ground terminals are wired together. However, this was changed in 1996 for safety reasons, thus leading to the introduction of the 4-prong outlets.
- Is It Safe to Keep Using My Existing 3-Prong Dryer Outlet? While 3-prong outlets are not as safe as 4-prong ones due to potential electric shock risks, they are allowed by the NEC as long as they remain code-compliant. It’s essential to ensure they are correctly installed and grounded.
- Should I Switch to a 4-prong Outlet If I’m Installing a New Circuit? Absolutely! Going for a 4-prong outlet is a great idea if installing a new circuit. It offers better safety due to the separate neutral and ground wires.
- What Safety Precautions Should I Take When Wiring a Dryer Outlet? First and foremost, always turn off the power from the main panel before you begin. Also, use a voltage tester to confirm that the power is off and test the outlet once installed.
Alright, team, if you’ve got more questions, don’t hesitate to ask! Always remember, safety first! And keep those wires tight and right! 🛠️🔌👷♂️
References
Website Resources:
- 3-prong dryer outlet. https://www.amazon.com/Eversimpleinc-Electric-3-Prong-Receptacle-Connector/dp/B08ZYH2RZV/
- 4-prong dryer outlet. https://www.amazon.com/Eversimpleinc-Adapter-Connects-4-Prong-Receptacle/dp/B08XC2H327/
Books:
- Gregory Fletcher. Residential Construction Academy: House Wiring. Cengage Learning. 2014. https://books.google.com.ph/books?id=ICx-BAAAQBAJ
Video References:
LRN2DIY
Ricky Jewett
S33 Electrical