15 min read
How to Hook Up a 4 Wire Dryer Cord (7 Step Guide)

Getting a new dryer is exciting, but those jumbled wires can be daunting. It’s common to find yourself staring at the four different colors and wondering what goes where.
Quick Summary: Hook up a 4-wire dryer cord with these steps:
- Step 1: Remove the Terminal Block Cover
- Step 2: Install Strain Relief
- Step 3: Feed Wires Through Strain Relief
- Step 4: Connect Neutral and Ground Wires
- Step 5: Attach Black and Red Wires
- Step 6: Secure Terminal Block Cover
- Step 7: Test Your Dryer Cord for safety and functionality.
Don’t worry about this getting confusing– with my clear instructions and a little patience, it’s easier than it looks! I will discuss safety precautions, review each wire’s purpose, and follow the correct installation methods below.
The Importance of Safety
Before we dive into the steps to hook up a 4-wire dryer cord, I can’t stress enough how important it is to prioritize safety.
We might be tempted to rush into projects like these without considering potential dangers, but let me assure you, that’s a risk not worth taking. Dryers are high-voltage appliances; mishandling their electrical components can lead to severe or fatal accidents.
You’re probably wondering: “What kind of risks are there?” Well, there are several. Incorrect wiring could result in a short circuit, which can cause an electrical fire. Improper grounding, another common mistake made during installation, can have serious consequences, including electrocution.
This is why homeowners like us must understand what we’re dealing with. When installing a 4-wire dryer cord, always remember to disconnect power from the appliance first and foremost. Also important is using tools designed for working with electricity – they often have insulated handles that provide an extra layer of protection against accidental shocks.
Finally, if you ever feel uncertain or uncomfortable about handling this project yourself – don’t hesitate to call in a professional! They’ve got years of experience and training; they know exactly what they’re doing.
Here are some additional safety measures that are also important to consider:
| Safety Measure | Description |
|---|---|
| Disconnect Power | Follow the Manufacturer’s Instructions |
| Use Insulated Tools | Tools with insulated handles for safety. |
| Call a Professional if Uncertain | Seek expert help if unsure. |
| Follow the Manufacturer’s Instructions | Refer to your dryer’s manual. |
| Check Local Wiring Regulations | Adhere to area electrical codes. |
Not only does prioritizing safety protect you and your loved ones from harm, but it also ensures the longevity of your appliances.
Preparing for Installation
Before diving in, let’s ensure we’re ready to roll. First off, Ensure the dryer is unplugged from its power source. You don’t want to mess with wires when electricity flows through them.
Next on our list is to gather your tools. You will need a screwdriver and an adjustable wrench for this job. Depending on the model of your dryer, you might also need a nut driver or socket set – so it’s best to have those at hand, too.
Let me stress here: Knowledge of your dryer’s specifics is vital. It pays off to take some time and scour through that owner’s manual that came with your machine (assuming it didn’t get lost in the shuffle). If you can’t find yours, no worries; most manufacturers have their manuals available online.
Now, let’s talk about location! The area where you plan on installing your new 4-wire cord should be dry, well-lit, and spacious enough for you to move around comfortably while working on the installation.
Finally, keep in mind that every state has different codes regarding home wiring projects like this one – so do check if any specific regulations apply before getting started!
Step 1: Removing Terminal Block Cover
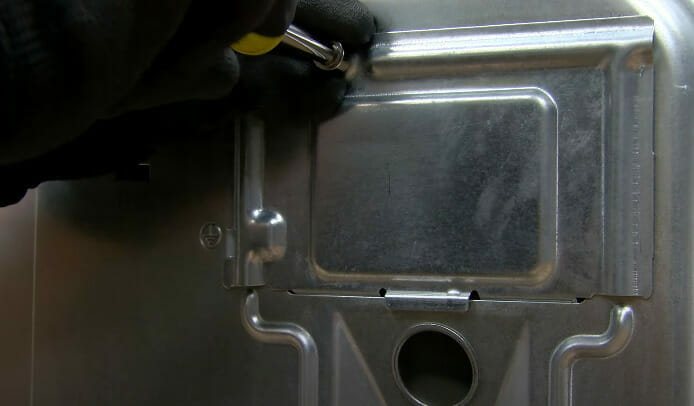
Before we dive into the nitty-gritty of hooking up a 4 wire dryer cord, there’s something essential I need to address. It’s all about getting that terminal block cover off. This may sound hard, but trust me – it’s simpler than you think.
Locating the Terminal Block Cover
Once you’ve ensured the power is off, I’ll guide you through locating the terminal block cover. It’s usually found at the back of your dryer and conceals all those important wires we’ll deal with shortly.
Unscrewing
You’ll likely need a screwdriver for this step (a nut driver would also do). Find those screws holding your terminal block cover in place and give them a good turn counter-clockwise.
Removing the Terminal Block Cover
Gently remove the terminal block cover to reveal what’s beneath. Don’t be intimidated by its complex look; we will tackle it together in the following steps.
Step 2: Installing the Strain Relief

Now, if you’re wondering what a strain relief is, let me explain.
It’s a device that clamps onto your dryer cord to prevent it from being yanked out of the wall socket or damaging the terminal connections inside your dryer. Essentially, it helps secure your dryer cord and keep things safe.
First, we must have all the necessary tools before tackling this head-on. We’ll need:
- A pair of pliers
- Screwdriver (flat-head or Phillips, depending on your dryer model)
- The strain relief itself (this should come with your new dryer cord)
Once you’ve gathered all these together, we can move forward.
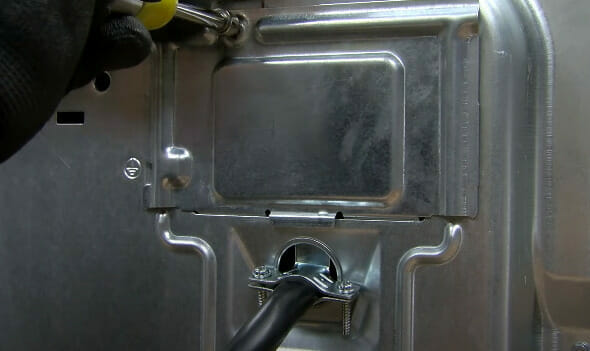
First, locate the hole in the back of your dryer where the power cord will be inserted. This is typically at the base of your appliance. You’ll find two parts for most strain reliefs – one part goes outside, and another part goes inside this hole.
Next up: grab those pliers! You’ll need them to squeeze both parts of the strain relief together around that hole I mentioned earlier. It may take some elbow grease, but hang in there.
Finally, tighten those screws using that screwdriver you pulled out earlier. You want everything snug but not overly tight.
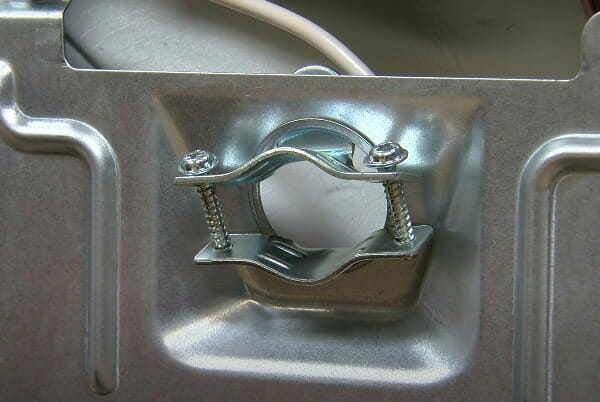
And voila! You’ve installed a strain relief for your 4-wire dryer cord! Trust me; this little gadget does wonders when it comes to prolonging the life of your cord and dryer.
Step 3: Feeding Wires through Strain Relief
You’ve got your new 4-wire dryer cord ready and your screwdriver in hand. The first thing you’ll want to do is loosen the screws on the strain relief connector. Some might get tripped up here – make sure you feed each wire individually through its designated holes.
Now, don’t rush this part! Shoving those wires in any old way might be tempting, but patience pays off here. You’ll want to ensure all four wires are thoroughly secure and not pinched or excessively bent within the strain relief. Once they’re snugly fitted inside, tighten up those screws again.
Remember, we’re aiming for durability and safety here! A well-secured set of wires can save you from potential electrical hazards down the road and extend the life of your appliance.
Key Takeaways:
- Loosen screws on the strain relief connector before beginning.
- Feed each wire individually through their designated holes
- Make sure wires aren’t pinched or excessively bent
- Tighten screws once all four wires are securely inside
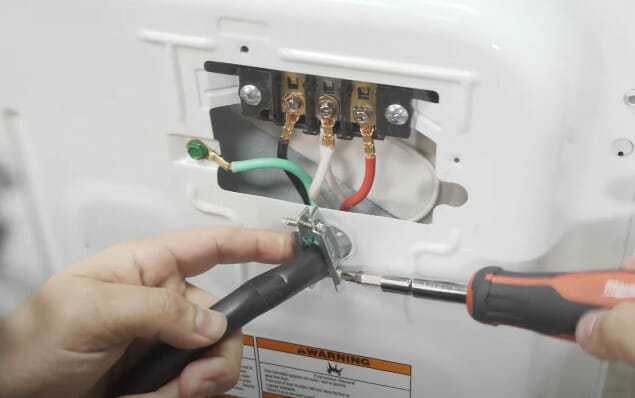
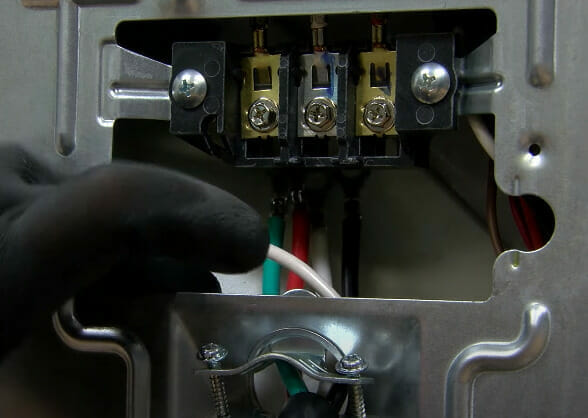
Step 4: Connecting the Neutral and Ground Wires
This step is crucial in ensuring your dryer’s safety and proper functioning.
The first thing to remember – color matters.
Usually, white is used for neutral wires, while green or bare copper signifies ground wires.
If yours are different colors, don’t sweat! Just check the dryer manual – it’s there to help!
Once identified, locate where these two need to go on the back of your dryer. Typically, they connect to a central terminal block, an obvious metallic piece eager to be connected. Remember to loosen those screws before trying to hook anything onto them.
Now comes the fun part – attaching these wires. Here’s where things can get a bit tricky because it varies by brand and model. Your best bet is always going by what your manual says, but typically:
- The white (neutral) wire connects to the middle connector.
- The green or bare (ground) wire attaches either directly to the dryer’s frame or alongside the neutral wire.
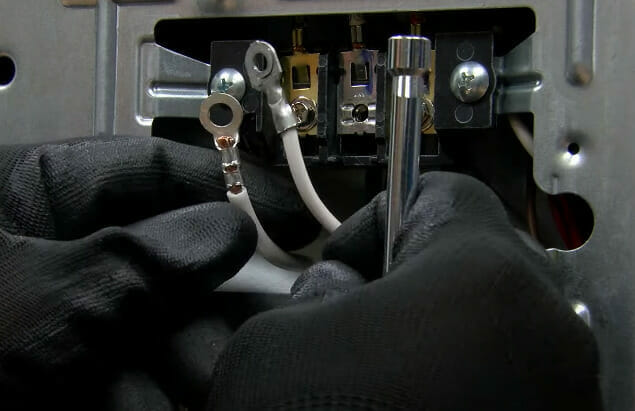
Finally, after securely fastening both wires with screws again, give them a slight tug for good measure – they should be firmly in place.
You’ve successfully completed Step 4 in hooking up your new 4-wire dryer cord.
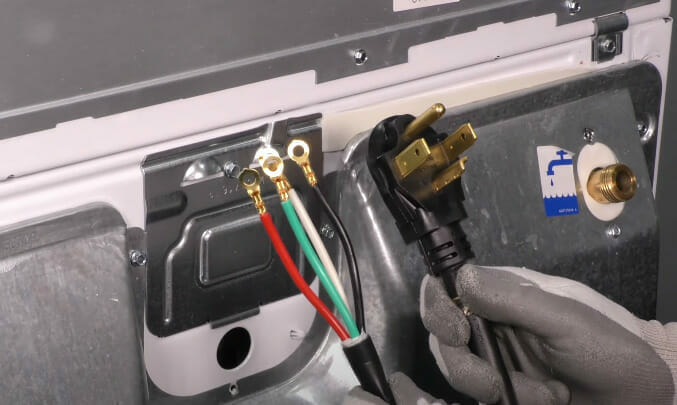
Step 5: Attaching Black and Red Wires

We’re on the home stretch; let’s discuss how you’ll connect those black and red wires. These are your hot wires, carrying all that electric power to your dryer.
First off, locate the terminal block in your dryer. That’s where these wires will go. You’ll typically find it at the back of the machine. Looking at the terminal block, you should see three posts sticking out from it. The middle one’s for your neutral wire (that white or green one).
Those two each attach to an outside post on that terminal block – it doesn’t matter which color goes to what side as long as they’re not attached to the neutral post.
Next up is tightening everything down. Once those wires are hooked up onto their respective posts, secure them with some robust tightening action using a nut driver or screwdriver (whatever tool makes sense for your dryer model). We don’t want any loose connections causing trouble later on.
Lastly, if anything seems off or uncertain during this process, do yourself a favor and call in a professional – better safe than sorry!
Remember: black and red wires go on either side of that terminal block away from that middle neutral post – tighten them well so they stay put – always keep safety front of mind.
Step 6: Securing the Terminal Block Cover
This is where things get interesting. It’s all about making sure everything stays in place.
First off, grab that cover you set aside earlier. You’re going to position it over the exposed terminal block area. Make sure those little holes on the sides of the cover line up with the screw holes on your dryer.
Next, you’ll take those screws you saved from before and thread them back into their corresponding holes. Don’t get ahead of yourself here; doing this carefully is crucial! The last thing you want is a stripped screw or misaligned cover mucking up your installation process.
Now, I bet you’re wondering how tight these screws should be? They should be snug but not overtightened. The cover could rattle or even fall off during operation if it is too loose. On the other hand, if it’s too tight, you might damage something.
To ensure a perfect fit every time, tighten each screw until it feels secure. Then give it another quarter turn for good measure (if possible). Remember to alternate between screws to distribute the pressure across the cover evenly.
And voila! Your terminal block cover should now be securely attached to your dryer again – protecting those important electrical connections inside from dust and debris while ensuring the safe operation of your appliance.
Step 7: Testing your Dryer Cord

Now that we’ve connected the dryer cord, it’s time to move on to testing. This is a crucial step you don’t want to skip! We need to ensure everything’s in order and your appliance is safe.
To begin with, plug your newly wired dryer into the outlet. Be sure not to force it – if it’s resisting, double-check your work before proceeding. The plugs should fit snugly without requiring any wrestling.
Next up, switch on the circuit breaker. This might seem like a minor detail, but it’s essential. If there were any errors in installation or wiring issues, this would likely trigger the breaker to trip right away – a clear sign something’s amiss.
Once the power flows smoothly, it’s time for the moment of truth: turning on your dryer. You’re looking for normal operation here; if you hear odd noises or see sparks flying (literally!), unplug immediately and revisit your installation process.
Remember:
- Always prioritize safety when dealing with electrical appliances.
- Rushing through these steps could lead to serious consequences.
- You’ve made it this far; take pride in doing things right!
Finally, run a full, empty drying cycle before throwing clothes in – as an extra precaution. That way, should anything go wrong during this test run (like unusual heat), you won’t have ruined a load of laundry, too!
There you have it – from unwiring the old cord to testing the new one – we’ve covered every angle so you can do this job confidently and safely!
Pro Tips for a Smooth Installation
Before we wrap up, let’s delve into some pro tips to make your dryer cord installation as smooth as butter. Trust me, I’ve been there and done this many times, so these suggestions come from hands-on experience.
First off, always remember safety first. Before messing with wires and plugs, ensure the main power is turned off at the circuit breaker. It’s easy to forget but can save you from a nasty shock!
Next up on my list of tips is: don’t rush. Take your time to read through the manufacturer’s instruction manual carefully before starting any work on your appliance. Familiarize yourself with all the components and steps involved in the process.
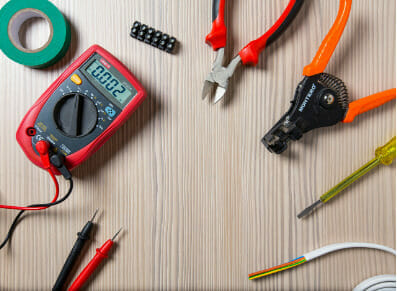
One important thing that often gets overlooked is using the correct tools. A good quality wire stripper and screwdriver can make all the difference in a secure connection.
Now, here’s something not everyone will tell you – always test your connections before putting everything back together. A multimeter is handy for this purpose. This simple step can save you loads of time troubleshooting if things don’t work right after assembly.
Here are a few more key points:
- Keep track of which wire goes where by taking a photo or making notes before disconnecting anything.
- Remember, color coding in wires matters! Red and black are hot wires, white is neutral, and the green or bare wire is ground.
- Check twice if you have connected every wire securely before turning on the power.
There you have it – my top tips for hooking up that 4-wire dryer cord like an absolute pro! Just remember, if things seem overwhelming or unsafe at any point – there’s no shame in calling in professional help!
References
Studies:
- Electrical Safety In and Around The Home. https://www.jstor.org/stable/43164818
Organizations:
- Electrical Safety Foundation International (ESFI). https://www.esfi.org/
- National Fire Protection Association (NFPA). https://www.nfpa.org/
- Consumer Product Safety Commission (CPSC). https://www.cpsc.gov/
Books:
- “Wiring Simplified” by Frederic P. Hartwell and Herbert P. Richter
- “Electrical Wiring Residential” by Ray C. Mullin and Phil Simmons
Website Resources:
- ESFI’s. https://www.esfi.org/
- NFPA’s. https://www.nfpa.org/
- CPSC’s. https://www.cpsc.gov/
Videos References:
W Service
The Appliance Plug