8 min read
How to Wire a Dryer Motor for Other Uses and DIY Projects (4-Step Guide)

Dryer motors span a wide spectrum of applications, and you don’t have to discard an old or idle dryer motor, as you can repurpose them for other uses instead.
I’ve found that connecting dryer motors to devices such as a blower for dust collecting or to a belt for other DIY projects can be very useful. It’s not difficult to wire a dryer motor, and you don’t need particular experience. All you need to do is identify which wire goes where and for what purpose.
In general, follow these steps to rewire a dryer motor to another device:
- Unplug the dryer and remove its motor by disengaging the cord-connection panel at the back.
- Remove the old wires from the dryer motor.
- Attach a blower, belt, or other appliance to the motor for other DIY projects.
- Connect a 2-prong power cord to the blue and white wires removed from terminals 4 and 5.
- Connect the green wire to the ground screw that holds the ground strap.
- Connect the dryer motor to a power source to test it.
We will go into more detail below.
Getting Started – How a Dryer Motor Works
The system comprises the start and the main winding and operates at a 115V alternating current.
However, some dryers function at 220V AC in the US. A dryer motor converts electromagnetic energy into mechanical energy harnessed to turn the dryer blower and the drum.
So, the mechanism used by the dryer motor can be used to perform mechanical work in DIY-related projects.
The start winding comprises thinner wires and thus experiences higher resistance. The start winding has fewer turns, giving the dryer motor phase shift and initial rotation.
Technically, the start winding is turned on briefly at startup. Otherwise, it will burn out within a minute if it stays on. So, the start winding gets disconnected when the motor picks up speed. Ideally, the winding in the start winding disengages when the dryer motor starts running.
Let’s go on to the steps. Note that your mileage may vary depending on your wiring device, so this guide assumes some basic compatibility.
Procedure – Wiring a Dryer Motor for Other Uses
Step 1: Check Terminal Numbering
The dryer motor terminals are labeled 2, 6, 4, 3, 5, and 1. To locate the numbers, flip the motor over and check the sides.
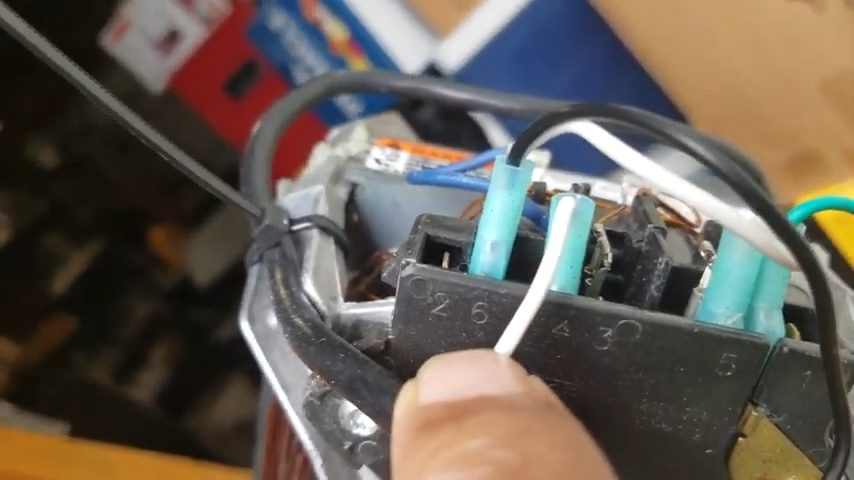
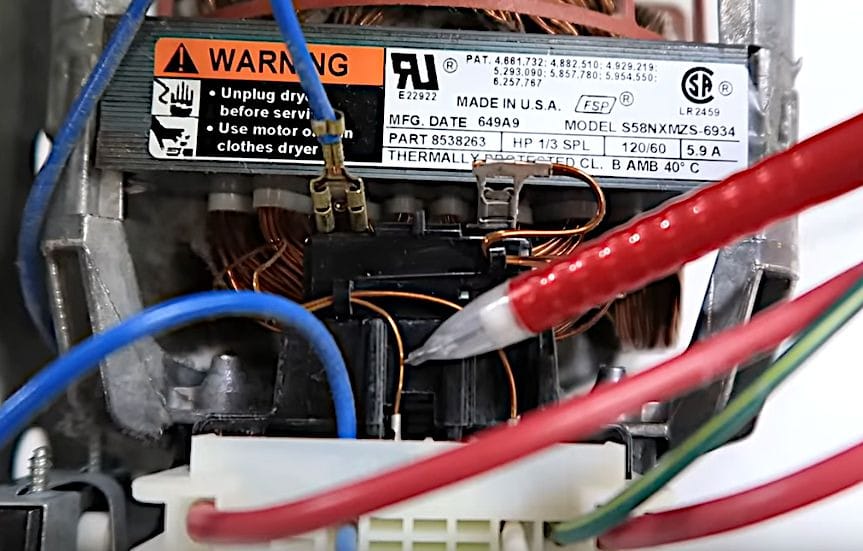
The ground terminal is right below terminal number 1. In this guide, I will discuss the dryer motor with the following electrical properties for the heating element: 240V and 25 amps for terminals 1 and 2.
After identifying the terminal numbers, go ahead and check the wiring harness denoted as follows:
- White wire – neutral
- Black and red wires – current-bearing wires
- Green wire –ground
- Blue wire – attached to the switch
Step 2: Remove the Motor Wires
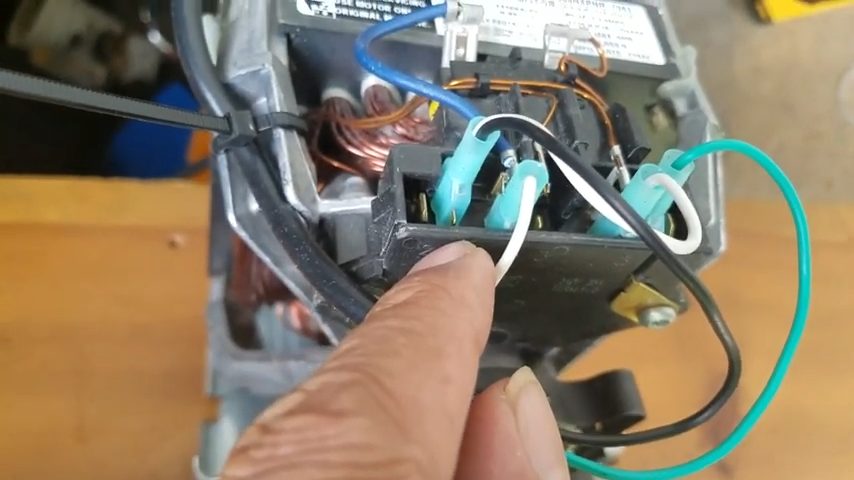
If the motor is still in the dryer, unplug the dryer and sever the cord-bearing connection at the back of the dryer. Disconnect the wires from the screws.
| 2 | 6 | 4 | 3 | 5 | 1 |
| red | black | blue | – | white | red |
| heater | – | motor | – | motor | heater |
Additionally, there’s a green wire connected to a ground point on the motor. Note the following:
- Terminal 6 is wired to the red or black wire, which connects internally to terminal five.
- The blue wire goes through the switch and into the motor. The switch is attached to an idler pulley designed to hit the switch to shut everything off and protect the belt from coming off or breaking.
- Another white wire is connected to terminal 4, and the blue wire is in the motor’s wiring harness.
- Again, the blue wires are attached to another set of connectors, usually another set of safety switches.
- The white wire goes to terminal 5.
- The green wire goes to the ground.
You can see thinner wires behind terminals 4 and 5 in the picture below (being pointed at) going to the motor, i.e., to power it and connect it.
Step 3: Connect Another Device to The Motor
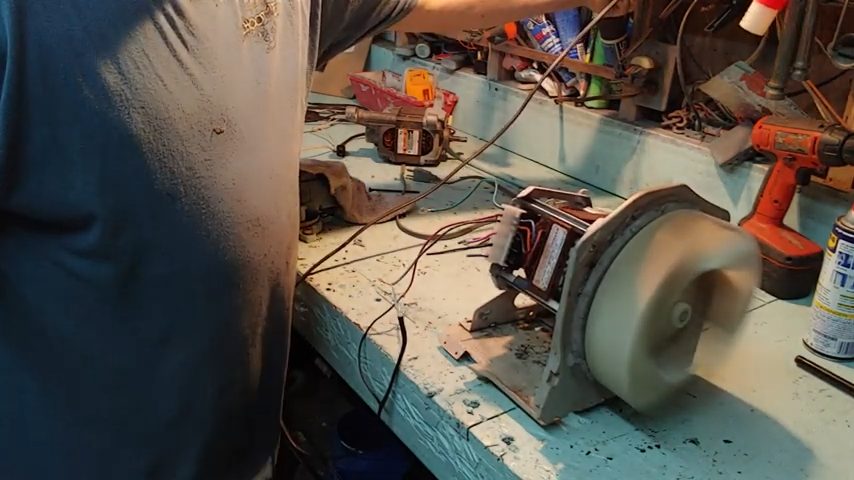
You can wire a blower or any other compatible device to the motor.
You can craft a sensorless vector control motor drive (a fan) and other interesting devices for various DIY projects with an old dryer motor. It is especially suitable for a dust collector or a belt sander.
Note the following:
- You won’t need the red wires to operate the motor, as they are for the heater.
- You will need the green wire for the ground connection.
- The 2 wires that power the motor are the blue and white wires connected to terminals 4 and 5, respectively.
Step 4: Connect the Motor to Power
Note: The color of the current-bearing wires in dryer motors varies between red and black, or both may be present.
To connect the motor to a power source, wire the blue and the white wires to a two-prong plug.
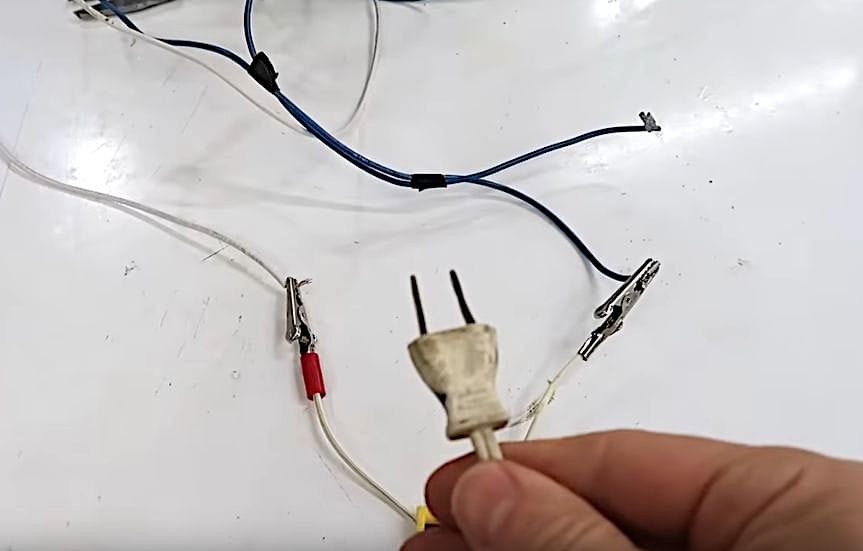
So, all you need to do to operate the dryer motor is connect the hot side of the 120v line to the blue wire and the neutral line to the white wire.
Strip about one inch of the insulation off the blue and the white wires with a wire stripper. Connect them to separate wires on a two-terminal plug and nest the spliced terminals in a wire cap for safety. You may use electrical tape to insulate the twisted end instead.
If it’s a 3-prong plug, connect the green ground wire as well, as it’s a non-insulated setup.
Next, insert the plug into a wall outlet and turn the power on to verify if the motor is working. Also, check if your blower or any other device connected to the dryer motor is working well.
FAQs
How Do You Tell if a Dryer Motor is Bad?
You will hear a loud grinding and rumbling sound from the worn-out parts of the dryer. Also, a faulty or damaged thermostat can cause your dryer motor to stop working. To make your dryer operational again, replace the fuse or the thermostat.
How Many Ohms Should the Motor Have?
If the dryer is not used or heating, the ohms value should be about 15. Attach the probe leads to the motor terminals to test the dryer motor with a multimeter.
Ensure the multimeter is set to measure ohms or continuity. If the motor does not give a reading or the display unit flashes numbers, your dryer motor is fired up and requires replacement.
What Makes Dryer Motors Burn Out?
Dirt or lint can cause your dryer motor to overheat or burn out. So, clean the motor regularly to prevent it from burning out. Also, ensure it is operating at the required volts and amps.
References
Website Resources:
- electromagnetic energy. https://www.thoughtco.com/examples-of-electromagnetic-energy-608911
- mechanical energy. https://www.britannica.com/science/mechanical-energy
Video References:
Rockin Horsefeathers
Grandpa Cotton
Matthias random stuff