18 min read
How to Wire Rocker Switch (7 Easy Steps)
Wiring a rocker switch might seem intimidating, but I’m here to tell you it’s not as complex as you’d think.
Rocker switches are indispensable components in many electrical systems. They’re used in everything from home appliances to industrial equipment.
We’ll cover selecting the right type of rocker switch for your project, what tools you’ll need, and finally – connecting those wires! Trust me, once you’ve got these basics down, there won’t be any electrical task that can stump you!
We’ll get into more detail below.
Refresher On Rocker Switches
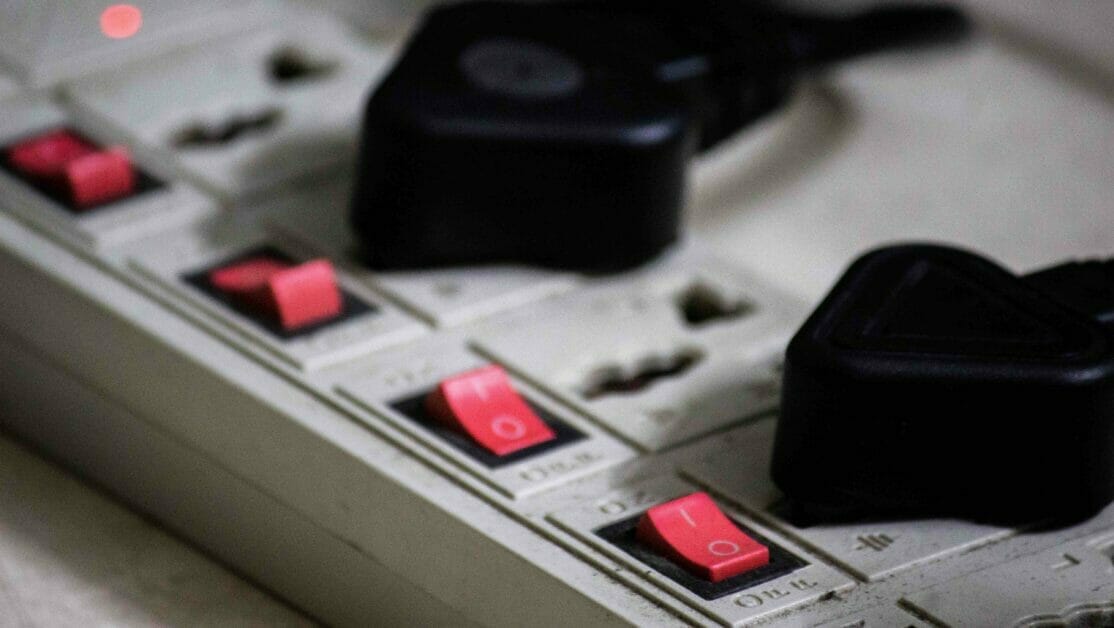
A rocker switch is an electrical switch that rocks or pivots back and forth on a central hinge or axis. This rocking mechanism allows users to easily toggle between two or more positions, typically ON and OFF.
Here’s a brief overview:
| Feature | Description |
|---|---|
| Appearance | Flat, concave, or convex surface. When pressed on one side, the other side raises like a seesaw. |
| Function | Typically, it toggles between two positions: ON and OFF. Some have more positions or indicator lights. |
| Applications | Household light switches, electrical appliances, industrial controls, automotive dashboards, computer power supplies. |
| Types | Single Pole Single Throw (SPST) Single Pole Double Throw (SPDT) Double Pole Single Throw (DPST) Double Pole Double Throw (DPDT) Triple Pole Single Throw (TPST) Triple Pole Double Throw (TPDT) |
| Materials | It commonly uses hard plastics for the switch body and metal for the terminals. |
| Safety | Features may include a locking mechanism or illumination to indicate status. |
How to Choose a Rocker Switch: AC or DC Circuit?
Choosing a rocker switch involves understanding whether you’re dealing with an AC (Alternating Current) or DC (Direct Current) circuit. The difference between the two is significant regarding electrical characteristics and applications.
Here’s a guide to help you make the right choice:
| Criteria | AC (Alternating Current) | DC (Direct Current) |
|---|---|---|
| Basic Definition | Voltage changes polarity and varies over time. | Voltage remains constant over time. |
| Common Uses | Household appliances, power transmission. | Batteries, electronic devices, car electrical systems. |
| Examples | Wall outlets, major appliances, residential lighting. | Flashlights, mobile devices, car headlights. |
| Voltage & Current Rating | Should match with household voltage (e.g., 110V or 220V). | Must be rated for the specific voltage, e.g., 12V for a car. |
| Breakdown Voltage | Typically, it is lower than DC switches due to AC’s zero-voltage point. | Requires higher breakdown voltage as DC doesn’t have a zero-voltage point regularly. |
| Polarity Consideration | It is not applicable, as AC voltage changes polarity. | Essential. Positive and negative terminals must be correctly wired. |
| Switch Configuration | Based on application needs (SPST, SPDT, etc.). | Consider using a double pole (DP) switch for controlling both positive and negative. |
| Environment & Usage | Depending on placement, we can consider standard or waterproof switches. | Waterproof or water-resistant for outdoor use; illuminated for user feedback. |
| Safety Certifications | Look for UL (Underwriters Laboratories) or region-specific certifications. | Look for certifications relevant to DC applications and region-specific standards. |
| Physical Size & Mounting | Ensure the switch fits in the desired location; consider panel mount or other types. | Confirm size and type, such as panel mount or snap-in, based on the application. |
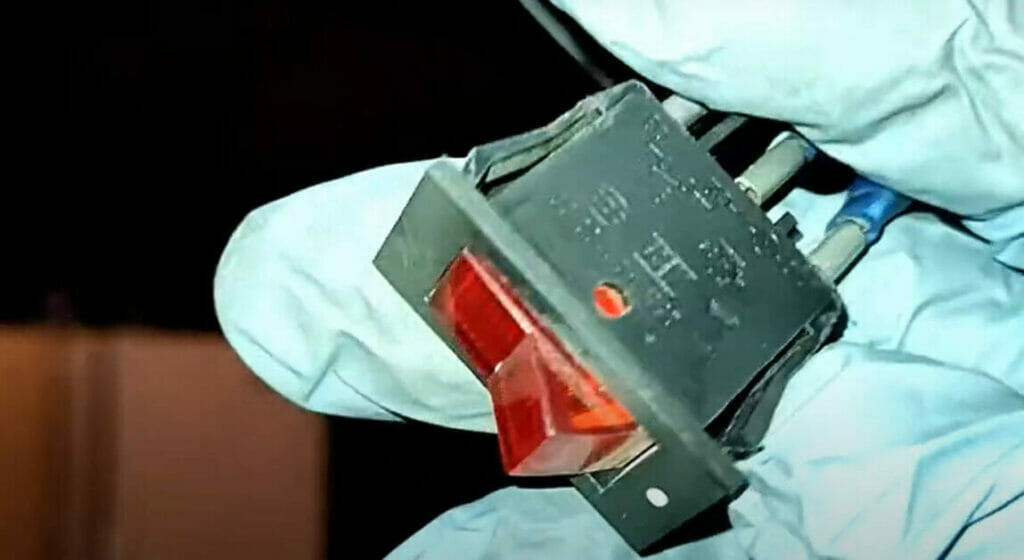
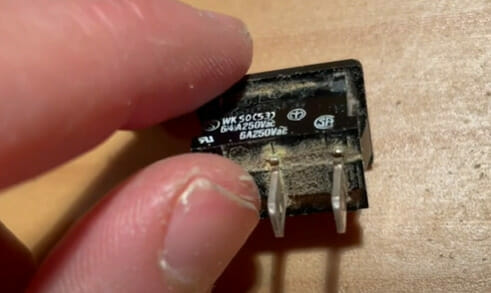
Rocker Switch Terminals
Rocker switches come in various configurations, each with a different number of terminals or contact points to connect wiring. Understanding the terminals on a rocker switch is crucial for proper installation.
| Switch Type | Terminals | Description | Common Uses |
|---|---|---|---|
| SPST (Single Pole, Single Throw) | 2 | Basic on/off switch with one input and one output. | Simple devices or circuits requiring on/off functionality. |
| SPDT (Single Pole, Double Throw) | 3 (COM/C, NC, NO) | The switch connects one input to either of two outputs, routing one input to two possible paths. | Devices must switch between two operating states (e.g., fan’s high/low). |
| DPST (Double Pole, Single Throw) | 4 (Two separate pairs) | Like two SPST switches operated by one button. Controls two circuits, turning them on or off. | Devices requiring two on/off controls activated together (e.g., two lights). |
| DPDT (Double Pole, Double Throw) | 6 (Two sets of COM, NC, and NO) | Manages two circuits, routing each to one of two possible paths. | Complex devices or scenarios to switch two inputs between two outputs at once. |
| Illuminated Rocker Switches | Varies (Extra terminals for illumination) | It works per base switch type (like SPST or SPDT) but has an in-built light for status indication. | Devices needing visual indication of switch status. |
| Momentary Rocker Switches | Varies (Based on base configuration) | Only remains in the ‘on’ or ‘off’ position while pressed, then returns to the default position. | Temporary actions, like a car’s power window control. |
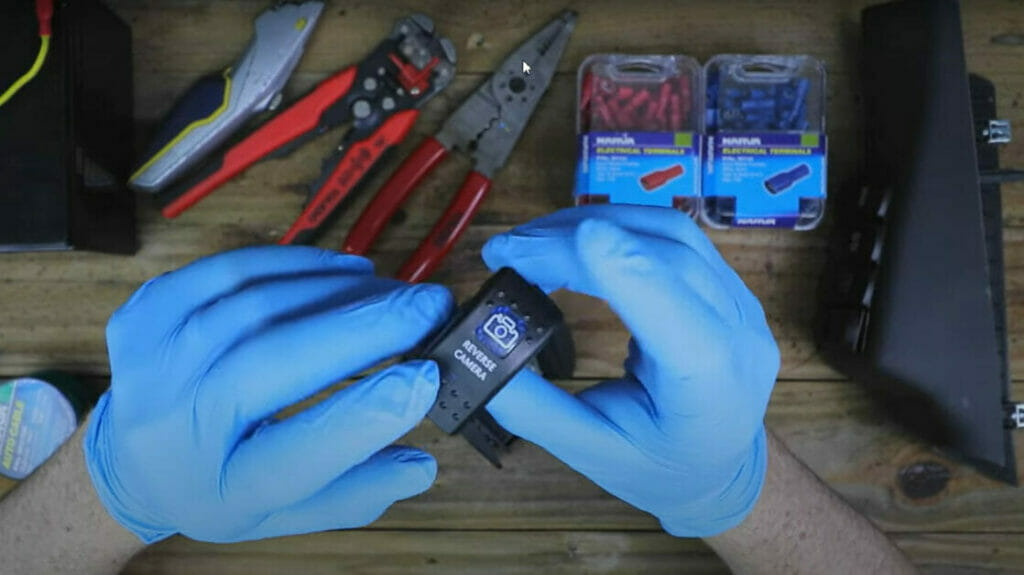
Pregame: Tools and Materials
Let’s discuss your needs before we get into the nitty-gritty of wiring a rocker switch. The right tools and materials are essential to ensure a safe and successful installation process.
- Rocker Switches: You’ll find these handy little devices in various styles and sizes, so choose one that fits your specific project needs.
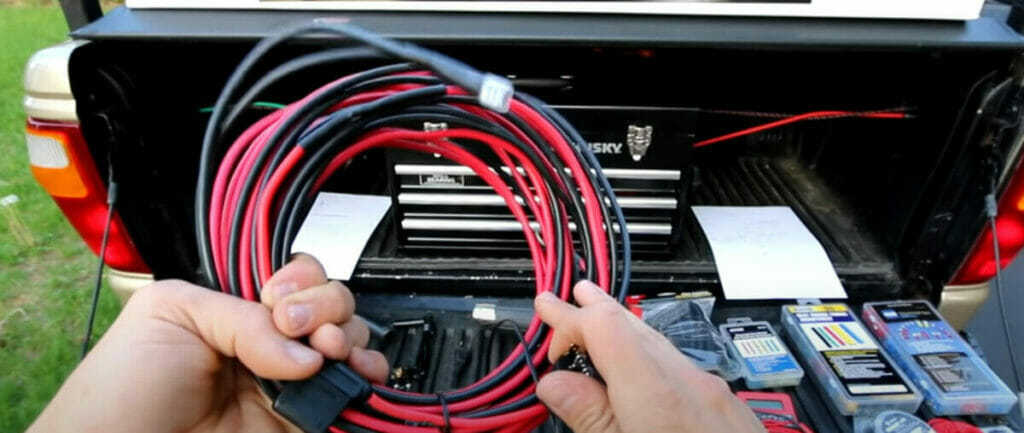
- Electrical Wire: The gauge or thickness of the wire depends on the electrical load of your device.
- Note: A 14-gauge wire should do just fine for most household applications.
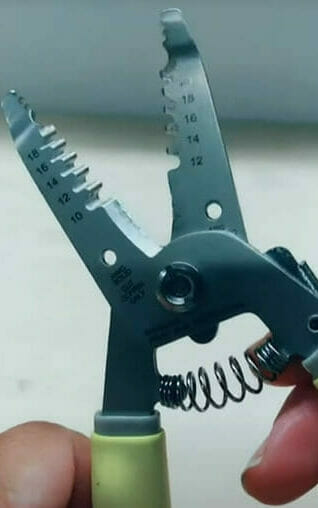
- Wire Strippers: These are designed to strip off the insulation from your wires neatly, revealing the conductive metal core needed for your connections.
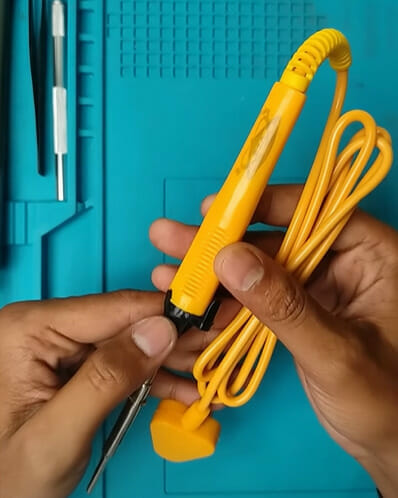
- Soldering Iron: This tool is used when you want to make stronger connections between your wires and switch terminals.
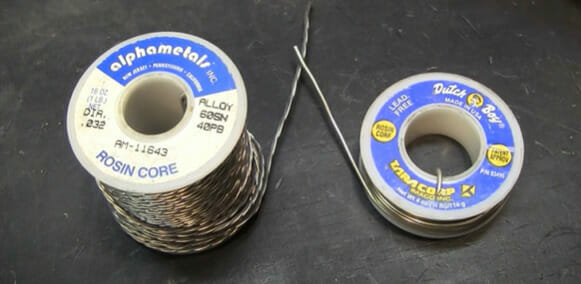
- Solder: This acts like glue in this scenario – bonding those connections securely so they don’t come loose over time.

Safety Precautions
When wiring a rocker switch, I can’t emphasize enough how crucial safety is. It’s not something to be taken lightly. Here are a few key precautions you’ll want to keep in mind.
- Disconnect Power:
- Always disconnect the power before working with any electrical wiring.
- You don’t want any surprises when you’re handling wires and switches.
- Use Appropriate Tools:
- Always use tools designed for electrical work.
- These are made with materials that won’t conduct electricity and are specifically created to safely handle the intricate parts of switches and other electrical components.
- Personal Protective Equipment (PPE):
- Never forget your personal protective equipment (PPE).
- This includes safety glasses and insulated gloves.
- When in Doubt, Pause:
- If at any point you feel unsure or uncomfortable about what you’re doing – stop.
- There’s no shame in calling in a professional electrician for help or advice.
Step-by-Step Wiring Guide
Let’s dive right into this, shall we? Wiring a rocker switch might initially seem intimidating, but don’t fret. I’m here to guide you through the process step by step.
Step 1: Safety First
- Disconnect power to the circuit you’ll be working on to ensure your safety.

Step 2: Gather Necessary Materials
- Rocker switch of the desired type (e.g., SPST, SPDT, DPST, DPDT)
- Wire of appropriate gauge (commonly 14-16 gauge for household applications)
- Wire strippers
- Wire connectors or soldering iron and solder
- Screwdriver or other required tools for your specific application
- Multimeter (for testing, optional but recommended)
Step 3: Prepare the Installation Site
- If you’re replacing an old switch, remove it by disconnecting the wires.
- If it’s a new installation, identify where you want the switch and prepare the site (e.g., drilling a hole if necessary).
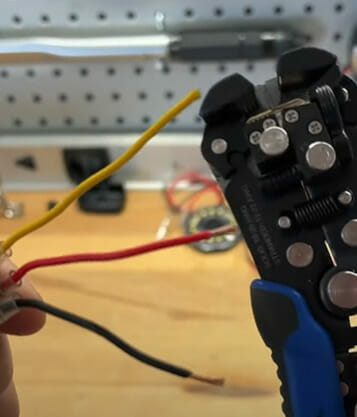
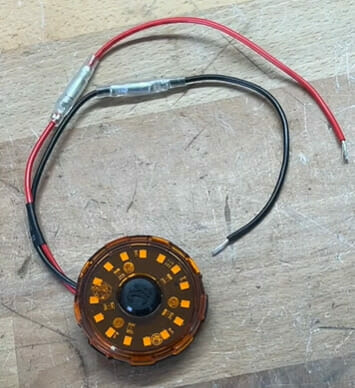
Step 4: Cutting and Stripping Wires
- Use wire strippers to strip approximately half an inch from each wire end, exposing the conductive material.

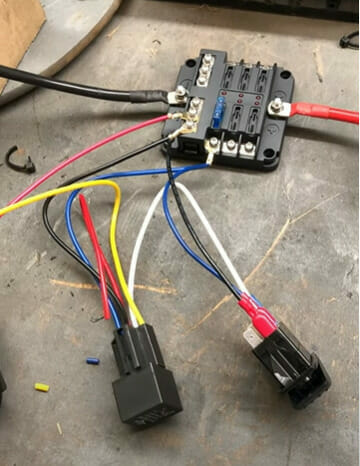
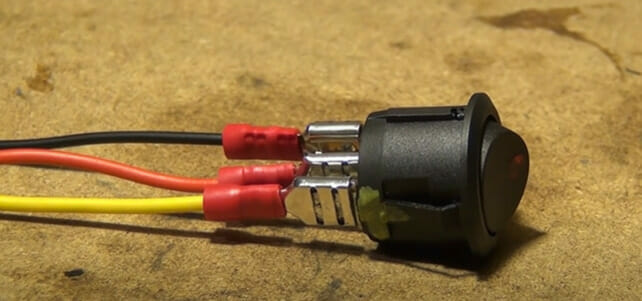
Step 5: Wire the Rocker Switch
- Connect the wires to the appropriate terminals on the switch. This usually involves:
- Connecting the power source wire to the input terminal.
- Connecting the output wire(s) to the device you wish to control.
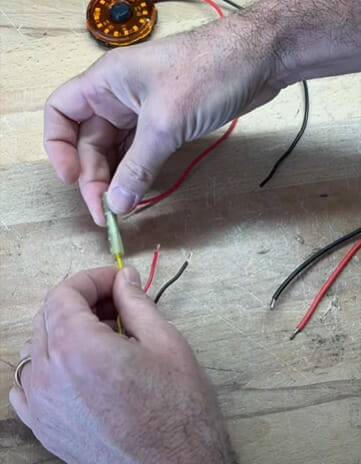
- Use wire connectors or solder to secure the connections.
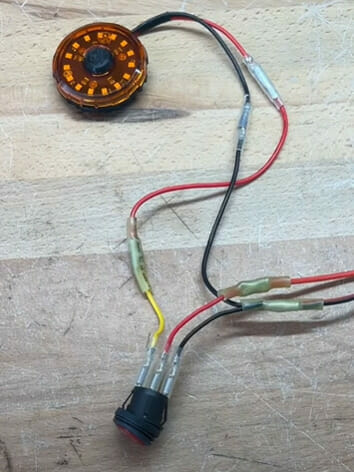
Step 6: Mount the Rocker Switch
- Fit the switch into the desired location.
- Secure it using the provided nut, clip, or any other securing method your switch might come with.
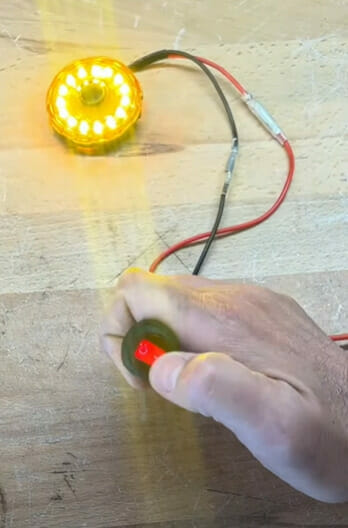
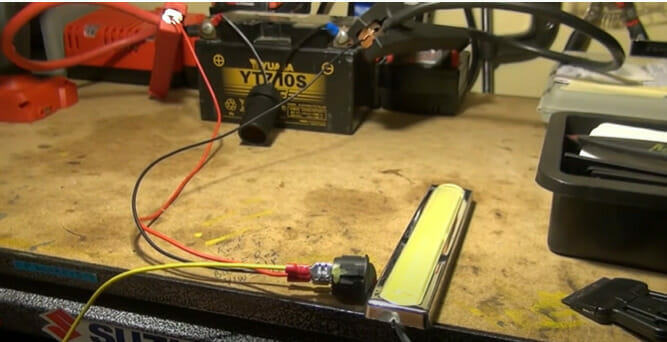
Step 7: Test the Installation
- Use the rocker switch to turn the connected device on and off.
- Use a multimeter to test the connections and ensure the circuit is complete.
Maintenance and Care
Rocker switches, like any electrical components, benefit from regular maintenance and care.
- Regular Cleaning: Ensure the switch is free from dust and grime. Using a soft cloth, gently clean the surface to avoid the buildup that might affect its operation.
- Moisture Prevention: Rocker switches should be checked for moisture buildup, especially in humid environments. Moisture can lead to short circuits or reduced lifespan of the switch.
- Physical Inspection: Every few months, inspect the switch for any signs of wear, tear, or damage. If the rocker switch feels loose or its movement is no longer smooth, it might be time for a replacement.
- Electrical Testing: Use a multimeter to check your rocker switch’s connections periodically. This can help in detecting any potential issues before they become major problems.
Troubleshooting Common Issues
I’ve been there. It’s frustrating when you’ve followed the wiring guide to the letter, yet that stubborn rocker switch refuses to power up. But before you toss it in the bin, let’s look at some common issues and how to troubleshoot them.
| Problem | Potential Causes | Solution |
|---|---|---|
| The switch Doesn’t Power Up | – Connections | Double-check that all wires are snugly connected to the terminals. |
| – Wire Gauge | Ensure your wire’s thickness is compatible with the switch’s requirements. | |
| – Circuit Check | Use a multimeter to verify there’s a consistent power supply. | |
| – Fuse Inspection | A blown fuse can often be the culprit. Replace if necessary. | |
| Intermittent Operation | – Corrosion | Examine wires for rust or corrosion. Clean or replace the affected sections. |
| – Switch Mechanism | Occasionally, the internal components may wear out. Consider replacing the switch. | |
| – Voltage Stability | Fluctuating voltage can cause inconsistency. Confirm stable voltage with a multimeter. | |
| Switch Overheating | – Overload | Ensure the system isn’t overburdening the switch beyond its rated capacity. |
| – Wiring Issues | A short circuit or grounding problem might be causing the heat. Check the entire circuit. | |
| – Environmental Factors | Ensure there aren’t external heat sources or poor ventilation causing the switch to warm up. | |
| Buzzing or Humming Noise | – Grounding | A weak ground often results in buzzing. Reinforce the grounding connection. |
| – Internal Defect | Persistent noise might indicate a faulty switch. Replacement might be in order. | |
| Stiff Toggle Movement | – Dirt Build-Up | Clean the switch to ensure no dirt or grime is causing friction. |
| – Wear and Tear | Over time, the switch’s internal components might degrade. Consider getting a new one. | |
| LED Indicator Issues | – Burned-Out LED | If the switch works, the LED might have burned out, but the light doesn’t. |
| (for illuminated switches) | – Connection | Ensure the LED’s connectors or wires aren’t loose or disconnected. |
Frequently Asked Questions
Q: Is there a specific orientation for installing a rocker switch?
A: While rocker switches can technically be installed in any orientation, it’s common to install them so that the “ON” position is towards the top and the “OFF” position is at the bottom. Always refer to the manufacturer’s guide or label on the switch for clarity.
Q: What’s the difference between rocker and toggle switches?
A: While both are types of electrical switches, they differ mainly in design. A rocker switch operates with a rocking motion, while a toggle switch uses a lever that’s moved up or down. The choice between them usually depends on user preference and the specific application.
Q: How long do rocker switches last?
A: The lifespan of a rocker switch largely depends on its quality, usage, and environmental conditions. However, many rocker switches are rated for tens to hundreds of thousands of cycles. Always check the manufacturer’s specifications for precise information.
Q: Can I paint or customize the surface of my rocker switch?
A: While it’s possible to customize the appearance of a rocker switch, be cautious. Avoid painting over labels that indicate the switch’s position (ON/OFF) or any illuminated areas. Always use materials that won’t interfere with the switch’s function or safety.
Q: Are rocker switches waterproof
A: Not all rocker switches are waterproof. However, you can find specific rocker switches that are water-resistant or waterproof, ideal for marine or outdoor applications. Always check the switch’s IP rating to determine its water and dust resistance level.
Q: Why does my rocker switch make a clicking sound when toggled
A: The clicking sound is typical for many rocker switches. It results from the internal mechanism making and breaking the electrical connection. If the sound is excessively loud or different from the usual click, it might indicate a problem.
Q: Can I use a rocker switch with a dimmer function?
A: Yes, there are rocker switches designed with built-in dimmer functions. These are typically used for lighting applications where you want to control the brightness of a light source. Ensure you’re using the correct type of dimmable bulb with such switches.
Q: My rocker switch has more terminals than I expected. Why?
A: Some rocker switches come with additional terminals for specialized functions, like grounding, illumination, or connecting to other switches in a multi-switch setup. Always refer to the product’s wiring diagram or manual to understand each terminal’s purpose.
References
Website Resources:
- National Electrical Manufacturers Association (NEMA). https://www.nema.org/
- Electrical Safety Foundation International (ESFI). https://www.esfi.org/
- The Spruce. https://www.thespruce.com/
Video Resources:
VideoShowMeHow

Karem Safety
Ray Collier
Oliver Porter
Trail Recon
Fahad Nasir
electronhacks
akash9
seenjanedrill
PistonShack
ChrisFix
ImStricken06