7 min read
How to Wire Lights on a 48 Volt Golf Cart (5-Step Guide)
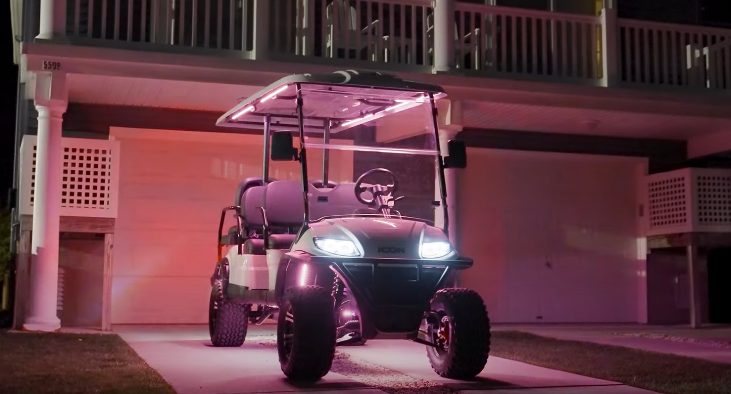
Having golfed for many years at night since it’s the only time my schedule permits I know a thing or two about golf lights. Wiring lights onto golf carts are a common modification. Evening golf is becoming increasingly popular. However, because the majority of lights are 12-volt embellishments, the installation procedure for a 48-volt golf cart is more uncommon and well cover this today.
In general, to wire lights on a 48 Volt Golf Cart:
- Choose the suitable lights for you
- Mark and pinpoint the light installation area
- Install your headlights
- Activate the headlights
- Turn on your headlights
Below, we’ll walk you through the process of wiring lights on a 48-volt club car golf cart in more detail.
How to Wire Lights on a 48-volt Golf Cart
Things to be Considered
Wiring lights on a golf cart is simple, but there are a few things you should know before you begin.
Select Light Position
First, pick where you want your lights to be installed. Most people put the lights near the front and back of the cart, but you may place them anywhere you choose.
Select the Appropriate Sort of Lighting
The next step is to decide what kind of lighting you want to use. Lights of many varieties are available, ranging from headlights and tail lights to spotlight and work lights.
Select the Size and Form of the Light
After deciding on the sort of light to utilize, you must select the size and shape of the light. There are several sizes and types of lights available, so it is critical to select one that will complement the rest of the golf cart.
Choose Between a Single and a Double Battery
Finally, you must determine how you intend to wire lights. There are two methods for wiring lights on a golf cart: one golf cart battery or two golf cart batteries.
- A Single Golf Cart Battery
If you connect the lights to a single battery, they will all be powered by the same battery. This is quicker to install, but it puts a burden on the battery and causes it to expire sooner than if the lights were wired with two batteries.
- Double Golf Cart Battery
If you attach the lights to two batteries, each light will have its own battery. This is harder to install, but it will make your batteries last longer.
Once you’ve decided on the placement, kind, size, and form of your light, as well as how you want to wire it, you may proceed with the following steps:
1. Choose a Suitable Light
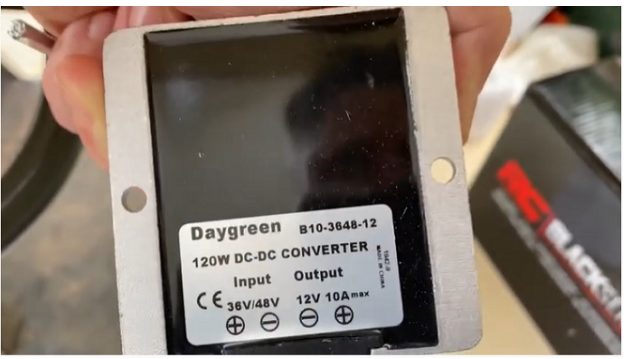
In 48-volt systems, there is no way to tap into 12-volts. You must either connect your golf cart lights to a single 8-volt battery (lights will not burn as brilliantly but will last longer) or connect to two 16-volt batteries (lights burn very brightly but they will not last as long).
Choose a set of 36 or 48-volt head and tail lights if you want to use the golf cart lights regularly but don’t want to spend the money on a voltage reducer. These golf cart battery chargers connect to all of the batteries in the pack and draw them all down at the same time. The golf cart battery charger then equally recharges them all, and life is good!
2. Mark and Pinpoint the Light Installation Area
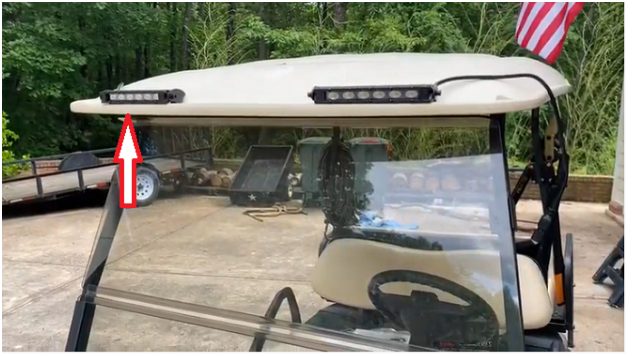
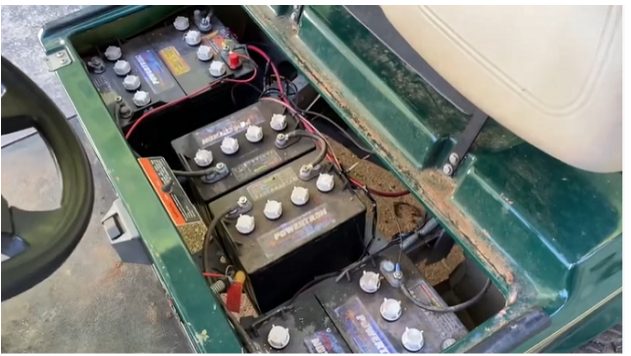
Because golf carts might have up to six batteries, disconnect the negative terminal from each one. The batteries are located beneath the front seat. Mark where you want to install the headlights.
Mount them as high as possible for the best visibility.
Clamp the headlights using the mounting brackets.
Clamp the brackets’ opposite end to the bumper or roll bar.
Locate and install the toggle switch that controls the lights. This switch is often located on the left side of the steering wheel, but you can choose the placement that works best for you.
3. Install your Headlights
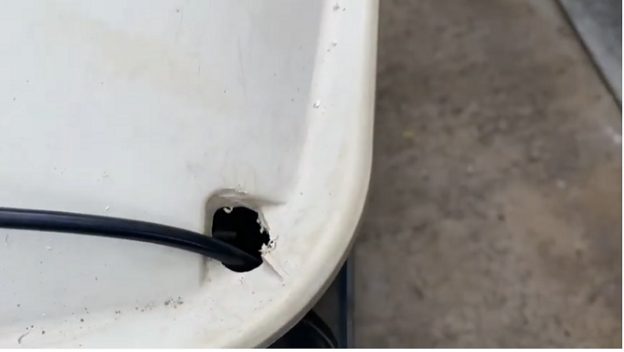
Drill a 12-inch hole in the location where you want to put the switch. The threaded section of the switch may be a different size, so double-check to ensure that the 12-inch hole will fit the component.
Before drilling, make the necessary size modifications to the size of the hole.
Connect one end of the lead to the positive battery terminal with the integrated fuser holder. To connect these parts, you’ll need a solderless ring terminal.
4. Activate the Headlights
Connect the other lead of the inline fuse holder with a butt connection.
Extend the lead to the toggle switch’s center terminal.
Connect the lead to the switch using an insulated female spade terminal.
Obtain a 16-gauge wire. Connect it from the toggle switch at the second terminal to the headlights. To connect the wire to the headlights, use a solderless butt connection. Nylon wire ties are used to secure the wires. It is critical to ensure that the cables are securely fastened. Make sure to cover the connections with electrical tape. (1)
Install the toggle switch. Connect it to the hole and use the screw to secure it.
5. Turn on Your Headlights
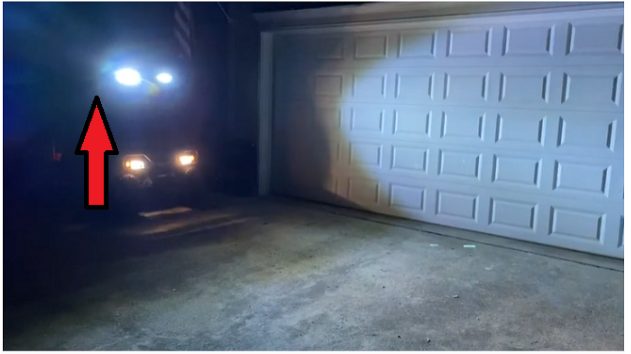
Reconnect all of the batteries’ negative connections. Ensure that all terminals are reconnected to their original places. Turn the toggle switch to the on position to test the lights. Check your wiring and battery connections if the lights do not come on.
FAQs
Is there any equipment necessary to install lighting on a golf cart?
The lighting installation kit includes all of the essential components, such as the lamp socket and pin connector. Certain tools are required for the installation or repair of certain items.
– An electric drill
– 9/16 wrench
– Wire crimped
– Wire cutters
– Electrical tape
– Screwdriver
– An Allen wrench
– Wire stripper
– Voltage reducer
– 10mm socket
– 13mm socket
– T30 and t-15 torque bit
– Marking pencil
– Cordless drills with a smaller tip and 7 16 drill
– Measuring Tape
– Safety equipment
– Nylon wire
Tips to Install Lights on a Golf Cart
1. Check that the lights are properly fastened so that they do not break free and fall off while the cart is in motion.
2. Secure any connections using zip ties or wire nuts to keep them from falling loose.
3. Before driving the cart, ensure the lights are operating correctly.
4. When driving the cart at night, be cautious since the headlights might overwhelm on coming traffic. (2)
5. When utilizing the cart on public roads, abide by all local regulations and ordinances.
Take a look at some of our related articles below.
- How to test golf cart batteries with multimeter
- What gauge wire to connect two 12v batteries in parallel
- How to wire a 220 well pressure switch
References
(1) Nylon – https://www.britannica.com/science/nylon
(2) traffic – https://www.familyhandyman.com/list/traffic-rules-everyone-forgets/
Video Reference