5 min read
How to Test Golf Cart Batteries with a Multimeter (Guide)
One of the most common problems with a golf cart is when your golf cart’s battery gives out. This guide teaches you how to test it and if it needs replacement.
Open Circuit Test
Step # 1 – Put Safety First to Avoid Unwanted Incidents
Safety first is something that most people have been taught since they were kids. The same is true when testing golf cart batteries with a multimeter. You need to take some basic safety precautions before you begin. These include:
- Make sure that the multimeter is set to read the DC voltage.
- Don’t touch the probes directly on the battery terminals, as this will cause a spark and could cause harm.
- Always wear eye protection and gloves.
- Ensure the vehicle is turned off, the parking brake is on, and the keys are removed from the ignition.
Step # 2 – To Test a Power Cell, Inspect it
The next step is to physically inspect the power cell to be tested with a multimeter. The physical inspection of the battery should include checking for any cracks or holes in the case, damage to the terminals, and other defects that may appear on the external part of the battery.
If there are any cracks or fissures in the external casing, this can be a sign that there is internal damage and could lead to a more serious problem later on.
Step # 3 – Prepare a Battery for the Test
If you have a battery that is difficult to reach or otherwise awkward to get at, the best thing to do is ensure it’s fully charged. A battery that isn’t at full charge will give a false reading and make it appear as if the battery were dead when, in reality, it isn’t.
If you don’t think the battery needs to be charged, check its charge state with a hydrometer, which will tell you how much of its capacity is available.
If the hydrometer indicates less than 50% of the total capacity left, then you should charge it before proceeding with the test.
Step # 4 – Accurate Readings Can Be Achieved by Configuring the Device Correctly
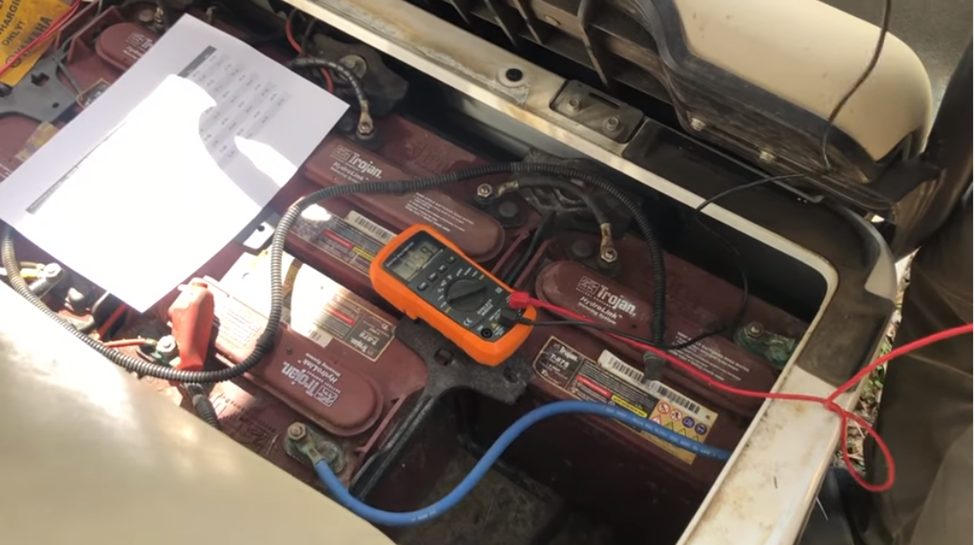
To get an accurate reading of your battery’s capacity, you must first configure your multimeter to read DC voltage. This can be done by selecting the appropriate setting on the device’s dial. Once configured, connect the leads to the battery terminal posts. The positive lead should be connected to the positive post and vice versa.
Next, look at your multimeter display window to see what reading is indicated. A 12.6 volts or higher reading indicates a fully charged battery is present, while 12.4 volts or less indicates a discharged battery.
If a lower-than-normal reading is noted, try charging your battery for 24 hours and retesting it with the multimeter to see if it brings its voltage back up.
Step # 5 – Connect the Probes to the Battery
In this step, you will ensure that the two probes of your device are correctly connected to the battery. You must connect the red probe to the positive terminal and the black probe to the negative terminal. A “+” sign denotes the positive terminal, while the negative terminal is denoted by a “-” sign or a “–” sign. You can also identify them by color; red indicates positive, and black indicates negative.
You must use crocodile clips to connect your device to the battery terminals. If you do not have crocodile clips, you can use small jumper wires to connect your device to the battery terminals. However, using crocodile clips to connect your device to the battery terminals is recommended, as it is more convenient and less prone to errors.

Step # 6 – To Test the Battery, Put it Under a Slight Load
To get a reading from the multimeter, you need to put a load on the battery. This can be accomplished by simply turning on the headlights of the golf cart. With the meter set to DC volts and the negative lead connected, touch the positive lead with the other hand. The voltage should be between 6 and 8 volts. If not, the battery may need recharging or replacing.
If your batteries are wired in series (the positive of one battery is connected directly to the negative of another), you will have to do this for each individual battery. If they are wired in parallel (all positives and negatives), you can check any single battery.
References
Website Resources:
Video References:
Deep Cycle Battery San Diego
South Atlanta Golf Carts LLC
DIY Golf Cart