11 min read
How to Wire in Series (5-Step Guide)

Ever caught yourself marveling at those sparkling Christmas lights or the LED sets lighting up your home and thought, “How do they do that?” Guess what? It’s all about getting savvy with series wiring.
Quick Summary: Wiring a series circuit is a breeze once you get the hang of it, especially with these five straightforward steps in your toolkit:
🔍 Step 1: Plan Your Circuit
🛠️ Step 2: Start Building Your Circuit
🔗 Step 3: Complete the Circuit
🔒 Step 4: Ensuring Secure Connections
🔎 Step 5: Testing the Circuit
In this article, I’ll guide you on this electrifying journey, unraveling the ins and outs of series wiring. So buckle up, and let’s shed some light on the fascinating world of series wiring.
What is Series Wiring?

Let’s dive into the nuts and bolts of series wiring, which is pretty neat once you get the hang of it. Imagine linking a series of components together, like a line of dominoes, where each one is connected to the next seamlessly.
Think about your classic string of garden lights. Ever noticed how, if one light goes out, the entire string stops glowing? That’s series wiring for you. Each light is a crucial link in this lineup.
It’s like a missing domino, halting the whole sequence when one goes out. This is the crux of a series circuit – a continuous, unbroken line where every component is directly linked to its partner.
Series wiring isn’t just a fancy concept; it’s practical and used in everyday items, like those cozy garden lights that charm your backyard. So, let’s get our hands on this and unravel the magic of series wiring.
Tools and Materials Needed
Arranging a successful series wiring project calls for having the correct tools and materials at disposal. Let me guide you on what you’ll need to kickstart this wonderful journey of learning about series circuits.
We’ll start with the basics.
- You’ll need a D battery as your power source.
- Pair that with a bulb so there’s something that’ll light up when you’re successful.
- You’ll also need a good length of wire, arming ourselves with the lifeblood of our circuit.
To craft these basic items into a working circuit, there are some tools you’ll find invaluable.
- Let’s start with wire strippers — your bread and butter tool, adept at revealing the conductive metal core of our wire beneath its insulating shield.
- Don’t forget to have a battery holder and bulb holder in hand. They’ll help steady the key players of your circuit, giving you a good runway toward understanding the workings of a series circuit.
That’s it! I’ve given you a wholesome list of what you’ll need — tools, materials, and an explorer’s mindset. Remember, building a series circuit is only the beginning.
Step-by-Step Guide to Wiring in Series
I’ll walk you through the wiring process in series in this step-by-step guide. It might seem a complicated process, but it becomes a walk in the park with some practice.
Step 1: Plan Your Circuit
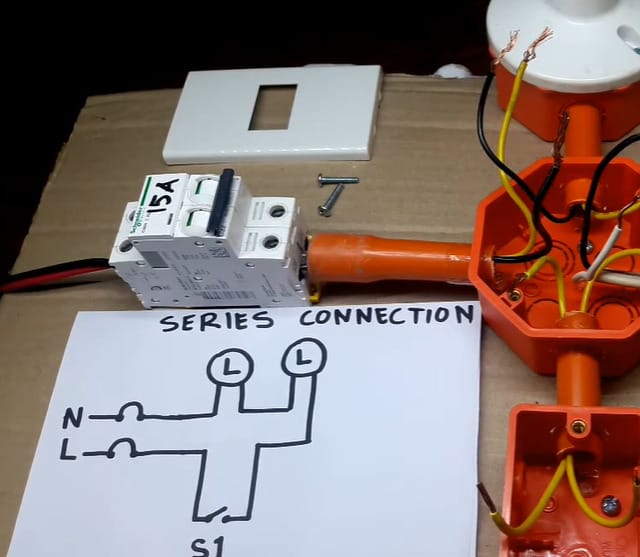
Just like planning a big room makeover, start by sketching your circuit. This blueprint guides how the components will be connected in series.
Make sure the power source you’ve chosen is compatible with your components – think of it as picking the right paint color for a room.
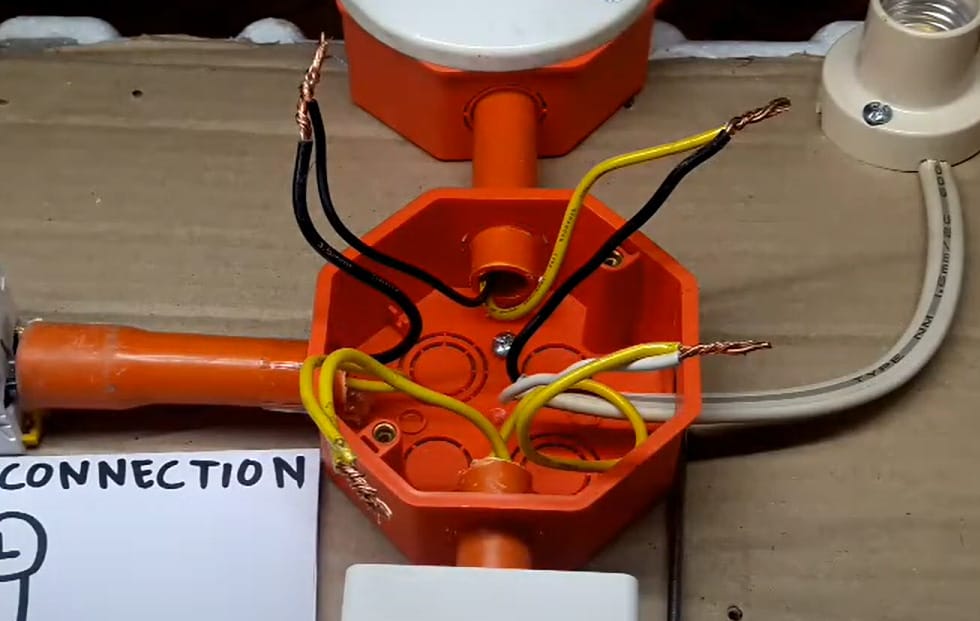
Step 2: Start Building Your Circuit
- Step 1: Attach the positive terminal of the battery to the first terminal of the resistor or LED (the anode of the LED or one end of the resistor).
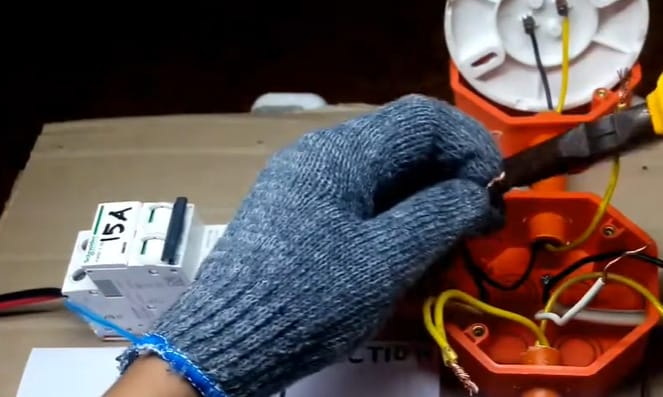
- Step 2: Connect the second terminal of the first resistor or LED to the first terminal of the next resistor or LED. Repeat this process for each additional component.
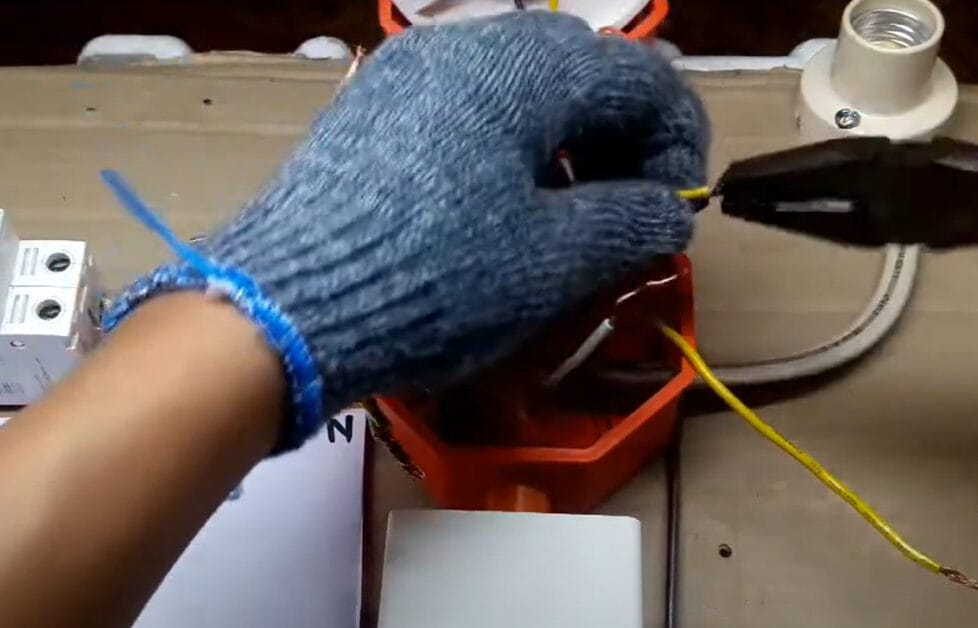
Step 3: Complete the Circuit
- Connect the final component to the battery’s negative terminal. This completes your circuit, allowing current to flow through all components in a single path.
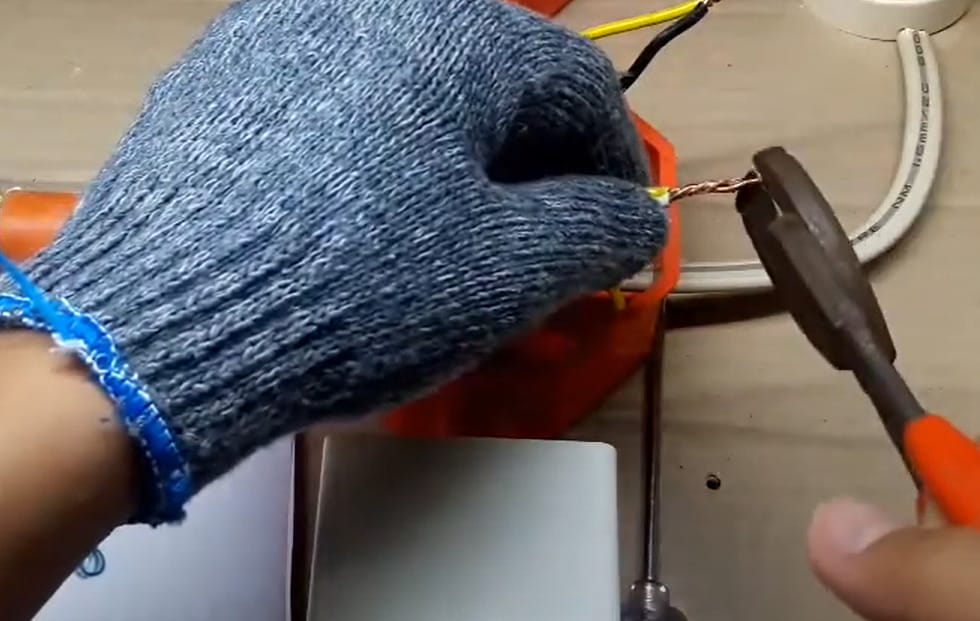
Step 4: Ensuring Secure Connections
It’s time to double-check your work. Review all your connections to ensure they’re secure and correctly oriented.
A Series connection is best depicted as components connected in a line. It’s about creating a single path through which current can flow. Accuracy is key here!
Step 5: Testing the Circuit
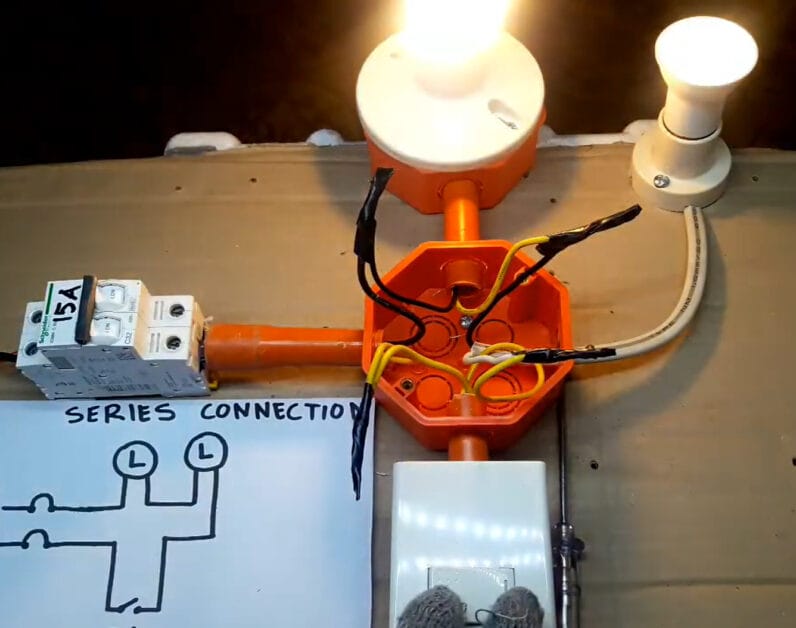
You’ve reached the final step, and your series circuit is set up, ready to put the pedal to the metal.
Power on your supply and check if all LEDs illuminate — that’s your green light. If they don’t light up, recheck your connections and give it another try.
Remember, practice makes perfect! Keep persisting, and soon enough, you’ll be acing it!
Troubleshooting Common Issues for Series Connections
You’ve done your wiring, but the serious work isn’t over yet. You’ll need to understand a key fact: even after you’ve followed all the right steps, things might not work as expected. That’s where troubleshooting comes in.
- Check Each Component: It’s like inspecting every tile in a mosaic. If one part of your series circuit isn’t working, it can stop the whole show. Ensure each component, be it a resistor, LED, or other, is in good shape and properly connected.
- Mind the Polarity: This is crucial, especially with diodes like LEDs. If one is flipped the wrong way, it’s like putting a door in backward – nothing will work right. Double-check to ensure all components are aligned correctly according to their positive and negative ends.
- Inspect Your Connections: Loose connections are like poorly hammered nails; they can make the whole structure shaky. Ensure that all connections are secure and well-made. If you’ve soldered, look out for cold joints – they can be as sneaky as a draft in a well-sealed room.
- Power Supply Check: Ensure your power source is up to the task. It’s like having the right size engine in a car – too weak, and it won’t go; too strong, and you might blow a fuse. Ensure the voltage and current match what your circuit needs.
- Look Out for Overload: Adding too many components in a series can be like overloading a shelf. Each component adds resistance, which can change how the circuit behaves. Monitor the resistance and ensure it aligns with your power source’s capabilities.
- Use a Multimeter: This tool is like your detective’s magnifying glass. Check for continuity, voltage drops, and proper current flow. It can help you pinpoint exactly where the issue lies.
Remember, troubleshooting is part art, part science. It’s about looking at the details, understanding how they fit into the bigger picture, and sometimes, a bit of trial and error.
Advantages and Disadvantages of Series Wiring
Series wiring holds its uniqueness and can be an unmistakable choice based on the situation. That said, just like all other electrical configurations, it has pros and some setbacks.
Advantages of Series Wiring:
- Simplicity: It’s the most straightforward way of wiring your components. Just connect the end of one to the beginning of the next, and so on.
- Reliable Electricity Flow: Series wiring ensures the reliable flow of electricity across the circuit, leading to more consistent power delivery for each component connected beneath the series umbrella.
Disadvantages of Series Wiring:
- Dependency on Each Component: When one component in a series circuit fails, it often causes the entire circuit to stop functioning.
- Vulnerability to Single Failures: Visualize a string of lights – if one bulb burns out, the whole string goes dark.
- Shading Issue in Solar Panels: Since all the panels are interconnected in a sequence, the output lowers even if a single panel is shaded, impacting the performance of the entire string.
Tips for Effective Series Wiring
As we dive into the art of wiring in series, we can’t ignore some solid tips that will ensure your system works like a charm. This is especially crucial when a minor mishap could compromise the entire operation.
- Consider Component Voltage: The total voltage of your circuit is determined by the sum of all the voltages across each LED.
- Visualize as One Big Loop: Train your mind to see the circuits as one big loop – it’s easier to wire it that way.
- Use Series Wiring for GFCI: If you are keen on connecting household items downstream of a GFCI (ground-fault circuit interrupter) receptacle, always resort to series wiring.
- Consider Alternatives to Parallel Wiring: In your pursuit of mastery in series wiring, you may find parallel wiring tempting. However, remember, it’s not always the soundest method of connecting electrical devices.
- Safety Precaution: Before you start, always ensure your power source is disconnected when servicing, repairing, or installing your circuits.
Frequently Asked Questions
- Can I Mix Different Types Of Components In A Series Circuit?
- Absolutely! Mixing components like LEDs and resistors is doable. Just remember, it’s like adding different flavors to a recipe – each component brings its characteristics to the circuit.
- Is Series Wiring Suitable For Outdoor Lighting?
- Yes, series wiring can be used for outdoor lighting. However, think of it as setting up a line of dominos – if one light fails, the rest will go out. So, it’s important to consider the reliability and maintenance aspects.
- How Do I Calculate Total Voltage In A Series Circuit?
- Add up the voltage across each component, like tallying your total at a checkout. For instance, if you have three 2V LEDs in series, your total voltage will be 6V.
- What Safety Precautions Should I Take When Working With Series Circuits?
- Safety first! Always disconnect your power source when working on your circuit. Think of it as turning off the water before fixing a pipe. Wear protective gear, and double-check your connections.
- Can I Use Series Wiring For High-Power Applications?
- It’s possible, but consider it towing a heavy trailer with a small car. High-power applications often require more complex setups like parallel circuits to share the load effectively.
- How Do I Choose The Right Wire Size For Series Wiring?
- Choosing wire size is like picking the right pipes for plumbing. It depends on the current you expect to flow. Higher current requires thicker wires to handle the load without overheating.
References
Organizations:
- Institute of Electrical and Electronics Engineers (IEEE). https://www.ieee.org/
- National Electrical Manufacturers Association (NEMA). https://www.nema.org/
- International Electrotechnical Commission (IEC). https://www.iec.ch/homepage
Books:
- “Practical Electronics for Inventors” by Paul Scherz and Simon Monk. https://books.google.com/books/about/Practical_Electronics_for_Inventors_Thir.html?id=bU0OkMwFeWIC
- “The Art of Electronics” by Paul Horowitz and Winfield Hill. https://artofelectronics.net/
- “Electronics For Dummies” by Cathleen Shamieh. https://books.google.com/books/about/Electronics_For_Dummies.html?id=0yJ3blaI7b8C
Website Resources:
- All About Circuits. https://www.allaboutcircuits.com/
- SparkFun Electronics. https://www.sparkfun.com/
- Make: DIY Projects and Ideas for Makers. https://makezine.com/
Video References:
Local Electrician