14 min read
How to Wire an LED Light (3 Scenarios)
LED lights produce much light without drawing high currents like the old incandescent ones and can also operate on DC rather than AC.
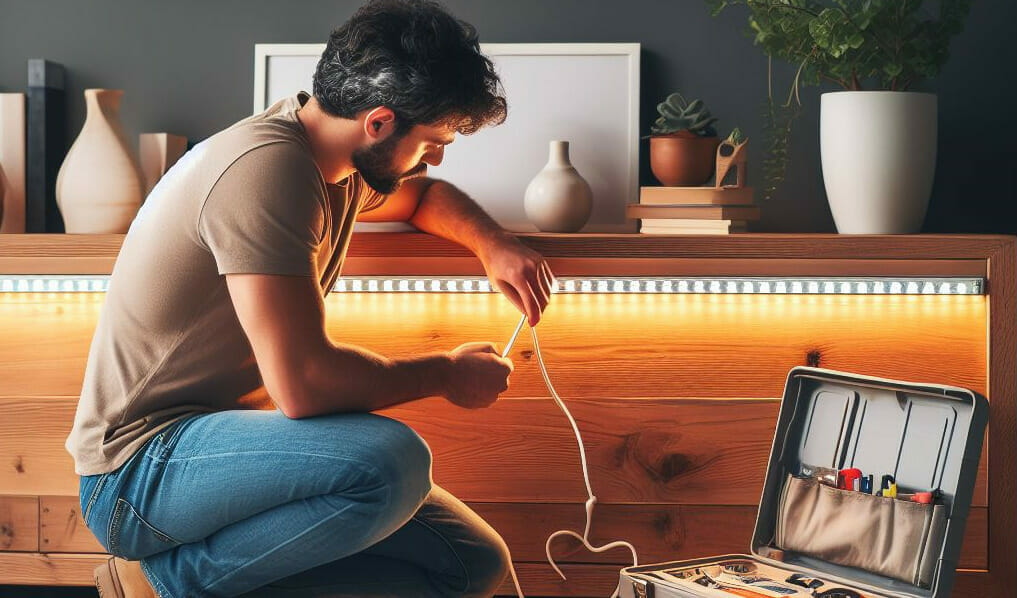
This article shows how to wire one, covering three scenarios: an AC ceiling LED light, a simple DC LED light, and an LED strip light.
The general procedure to wire a DC LED light is to connect the positive (+) and negative (-) wires to the power supply’s corresponding terminals. You connect the corresponding hot and neutral wires for an AC light and then ground the fixture.
An LED strip light also has only two power wires. Any extra ones are for different colors or light types. Attach the wires to the marked terminals on the controller and the adapter.
Read further for more detailed instructions.
LED Lights
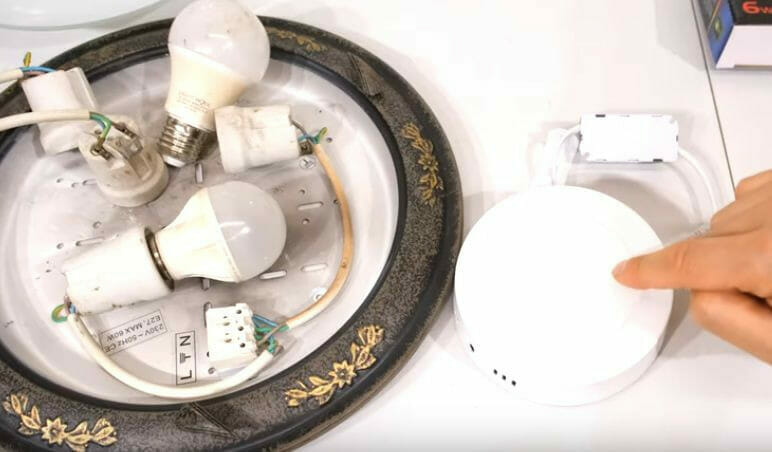
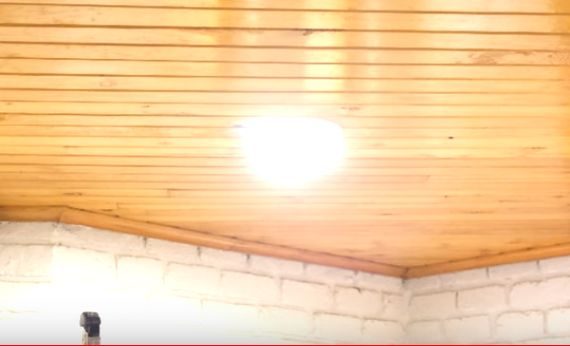
There’s a trend to replace traditional light fittings designed for incandescent lights with LED ones due to the greater efficiency (greater brightness at lower wattage).
For example, the surface mount LED light on the right in the picture below has a 6W bulb with a greater light output than the pair of 7W bulbs in the old fitting with a diffusing cover.
Considerations and Requirements
Type of LED Light
Before wiring and installing one, you must consider what type of LED light you want and what features you need.
The important features are brightness and color temperature. Brightness is indicated in lumens (amount of light emitted), and the color temperature ranges from warm to cool white.
LED lights come in various types, including ordinary light bulbs, spotlights, and strips. The wiring procedure is mostly the same throughout but varies according to the type of LED light. I’ve given a brief guide if you’re unsure which type to buy.
Also, LED lights come in both AC and DC types. Only the AC type can connect directly to your home wiring, whereas DC LED lights require a separate power supply or connect to your solar-powered system. This also makes a big difference to the wiring.
The Power Supply
The power supply must supply the correct voltage and current for the LED light.
If it’s an AC-powered LED light, it’s usually rated for 120V, and you can attach it directly to your home’s electrical system. You probably don’t need to do any wiring at all. It may be 240V if it came from outside the United States.
Check the voltage rating and current or power requirement if it’s a DC-powered LED light. The voltage is usually 12V or 24V, but maybe 48V or higher. The power supply’s (or driver’s) wattage capacity should be adequate to accommodate an LED with a load between 30% and 80% of this capacity.
Any lower than 30% could overpower the LED light; higher than 80% would overwork the power supply or driver.
For example, an LED light rated for 30-80 watts should be used with a 100-watt driver.
Wire and Length of Run
The wire required is normally a 22-gauge one for a low-density (less bright) LED light to an 18-gauge one for a higher-density (highly bright) LED light.
Usually, you don’t need to worry about the run unless it’s long and you’re wiring a high-powered LED light, i.e., one with a high lumens rating (high-density light).
If this is the case and the brightness is not what you expected, try one or more of the following:
- Use lower gauge (thicker) wire to reduce the resistance.
- Split the load by adding another driver.
- Install any additional LED lights in parallel rather than daisy-chaining them.
Wiring Procedure for an AC LED Light
The wiring procedure described below applies to high-voltage (110-120V) LED lighting for replacing an old non-LED fitting.
Step 1: Turn Off the Breaker
Turn the breaker off for the circuit you will be working on.
Step 2: Remove the Old Fitting
Remove the cover of the old fitting to reveal the wires. Note the wire colors used and where they are connected. Then, disconnect the wires and remove the old fitting completely.
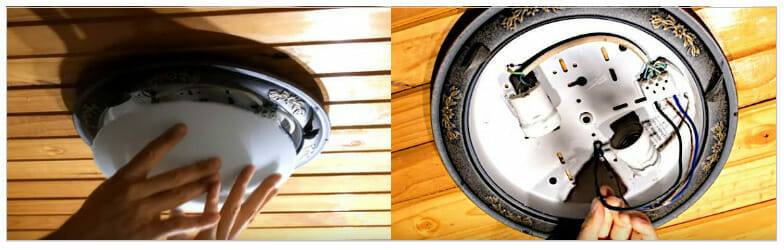
In the above example, black is the neutral (usually white in the US), and blue is the live or hot wire (usually black or red).
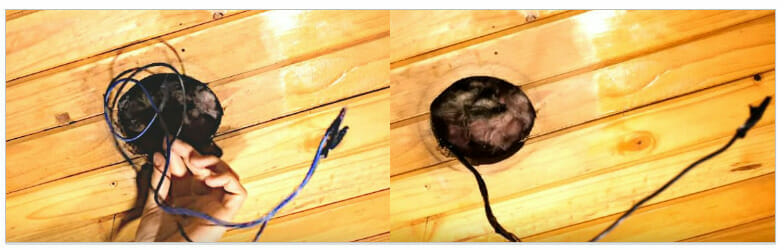
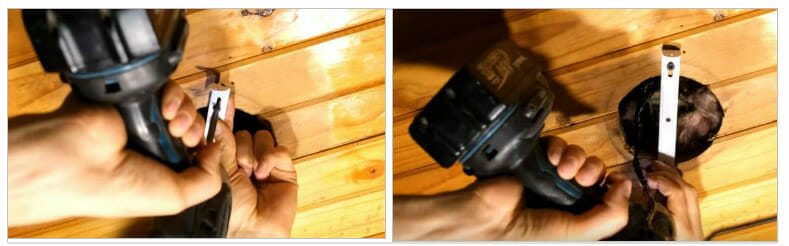
Step 3: Seal the Wiring
If it’s a ceiling light fixture, wires should not normally be loose like on the left in the picture below.
If that’s the case, seal them (bind them together) using electrical tape. Seal the wiring using electrical tape, as on the right.
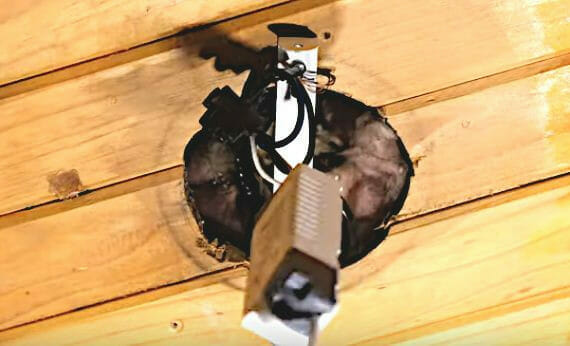
Step 4: Attach the Fitting
Attach the new LED fitting.
Usually, it’s a bracket to attach. Make sure it is equidistant.
Step 5: Connect the Wires
Connect the corresponding wires.
- Connect the light fitting’s positive wire to the hot (line) wire from the ceiling. In this case, it’s white with blue, but normally, it’s the two black wires together.
- Connect the negative wire to the neutral line wire.
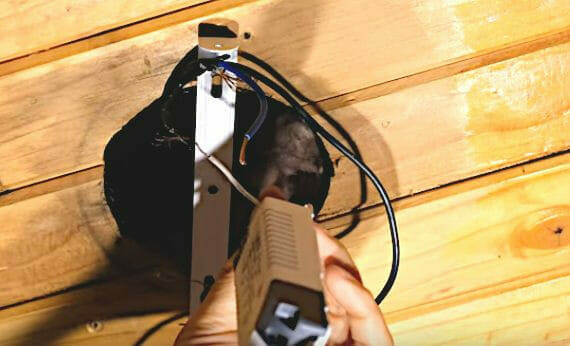
Use wire nuts, connectors, or terminal blocks to make the connections. Terminal blocks are used in the example below.
The DC LED light will have a DC jack that converts AC to DC, as shown in the picture below.

Step 6: Ground the Fixture
Ground the light by attaching the ground wire to a metallic part of the fixture. You can attach it to a screw if no grounding terminal is provided.
Step 7: Attach the Light Fixture
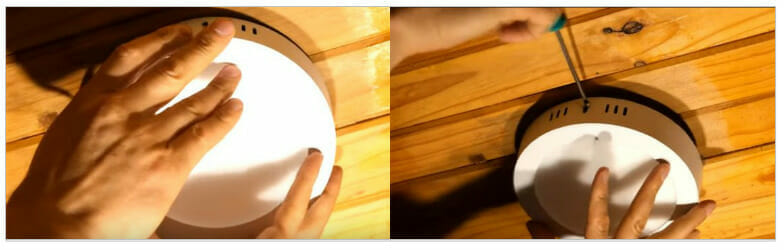
A surface-mount LED light has now replaced the old light fitting.
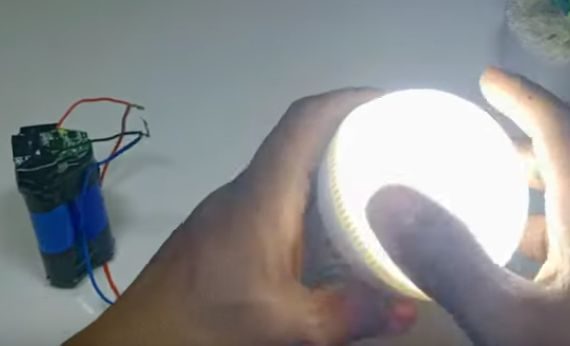
Wiring a Simple DC LED Light (Low Voltage)
Whichever type of LED light you have, the general procedure involves connecting the positive (+) and negative (-) wires to the power supply’s corresponding terminals.
This is a very simple setup, as you can see below.
Wiring Procedure for an LED Light (Low Voltage)
The wiring procedure described below applies to low-voltage (12/24/48V) LED lighting.
We will wire an LED strip light to illustrate it.
Requirements
It would be best if you usually had the following to wire an LED strip light:
- LED light strip roll
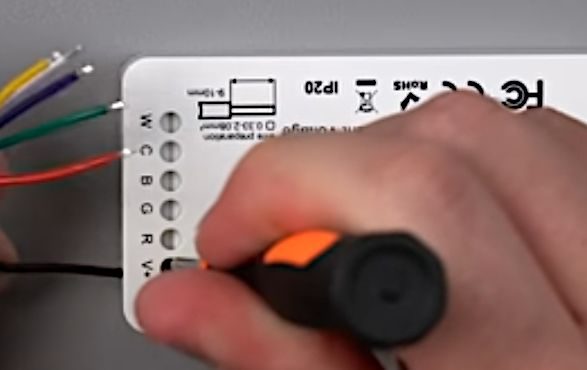
- Controller
- Power source
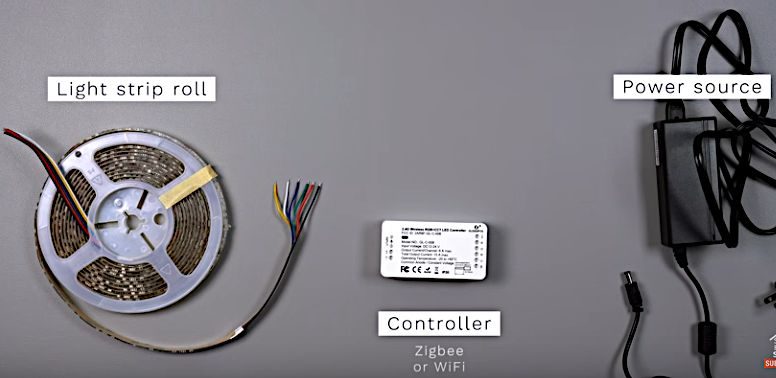
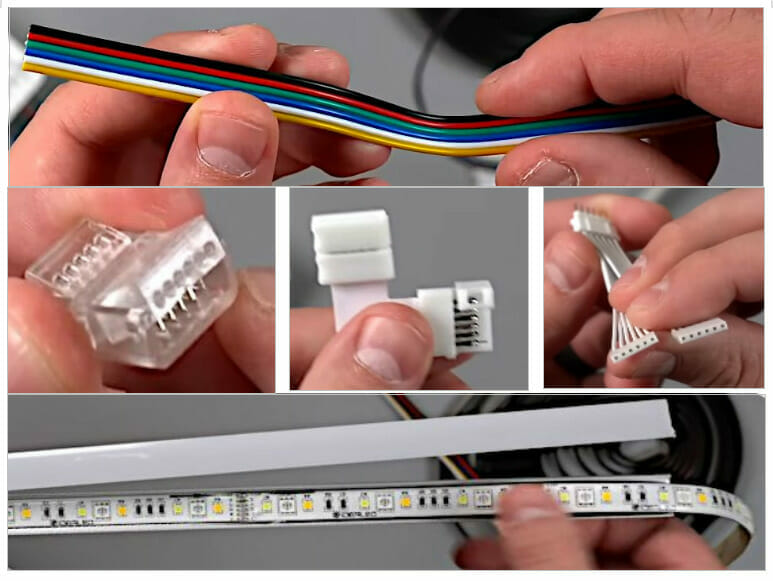
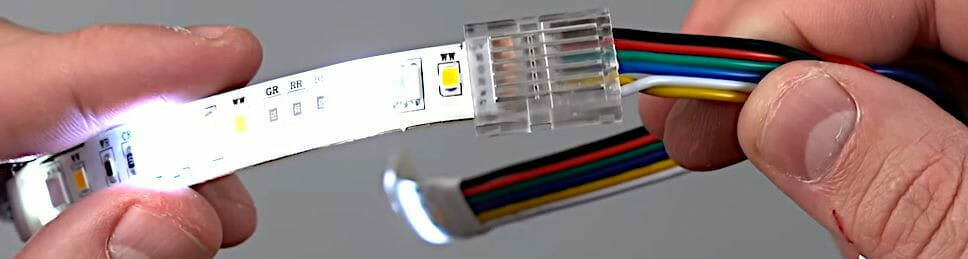
As you can see, 6 wires are attached at the end of the LED strip roll. But don’t worry. It’s easy to connect them.
Step 1: Connect the LED Light
DC wires typically use stranded wire, so ensure you twist the strands before connecting the wire.
If it’s an LED strip light, you might require a soldering iron to connect the wires to the strip, whereas some types don’t require any soldering.
Only 2 of the wires are for the power source. The others are for different colors or types. The wires connect to the controller on which the terminals are usually marked.
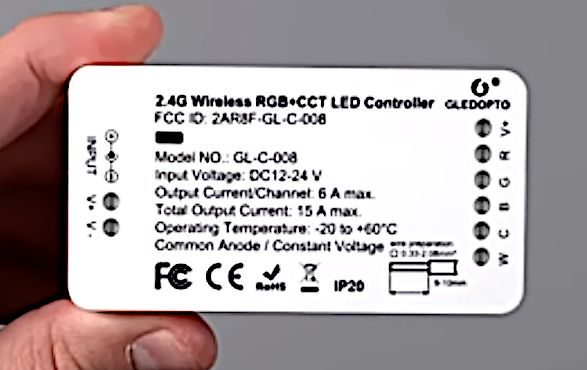
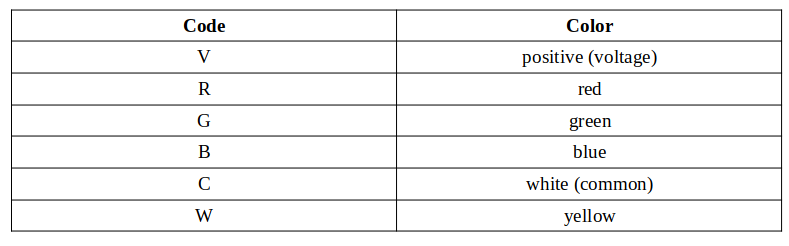
Connect the wires to the corresponding terminals, as indicated in the above table.
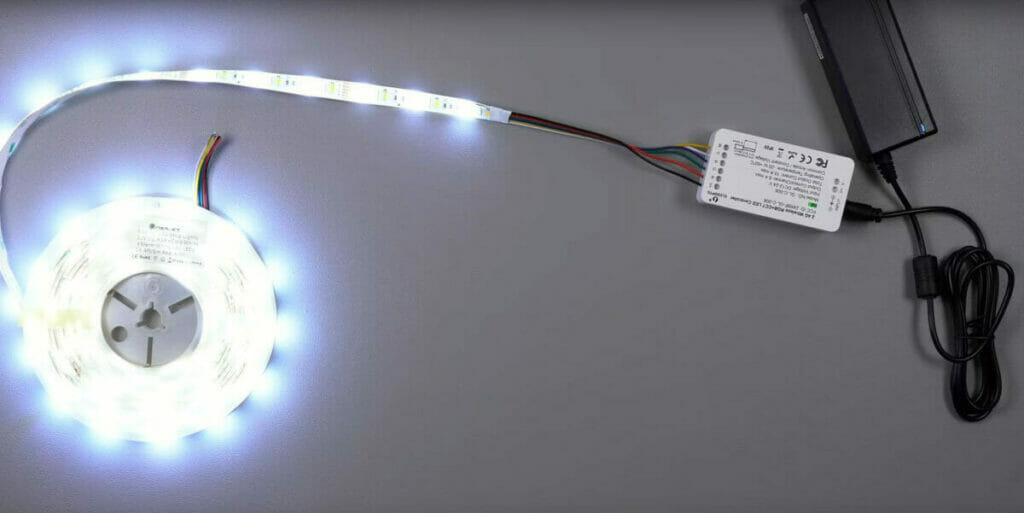
Step 2: Test the LED Light
You can install the LED light after the wiring, but I recommend testing it first.
Connect the power source.
The LED light should light up. It’s that simple.
Step 3: Install the LED Light
Depending on your installation type, you may have to attach a mounting bracket or adhesive tape.
Additional Components and Accessories
Additional Components
Depending on your situation, you may need to add a transformer, a dimmer, and a resistor to the circuit.
- You will need a step-down or step-up transformer to attach a DC LED light to a power supply with a greater or lower voltage than required.
- You will need a dimmer to control the light’s brightness.
- You will need a resistor to limit the current.
Accessories
Accessories are available for the LED strip lights.
They are handy when extending the strip or covering a gap. Such accessories include:
- Extra cables (top)
- Straight connector (middle left)
- L or right-angle connector (middle center)
- Splitter (middle right)
- Channel covers (bottom)
A joint using a cable and straight connector would look like this:
Choosing an LED Light
Here’s a brief guide to help you choose the right LED light to wire and install.
Brightness: Choose the brightness you require for the location where the LED light will be installed. Here’s a chart that may help.

Color Temperature: Choose a warm white LED light for a comfortable feeling or a cool white one for general spaces.
LED Strip Light: Choose this for ambient lighting and greater energy efficiency. They usually require a 22-gauge wire and a 12V DC supply (18-gauge wire and 24V if high density).
COB LED Light: Choose this type for (spotless) high-intensity output in normally closed areas, such as cabinets, and frequented spaces, such as living rooms. They usually require an 18-gauge wire and a 24V DC power supply.
LED Spotlight: Choose this type for focused lighting or to highlight something like a picture frame.
FAQs
Ready to shed some light on your LED questions? Let’s dive into it!
1. Can I hook an LED light directly to my home’s power supply? Depends on your LED. If it’s an AC type! Hook it up directly. But you’ll need a separate power supply if it’s a DC type.
2. I’ve got many wires coming out of my LED strip. Help? Don’t sweat it! Most of the time, only two bad boys are for the power. The rest? They’re for different colors or light types. Just match them up with the marked terminals on your controller.
3. How do I ensure I’m not overpowering my LED light? Great question! Keep your LED’s load between 30% and 80% of your power supply’s capacity. Stay in that sweet spot, and you’re golden.
4. I’ve got a super long LED strip. Any advice? If it’s a lengthy run and the light’s not as bright as you hoped, try using a thicker wire to reduce resistance. Or consider adding another driver or installing additional LEDs in parallel.
5. Do I always need to solder my LED strip lights? Not always! Some LED strips are solder-free, making life a whole lot easier. Just make sure you’re connecting the right wires to the right places.
7. Can I dim these LED lights? If you’re looking to set the mood, you’re in luck! Many LED setups let you add a dimmer to control brightness. Just make sure your system’s compatible.
8. Do I need a transformer for my LED light? If you’re trying to hook up a DC LED to a different voltage than it requires, you might need a step-up or step-down transformer. Check your LED’s voltage needs and match it up!
9. Can I make my LED lights more stylish? Absolutely! Accessories like channel covers and connectors can make your setup look sleek and professional. Plus, they’re handy for extending your LED strip or bridging gaps.
10. Any parting advice, oh wise one? Always remember safety first! Turn off that breaker before you start any wiring work. And if you’re ever in doubt, consult an expert. Better safe than sorry!
References
Video References:
Craft Hornet

Ecologicaltime
Smart Home Solver