11 min read
How to Wire Fan and Light Switch (6 Simple Steps)

Have you ever tried to wire a fan and light switch and found yourself tangled up in a mess of wires? Well, you’re not alone.
Quick Summary: Here’s the rundown on wiring a ceiling fan and light with a single switch:
🔒 Safety Check: Power off, gear up!
💡 Old Fixture Out: Quick and clean.
🔧 Fan Ready: All parts set.
🔌 Wire Magic: Color match, connect.
🔗 Secure Connections: Tight and neat.
🌀 Fan Up: Mount with care.
✅ Test and Enjoy: Power on, cool down!
I will take you through a step-by-step guide on how to wire up a fan and light to one switch. I’ll also walk you through troubleshooting and maintenance tips to keep your setup running smoothly.
So, roll up your sleeves, grab your tools, and get started on this electrifying journey!
Tools and Materials Needed
As we delve further into wiring a fan and light switch, let’s not forget the essential Tools and Materials Needed.
- 🛠 Wire Connectors: These little guys are crucial for making safe and secure wire connections. They’ll keep everything together and safe under the cap.
- 🪜 Step Ladder: You’re going to need some height! A sturdy step ladder will get you up to the ceiling safely and comfortably.
- 🔧 Screwdriver: You can’t do much without this classic tool. You’ll need it for securing the fan bracket and any other screws that come your way.
- ✂️ Wire Cutter/Stripper: These are your best friends for dealing with wires. Cutting and stripping wires to the right length and insulation is key.
- ⚡ Circuit or Voltage Tester: This little device is a lifesaver, literally. Always check for live current before you touch any wires.
- 🎮 Remote (Optional): If your fan has a remote control feature, it’s a cool add-on for easy operation. Convenience at the click of a button!
- 🔋 Batteries (Optional): Don’t forget the batteries if you’re using a remote. It’s all about the power to control your fan and light from afar.
Remember, the right tools make the job not only easier but safer, too. Let’s get to it and make that fan and light installation a breeze!
Step-by-Step Wiring Instructions
We will break it down, piece by piece so that you can wire it up like a pro. So, grab your tools, roll up those sleeves, and make some electrical magic happen! Ready? Let’s do this!
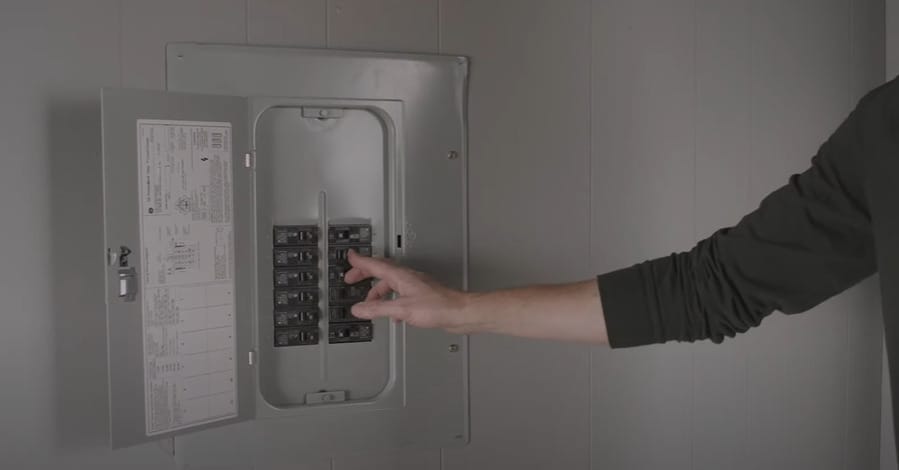
Step 1: Ensure Safety
- Locate your home’s electrical panel and switch off the circuit breaker that powers the room where you’re working. This prevents electrical shocks.
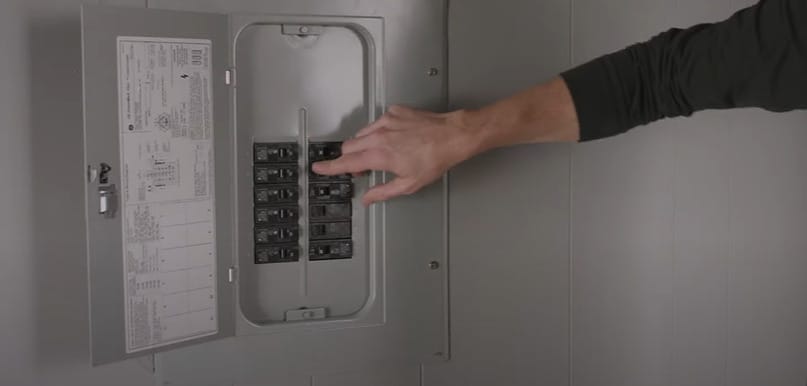
- Optionally, use a voltage tester on the wires you’ll be working with to ensure there’s no electricity flowing. It’s a critical safety step.
Step 2: Remove Existing Fixture
- Start by taking off the cover and removing any light bulbs from the existing fixture.
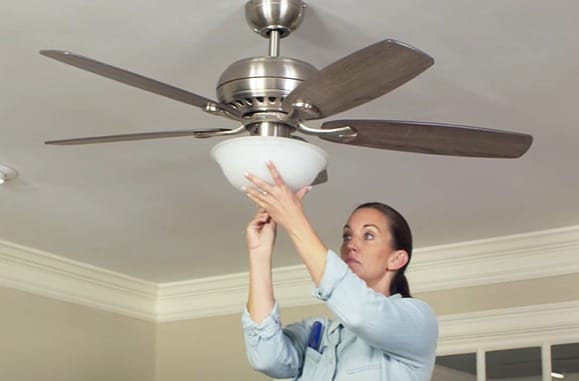
- Unscrew the fixture from the ceiling, carefully lowering it to reveal the wiring connections.
Step 3: Prepare the Fan
- Follow the fan’s instructions to assemble the mounting bracket. This bracket will support the weight of the fan. Secure the bracket to the electrical box in the ceiling using screws. Ensure it’s firmly in place.
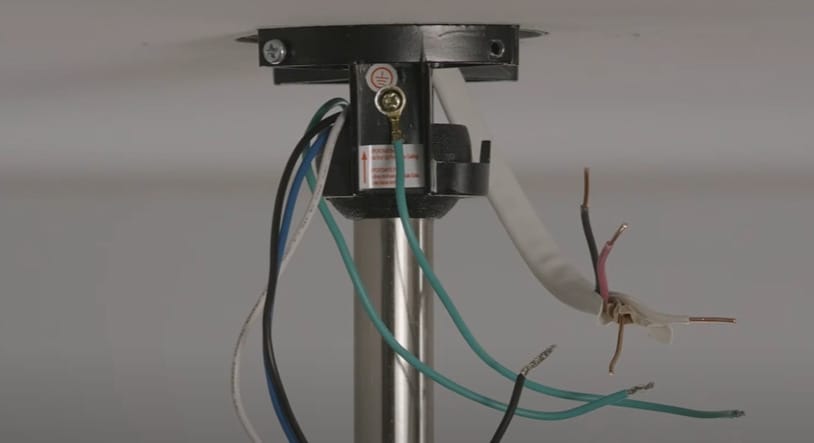
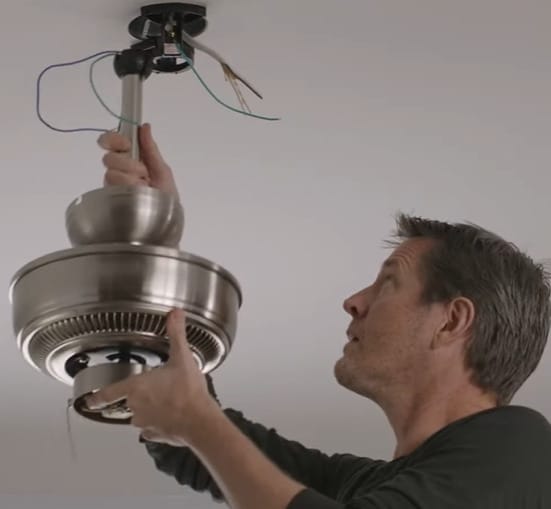
Step 4: Connect the Wires
- Twist the black wire from the ceiling (power supply) and the black wire from the fan (and the blue wire if your fan has a separate wire for the light kit). This is your hot wire connection.
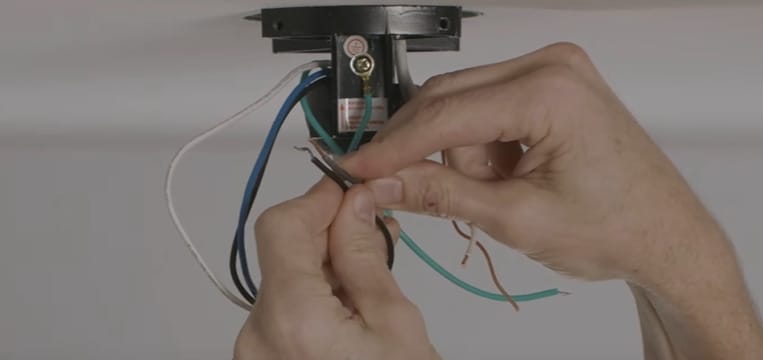
- Connect the white (neutral) wires from the ceiling and the fan. These wires return the electricity to the breaker panel.
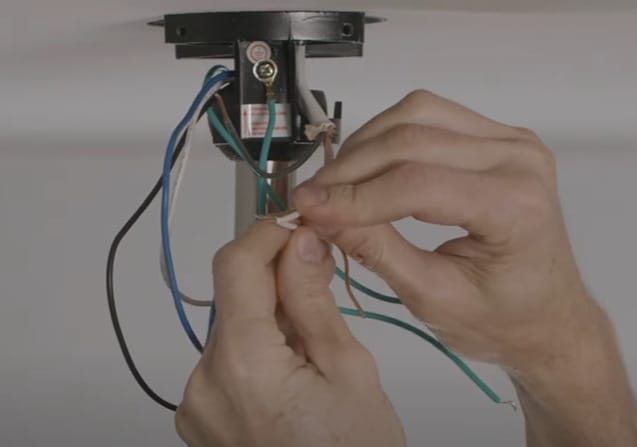
- Connect the green or bare copper wire from the ceiling (ground) to the green wire from the fan. This is a safety feature to prevent electrical shocks.
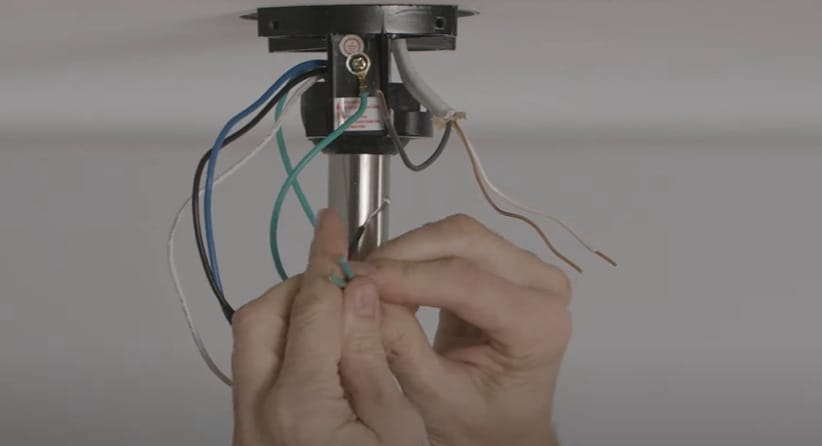
Step 5: Secure the Connections
- After twisting the wire ends, cap them with wire nuts to ensure a secure and safe electrical connection. Optionally, wrap electrical tape around each wire nut and wire for added security.

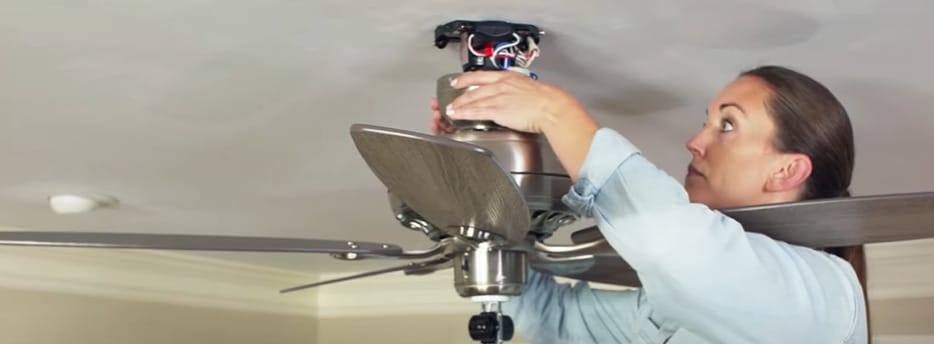
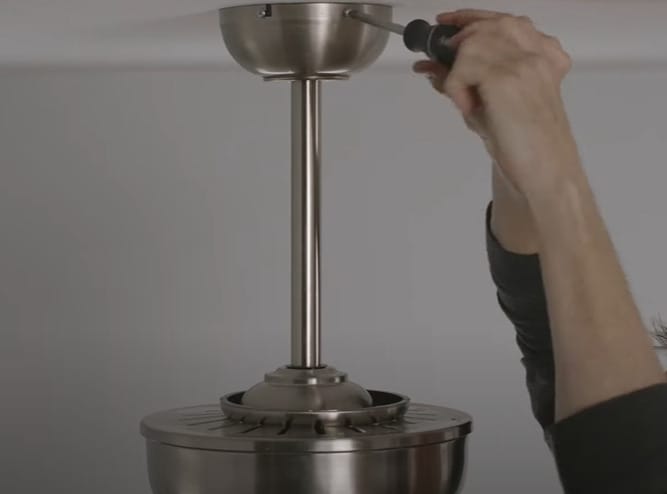
Step 6: Install the Fan
- Carefully lift the fan and place it onto the bracket. Depending on your fan model, this might involve hooking or screwing the fan into place.
- Once the fan body is secure, attach the fan blades per the manufacturer’s instructions. If your fan includes a light fixture, attach it now.
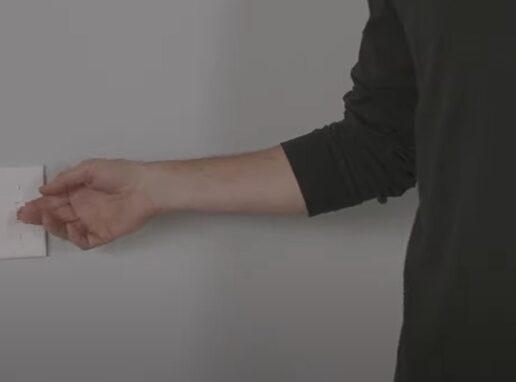
Step 7: Test Your Work
- Turn the power back on at the circuit breaker.
- Use the wall switch to test both the fan and the light functionality. Ensure the fan operates at different speeds and the light turns on and off smoothly.
Troubleshooting Common Issues with Your Fan and Light Setup
After you’ve successfully wired and installed your ceiling fan and light, it’s important to know how to handle any hiccups that might come up. Just like any home improvement project, there’s a chance you might run into a few common issues post-installation.
But don’t worry, I’ve got you covered. Let’s dive in and get those fans and lights working flawlessly!
| Issue | Troubleshooting Steps |
|---|---|
| Wobbling Fan | 1. Check all screws and bolts on the fan blades to ensure they’re tight. |
| 2. Use a balancing kit if provided with your fan to correct any imbalance. | |
| 3. Ensure the fan is correctly mounted to the ceiling box and that the box itself is secure. | |
| Flickering Lights | 1. Tighten any loose bulbs in the light fixture. |
| 2. Check the wire connections between the light kit and the fan to ensure they’re secure. | |
| 3. If using LED bulbs, ensure they’re compatible with your fan model. | |
| Fan or Light Not Working | 1. Verify that the switch controls both the fan and light correctly. |
| 2. Check for loose wire connections at the switch and fan housing. | |
| 3. Ensure the switch is not damaged and replace if necessary. | |
| Humming Noise from the Fan | 1. Check if the noise occurs at all speed settings; some fans naturally hum at lower speeds. |
| 2. Tighten any loose components in the fan housing. | |
| 3. If the fan has a speed control, try adjusting it to reduce humming. |
Maintaining Your Fan and Light Switch Setup
When you’re learning how to wire a fan and light switch, you always want to consider the long-term maintainability of your setup. Here are some ways to maintain your setup:
- Regular Inspection and Troubleshooting: It’s important to regularly inspect and troubleshoot common issues, such as loose wire connections and potential faults with the fan function or the remote.
- Cycling the Fan and Light Switch: Try cycling the fan and light switch off and on a few times to determine whether there might be intermittent faults, some of which may only appear when you’re using the remote.
- Tidying Up Unused Wires: Tidying up unused wires can drastically improve the lifespan of your fan and light setup.
- Checking Wire Functionality: A crucial tip I’d strongly recommend is to ensure all the wires are functioning correctly.
- Secure Terminations: Check the terminations consistently and make sure they’re secure.
- Mounting Box Durability: Another factor often overlooked is the mounting box. It should be robust enough to handle the weight of your fan.
- Choosing the Right Power Setup: You may consider using a single switch or split wire setup, depending on your power source.
By following these guidelines, you can maintain the reliability and safety of your fan and light switch setup over time.
Frequently Asked Questions
- Can I Use A Dimmer Switch With My Ceiling Fan And Light?
- Absolutely! You can use a dimmer switch, but make sure your fan and light are compatible. For the light, it’s a no-brainer, but check your fan’s specifications to ensure it supports dimming. It’s all about matching the right tech!
- How Do I Handle Wiring In An Older Home?
- Older homes can be tricky with their unique wiring setups. My advice? Take extra caution. If the wiring seems outdated or confusing, it might be time to call in a pro. Safety first, always!
- What’s The Best Way To Choose A Fan/Light Model For My Room?
- Think about the size of your room first. A larger room needs a fan with longer blades for effective air circulation. For lighting, consider the room’s natural light and what you’ll be using the space for. Brighter and bigger isn’t always better; it’s about what fits your space!
- Are Remote-Controlled Fans More Prone To Problems?
- Not necessarily. Remote-controlled fans are super convenient but need extra care, like any gadget. Keep the remote in good shape, and you’re golden. Just remember, batteries need changing, and sensors need a clear path!
- Can I Wire A Fan And Light To Separate Switches?
- You bet! Wiring a fan and light to separate switches gives you more control over their functions. It requires more wiring work, but it’s a great way to customize your space if you’re up for it.
- Is It Safe To Install A Ceiling Fan Where A Light Fixture Was?
- Generally, yes, but check that the electrical box is rated to hold a fan’s weight. Fans are heavier and need more support. If in doubt, upgrade the box to be on the safe side. Better safe than sorry!
References
Organizations:
- National Electrical Contractors Association (NECA). https://www.necanet.org/
- Institute of Electrical and Electronics Engineers (IEEE). https://www.ieee.org/
Website Resources:
- Electrical 101. https://www.electrical101.com/ceiling-fan-switch-wiring.html
- Storables. https://storables.com/articles/how-to-wire-a-ceiling-fan-to-a-light-switch/
Video References:
The Home Depot